
Specifications
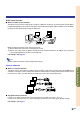


Easy to Use Functions
-69
Network Settings
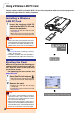
• To project images via a wireless connection, make sure to make the necessary network settings on both the
computer and projector.
• See the Wireless Reality software operation manual for details on how to set the computer.
• Also, as there are values that must be entered in a pre-configured network, make sure to consult with your
network administrator.
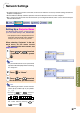
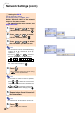
Setting Up a Projector Name
This Network setting assigns a name to the pro-
jector. The default setting is “MY_PROJECTOR”.
• The projector name is displayed when the
projector has been found via the computer,
and you can set the name as you like.
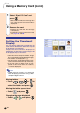
When selecting “Projector” in the net-
work menu on the menu screen
➝
For operating the menu screen, see
pages 50 to 55.
1 Press
or
to select
“Projector” and then press
.
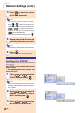
Note
• If a password has been set, the password
input box will be displayed when selecting
the “Projector”.
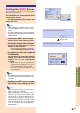
2 Press in “Name”.
3 Press
or
to select
the characters you want to set.
Note
• The following characters can be entered:
Letters (A-Z), numbers (0 – 9) or symbols
(–, _, ( )).
• Pressing
or
switches
between procedures as shown below.
• If you want to delete one charactor to the
left, select “BS” by pressing
or
and press
.