BD-HP90U BLU-RAY DISC/DVD PLAYER OPERATION MANUAL SHARP ELECTRONICS CORPORATION Sharp Plaza, Mahwah, New Jersey 07495-1163 SHARP CORPORATION Printed in China TINS–E825WJQZ 10P08-CH-NG The Spanish Quick Guide is included at the end of this operation manual. (See ES-1 – ES-8.) La Guía Rápida en Español se incluye al final de este manual de manejo. (Consulte ES-1 – ES-8.
OPERATION MANUAL ENGLISH For future reference, record the model and serial number (located on the rear of the product) in the space provided. Model No.: Serial No.: Introduction SAFETY INFORMATION This symbol warns the user of uninsulated voltage within the unit that can cause dangerous electric shocks. This symbol alerts the user that there are important operating and maintenance instructions in the literature accompanying this unit. • This Player is classified as a CLASS 1 LASER product.
SAFETY INFORMATION FCC Compliance Statement This device complies with part 15 of the FCC Rules. Operation is subject to the following two conditions: (1) This device may not cause harmful interference, and (2) this device must accept any interference received, including interference that may cause undesired operation. Wireless Radio For product available in the USA/Canada market, only channel 1–11 can be operated. Selection of other channels is not possible. This device is going to be operated in 2.412–2.
DEAR SHARP CUSTOMER Thank you for your purchase of the SHARP Blu-ray Disc/DVD Player. To ensure safety and many years of trouble-free operation of your product, please read the Important Safety Instructions carefully before using this product. IMPORTANT SAFETY INSTRUCTIONS Electricity is used to perform many useful functions, but it can also cause personal injuries and property damage if improperly handled. This product has been engineered and manufactured with the highest priority on safety.
IMPORTANT SAFETY INSTRUCTIONS • Water and Moisture—Do not use this product near water - for example, near a bath tub, wash bowl, kitchen sink, or laundry tub; in a wet basement; or near a swimming pool; and the like. • Stand—Do not place the product on an unstable cart, stand, tripod or table. Placing the product on an unstable base can cause the product to fall, resulting in serious personal injuries as well as damage to the product.
PRECAUTIONS Precautions on viewing stereoscopic 3D images • Do not view stereoscopic 3D images if you have a history of photosensitivity, heart disease or poor health. This may cause the symptoms to worsen. • If you experience any health problems such as fatigue and discomfort while viewing stereoscopic 3D images, immediately discontinue viewing. Continuing viewing after symptoms appear may cause health risks. Take a break until the symptoms have completely disappeared.
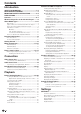
Contents Introduction SAFETY INFORMATION ......................................1–2 DEAR SHARP CUSTOMER .....................................3 IMPORTANT SAFETY INSTRUCTIONS ..............3–4 PRECAUTIONS ........................................................5 Contents ...............................................................6–7 What would you like to do with this Player? .........8 About Media Types ............................................9–11 Blu-ray Disc .........................................
Contents On Screen Language .................................................. 42 Version........................................................................ 42 System ....................................................................... 42 Communication Setup .......................................... 43–46 Sets whether “Cable” or “Wireless” is used for the network connection ............................................. 43 When selecting Cable ......................................
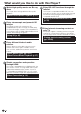
What would you like to do with this Player? Watch high quality movies on Blu-ray discs Enjoy BD-LIVE functions through the Internet This Player offers full high-definition Blu-ray disc playback. This Player is compatible with BD-LIVE. You can enjoy bonus content such as movie trailers through the Internet when playing back BD-Video discs compatible with BD-LIVE. Video/Picture/Music Playback (p. 27) Enjoying BONUSVIEW or BD-LIVE (p.
About Media Types Blu-ray Disc Blu-ray Disc is the ultimate next generation optical media format, offering the following key features: Types of Discs that Can Be Used with This Player • The following discs can be played back in this Player. Do not use an 8 cm (3”) to 12 cm (5”) adapter. • Use discs that conform to compatible standards as indicated by the presence of official logos on the disc label. Playback of discs not complying with these standards is not guaranteed.
About Media Types The following CD-RW/R discs cannot be played. • Discs on which data has not been recorded cannot be played back. • Discs recorded in a format other than an Audio CD and JPEG/MP3 file format cannot be played back. • Discs may not be played back depending on their recording status or the status of the disc itself. • Discs may not be played back depending on their compatibility with this Player.
About Media Types About Disc Contents DTS BD Video Linear PCM DTS is a digital sound system developed by DTS, Inc. for use in cinemas. Enjoy BD-specific functions including BONUSVIEW (BD-ROM Profile 1 Version 1.1), such as picture-in-picture, and BD-LIVE (page 29). For the BD video discs compatible with BONUSVIEW/BDLIVE, you can enjoy additional contents by copying the data from the discs or downloading it via the Internet.
Important Information Disc Precautions Be Careful of Scratches and Dust • BD, DVD and CD discs are sensitive to dust, fingerprints and especially scratches. A scratched disc may not be able to be played back. Handle discs with care and store them in a safe place. Proper Disc Storage Place the disc in the center of the disc case and store the case and disc upright. Avoid storing discs in locations subject to direct sunlight, close to heating appliances or in locations of high humidity.
Getting Started Step 1: Unpacking Make sure the following accessories are provided with the product. Remote control unit AC cord Page 22 Page 23 AC adapter Vertical stand Page 23 Page 17 Page 15 and 22 Introduction “AAA” size battery (g2) WARNING: The AC adapter and AC cord supplied with this player must not be used with other equipment. Step 2: Selecting equipment to connect Connection varies with the equipment used. Refer to Connection (Pages 18–21). Turn off the devices before connecting.
Major Components Main Unit (Front) 1 2 3 4 5 6 7 NOTE * When you insert or remove a USB memory device, be sure to turn the main power off. 8 9 Remote control sensor “Top” (p. 17) BD/DVD/CD mode indicator (p. 23) Disc slot (p. 27) EJECT (p. 27) 1 2 3 4 10 5 6 7 POWER (ON/STANDBY) indicator (p. 23) AQUOS PURE MODE indicator (pp. 23, 25) 3D indicator (pp. 23, 25) 8 USB terminal (p. 32) 9 POWER (p. 23) 10 Remote control sensor “Front” (p.
Major Components Remote Control Unit 1 16 2 4 19 5 6 7 8 9 10 11 12 13 14 15 20 21 22 23 24 25 26 27 28 29 8 9 10 11 12 13 14 15 16 17 18 19 20 21 22 23 24 25 26 27 28 29 30 31 Buttons under the cover 32 30 31 32 33 34 POWER (p. 23) m EJECT (p. 27) TOP MENU/TITLE LIST (pp. 28, 30) DISPLAY (pp. 27, 35) Cursor buttons (a/b/c/d), ENTER (pp. 24, 39) EXIT (p. 39) A (Red), B (Green), C (Blue), D (Yellow) (pp. 30, 31, 33, 46) AUDIO (p. 36), SUBTITLE (p. 36), ANGLE (p. 36) PinP (p. 29) REPEAT (p.
Player setup location Removing and replacing the terminal cover Before connecting the player to a TV, the AC adapter, etc., remove the terminal cover on the bottom of the player. 1 Remove the terminal cover on the bottom of the player. E Using the player in a vertical position Pass the cables through the end of the terminal cover. b Bottom side of the player b Bottom side of the player Pass the cables through here. Replace the terminal cover so the cables pass through the end of the cover.
Player setup location This player can be used in a horizontal or vertical position depending on the installation location. 2 Secure the stand to the player. 3 Bundle the cables. E Using the player in a horizontal position Remote control sensor “Front” E Using the player in a vertical position Remote control sensor “Top” Pass the cables through the stand. Connection Remote control sensor “Front” Switch the remote control sensor to “Front” or “Top” depending on the installation location.
Connection Video Connection Connecting to the HDMI Terminal • You can enjoy high quality digital picture and sound through the HDMI terminal. • When you use AQUOS LINK, make sure to use a certified HDMI cable. • For details on digital audio output formats (PCM/bitstream), refer to the digital audio output format selection table on page 51. STEPS 1 Be sure to turn off this Player and the equipment before making any connections.
Audio Connection Connecting to the Digital Audio Terminal • You can connect audio equipment or the TV to the OPTICAL DIGITAL AUDIO OUT terminal. • For details on digital audio output formats (PCM/bitstream), refer to the digital audio output format selection table on page 51. STEPS 1 Be sure to turn off this Player and the equipment before making any connections. 2 Firmly connect an optical digital cable (commercially available) to the optical digital audio terminals (1 and 2).
Broadband Internet Connection Internet Connection (LAN cable) • By connecting this player to the Internet, you can enjoy a variety of content on your TV using BD-LIVE functions, video streaming services and also perform software updates. • When using the Internet, a broadband Internet connection as shown below is required. STEPS 1 Be sure to turn off this Player and the equipment before making any connections. 2 Firmly connect a LAN cable (commercially available) to the ETHERNET terminal (1 and 2).
Broadband Internet Connection Internet Connection (Wireless LAN) • By connecting this player to the Internet, you can enjoy a variety of content on your TV using BD-LIVE functions, video streaming services and also perform software updates. • You can connect to a network using a wireless router/access point. STEPS 1 Be sure to turn off this Player and the equipment before making any connections.
Playback Before Starting Playback Loading the Batteries in the Remote Control 1 Hold in the tab on the battery cover and pull the cover towards the direction of the arrow. Approximate operating range of remote control You can select the remote control sensor used depending on the orientation of the player. See page 17 to switch the remote control sensor. Remote control sensor 2 3 Load the two “AAA” size batteries (R-03 size, UM/SUM-4).
Before Starting Playback Connecting the AC adapter Turning the power on 1 Plug the AC adapter cord in to the DC IN terminal on the rear of the Player. 2 Plug the supplied AC cord into the AC adapter. 3 Then, plug into an AC outlet. Press POWER on the remote control or on the Player to turn on the power of the Player. AC adapter Press POWER on the remote control or on the Player to enter standby. • The POWER indicator lights green.
Before Starting Playback Operating a SHARP TV Using the Remote Control Language Setting The Universal Remote Control may operate the basic functions of the SHARP TV. TV function control Changing the on-screen display language 1 Press HOME to display the menu screen. • The same operation can be performed by pressing ENTER after selecting the HOME icon on the Wall Paper screen. 2 Press a/b to select “Settings”, then press d or ENTER.
Before Starting Playback Using AQUOS LINK Controlling the Blu-ray disc player using AQUOS LINK Using 3D This sets output of 3D images. To view 3D images, playback of 3D content (3D BD video) is necessary with a 3D compatible TV and 3D glasses in addition to this player. What is AQUOS LINK? Using the HDMI CEC (Consumer Electronics Control), with AQUOS LINK you can interactively operate this player with your SHARP AQUOS TV. What you can do with AQUOS LINK Press 3D to change to the 3D mode.
Before Starting Playback Major functions of each button icon Control Panel This function allows you to operate this player using the TV remote control by displaying the control panel on the TV screen. POP-UP MENU • To operate this function, connect this player to a TV compatible with HDMI CEC (Consumer Electronics Control) using an HDMI cable (See page 18). Make sure that “Control Panel” is set to “Yes” (See page 41). When the settings are completed, perform the following operations.
Video/Picture/Music Playback Loading a Disc/Ejecting a Disc NOTE • The disc load time may vary depending on the disc. Regarding playback of BD video discs • Some of the newly released BD video discs cannot be played back unless you update the player software to the latest version. Therefore, it may be required to update the software of the player. Refer to pages 48–50 for more information regarding software updates for the player. POWER 1 2 EJECT Press POWER to turn on the power.
Video/Picture/Music Playback BD/DVD Menus Using the disc menu • This section explains how to play back a BD/DVD video disc with a top menu, disc menu or pop-up menu. • The titles listed in the top menu and a disc guide (for options like subtitles and audio languages) are given in the disc menu. DVD VIDEO Example: Select “SUBTITLE LANGUAGE”. 1 Press TOP MENU/TITLE LIST. • The disc menu screen is displayed if present on the DVD video disc. 2 Press a/b to select “SUBTITLE LANGUAGE”, then press ENTER.
Video/Picture/Music Playback Enjoying BONUSVIEW or BD-LIVE BD VIDEO This Player is compatible with additional functions of BD-Video, BONUSVIEW (BD-ROM Profile 1 Version 1.1) and BD-LIVE. For BD-Video discs compatible with BONUSVIEW, the functions of Picture in Picture and Virtual Package are available. For BD-LIVE compatible discs, you can enjoy a variety of functions via the Internet in addition to the BONUSVIEW functions.
Video/Picture/Music Playback DVD-R/-RW (VR format) / BD-RE/-R (BDAV format) Playback DVD-R DVD-RW BD-RE BD-R You can play back a recorded disc (DVD: VR format finalized disc only / BD: BDAV format disc only). • For a description of other playback functions, refer to ”Playback Functions” on pages 34–35. Playback by selecting a title 1 Load a recorded disc. • Disc playback will begin automatically. • Playback begins from the first title. 2 3 Press H STOP. Press TOP MENU/TITLE LIST.
Video/Picture/Music Playback Audio CD Playback To skip the track during playback AUDIO CD Press KSKIP or LSKIP/l. This Player can play back audio CDs. • Press KSKIP to skip backward. • Press LSKIP/l to skip forward. • For a description of other playback functions, refer to “Playback Functions” on pages 34–35. Operation procedure for the “Functions” menu 1 Press D (Yellow) (Functions) when the CD screen is displayed. • The “Functions” menu is activated.
Video/Picture/Music Playback Audio Data (MP3 File) Playback CD-R CD-RW DVD-R DVD-RW 5 Press ENTER to play back the selected file. • Playback of the selected file will begin. USB Track 01.mp3 This Player can play back audio data (MP3 files) recorded on CD-R/RW discs, DVD-R/RW discs and USB memory devices. 5:16 0:00 1 2 3 4 5 6 • For details on the audio data that you can play using this player, refer to page 10. Track 01.mp3 Track 02.mp3 Track 03.mp3 Track 04.mp3 Track 05.mp3 Track 06.
Video/Picture/Music Playback Displaying Still Images (JPEG files) CD-R CD-RW DVD-R DVD-RW USB This Player can display still images (JPEG files) recorded on CD-R/RW discs, DVD-R/RW discs and USB memory devices. • For details on the still images that you can display using this player, refer to page 10. • Still images are played one by one while during “Slide show”, they are automatically replaced one after another.
Playback Functions Pause/Frame Advance Playback BD VIDEO DVD VIDEO BD-R DVD-R BD-RE DVD-RW The Pause function is enabled when F PAUSE is pressed during playback. (If you are playing back an audio CD, audio data [MP3 files] or still images [JPEG files], these will also pause.) The Frame Advance Playback function is enabled when L SKIP/l is pressed during pause. • Frame Advance Playback may not function properly with discs other than DVD-RW/R (VR format).
Playback Functions Repeat Playback of a Title or Chapter (Repeat Playback) BD VIDEO DVD VIDEO BD-R DVD-R BD-RE DVD VIDEO DVD-R DVD-RW AUDIO CD DVD-RW AUDIO CD 1 2 3 Partial Repeat Playback (Repeat Playback of a Specified Part) Play back the title or chapter you want to repeat. Press REPEAT. Press a/b to select the type of Repeat Playback. 1 2 Press REPEAT during playback. Press a/b to select “Scene Selection”, then press ENTER. • “Set Start Point” displays.
Playback Functions Displaying the Audio Information You can display the audio information on the disc currently being played back by pressing AUDIO. • The displayed contents vary depending on the disc. BD VIDEO Switching the Angle BD VIDEO DVD VIDEO If multiple angles are recorded, you can switch between them. DVD VIDEO Press ANGLE during playback. The audio channel currently being played back will be displayed.
Settings During Playback Function control operation procedure Function Control BD VIDEO DVD VIDEO BD-R BD-RE DVD-RW DVD-R AUDIO CD This allows you to adjust various settings at once, like subtitles, angle settings and the title selection for Direct Playback. You can adjust the video and audio to suit your preferences. The operations are the same for BD and DVD. BD-VIDEO ENTER 㪜㪯㪠㪫 Press a/b to select the desired setting, then press ENTER.
Settings During Playback Functions which can be set Title/Track Number (Direct Title/Track Skip) • Shows the title number being played back (or track number when playing back an audio CD). You can skip to the start of the title (or track). • To skip to the start of a selected title (or track), press the Number buttons to enter the title (or track) number when this option is highlighted. Chapter Number (Direct Chapter Skip) • Shows the chapter number being played back.
Settings SETTINGS Common operations The “menu” enables various audio/visual settings and adjustments on the functions using the remote control unit. You need to call up the On Screen Display to perform settings for this player. The following is the explanation for the basic operations of the “menu”. Example: Setting “AQUOS LINK” 1 Movie Picture Music e-Contents Settings 3 2 Display the menu screen Press HOME to display the menu screen.
SETTINGS Audio Video Settings TV Aspect Ratio You can set the screen aspect ratio of the connected TV, and adjust the video output. If you switch your TV (i.e. because you have bought a new one) and the screen aspect ratio of the connected TV changes, you will have to change the “TV Aspect Ratio” setting. • To listen to the secondary audio of Blu-ray discs, select “PCM” or “Bitstream (Mix)”. • For details, refer to the digital audio output format selection table on page 51.
SETTINGS Smart Settings Playback Setting Auto Power Off Parental Control This sets the Player so that power is automatically shut off if playback is stopped and you do not perform any operations for about 10 minutes. Item Yes, No Front LED If you feel that the indicators on the player are too bright when watching movies, you can turn them off except for the POWER indicator. Item On, Off Control Panel This lets you set display of the control panel on the TV screen to on or off.
SETTINGS Password Setting This sets the password for setting or changing the Parental Control Level. Item Yes: Enter the 4-digit number. No NOTE • When you forget the password, you can reset the current password using “System Reset” under “Settings”. (See this page.) • You can also set the new password if desired. On Screen Language You can set the language you want to display on the screen.
SETTINGS Communication Setup 5 This allows you to perform and/or change the communication settings and select the type of Internet connection from Cable or Wireless (built-in). This setting is required to use BD-LIVE functions, video streaming services and software updates that connect to the Internet. Press a/b to select “Change”, then press ENTER. Current Ethernet setup info.
SETTINGS 10 For testing the connection to the Internet, after confirming the settings, press a/b to select “Test”, then press ENTER. • “Test” is available only when setting to obtain the IP address automatically. “Test” cannot be selected if the IP address has not been obtained automatically. Confirm the current setting.
SETTINGS 7 Press a/b to select “desired access point” or “Other Network”, then press ENTER. • For access points which are set to hide the SSID using the wireless router, select “Other Network” to set the access point. 12 13 Select “Next”, then press ENTER. For testing after confirming the settings, select “Test”, then press ENTER. • If the test has failed, an error message appears. Retry to perform the settings after checking that the connection (page 21) is performed properly. Confirm your setting.
SETTINGS 4 The operation procedure for inputting characters manually Repeat the step 3 to display all of the desired characters/numbers in the input field. Example: The screen for inputting numeric characters NOTE • Numeric characters such as IP address can be entered on the input screen either by selecting each of the characters in the “Numeric” mode or using the Number buttons on the remote control. IP Address Netmask Gateway 1 2 3 • Press n RETURN (Del.Char.
SETTINGS Before using the USB memory device 4 • The “USB Memory Management” screen is displayed. • “No USB Memory” appears when no USB memory is inserted. CAUTION: • Do not remove the USB memory device or unplug the AC cord while the operations for “USB Memory Management” or “Software Update (Manual Update from USB memory device)” are being performed. • Do not use a USB extension cable when connecting a USB memory device to the USB terminal on the player.
SETTINGS Software Update Settings 6 During access to the network and checking the latest version of firmware, “Accessing” blinks. • The current version of this unit software and the latest version of the update file on the network are displayed when latest version of firmware has been found. To update this player software with update file, select “Yes”, and go to step 7. In this player, the software version can be updated using either one of the following methods.
SETTINGS Manual Update from USB memory device This function allows software updates by inserting a USB memory device with the update file into the USB terminal on this player. • When a software update is performed, the software update data must be written onto the USB memory device in advance using a PC. • The USB memory device must be clear of all files except software update data to allow new software uploading. To check for the availability of a software update, visit www.sharpusa.
SETTINGS 2 The current version of this unit software and the version of the update file on the USB memory device are displayed. To update this player software with update file, select “Yes”, and press ENTER. Software update file is detected in the USB memory device. Start update? Current Ver. : Update Ver. : xxxxxxxxxx yyyyyyyyyy Yes No 3 If the USB memory device is not properly installed or the correct update file cannot be found on the USB memory device, an error message is displayed.
SETTINGS Digital Audio Output Selection Formats Audio Stream Setup Definition PCM Decodes Primary, Secondary and Effect audio streams together into PCM audio. Bitstream (Mix) Decodes Primary, Secondary and Effect audio streams together into PCM audio, then re-encodes the PCM audio into DTS bitstream. Bitstream Outputs only the Primary audio soundtrack (main soundtrack of the movie) so that your audio equipment can decode the audio bitstream. You will not hear Secondary and Effect audio.
Streaming content Playing back streaming content Instantly Watching Movies from Netflix Please check that the most current software is loaded on this player by using the software update function (See pages 48–50) or by visiting http://www. sharpusa.com/products/support/ to check for a download of the newest software version. This function allows you to enjoy Netflix through the Internet.
Playing back streaming content 6 You will see the following window. • The activation code is displayed. The screen of this player shown on the TV 10 11 Press c/d to select the desired title, then press ENTER. The title you selected is displayed. • To return to the step 10, press a. Press a/b to select “play”, then press ENTER or d PLAY to start playback. The screen of this player shown on the TV 7 Using your PC, visit http://www.netflix.
Playing back streaming content Enjoying Movies and Internet Application with VUDU You can enjoy moves and Internet applications with VUDU. VUDU Movies is the leading HD on-demand video service. VUDU Movies is built into your BD Player and utilizes your existing Internet connection to deliver the highest quality on-demand video available today. Example Getting Started 1 2 Press HOME to display the menu screen. Press a/b to select “e-Contents”, then press d or ENTER.
Playing back streaming content If the Settings on the PC Are Incorrect The screen as shown below will be displayed. Following the instructions on the screen, send e-mail again and make all the necessary settings. Example Troubleshooting - VUDU VUDU cannot be accessed. • If you are not able to access other network service (e.g. BD-LIVE) from your device, but are not able to access VUDU, please contact VUDU Customer Care at 1-888554-VUDU (8838). • If you are not able to access any network service (e.g.
Playing back streaming content Enjoying Pandora radio You can instantly listen to personalized radio stations, streamed over the Internet, from Pandora via this player. • To enjoy this function, make a broadband Internet connection to both your PC and this player (See pages 20–21), and then set communication settings (See pages 43–46), then perform the following operation. • Before using this function, please read “Network Service Disclaimer” (page xi).
Appendix RS-232C port specifications Parameter RS-232C port specifications Using Custom Control Devices with this Player • When a program is set, this Player can be controlled from the custom control device using the RS-232C terminal. The power can be turned on or off (standby) and automatic programed playback is possible. • Use an RS-232C cable cross-type (commercially available) for the connections. Input the parameter values, aligning left, and fill with blank(s) for the remainder.
Troubleshooting The following problems do not always suggest a defect or malfunction of this Player. Refer to the problems and lists of possible solutions below before calling for service. Power Problem Possible causes and solutions The Player power cannot be turned on. • Make sure that the AC adapter cord is connected to the DC IN terminal on the rear of the player, the AC cord is connected to the AC adapter and the AC cord is plugged into an AC outlet. (Page 23) • Reset the player.
Troubleshooting Picture Problem Possible causes and solutions No picture. • Make sure that the cables are connected correctly. (Page 18) • Make sure that the connected TV or the AV receiver is set to the correct input. (Page 18) • Take out the disc and clean it. (Page 12) • Make sure that region code on the disc matches that of this Player. (Page 9) • There is no picture from the HDMI output. − Are the settings performed correctly? Please check the settings.
Troubleshooting Network Problem Possible causes and solutions Cannot connect to the Internet. When the wired Internet connection is made • Is the LAN cable connected properly? • Is the wrong cable such as a modular cable used? Connect a LAN cable to the ETHERNET terminal.
On-screen Error Messages The following messages appear on the TV screen in case of an error during operation. Error message Possible Error Cannot play. • The disc cannot be played back with this Player. Incompatible disc. • If you load a disc which cannot be played with this Player (i.e. a scratched disc), or if you load a disc upside down, this message will appear, and the disc will automatically pop out. • Occurs if the loaded disc cannot be played because it is a non-standard disc or scratched, etc.
Specifications Specifications are subject to change without notice. General Power requirements DC 12V (with the supplied AC adapter) Power consumption (Normal) 16 W (with the supplied AC adapter at AC120V, 60Hz) Power consumption (Standby) 0.4 W (with the supplied AC adapter at AC120V, 60Hz) Dimensions Approx. 17 g 2 1/2 g 8 5/8 inch (W g H g D) Approx. 430 mm g 36 mm g 218 mm (W g H g D) Weight Approx. 5.1 lbs. (2.
Specifications Wireless LAN (Internal antenna) Frequency band Draft 802.11n Radio: 2.4GHz 802.11g Radio: 2.4GHz 802.11b Radio: 2.4GHz 2.412 – 2.462GHz (channel 1–11) Modulation DBPSK @ 1Mbps DQPSK@ 2Mbp CCK@ 5.5/11 Mbps BPSK@ 6/9 Mbps QPSK@ 12/18Mbps 16-QAM@ 24/36 Mbps 64-QAM@ 48/54 Mpb and above, Rx up to 300Mbps Transport power and sensitivity Security Tx output power: (Typical) 11b 16.
Glossary Ad-hoc mode (page 21) Chapter number (pages 37, 38) Ad-hoc mode is a wireless LAN communication format. This performs direct communication between equipment without an access point. (Ad-hoc mode is not supported.) Sections of a movie or a music feature that are smaller than titles. A title is composed of several chapters. Some discs may only be comprised of a single chapter.
Glossary DTS-HD Master Audio | Essential JPEG (pages 9, 10, 33) DTS-HD Master Audio | Essential is a lossless audio compression technology developed for the next generation high definition optical disc format. JPEG (Joint Photographic Experts Group) is a still image data compression format and is used in most of digital cameras.
Glossary Parental control (page 41) x.v.Color In some digital broadcasts and BD/DVD video discs, a control level for disc viewing is set depending on the age of the viewer. With this Player, you can set the control level for viewing such broadcasts and discs. x.v.Color reproduces a greater range of color than before, showing almost all of the colors that the human eye can detect.
Network Service Disclaimer This Sharp device facilitates the access to content and services provided by third parties. The content and services accessible via this device belong to and may be proprietary to third parties. Therefore, any use of such third party content and services must be in accordance with any authorization or terms of use provided by such content or service provider. Sharp shall not be liable to you or any third party for your failure to abide by such authorization or terms of use.
About Software License Information on the Software License for This Product Software composition The software included in this product is comprised of various software components whose individual copyrights are held by SHARP or by third parties.
CONSUMER LIMITED WARRANTY (Valid for warranty service in the U.S.
Memo xiv
Guía Rápida en Español Para referencia en el futuro, escriba el modelo y el número de serie (que se encuentra en la parte trasera del producto) en el espacio facilitado. N°. de modelo: INFORMACIÓN DE SEGURIDAD Guía Rápida en Español N°. de serie: AVISO: PARA REDUCIR EL RIESGO DE INCENDÍO O ELECTROCHOQUE NO EXPONGA ESTE APARATO A LA HUMEDAD. Este símbolo previene al usuario del voltaje aislado dentro de la unidad que puede provocar descargas eléctricas peligrosas.
Guía Rápida en Español INFORMACIÓN DE SEGURIDAD “ADVERTENCIA—Las reglas de la FCC (Comisión Federal de Comunicaciones) estipulan que cualquier modificación o cambio a este equipo no aprobado expresamente por el fabricante podrá anular la autorización del usuario para operar este equipo”.
Guía Rápida en Español ESTIMADO CLIENTE DE SHARP Gracias por haber adquirido el reproductor de disco Blu-ray/DVD SHARP. Para garantizar su seguridad y muchos años de uso sin problemas de su producto, por favor lea cuidadosamente las precauciones de seguridad importantes antes de usar este producto. PRECAUCIONES DE SEGURIDAD IMPORTANTES La electricidad se usa para realizar muchas funciones útiles, pero también puede causar lesiones en personas y daños en la propiedad si se utiliza incorrectamente.
Guía Rápida en Español PRECAUCIONES DE SEGURIDAD IMPORTANTES • Agua y humedad — No utilice este producto cerca del agua como, por ejemplo, una bañera, palangana, fregadero de cocina o lavadora; en un sótano húmedo; cerca de una piscina o un lugar similar. • Soporte — No coloque el producto en un carrito, soporte, trípode o mesa inestable.
Guía Rápida en Español Accesorios Unidad de mando a distancia Adaptador de ca Cable de ca Pila tamaño “AAA” (g2) Soporte vertical Cómo instalar las pilas 1 Presione en la pestaña en la tapa de las pilas y tire de la tapa en el sentido indicado por la flecha. 2 Instale las dos pilas tamaño “AAA” (tamaño R-03, UM/SUM-4). Coloque las pilas con sus terminales coincidiendo con las indicaciones m y n en el compartimiento de las pilas.
Guía Rápida en Español Conexión Al terminal DC IN Adaptador de ca A la toma de ca Al terminal HDMI OUT Cable HDMI (disponible en el comercio) Cable de ca 1 Enchufe el cable del adaptador de ca suministrado en el terminal DC IN en la parte trasera del reproductor. 2 Enchufe el cable de ca suministrado en el adaptador de ca. 3 Luego enchúfelo en una toma de ca.
Guía Rápida en Español Menú Configuración El menú Configuración está compuesto por varios menús en los cuales pueden hacerse diversos ajustes relacionados con idioma, funciones de audio, imágenes, etc. El siguiente ajuste es el proceso básico. Preparación: • Encienda su televisor y cambie a la entrada AV apropiada (Consulte el manual de manejo de su televisor). • Si está reproduciendo un BD / DVD, pulse el botón STOP.
Guía Rápida en Español Otras funciones de reproducción * Las siguientes operaciones pudieran no estar disponibles dependiendo del disco/ contenido. Botones Descripciones F PAUSE Pausa en la reproducción. • Durante la pausa, pulse dPLAY o F PAUSE nuevamente para reiniciar la reproducción. J FWD / G REV K SKIP / L SKIP/l Avance / retroceso rápido (Búsqueda) Durante la reproducción • Saltar al inicio de un capítulo / el capítulo siguiente.
BD-HP90U BLU-RAY DISC/DVD PLAYER OPERATION MANUAL SHARP ELECTRONICS CORPORATION Sharp Plaza, Mahwah, New Jersey 07495-1163 SHARP CORPORATION Printed in China TINS–E825WJQZ 10P08-CH-NG The Spanish Quick Guide is included at the end of this operation manual. (See ES-1 – ES-8.) La Guía Rápida en Español se incluye al final de este manual de manejo. (Consulte ES-1 – ES-8.