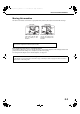
NA KS1 CZZ ApollonII_general-copy_SEC.
ApollonII_general-copy_SEC.book 1 ページ 2004年9月6日 月曜日 午後4時57分 The power switch positions are marked " I " to indicate power "ON" and " " to indicate stand-by. In the stand-by position, power is being supplied to a drying heater within the optical system of the copier. Caution: For complete electrical disconnection, pull out the main plug. The socket-outlet shall be installed near the equipment and shall be easily accessible. FOR YOUR RECORDS ...
ApollonII_general-copy_SEC.
ApollonII_general-copy_SEC.
sec_apollon_00.fm 1 ページ 2004年11月16日 火曜日 午後1時15分 NOTES ● Considerable care has been taken in preparing this manual. If you have any comments or concerns about the manual, please contact your nearest SHARP Service Department. ● This product has undergone strict quality control and inspection procedures. In the unlikely event that a defect or other problem is discovered, please contact your dealer or nearest SHARP Service Department.
ApollonII_general-copy_SEC.book 2 ページ 2004年9月6日 月曜日 午後4時57分 INSTALLATION REQUIREMENTS Improper installation may damage this product. Please note the following during initial installation and whenever the machine is moved. 1. The machine should be installed near an accessible power outlet for easy connection. 2. Be sure to connect the power cord only to a power outlet that meets the specified voltage and current requirements. Also make certain the outlet is properly grounded.
ApollonII_general-copy_SEC.book 3 ページ 2004年9月6日 月曜日 午後4時57分 INSTALLATION REQUIREMENTS Moving this machine Pull out the four handles as shown below, grasp them firmly, and keep the machine horizontal while moving it. Left side Exit tray Handles Before lifting the machine, fold up the exit tray and tape it securely to the machine. Right side Bypass tray Handles Before lifting the machine, fold up the bypass tray and tape it securely to the machine.
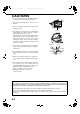
ApollonII_general-copy_SEC.book 4 ページ 2004年9月6日 月曜日 午後4時57分 CAUTIONS 1. Do not touch the photoconductive drum. Scratches or smudges on the drum will cause dirty prints. 2. The fusing unit is extremely hot. Exercise care in this area. 3. Do not look directly at the light source. Doing so may damage your eyes. Fusing unit 4. Four adjusters are provided on all optional stand/ paper drawer units. These adjusters should be lowered until they contact the floor.
ApollonII_general-copy_SEC.book 5 ページ 2004年9月6日 月曜日 午後4時57分 CONTENTS OPERATION MANUALS.................................................0-1 INSTALLATION REQUIREMENTS.................................0-2 ● Moving this machine..................................................0-3 CAUTIONS......................................................................0-4 CHAPTER 1 BEFORE USING THE PRODUCT INTRODUCTION.............................................................1-2 MAIN FEATURES .......................
ApollonII_general-copy_SEC.book 6 ページ 2004年9月6日 月曜日 午後4時57分 CONTENTS CHAPTER 4 BEFORE MAKING COPIES PART NAMES AND FUNCTIONS (The Reversing Single Pass Feeder) .................................................................. 4-2 ● Exterior ..................................................................... 4-2 ● Operation Panel........................................................ 4-3 ● Touch Panel (main screen of copy mode) ................ 4-4 REVERSING SINGLE PASS FEEDER ......................
ApollonII_general-copy_SEC.book 1 ページ 2004年9月6日 月曜日 午後4時57分 CHAPTER 1 BEFORE USING THE PRODUCT This chapter contains basic information that should be read before using the product. Page INTRODUCTION ...........................................................................................1-2 MAIN FEATURES ..........................................................................................1-2 PART NAMES AND FUNCTIONS .................................................................1-4 ● Exterior.
ApollonII_general-copy_SEC.book 2 ページ 2004年9月6日 月曜日 午後4時57分 INTRODUCTION To gain the maximum benefits in using this product, it is recommended that the user read this manual to become familiar with all the features and functions of the basic product and the precautionary information contained in the manual. This product is a high speed Digital full color copier/printer that can be expanded to become multifunctional through the installation of optional peripheral devices.
sec_apollon_01_1.fm 3 ページ 2004年9月16日 木曜日 午後6時52分 MAIN FEATURES 3 Advanced image processing features based on digital technology The scanned image data is converted to digital data, enabling the following advanced image processing features: ● Photo Repeat : Up to 24 full-size copies of a photo image can be made on a single sheet of paper (page 6-18). ● Multi shot : Up to four original pages can be copied onto a single sheet (page 6-19).
ApollonII_general-copy_SEC.book 4 ページ 2004年9月6日 月曜日 午後4時57分 PART NAMES AND FUNCTIONS Exterior Left tray (See page 5-5) Bypass tray Finished sheets are deposited here. Left side cover Special papers (including transparency film) and copy paper can be fed from the bypass tray. Stand/1 x 500 sheet paper drawer * Open this cover when a paper misfeed occurs in the fusing unit or the transfer unit.
ApollonII_general-copy_SEC.book 5 ページ 2004年9月6日 月曜日 午後4時57分 PART NAMES AND FUNCTIONS Interior 1 Fusing unit Toner cartridge Toner images are fused here. The toner cartridge must be replaced when indicated on the operation panel. (See page 2-15) Right side cover CAUTION The fusing unit is hot. Take care in removing misfed paper. Open when a misfeed has occurred in the paper feed area. Right cover of paper drawer Open this cover to remove paper misfed in the paper drawer.
ApollonII_general-copy_SEC.book 6 ページ 2004年9月6日 月曜日 午後4時57分 PART NAMES AND FUNCTIONS Part names and functions of peripheral devices Large Capacity tray (AR-LC8) Stand/3 x 500 sheet paper drawer (AR-D18N) The large capacity tray provides the added convenience of having 3,500 sheets of 8-1/2" x 11" or A4 paper (21 lbs. or 80 g/m2) available. This stand has three paper trays. Each tray can hold approximately 500 sheets of the recommended paper for color (21 lbs.
ApollonII_general-copy_SEC.book 7 ページ 2004年9月6日 月曜日 午後4時57分 PART NAMES AND FUNCTIONS ■ Other optional equipment ● PS3 expansion kit (AR-PK4) This kit provides compatibility of PostScript level 3 to the printer. ● Facsimile expansion kit (AR-FX10) This kit must be installed to use the fax function. ● Fax memory (8 MB) (AR-MM9) This adds memory for use by the fax function. ● 256 MB optional memory (AR-SM5) This adds memory that is used for the copy function, printer function, and scanner function.
ApollonII_general-copy_SEC.book 8 ページ 2004年9月6日 月曜日 午後4時57分 PART NAMES AND FUNCTIONS Operation panel Touch panel Numeric keys The machine status, messages and touch keys are displayed on the panel. When using the touch panel, first change the display to the mode that you wish to use: printer mode, copy mode, network scanner mode, or fax mode*. For details see the next page. Use to enter number values for various settings.
ApollonII_general-copy_SEC.book 9 ページ 2004年9月6日 月曜日 午後4時57分 PART NAMES AND FUNCTIONS Touch panel Using the touch panel Selection of function [Example 1] [Example 1] JOB QUEUE SETS / PRO COPY 003 / 00 Suzuki 003 / 00 0666211221 010 / 00 Beep tone Items on the touch panel are easily selectable by touching the key associated with the item with a finger. Selection of an item will be accompanied with a beep tone to confirm the item was selected.
ApollonII_general-copy_SEC.book 10 ページ 2004年9月6日 月曜日 午後4時57分 PART NAMES AND FUNCTIONS Job status screen (common to print, copy, network scan and fax) This screen is displayed when the [JOB STATUS] key on the operation panel is pressed. A job list showing the current job at the top of the job queue or a list showing completed jobs can be displayed. The contents of jobs can be viewed or jobs can be deleted from the queue. (The screen below is an example and differs from actual screens.
sec_apollon_01_1.fm 11 ページ 2004年11月15日 月曜日 午前11時44分 AUDITING MODE When the account counter function is turned on, a count is kept of the number of copy sheets used by each account (maximum of 200 accounts). The counts can be displayed and totaled as needed. The key operator programs can be used to enable auditing mode separately for copy mode, fax mode, network scanner mode, and printer mode.
ApollonII_general-copy_SEC.book 12 ページ 2004年9月6日 月曜日 午後4時57分 AUDITING MODE your account number (5 digits) with 1 Enter the numeric keys. the appropriate steps to perform 2 Follow the copy job. As you enter your account number, the hyphens ( ) change to asterisks ( ). If you enter an incorrect digit, press the key and re-enter the correct digit. When a correct account number is entered, the following message will appear. When copying is begun, the following message will appear.
ApollonII_general-copy_SEC.book 1 ページ 2004年9月6日 月曜日 午後4時57分 CHAPTER 2 MANAGING THE MACHINE This chapter explains how to load paper, replace the toner cartridge, and remove paper misfeeds. It also contains information about supplies. Page LOADING PAPER..........................................................................................2-2 ● Loading paper in paper tray 1 ................................................................2-2 ● Changing the paper size in paper tray 1 ....................
ApollonII_general-copy_SEC.book 2 ページ 2004年9月6日 月曜日 午後4時57分 LOADING PAPER The message "ADD PAPER" or "OPEN TRAY AND ADD PAPER" will appear when paper runs out during operation. Follow the procedure below to load paper. NOTES ● Do not use curled or folded paper. Doing so may cause a misfeed. ● For best results use paper supplied by SHARP. (See pages 2-9, 2-17.
ApollonII_general-copy_SEC.book 3 ページ 2004年9月6日 月曜日 午後4時57分 LOADING PAPER 4 Load paper into the tray. the paper type of the paper that was 6 Set loaded in the 1st tray. If you loaded a different type of paper from the previous paper, be sure to set the new paper type as explained in "Setting the paper type" (page 211). paper size in paper tray 1 is now 7 Changing complete. 2 5 Gently push tray 1 into the machine. Push the tray firmly all the way into the machine.
sec_apollon_02-1.fm 4 ページ 2004年9月14日 火曜日 午前10時44分 LOADING PAPER Loading paper in the bypass tray The bypass tray can be used to feed the same paper specified for paper tray 1 or for special papers. For paper types that can be used in the bypass tray, see the specifications for the bypass tray in the paper tray specifications (page 2-9). Up to 250 sheets of SHARP standard paper or up to 100 postcards can be set in the bypass tray.
ApollonII_general-copy_SEC.book 5 ページ 2004年9月6日 月曜日 午後4時57分 LOADING PAPER NOTES ● Be sure to load 5-1/2" x 8-1/2" paper, A6 paper, A5 paper, and postcards as shown in the diagram below. 2 A6 paper, post cards. 5-1/2" x 8-1/2" paper, A5 paper. ● When loading plain paper other than paper recommended for color, SHARP standard paper, special media other than postcards, SHARPrecommended transparency film, or paper to be printed on the back, the paper must be loaded one sheet at a time.
sec_apollon_02-1.fm 6 ページ 2004年9月14日 火曜日 午前10時45分 LOADING PAPER ■ Setting envelopes or postcards When setting envelopes or postcards in the bypass tray, set them in the orientation shown below. Loading postcards Insert the postcard with the side to be printed on facing up. The postcard should be oriented as shown in the diagram. Loading envelopes Only the front side of envelopes can be printed. Insert the envelope with the front side facing up.
ApollonII_general-copy_SEC.book 7 ページ 2004年9月6日 月曜日 午後4時57分 LOADING PAPER the duplex bypass/inverter unit 1 Unlatch and slide it to the left. close the duplex bypass/inverter 3 Gently unit. Unlatch the unit and gently move it away from the machine. If the machine is not equipped with a duplex bypass/ inverter unit, open the side cover similarly. If the machine is not equipped with a duplex bypass/inverter unit, close the side cover.
ApollonII_general-copy_SEC.book 8 ページ 2004年9月6日 月曜日 午後4時57分 LOADING PAPER Loading paper in the duplex module/2 x 500 sheet paper drawer Upper tray: The upper tray contains a duplex module that automatically turns print paper over for automatic two-sided printing. Middle and lower paper trays: The middle and lower trays are paper trays. Up to 500 sheets of paper recommended for color or SHARP recommended plain paper can be loaded in these trays.
ApollonII_general-copy_SEC.book 9 ページ 2004年9月6日 月曜日 午後4時57分 LOADING PAPER Specifications of paper trays The specifications for the types and sizes of paper that can be loaded in the paper trays are shown below. Paper tray type A Paper tray 1 Tray No. (tray name) Applicable paper types Applicable paper sizes Remarks Paper recommended for color 11"x17", 8-1/2"x14", 8-1/2"x13", 8-1/2"x11", 8-1/2"x11"R, 5-1/2"x8-1/2", 7-1/4"x10-1/2"R, Extra.
ApollonII_general-copy_SEC.book 10 ページ 2004年9月6日 月曜日 午後4時57分 LOADING PAPER ■ More information on plain paper The following restrictions apply to plain paper. Be sure to load the paper correctly. Incorrect loading may result in skewed feeding or misfeeds. Plain paper SHARP paper standard Restrictions on paper other than SHARP standard paper Paper in inch system Paper in AB system 5-1/2" x 8-1/2" - 12" x 18"* A6R - A3W* 21 lbs. 80g/m2 17 to 28 lbs.
ApollonII_general-copy_SEC.book 11 ページ 2004年9月6日 月曜日 午後4時57分 LOADING PAPER Setting the paper type (except the bypass tray) Setting the paper size when an extra size is loaded Follow these steps to change the paper type setting when the paper type has been changed in a paper tray. For the paper types that can be used in each tray, see page 2-9. To change the paper type setting for the bypass tray, see page 2-12.
ApollonII_general-copy_SEC.book 12 ページ 2004年9月6日 月曜日 午後4時57分 LOADING PAPER Setting the paper type and paper size in the bypass tray Follow the steps below to set the type and size of the paper loaded in the bypass tray. 1 Touch the [PAPER SELECT] key. (When copy mode is selected) Touch the [PAPER SELECT] key in the AUTO 8½x11 main screen of the copy PAPER SELECT mode. [HEAVY PAPER 1] 3 Touch PAPER 2], and go to step 6. HEAVY PAPER1 28+lbs. 54 lbs. HEAVY PAPER2 54+lbs. 80 lbs.
sec_apollon_02-1.fm 13 ページ 2004年9月14日 火曜日 午前10時47分 CUSTOM SETTINGS The items that can be set with the custom settings are shown below. ● Total count ................................... The number of pages processed by the machine and optional equipment can be displayed. (See page 2-14.) ● Display contrast ........................... Used to adjust the contrast of the operation panel display. (See page 2-14.) ● List print ....................................... Used to print a list of machine settings.
ApollonII_general-copy_SEC.book 14 ページ 2004年9月6日 月曜日 午後4時57分 CUSTOM SETTINGS the year, month, day, hour or 3 Touch minute key, and then use the or key to adjust the setting. ● If you select a non-existent date (for example, Feb. 30), the [OK] key will gray out to prevent entry of the date. ● Select [DAYLIGHT SAVING TIME SETTING] checkbox to have the time automatically change at the beginning and end of daylight saving time. 4 Touch the [OK] key. finish the setting operation, touch the 5 To [EXIT] key.
ApollonII_general-copy_SEC.book 15 ページ 2004年9月6日 月曜日 午後4時57分 REPLACING THE TONER CARTRIDGES When toner runs low, "[ ] TONER SUPPLY IS LOW" appears in the display. It is recommended that you keep a set of new toner cartridges so that you can replace them quickly when toner runs out. READY TO COPY. ([ ]TONER SUPPLY IS LOW.) If you continue to use the toner cartridge, the toner will eventually run out, the machine will stop and the following message will appear.
ApollonII_general-copy_SEC.book 16 ページ 2004年9月6日 月曜日 午後4時57分 REPLACING THE TONER CARTRIDGES the protective material from the 5 Remove new toner cartridge. 8 Return the cartridge lock lever. 9 Close the front cover. 6 Insert the new toner cartridge. Align the insert holes as shown and then push the cartridge in. NOTE A toner cartridge of a different color cannot be installed. For instance, a yellow cartridge cannot be installed in the cyan position.
ApollonII_general-copy_SEC.book 17 ページ 2004年9月6日 月曜日 午後4時57分 STORAGE OF SUPPLIES Standard supplies for this product that can replaced by the user include paper, toner cartridges, and staple cartridges for the finisher. For best copying results, be sure to use only Sharp Genuine Supplies which are designed, engineered, and tested to maximize the life and performance of Sharp products. Look for the Genuine Supplies label on the toner package. GENUINE SUPPLIES 2 ■ Proper storage 1.
ApollonII_general-copy_SEC.book 18 ページ 2004年9月6日 月曜日 午後4時57分 MISFEED REMOVAL When a misfeed has occurred during printing, the message "MISFEED HAS OCCURRED." will appear in the touch panel display of the operation panel and printing output will stop. The approximate locations of possible misfeeds are indicated by " " in the illustration below. The page numbers for detailed information for misfeed removal for each are also shown.
ApollonII_general-copy_SEC.book 19 ページ 2004年9月6日 月曜日 午後4時57分 MISFEED REMOVAL Misfeed in the paper feed area NOTE Paper misfed from a paper tray may be extending out of the tray into the right side cover area. In this case if the tray is drawn out of the machine, the paper may become torn and difficult to remove. To prevent this from happening, always open the right side cover first and remove the misfed paper if it is extending into that area.
ApollonII_general-copy_SEC.book 20 ページ 2004年9月6日 月曜日 午後4時57分 MISFEED REMOVAL Misfeed in the transport area, fusing area, and exit area Transport area 1 Fusing area Open the upper side cover and check for a misfeed. 1 Open the duplex bypass/inverter unit. Grasp the finger hold and gently open the unit. Push the lever upward and gently open the cover. NOTE If paper is loaded in the bypass tray, temporarily remove the paper and close the bypass tray before opening the side cover.
ApollonII_general-copy_SEC.book 21 ページ 2004年9月6日 月曜日 午後4時57分 MISFEED REMOVAL Misfeed in the stand/1 x 500 sheet paper drawer NOTE Paper misfed from a paper tray may be extending out of the tray into the right side cover area. In this case if the tray is drawn out of the machine, the paper may become torn and difficult to remove. To prevent this from happening, always open the right side cover first and remove the misfed paper if it is extending into that area. 1 Open the upper and lower side covers.
ApollonII_general-copy_SEC.book 22 ページ 2004年9月6日 月曜日 午後4時57分 MISFEED REMOVAL Misfeed in the duplex bypass/inverter unit and duplex module/2 x 500 sheet paper drawer NOTE Paper misfed from a paper tray may be extending out of the tray into the right side cover area. In this case if the tray is drawn out of the machine, the paper may become torn and difficult to remove. To prevent this from happening, always open the right side cover first and remove the misfed paper if it is extending into that area.
ApollonII_general-copy_SEC.book 23 ページ 2004年9月6日 月曜日 午後4時57分 MISFEED REMOVAL the misfed paper from the duplex 10 Remove module. Be careful not to tear the misfed paper during removal. ■ Misfeed in the upper or lower tray To remove misfed paper from the upper tray or lower tray, follow steps 1 through 5 of "Misfeed in the stand/1 x 500 sheet paper drawer" on page 221. 2 11 Gently close the duplex module. Push the tray firmly all the way into the machine.
ApollonII_general-copy_SEC.book 24 ページ 2004年9月6日 月曜日 午後4時57分 TROUBLESHOOTING Check the following troubleshooting list before requesting service as many problems can be fixed by the user. If you are unable to solve the problem by checking the list, turn off the power switch, unplug the power cord. Problems related to general use of the machine are described below. For problems related to the copy function, see page 7-4. For fax, printer, and network scanner problems, see the manuals for those functions.
ApollonII_general-copy_SEC.book 25 ページ 2004年9月6日 月曜日 午後4時57分 TROUBLESHOOTING Problem Check Solution or cause Smudges on printed sheets. Does a message appear indicating the need for maintenance? Please contact the your dealer as soon as possible. Color occur. When printing in color, character and color deviations appear. Perform color registration as explained on pages 12 and 13 of the key operator's guide. The display of the tray's paper size slide differs from the paper size in the tray.
ApollonII_general-copy_SEC.
ApollonII_general-copy_SEC.book 1 ページ 2004年9月6日 月曜日 午後4時57分 CHAPTER 3 PERIPHERAL DEVICES This chapter explains procedures for using the peripheral devices such as the Saddle Stitch Finisher (AR-F13). Page SADDLE STITCH FINISHER .........................................................................3-2 ● Part names and functions ......................................................................3-2 ● Specifications ....................................................................................
ApollonII_general-copy_SEC.book 2 ページ 2004年9月6日 月曜日 午後4時57分 SADDLE STITCH FINISHER The saddle stitch finisher can automatically place two staples for centerline binding of prints or copies and fold them along the centerline. An optional hole punching unit is available for installation into the finisher. Part names and functions Stapler compiler Paper to be stapled is stacked temporarily. When printing on post cards or envelopes, remove the output from here.
ApollonII_general-copy_SEC.
ApollonII_general-copy_SEC.book 4 ページ 2004年9月6日 月曜日 午後4時57分 SADDLE STITCH FINISHER Saddle stitch finisher functions ■ Sort mode Sorted sets will be delivered. Original Printouts ■ Group mode Groups of copies of the same page will be delivered. Original Printouts ■ Offset mode Offset mode Non-offset mode Sets will move from side to side so that each set or group will be offset from the previous set or group for easy separation. (The offset function only operates in the offset tray.
ApollonII_general-copy_SEC.book 5 ページ 2004年9月6日 月曜日 午後4時57分 SADDLE STITCH FINISHER ■ Saddle stitch function The saddle stitch finisher can automatically place two staples for centerline binding of prints or copies and fold them along the centerline. 6 4 2 7 9 11 ■ Hole punching (only if a punch module is installed) If the saddle stitch finisher is equipped with a hole punch module, printed paper can be hole punched and delivered to the offset tray.
ApollonII_general-copy_SEC.book 6 ページ 2004年9月6日 月曜日 午後4時57分 SADDLE STITCH FINISHER Using the saddle stitch finisher Touch the [Output] key on the main screen of copy mode to display the screen that allows selection of sort, staple sort, centerline stapling, group function, and the output tray. OUTPUT SORT OK OFFSET FINISHER TRAY CENTER TRAY STAPLE SORT SADDLE STITCH PUNCH GROUP [GROUP] key (See page 3-4.) [OK] key When Group is selected, all copies of the same original will be grouped.
ApollonII_general-copy_SEC.book 7 ページ 2004年9月6日 月曜日 午後4時57分 SADDLE STITCH FINISHER Staple cartridge replacement and staple jam removal When the staple cartridge becomes empty or staples become jammed, a message will appear in the message display of the operation panel. Follow the procedure below to replace the staple cartridge or remove jammed staples. ■ Staple cartridge replacement 1 Open the front cover. a new 6 Insert staple box.
ApollonII_general-copy_SEC.book 8 ページ 2004年9月6日 月曜日 午後4時57分 SADDLE STITCH FINISHER ■ Staple jam removal the saddle stitch finisher and slide 1 Unlatch it away from the main unit. 2 Open the front cover. roller rotating knob C as shown in the 3 Turn illustration until the blue indication is seen. 6 Remove the misfed paper. Be careful not to tear the misfed paper during removal. 7 Close the saddle stitch section cover. 8 Pull out the stapler section.
sec_apollon_03-1.fm 9 ページ 2004年11月15日 月曜日 午前11時45分 SADDLE STITCH FINISHER 11 Raise the lever at the end of the staple box. the 14 Push finisher. stapler section back into the Remove the top staple if it is bent. If bent staples remain, a staple jam will occur again. 12 Return the lever to its original position. 15 Close the front cover. 3 13 Reinstall the staple box. Push the staple box in until it clicks into place. the saddle stitch 16 Push against the main unit.
ApollonII_general-copy_SEC.book 10 ページ 2004年9月6日 月曜日 午後4時57分 SADDLE STITCH FINISHER Misfeed in the saddle stitch finisher When a misfeed occurs in the saddle stitch finisher, remove the misfed paper following the procedure below. the saddle stitch finisher and slide 1 Unlatch it away from the main unit. NOTE The saddle stitch finisher and the machine are connected at the rear. Exercise caution when pulling them apart. 5 Remove the misfed paper. Remove the paper gently, taking care not to tear it.
ApollonII_general-copy_SEC.book 11 ページ 2004年9月6日 月曜日 午後4時57分 SADDLE STITCH FINISHER 10 Open the front cover. 13 Close the saddle stitch section cover. roller rotating knob in the direction of 11 Turn the arrow. 14 Close the front cover. 3 any misfed paper from the saddle 12 Remove stitch tray. the saddle stitch 15 Push against the main unit. finisher back Be careful not to tear the misfed paper during removal.
ApollonII_general-copy_SEC.book 12 ページ 2004年9月6日 月曜日 午後4時57分 SADDLE STITCH FINISHER Troubleshooting saddle stitch finisher problems Check the list below before calling for service. Problem Stapling position is not correct (including saddle stitch). The saddle stitch finisher does not operate. Stapling cannot be performed (including saddle stitch). The punch hole positions are not correct*1 Check Solution or cause Stapling position not set properly? Check the stapling position setting.
ApollonII_general-copy_SEC.book 13 ページ 2004年9月6日 月曜日 午後4時57分 SADDLE STITCH FINISHER Stapling position quick reference guide for duplex output The orientation of the copy paper, original, scanned original data, and binding position selection are all interrelated. The table below shows these relationships.
ApollonII_general-copy_SEC.book 14 ページ 2004年9月6日 月曜日 午後4時57分 SADDLE STITCH FINISHER Relation between print image and saddle stitch The orientation of the copy paper, original, scanned original data, and binding position selection are all interrelated. The table below shows these relationships.
ApollonII_general-copy_SEC.book 15 ページ 2004年9月6日 月曜日 午後4時57分 LARGE CAPACITY TRAY The large capacity tray can hold approximately 3,500 sheets (21 lbs. (80 g/m2)) of 8-1/2" x 11" (A4) size paper. (For the types of paper that can be loaded in the large capacity tray, see "Large Capacity tray" in the tray specifications (page 2-9).) Part name Top cover Open for misfeed removal. Release lever 3 NOTES ● Do not place heavy objects on the large capacity tray or press down hard on the tray.
ApollonII_general-copy_SEC.book 16 ページ 2004年9月6日 月曜日 午後4時57分 LARGE CAPACITY TRAY Loading paper in the large capacity tray 1 Pull the tray out until it stops. When the tray is in operation, do not use excessive force to pull the tray out. This may damage the tray. the paper in the center of the paper 2 Place table. The paper stack must not be higher than the indicator line (up to 3,500 sheets of SHARP standard paper (21 lbs.
ApollonII_general-copy_SEC.book 17 ページ 2004年9月6日 月曜日 午後4時57分 LARGE CAPACITY TRAY Misfeed in the large capacity tray When a misfeed occurs in the large capacity tray, remove the misfed paper, following the procedure below. holding the tray release lever, 1 While carefully slide the large capacity tray away from the main unit until it stops. the large capacity tray towards the 5 Push main unit and latch it into place. Gently push the large capacity tray back in until it stops.
ApollonII_general-copy_SEC.
ApollonII_general-copy_SEC.
ApollonII_general-copy_SEC.
ApollonII_general-copy_SEC.book 1 ページ 2004年9月6日 月曜日 午後4時57分 CHAPTER 4 BEFORE MAKING COPIES This chapter provides basic information necessary for using the copier functions of the machine. Please read this chapter before making copies. Page PART NAMES AND FUNCTIONS (The Reversing Single Pass Feeder) ......4-2 ● Exterior...................................................................................................4-2 ● Operation Panel ..................................................................
ApollonII_general-copy_SEC.book 2 ページ 2004年9月6日 月曜日 午後4時57分 PART NAMES AND FUNCTIONS (The Reversing Single Pass Feeder) Exterior *RSPF exit area *RSPF right side cover (page 7-2) Finished originals are output here. Open to remove misfed originals. Document feeder tray (page 4-6) Reversing tray Set the originals here for automatic feeding. Pull out to remove misfed originals. Original guides (page 4-6) Document glass Adjust to the size of the originals.
ApollonII_general-copy_SEC.book 3 ページ 2004年9月6日 月曜日 午後4時57分 PART NAMES AND FUNCTIONS (The Reversing Single Pass Feeder) Operation Panel Touch panel (Details are on the next page 4-4) [CA] key (clear all key) Messages and touch keys are displayed here. Selections are made by touching the displayed keys. Selections made with the keys are confirmed by a "beep"* that is sounded when a key is touched, and highlighting of the selection key.
ApollonII_general-copy_SEC.book 4 ページ 2004年9月6日 月曜日 午後4時57分 PART NAMES AND FUNCTIONS (The Reversing Single Pass Feeder) Touch Panel (main screen of copy mode) The main screen of copy mode shows messages and keys necessary for copying and settings that can be selected. Touch a key to make a selection. The main screen of the copy mode will be displayed when the [COPY] key is pressed.* * Except when the custom settings screen is displayed. READY TO COPY.
ApollonII_general-copy_SEC.book 5 ページ 2004年9月6日 月曜日 午後4時57分 REVERSING SINGLE PASS FEEDER The reversing single pass feeder can be used to automatically feed originals for continuous copying. Both sides of two-sided sheet originals can be scanned without having to manually turn the originals over. This feature is convenient for making copies of a large number of originals.
ApollonII_general-copy_SEC.book 6 ページ 2004年9月6日 月曜日 午後4時57分 SETTING ORIGINALS ■ When using the reversing single pass feeder the original guides to the size of the 1 Adjust originals. ■ When using the document glass Open the document cover, place the original face down on the document glass, and then gently close the document cover. Original size detector the originals 2 Place document feeder tray. face up in the Set the originals all the way into the feed slot.
ApollonII_general-copy_SEC.book 7 ページ 2004年9月6日 月曜日 午後4時57分 SETTING ORIGINALS ■ Standard original setting orientation [Example 1] Document feeder tray Document glass Top Top Bottom Bottom Place originals in the document feeder tray or on the document glass so that the top and bottom of the original is positioned as shown in the illustration. If not, staples will be incorrectly positioned and some special features may not give the expected result.
ApollonII_general-copy_SEC.book 8 ページ 2004年9月6日 月曜日 午後4時57分 SELECTING THE ORIGINAL SIZE When the correct original size is not detected or the original size is not displayed, you can manually specify the original size. By causing the machine to recognize the original size, you can have the automatic ratio selection function (page 512) automatically set a suitable enlargement or reduction ratio for the selected paper size.
ApollonII_general-copy_SEC.book 9 ページ 2004年9月6日 月曜日 午後4時57分 STORING, DELETING, AND USING ORIGINAL SIZES Up to 9 special original sizes can be stored. Stored sizes can be easily called up and are not erased if the power is turned off. Storing a frequently used original size saves you the trouble of manually setting the size each time you copy that size of document. ● To cancel an original size storing, using, or deleting operation, press the [CA] key or touch the [ORIGINAL] key on the screen.
ApollonII_general-copy_SEC.
ApollonII_general-copy_SEC.book 1 ページ 2004年9月6日 月曜日 午後4時57分 CHAPTER 5 BASIC PROCEDURE FOR MAKING COPIES This chapter explains the procedures for using basic copy functions, including making normal copies and enlarging/reducing copies. Page NORMAL COPYING ......................................................................................5-2 ● Copying from the reversing single pass feeder......................................5-2 ● Automatic two-sided copying from the reversing single pass feeder .....
ApollonII_general-copy_SEC.book 2 ページ 2004年9月6日 月曜日 午後4時57分 NORMAL COPYING This section describes the normal copying procedure. Copying from the reversing single pass feeder NOTE Certain restrictions exist depending on the amount of memory installed and the copy settings. (See "Copy mode output restrictions" and "Guidelines for the number of scannable originals during sort copying" on page 5-4.) ■ 1-sided copies of 1-sided originals Original Copy the originals in the document feeder 1 Place tray.
ApollonII_general-copy_SEC.book 3 ページ 2004年9月6日 月曜日 午後4時57分 NORMAL COPYING the desired output mode (see page 7 Select 5-5). 2-SIDED COPY OUTPUT The sort mode is the default mode. To select the group mode, touch the [OUTPUT] key, then touch the [GROUP] key on the output setting screen, and then touch the [OK] key on the setting screen. the numeric keys to set the desired 8 Use number of copies. Up to 999 can be set.
sec_apollon_05-1.
sec_apollon_05-1.
ApollonII_general-copy_SEC.book 6 ページ 2004年9月6日 月曜日 午後4時57分 NORMAL COPYING Automatic two-sided copying from the reversing single pass feeder When a duplex module/2 x 500 sheet paper drawer and a duplex bypass/inverter unit are installed, the following automatic two-sided copy functions are possible. The copy paper is turned over automatically, allowing easy twosided copying. NOTE Certain restrictions exist depending on the amount of memory installed and the copy settings.
ApollonII_general-copy_SEC.book 7 ページ 2004年9月6日 月曜日 午後4時57分 NORMAL COPYING Copying from the document glass When copying originals which cannot be fed from the reversing single pass feeder such as thick originals, open the document cover and copy the originals from the document glass. NOTE Certain restrictions exist depending on the amount of memory installed and the copy settings.
ApollonII_general-copy_SEC.book 8 ページ 2004年9月6日 月曜日 午後4時57分 NORMAL COPYING the desired output mode. (See page 4 Select 5-5.) the [COLOR COPY START ( 6 Press or [BLACK COPY START ( )] key. When a document is detected on the 2-SIDED COPY document glass, the group mode will be automatically selected. OUTPUT To select sort copy, touch the [OUTPUT] key, then touch the [SORT] key on the displayed screen, and then touch the [OK] key.
ApollonII_general-copy_SEC.book 9 ページ 2004年9月6日 月曜日 午後4時57分 NORMAL COPYING Automatic two-sided copying from the document glass When a duplex module/2 x 500 sheet paper drawer and a duplex bypass/inverter unit are installed, the following automatic two-sided copy function is possible. The copy paper is turned over automatically, allowing easy two-sided copying. NOTE Certain restrictions exist depending on the amount of memory installed and the copy settings.
ApollonII_general-copy_SEC.book 10 ページ 2004年9月6日 月曜日 午後4時57分 EXPOSURE ADJUSTMENTS This copier has seven exposure modes to choose from: AUTO, TEXT/PRTD. PHOTO, TEXT/PHOTO, TEXT, PHOTO, PRINTED PHOTO and MAP. [AUTO] This is the standard initial setting for this copier. When a black and white copy is made, the exposure is automatically adjusted to obtain the best image quality. When a full-color copy is made, the image is adjusted in the same way as when [TEXT/PRTD.PHOTO] (initial settings) is selected.
ApollonII_general-copy_SEC.book 11 ページ 2004年9月6日 月曜日 午後4時57分 EXPOSURE ADJUSTMENTS a setting other than "AUTO" has been 3 Ifselected in step 2, manually adjust the the [COLOR COPY START ( 5 Press or [BLACK COPY START ( )] key. )] copy exposure. MANUAL 1 3 TEXT 5 PRIN PHOT Touch the key to make darker copies. Touch the key to make lighter copies.
ApollonII_general-copy_SEC.book 12 ページ 2004年9月6日 月曜日 午後4時57分 REDUCTION/ENLARGEMENT/ZOOM Reduction and enlargement ratios can be selected either automatically or manually as described in this section. Automatic selection (auto image) The reduction or enlargement ratio will be selected automatically based on the original size and the selected paper size. the original in the document feeder 1 Place tray or on the document glass.
ApollonII_general-copy_SEC.book 13 ページ 2004年9月6日 月曜日 午後4時57分 REDUCTION/ENLARGEMENT/ZOOM Manual selection The preset ratios (maximum 400%, minimum 25%) can be selected with the enlargement and reduction keys. In addition, the zoom keys can be used to select any ratio from 50% to 200% in increments of 1%. NOTE When the reversing single pass feeder is used, the ratio can only be set within the range 50% to 200%.
ApollonII_general-copy_SEC.book 14 ページ 2004年9月6日 月曜日 午後4時57分 REDUCTION/ENLARGEMENT/ZOOM that the desired paper size has 6 Ensure been automatically selected based on the selected copy ratio or select another size as needed.
ApollonII_general-copy_SEC.book 15 ページ 2004年9月6日 月曜日 午後4時57分 REDUCTION/ENLARGEMENT/ZOOM XY ZOOM The XY ZOOM feature allows the horizontal and vertical copy ratios to be changed independently. The preset ratios (maximum 400%, minimum 25%) can be selected with the enlargement and reduction keys. In addition, the zoom keys can be used to select any ratio from 50% to 200% in increments of 1%. NOTE When the reversing single pass feeder is used, the ratio can only be set within the range 50% to 200%.
ApollonII_general-copy_SEC.book 16 ページ 2004年9月6日 月曜日 午後4時57分 REDUCTION/ENLARGEMENT/ZOOM the 7 Use ZOOM ([ reduction, enlargement, and ], [ ]) keys to change the copy ratio in the vertical (Y) direction. 77% X A 64% Y ZOOM 50% % A % X 50 % Y 77 % The zoom keys can be used to change the ratio 2 from 50% to 200% in increments of 1%. 4 XY Touch the [ ] key to increase the ratio, or the CANCEL ZOOM [ ] key to decrease the ratio.
ApollonII_general-copy_SEC.book 17 ページ 2004年9月6日 月曜日 午後4時57分 SPECIAL PAPERS Special papers including transparency film, postcards and envelopes must be fed through the bypass tray. the original in the document feeder 1 Place tray or on the document glass. (pages 4-6 to 4-9) 2 Load the special paper in the bypass tray. See pages 2-6 and 2-9 for the specifications of paper that can be used in the bypass tray. For the paper loading instructions see "Loading paper in the bypass tray" (page 2-4).
ApollonII_general-copy_SEC.
ApollonII_general-copy_SEC.book 1 ページ 2004年9月6日 月曜日 午後4時57分 CHAPTER 6 CONVENIENT COPY FUNCTIONS This chapter explains special-purpose functions, storing of copy settings, and other convenient functions. Please select and read sections of this chapter as needed. Page SPECIAL MODES..........................................................................................6-2 ● Common operation procedure for using the special functions ...............6-3 ● Margin shift ......................................
ApollonII_general-copy_SEC.book 2 ページ 2004年9月6日 月曜日 午後4時57分 SPECIAL MODES When the [SPECIAL MODES] key on the main screen of the copy mode is touched, the special modes screen containing several special function touch keys will appear. These functions are shown below. Touch the [SPECIAL MODES] key in the main screen READY TO COPY.
ApollonII_general-copy_SEC.book 3 ページ 2004年9月6日 月曜日 午後4時57分 SPECIAL MODES Common operation procedure for using the special functions 1 Touch the [SPECIAL MODES] key. SPECIAL MODES 2-SIDED COPY 2 Touch mode. the key for the desired special MARGIN SHIFT Example: To set the margin shift function CENTERING If you touch the menu keys for color adjustment or image editing, you will go to the menu screen for selection of the corresponding functions.
ApollonII_general-copy_SEC.book 4 ページ 2004年9月6日 月曜日 午後4時57分 SPECIAL MODES Margin shift The margin shift function will automatically shift the text or image on the copy paper approximately 1/2" (10 mm) in its initial setting. One-sided copying Image shifted to the right Original Margin Image shifted to the left ● The shift direction can be selected from right or left shift as shown in the illustration.
ApollonII_general-copy_SEC.book 5 ページ 2004年9月6日 月曜日 午後4時57分 SPECIAL MODES Erase The erase function is used to erase the shadow lines on copies produced when copying thick originals or books. The erase modes that can be selected are shown below. The erase width is approximately 1/2" (10 mm) in it's initial setting. Original Copy EDGE ERASE Eliminates shadow lines around the edges of copies caused when heavy paper or a book is used as an original.
ApollonII_general-copy_SEC.book 6 ページ 2004年9月6日 月曜日 午後4時57分 SPECIAL MODES Dual page copy The dual page copy function produces separate copies of two documents placed side by side on the document glass. It is especially useful when copying books and other bound documents. [Example] Copying right and left pages of a book Book original Dual page copy ● The dual page copy function can be used with reduction copying but cannot be used with enlargement copying.
ApollonII_general-copy_SEC.book 7 ページ 2004年9月6日 月曜日 午後4時57分 SPECIAL MODES Centering When the original and copy paper are of different sizes, CENTERING is used to shift the image to the center of the copy paper but only in the left to right direction. [Example] Original the [CENTERING] 1 Touch SPECIAL MODES screen. MARGIN SHIFT CENTERING the [OK] 2 Touch MODES screen.
ApollonII_general-copy_SEC.book 8 ページ 2004年9月6日 月曜日 午後4時57分 SPECIAL MODES Transparency film with insert sheets 2 4 When copying onto transparency film, blank insert sheets can be placed between transparent sheets. Example: Inserting insert sheets between transparencies ●Insert sheets cannot be copied on in any mode. Originals (1-sided) ●This mode can be selected only in the 1-sided to 14 sided and 2-sided to 1-sided modes. 3 2 ●A multiple number of copies cannot be selected in 1 4 this mode.
ApollonII_general-copy_SEC.book 9 ページ 2004年9月6日 月曜日 午後4時57分 SPECIAL MODES Covers The COVERS mode is used to place covers on the front, back, or both the front and back of multipage documents. This function can only be used when the originals are placed in the document feeder tray of the reversing single pass feeder. (The document glass cannot be used.
ApollonII_general-copy_SEC.book 10 ページ 2004年9月6日 月曜日 午後4時57分 SPECIAL MODES whether the front cover sheets 3 Indicate are copied on or not. CANCEL OK PRINT ON FRONT COVER? NO YES 4 Select [YES] or [NO] on the touch panel. If [YES] is selected, the first page of the document will be copied onto the front cover sheet. Touch the [OK] key on the COVER setting screen. Return to the SPECIAL MODES screen. the [OK] 5 Touch MODES screen. key on the SPECIAL Return to the main screen of copy mode.
ApollonII_general-copy_SEC.book 11 ページ 2004年9月6日 月曜日 午後4時57分 COLOR ADJUSTMENTS MENU The [COLOR ADJUSTMENTS] menu in [SPECIAL MODES] enables the following parameters to be adjusted to modify the characteristics of a color copy. Settings adjusted with the color adjustments menu do not affect black and white copying. OK SPECIAL MODES MARGIN SHIFT ERASE DUAL PAGE COPY CENTERING COVERS TRANSPARENCY INSERTS key to switch to the second SPECIAL MODES screen.
sec_apollon_06-1.fm 12 ページ 2004年11月15日 月曜日 午前11時45分 COLOR ADJUSTMENTS MENU RGB adjust Strengthens or weakens one of three primary colors, red (R), green (G), or blue (B). the [RGB ADJUST] key on the 1 Touch COLOR ADJUSTMENTS menu screen. OLOR ADJUSTMENTS the [OK] key (inside [OK] key) on 4 Touch the RGB ADJUST setting screen. Return to the COLOR ADJUSTMENTS menu screen. RGB ADJUST SH COLOR BALANCE the [OK] key on the 5 Touch ADJUSTMENTS menu screen. BR COLOR Return to the SPECIAL MODES screen.
ApollonII_general-copy_SEC.book 13 ページ 2004年9月6日 月曜日 午後4時57分 COLOR ADJUSTMENTS MENU Sharpness Sharpens or softens image outlines. the [SHARPNESS] key on the 1 Touch COLOR ADJUSTMENTS menu screen. T SHARPNESS SU BAC BRIGHTNESS INT The SHARPNESS setting screen will appear. The color adjustments icon ( ) will also appear in the upper left of the screen to indicate that the function is turned on. the [SOFT] key to soften image 2 Touch outlines or touch the [SHARP] key to sharpen them.
ApollonII_general-copy_SEC.book 14 ページ 2004年9月6日 月曜日 午後4時57分 COLOR ADJUSTMENTS MENU Color balance This function is used to adjust the color, tone, and density of color copies. the [COLOR BALANCE] key on the 1 Touch COLOR ADJUSTMENTS menu screen. 2 RGB ADJUST SH COLOR BALANCE BRI The COLOR BALANCE setting screen will appear. Use the keys indicated in the illustration below to adjust the color balance settings.
ApollonII_general-copy_SEC.book 15 ページ 2004年9月6日 月曜日 午後4時57分 COLOR ADJUSTMENTS MENU Brightness This copier allows the level of brightness of images to be adjusted. the [BRIGHTNESS] key on the 1 Touch COLOR ADJUSTMENTS menu screen. the [OK] key (inside [OK] key) on 3 Touch the BRIGHTNESS setting screen. The BRIGHTNESS setting screen will appear. Return to the COLOR ADJUSTMENTS menu screen. T SHARPNESS SU BAC BRIGHTNESS IN the [OK] key on the 4 Touch ADJUSTMENTS menu screen.
ApollonII_general-copy_SEC.book 16 ページ 2004年9月6日 月曜日 午後4時57分 IMAGE EDIT MENU To use the following convenient copy functions, touch the [IMAGE EDIT] key in [SPECIAL MODES]. OK SPECIAL MODES MARGIN SHIFT ERASE DUAL PAGE COPY CENTERING COVERS TRANSPARENCY INSERTS key to switch to the second SPECIAL MODES screen. OK SPECIAL MODES COLOR ADJUSTMENTS 1 Touch the IMAGE EDIT B/W REVERSE 2 Touch the [IMAGE EDIT] key in the second SPECIAL MODES screen.
ApollonII_general-copy_SEC.book 17 ページ 2004年9月6日 月曜日 午後4時57分 IMAGE EDIT MENU Single color Produces copies with a selected single color. the [SINGLE COLOR] key on the 1 Touch IMAGE EDIT screen. IMAGE EDIT FULL-BLEED M I SINGLE COLOR 11x17 FULL-BLEED The SINGLE COLOR setting screen will appear. MULT ENLA Return to the IMAGE EDIT menu screen. the [OK] key on the IMAGE EDIT 4 Touch menu screen. Return to the SPECIAL MODES screen. the [OK] 5 Touch MODES screen. 2 Select the desired color.
ApollonII_general-copy_SEC.book 18 ページ 2004年9月6日 月曜日 午後4時57分 IMAGE EDIT MENU Photo Repeat PHOTO REPEAT is used to produce repeated images of a photo on a single sheet of copy paper. ● Up to 24 repeats can be made on a single copy sheet. The number of copies on a single sheet depends on the original size and copy paper size. ● Reduction or enlargement cannot be selected with this function. If reduction or enlargement has been selected, the copy ratio will be reset to 100% when this function is selected.
ApollonII_general-copy_SEC.book 19 ページ 2004年9月6日 月曜日 午後4時57分 IMAGE EDIT MENU the [PHOTO REPEAT] key on the 1 Touch IMAGE EDIT menu screen. R PHOTO REPEAT GE NT MU The PHOTO REPEAT setting screen will appear. Return to the SPECIAL MODES screen. the [OK] 5 Touch MODES screen. key on the SPECIAL Return to the main screen of copy mode. PAMPHLET COPY the key for the desired combination 2 Touch of original type and paper size.
ApollonII_general-copy_SEC.book 20 ページ 2004年9月6日 月曜日 午後4時57分 IMAGE EDIT MENU the [MULTI SHOT] 1 Touch IMAGE EDIT menu screen. OK AT key on the The MULTI SHOT setting screen will appear. The multi shot icon ( , etc.) will also appear in the upper left of the screen to indicate that the function is turned on. MULTI SHOT OPY the number of originals to be 2 Select copied onto one sheet of copy paper on the multi shot selection screen.
ApollonII_general-copy_SEC.book 21 ページ 2004年9月6日 月曜日 午後4時57分 IMAGE EDIT MENU 11" x 17" (A3) Full-bleed In other copy modes, image loss will occur along the copy edges. When the 11" x 17" (A3) FULL-BLEED function is used, the full image of an 11" x 17" (A3) size original will be copied onto 12" x 18" (A3W) size copy paper. The 11" x 17" (A3) FULL-BLEED function can only be used when the original is placed on the document glass. (The reversing single pass feeder cannot be used.
ApollonII_general-copy_SEC.book 22 ページ 2004年9月6日 月曜日 午後4時57分 IMAGE EDIT MENU Multi-page enlargement This function is used to enlarge an original image to a size larger than 11" x 17" (A3) and print divided images onto multiple sheets of copy paper. [Example] Copy (enlarged image on 8 sheets of 11" x 17" (A3) paper) Original (8-1/2" x 11" (A4) size) Overlap of sections of image ● There will be a margin around the edges of each copy.
sec_apollon_06-2.fm 23 ページ 2004年11月15日 月曜日 午前11時46分 IMAGE EDIT MENU the placement orientation and the 4 Check number of copies Example: Enlargement size = 22" x 17" (A2), original size = 8-1/2" x 11" (A4) OK IMAGE EDIT CANCEL MULTI-PAGE ENLARGEMENT ENLARGEMENT SIZE (INCH) 22x34 22x17 34x44 44x68 key on the SPECIAL Return to the main screen of copy mode. About the steps that follow See pages 5-7 and 5-8. OK ORIGINAL SIZE & ORIENTATION 11x17 8½x14 the [OK] 8 Touch MODES screen.
ApollonII_general-copy_SEC.book 24 ページ 2004年9月6日 月曜日 午後4時57分 IMAGE EDIT MENU Pamphlet copy The pamphlet copy function is used to arrange copies in proper order for eventual center-stapling and folding into a booklet. Two original pages are copied onto each side of copy paper. Four pages are, therefore, copied onto one sheet. This function is convenient for arranging copies into an attractive booklet or pamphlet.
ApollonII_general-copy_SEC.book 25 ページ 2004年9月6日 月曜日 午後4時57分 JOB PROGRAM MEMORY Frequently used job programs can be stored in each of ten storage registers. This is convenient for quick job recall without losing time manually reprogramming each aspect of a job. Job programs can be recalled with ease, and the programs are retained even when the power is turned off. By programming frequently used copy settings, you can eliminate the bother of selecting the settings each time you use them for a copy job.
ApollonII_general-copy_SEC.book 26 ページ 2004年9月6日 月曜日 午後4時57分 JOB PROGRAM MEMORY Recalling a job program 1 Press the [#/P] key. the number of copies as needed and 3 Set press the [COLOR COPY START ( )] or [BLACK COPY START ( )] key. Copying will start with the settings of the recalled job program. the desired storage register 2 Touch number key to recall the job from memory. When a number key is touched, the selection screen will be closed and the stored job program will be recalled.
ApollonII_general-copy_SEC.book 27 ページ 2004年9月6日 月曜日 午後4時57分 INTERRUPTING A COPY RUN INTERRUPT can be used to temporarily stop a long copy run so that another copy job can be run. It is not possible to interrupt an automatic two-sided copy job. 1 Touch the [INTERRUPT] key. 0 INTERRUPT ORIGINAL 8½x11 AUTO ORIGINAL PLAIN 5½x8½ AUTO EXPOSURE all other desired settings such as 3 Make exposure, paper size and number of If the [INTERRUPT] key does not appear, interrupt copying is not possible.
ApollonII_general-copy_SEC.
ApollonII_general-copy_SEC.book 1 ページ 2004年9月6日 月曜日 午後4時57分 CHAPTER 7 MACHINE MAINTENANCE (FOR COPYING) This chapter explains procedures for removing misfeeds in a reversing single pass feeder, cleaning the machine, and troubleshooting. Page REMOVING AN ORIGINAL MISFEED ..........................................................7-2 ● Removing a misfed original from the reversing single pass feeder .......7-2 USER MAINTENANCE (For copying)............................................................
ApollonII_general-copy_SEC.book 2 ページ 2004年9月6日 月曜日 午後4時57分 REMOVING AN ORIGINAL MISFEED Removing a misfed original from the reversing single pass feeder If an original misfeed occurs in the reversing single pass feeder, follow the steps below to remove the misfed original. NOTES ● For misfeed removal in the main unit and other peripheral devices, see page 2-18. ● When a misfeed occurs, touch the [INFORMATION] key to display detailed information for misfeed removal.
ApollonII_general-copy_SEC.book 3 ページ 2004年9月6日 月曜日 午後4時57分 USER MAINTENANCE (For copying) To ensure good service from this product over a long period of time, it is recommended that the following maintenance procedures be performed on a regular basis. CAUTION Do not use flammable spray to clean the machine. If gas from the spray comes in contact with hot electrical components or the fusing unit inside the machine, fire or electrical shock may result. Wipe with a clean, soft cloth.
ApollonII_general-copy_SEC.book 4 ページ 2004年9月6日 月曜日 午後4時57分 TROUBLESHOOTING Whenever the machine stops or operation is not possible, check the operation panel display for messages. In most cases, these messages will give sufficient information to return the machine to an operating condition. In cases where this information is not enough, check the list below for more information. This section describes problems concerning copier features.
ApollonII_general-copy_SEC.book 5 ページ 2004年9月6日 月曜日 午後4時57分 TROUBLESHOOTING Problem Job cancelation needed Scanning of originals is incomplete. The selected number of sets of copies is not printed. Not all pages are copied Check Is a message requesting cancelation of job displayed? Is a message indicating memory is full displayed? Solution or cause Press the [CA] (clear all) key to cancel the current job.
ApollonII_general-copy_SEC.
ApollonII_general-copy_SEC.book 1 ページ 2004年9月6日 月曜日 午後4時57分 CHAPTER 8 SPECIFICATIONS This chapter contains useful information about the machine. Page SPECIFICATIONS .........................................................................................8-2 ● Copier and Main unit ..............................................................................8-2 ● Reversing single pass feeder.................................................................8-4 ● Duplex bypass/inverter unit (optional).....
sec_apollon_08.fm 2 ページ 2004年9月14日 火曜日 午前10時51分 SPECIFICATIONS Copier and Main unit Type Desktop (can be upgraded to console type if an optional stand is installed.
ApollonII_general-copy_SEC.book 3 ページ 2004年9月6日 月曜日 午後4時57分 SPECIFICATIONS Continuous copying speed (when the offset function is not used) Black and white copying Copy paper size 100% / Reduced / Enlarged 11" x 17" (A3) 13 copies/min. 12" x 18" (A3 wide) 7 copies/min. 8-1/2" x 14" (B4), 8-1/2" x 13" 15 copies/min. 8-1/2" x 11" (A4) 26 copies/min. 8-1/2" x 11"R (A4R) 19 copies/min. B5 26 copies/min. 7-1/4" x 10-1/2"R (B5R) 19 copies/min. 8-1/2" x 5-1/2" (A5) 26 copies/min.
ApollonII_general-copy_SEC.book 4 ページ 2004年9月6日 月曜日 午後4時57分 SPECIFICATIONS Reversing single pass feeder Original sizes 5-1/2" x 8-1/2" to 11" x 17" (A5 to A3) Original weight 15 to 24 lbs. (56 to 90 g/m2) Capacity Up to 40 sheets (8-1/2" x 11", 21 lbs. (A4, 80 g/m2)) Up to 30 sheets (8-1/2" x 14" or larger, 21 lbs. (B4 or larger, 80 g/m2)) Power supply Supplied from machine Dimensions 22-61/64" (W) x 17-9/64" (D) x 5-1/4" (H) (583 mm (W) x 435 mm (D) x 133 mm (H)) Weight Approx. 11.9 lbs.
ApollonII_general-copy_SEC.book 5 ページ 2004年9月6日 月曜日 午後4時57分 INDEX [#/P] key ................................................................. 4-3 [ ] key ................................................................... 4-3 1-sided copies ................................................. 5-2, 5-7 11" x 17" Full-bleed ..................................... 6-16, 6-21 256 MB optional memory ....................................... 1-7 Copy ratio selection..............................................
sec_apollon_08.fm 6 ページ 2004年9月14日 火曜日 午前10時52分 INDEX ■ H Icon ........................................................................ 1-9 If the machine is to be left unused for a long time.. 0-3 Image edit menu ........................................... 6-2, 6-16 Image send ............................................................ 1-8 Information ........................................................... 2-18 Insert sheets...........................................................
ApollonII_general-copy_SEC.book 7 ページ 2004年9月6日 月曜日 午後4時57分 INDEX Postcards ............................................ 2-4 to 2-6, 5-17 Postcards with a coated front............................... 2-10 Power switch .......................................................... 1-4 Preheat mode......................................................... 1-3 Preset reduction/enlargement ratios .................... 5-13 Pressure adjusting levers............................. 2-6 to 2-7 Print....................
ApollonII_general-copy_SEC.
ApollonII_general-copy_SEC.book 1 ページ 2004年9月6日 月曜日 午後4時57分 For users in the USA This device complies with Part 15 of the FCC rules. Operation is subject to the following two conditions: (1) This device may not cause harmful interference, and (2) this device must accept any interference received, including interference that may cause undesired operation.
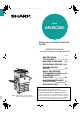
sec_apollon_cover4.fm 1 ページ 2004年11月15日 月曜日 午前11時48分 AR-BC260 (for general information and copier operation) SHARP ELECTRONICS CORPORATION Sharp Plaza, Mahwah, New Jersey 07430-1163. www.sharpusa.com SHARP ELECTRONICS OF CANADA LTD. 335 Britannia Road East, Mississauga, Ontario, L4Z 1W9 This manual has been printed using a vegetable-based soy oil ink to help protect the environment.