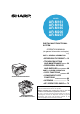
ページ 年 月 日 土曜日 午前 時 分 MODEL AR-M161 AR-M162 AR-M165 AR-M206 AR-M207 DIGITAL MULTIFUNCTIONAL SYSTEM OPERATION MANUAL (for general information and copier) Page PART 1: GENERAL INFORMATION • BEFORE USING THE PRODUCT 12 • TROUBLESHOOTING AND MAINTENANCE 24 • PERIPHERAL DEVICES AND SUPPLIES 40 PART 2: COPIER OPERATION • COPY FUNCTIONS AR-M161/AR-M162/AR-M165 • CONVENIENT COPY FUNCTIONS • APPENDIX • KEY OPERATOR'S GUIDE 45 64 73 75 Be sure to become thoroughly familiar with this manual to gain
1 ページ 年9月 日 木曜日 午前 時 分 In some areas, the "POWER" switch positions are marked "I" and " " on the copier instead of "ON" and "OFF". The symbol " " denotes the copier is not completely de-energized but in a stand-by condition at this "POWER" switch position. If your copier is so marked, please read "I" for "ON" and " " for "OFF". Caution! For a complete electrical disconnection, pull out the main plug. The socket-outlet shall be installed near the equipment and shall be easily accessible.
1 ページ 年9月 日 木曜日 午前 時 分 Part 1: General Information 1
ページ 2 年9月 日 木曜日 午前 時 分
ページ 4年 月 4日 木曜日 午後6時 分 Notes • Considerable care has been taken in preparing this manual. If you have any comments or concerns about the manual, please contact your nearest authorised service representative. • This product has undergone strict quality control and inspection procedures. In the unlikely event that a defect or other problem is discovered, please contact your dealer or nearest authorised service representative.
ページ 年9月 日 木曜日 午前 時 分 CONTENTS Part 1: General Information PRODUCT CONFIGURATIONS ................................................................................................................ 3 CAUTIONS................................................................................................................................................. 6 ● CAUTIONS ON USING.....................................................................................................................................
ページ 年9月 日 土曜日 午前 時 分 CONTENTS Part 2: Copier Operation 4 COPY FUNCTIONS NORMAL COPYING ........................................ 45 ● ● ● ● ● MAKING A COPY DARKER OR LIGHTER ....48 SELECTING THE TRAY.................................49 SETTING THE NUMBER OF COPIES ...........49 SELECTING THE ORIGINAL SIZE ................50 USING THE BYPASS TRAY TO COPY A SPECIAL SIZE ORIGINAL..............................51 REDUCING OR ENLARGING A COPY........... 52 ● AUTOMATIC RATIO SELECTION .................
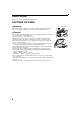
ページ 年 月 日 火曜日 午前 時 7分 CAUTIONS Follow the cautions below when using this machine. CAUTIONS ON USING Warning: • The fusing area is hot. Exercise care in this area when removing misfed paper. • Do not look directly at the light source. Doing so may damage your eyes. Caution: • Do not switch the machine rapidly on and off. After turning the machine off, wait 10 to 15 seconds before turning it back on. • Place the machine on a firm, level surface.
ページ 年9月 日 木曜日 午前 時 分 CAUTIONS LASER INFORMATION Wave length 785 nm + 10 nm/- 15 nm Pulse times (8.141 µs ± 0.1 µs)/7 mm Output power 0.14 mW - 0.22 mW At the production line, the output power of the scanner unit is adjusted to 0.8 MILLIWATT PLUS 10 % and is maintained constant by the operation of the Automatic Power Control (APC). Caution Use of controls or adjustments or performance of procedures other than those specified herein may result in hazardous radiation exposure.
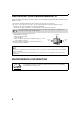
ページ 年9月 日 木曜日 午前 時 分 INSTALLATION REQUIREMENTS Improper installation may damage this product. Please note the following during initial installation and whenever the machine is moved. 1. The machine should be installed near an accessible power outlet for easy connection. 2. Be sure to connect the power cord only to a power outlet that meets the specified voltage and current requirements. Also make certain the outlet is properly grounded.
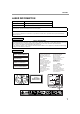
ページ 年9月 日 木曜日 午前 時 分 MANUALS PROVIDED WITH THE PRODUCT Multiple manuals are provided for use of the machine. Please read each manual as appropriate for the functions that you wish to use. Operation manual (for general information and copier) (this manual): The first half of this manual contains general information on the machine, including safety precautions and the procedures for loading paper, removing misfeeds, and performing regular maintenance.
1 ページ 年9月 日 木曜日 午前 時 分 MAIN FEATURES High-speed laser copying • First-copy time*1 at 300 dpi*2 is only 7.2 seconds. • Copying speed is 20 (AR-M206/AR-M207) or 16 (AR-M161/AR-M162/AR-M165) copies per minute. This provides a big boost to workplace productivity. *1 Measured after the machine has warmed up following power-on, copying using the document glass (A4 (8-1/2" x 11") paper fed from machine tray 1).
11 ページ 年9月 日 木曜日 午前 時 分 MAIN FEATURES Fax function (option) Installation of the optional facsimile expansion kit enables the plain-paper, Super G3 laser fax function to be used. Network connection (option) The optional network expansion kit (AR-NB3) can be installed to enable the machine to be used as a network printer and network scanner. Environment and people friendly design • Preheat and auto power shut-off modes are provided to reduce power consumption when the machine is not in active use.
1 ページ 1 年9月 日 木曜日 午前 時 分 BEFORE USING THE PRODUCT This chapter contains basic information required for use of the machine. Please read this chapter before using the machine. PART NAMES AND FUNCTIONS (5) (15) (10) (11) (9) (1) (6) (2) (7) (3) (7) (8) (4) (17) (14) (1) USB 2.0 port (USB-2) (when the dual function board is installed) Connect to your computer to this port to use the printer and scanner functions. (2) USB 1.
1 ページ 年9月 日 木曜日 午前 時 分 BEFORE USING THE PRODUCT (23) (24) (25) (29) (30) (26) 1 (21) (28) (31) (27) (32) (22) (15) Document cover (when installed) Open to make a copy from the document glass. (26) Right side cover (when the SPF is installed) Open to remove misfed originals. (16) Side cover Open to remove misfed paper. (27) Fusing unit release levers To remove the paper misfed in the fusing unit, push down on these levers and remove the paper.
ページ 4年 月 4日 木曜日 午後 時 分 BEFORE USING THE PRODUCT OPERATION PANEL (1) (2) (3) (4) 26 27 28 29 41 30 42 43 44 45 COPY A 31 B 32 F 36 G 37 K C 33 H 38 L D 34 I 39 M E J 40 N P 46 35 Q 47 U R 48 V W SPEAKER REDIAL/PAUSE O SHIFT S 49 T 50 XYZ SP SPEED COMM. SETTING SYMBOL SPACE/– ON LINE DATA PRINT SCAN LINE DATA FAX The indicators of the operation panel may differ depending on the country and region.
1 ページ 年9月 日 木曜日 午前 時 分 BEFORE USING THE PRODUCT (5) (6) (7) (8) (9) (10) (11) (12) FAX STATUS BACK PAPER COPY EXPOSURE SELECT COPY RATIO AUTO IMAGE OUTPUT 2-SIDED COPY OK DEF GHI JKL MNO PQRS TUV WXYZ (21) (22) (23) (13) LINE STATUS indicator (when the fax option is installed) This key is used in fax mode. For more information, see the "Operation manual (for facsimile)" that accompanies the optional facsimile expansion kit.
1 ページ 年9月 日 木曜日 午前 時 分 BEFORE USING THE PRODUCT Display (base screen) Icons appearing in the special function icon display Example: Copy mode (1) (2) (3) (4) Ready to copy.
1 ページ 年9月 日 木曜日 午前 時 分 TURNING THE POWER ON AND OFF The power switch is located on the left side of the machine. POWER ON POWER OFF Turn the power switch to the "ON" position Make sure that the machine is not in operation and then turn the power switch to the "OFF" position. • It will take about 45 seconds for the machine to warm up. • When the power switch is turned to the "ON" position, the message "System check." will appear in the message display and warm-up will start.
1 ページ 年9月 日 木曜日 午前 時 分 BEFORE USING THE PRODUCT Default settings The machine is set at the factory to return all settings to the default settings one minute after a copy job is finished (auto clear function) or when the [CA] key is pressed. When the settings return to the default settings, any functions that were selected are cancelled. The auto clear time can be changed in the key operator programs. (Page 83) In the default state the display shown below appears.
1 ページ 年9月 日 木曜日 午前 時 分 BEFORE USING THE PRODUCT Special paper Follow these guidelines when using special paper. • Use SHARP recommended transparency film and label sheets. Using other than SHARP recommended paper may result in misfeeds or smudges on the output. • There are many varieties of special paper available on the market, and some cannot be used with this machine. Before using special paper, contact your authorised service representative.
ページ 年9月 日 木曜日 午前 時 分 BEFORE USING THE PRODUCT Loading paper in the bypass tray 1 Open the bypass tray. Important points when inserting paper in the bypass tray • Up to 100 sheets of standard copy paper can be set in the bypass tray. • Be sure to place A6 and B6 (5-1/2" x 8-1/2") size paper and envelopes horizontally as shown in the following diagram. Pull out the bypass tray extension to load B4 and A3 (8-1/2" x 14" and 11" x 17") size paper. 2 Set the bypass tray guides to the paper width.
1 ページ 年9月 日 木曜日 午前 時 分 BEFORE USING THE PRODUCT CHANGING THE PAPER SIZE SETTING OF A TRAY If the size of the loaded paper is different from the size shown in the display, follow the steps below to change the paper size setting of the tray. The paper size setting cannot be changed during copying, printing, fax printing (when the fax option is installed), or interrupt copying, or when a misfeed has occurred.
ページ 年9月 日 木曜日 午前 時 分 BEFORE USING THE PRODUCT DISABLING (ENABLING) AUTO TRAY SWITCHING When auto tray switching is enabled and paper runs out during copying or printing, the job will continue using paper from a different tray if that tray has the same size of paper in the same orientation. (This function does not operate when using the bypass tray or when a fax is being printed.) This function has been enabled at the factory. If you prefer to disable the function, follow the steps below.
ページ 年9月 日 木曜日 午前 時 分 AUDITING MODE When auditing mode is enabled, a count is kept of the pages printed by each account. The page counts can be viewed in the display. This function is enabled in the key operator programs. (For the counts in copy, print, and scan modes, see page 79. For the counts in fax mode, see the "Operation manual (for facsimile)" that accompanies the optional facsimile expansion kit.
ページ 2 年9月 日 木曜日 午前 時 分 TROUBLESHOOTING AND MAINTENANCE This chapter explains general troubleshooting and maintenance procedures such as removing misfeeds, replacing the toner cartridge, and cleaning the machine, as well as troubleshooting for the copy function. For troubleshooting for the fax function, printer function, and scanner function, see the respective manuals for each function. TROUBLESHOOTING MACHINE/COPYING PROBLEMS The machine does not operate. .........................................
ページ 年9月 日 木曜日 午前 時 分 TROUBLESHOOTING MACHINE/COPYING PROBLEMS Check the following troubleshooting list before requesting service as many problems can be fixed by the user. If you are unable to solve the problem by checking the list, turn off the power switch, unplug the power cord. Problems related to general use of the machine and copying are described below. If a problem occurs in printer or scanner mode, see the "Operation manual (for printer and scanner)".
ページ 年9月 日 木曜日 午前 時 分 TROUBLESHOOTING AND MAINTENANCE Problem Cause and solution The original was placed in the wrong position. → Place the original correctly. The paper size used for the copy is different from the selected paper size (part of the image is cut off or too much of the page is blank). An appropriate ratio was not used for the size of the original and the size of the paper. → Press the [AUTO IMAGE] key to select the appropriate copy ratio based on the original and copy sizes.
ページ 年9月 日 木曜日 午前 時 分 TROUBLESHOOTING AND MAINTENANCE Problem Cause and solution Was the SPF (or document cover) opened completely when the original was placed on the document glass? → Open the SPF completely and then place the original on the document glass. Close the SPF (or document cover). Page 45 The original is curled or folded. → The original size cannot be correctly detected if the original is curled or folded. Straighten the original. – The original has many solid black areas.
ページ 年9月 日 木曜日 午前 時 分 INDICATORS AND DISPLAY MESSAGES If one of the following messages appears in the display, take prompt action as instructed by the message. Message Action (Maintenance icon) It is time for regular maintenance. Contact your authorised service representative. (Developer replacement required icon) Developer is required. Contact your authorised service representative as soon as possible. Maintenance required. Call for service. Maintenance required soon.
ページ 年9月 日 木曜日 午前 時 分 REMOVING MISFEEDS When a misfeed occurs during copying, the message " Check the location and remove the misfeed. Note Clear paper path." and the location of the misfeed will appear. The paper may tear when you remove a misfeed. In this event, be sure to remove all torn pieces of paper from the machine, taking care not to touch the photoconductive drum (the green part). Any scratches or damage to the surface of the drum will cause dirty copies. First check the misfeed location.
ページ 年9月 日 木曜日 午前 時 分 TROUBLESHOOTING AND MAINTENANCE 2 Open and close the SPF. Opening and closing the cover clears the misfeed display. Copying cannot be resumed until this step is performed. A message may appear indicating the number of originals which must be returned to the document feeder tray. Return the originals to the document feeder tray and press the [START] key ( ). MISFEED IN THE BYPASS TRAY 1 Carefully remove the misfed paper from the bypass tray.
1 ページ 年9月 日 木曜日 午前 時 分 TROUBLESHOOTING AND MAINTENANCE MISFEED IN THE MACHINE To remove a paper misfeed from the machine, the bypass tray and then the side cover must be opened. Check whether the misfeed occurred in A, B, or C below and then follow the misfeed removal procedure for that location. 1 Open the bypass tray and then the side cover. 2 Determine where the misfeed occurred. 2 Location B If paper is misfed here, go to "Misfeed in B" (page 32).
ページ 年9月 日 木曜日 午前 時 分 TROUBLESHOOTING AND MAINTENANCE Misfeed in B 1 Open the front cover. 4 Lift the fusing unit release levers. 5 Close the front cover and the side cover. Push gently on both ends of the front cover. 2 Turn the roller rotating knob in the direction of the arrow. The message " Clear paper path." will be cleared and copying will be possible. Roller rotating knob 3 Lower the right and left fusing unit release levers and remove the misfed paper.
ページ 年9月 日 木曜日 午前 時 分 TROUBLESHOOTING AND MAINTENANCE Misfeed in C 1 Lower (1) in the illustration, open the fusing unit paper guide, and remove the misfed paper. 3 Close the side cover. The message " Clear paper path." will be cleared and copying will be possible. Be careful not to tear the misfed paper during removal. (1) Warning 2 Note The fusing unit is hot. Do not touch the fusing unit when removing misfed paper. Doing so may cause a burn or injury.
ページ 年 月 日 火曜日 午前 時 9分 TROUBLESHOOTING AND MAINTENANCE MISFEED IN TRAY 2 Note 1 • Make sure that there is no misfed paper in the tray before pulling it out. (Page 31) • Also use the following procedure to remove misfeeds that occur in the 250-sheet paper feed unit and the 2 x 250-sheet paper feed unit. Open the side cover. Grasp the handle to open the side cover. 5 Gently push tray 2 into the machine. Push the tray in completely. Side cover 2 Remove the misfed paper.
ページ 年9月 日 木曜日 午前 時 分 REPLACING THE TONER CARTRIDGE When the toner replacement icon ( ) appears, little toner remains. Obtain a replacement cartridge as soon as possible. When the message " Add toner. Can not copy or print." appears in the display, the toner cartridge must be replaced before copying can be resumed. Follow the steps below to replace the toner cartridge. Note 1 • During a long copy run or when copying originals with many dark areas, the message "Toner replenishment in progress.
ページ 年9月 日 木曜日 午前 時 分 CHECKING THE TOTAL OUTPUT COUNT To check the total number of pages output in copy, print, and fax modes and the total scan count in scanner mode, hold down the [COPY] key when the machine is in the standby state. The counts will appear while the key is held down. The total output count and the total scan count can be used as a guideline for cleaning. When the total output count and the total scan count exceed "999,999", the counts return to "0".
ページ 年9月 日 木曜日 午前 時 分 CLEANING THE MACHINE CLEANING THE DOCUMENT GLASS AND SPF/DOCUMENT COVER If the document glass, SPF, underside of the document cover, or the scanner for originals coming from SPF (A) (the long narrow glass surface on the right side of the document glass) become dirty, the dirt may appear on copies. Always keep these parts clean. (A) Wipe with a clean, soft cloth. If necessary, moisten the cloth with water or a small amount of neutral detergent.
ページ 年9月 日 木曜日 午前 時 分 TROUBLESHOOTING AND MAINTENANCE CLEANING THE TRANSFER CHARGER If white or black lines appear in copies or the image is blotchy, the transfer charger may be dirty. Follow the steps below to clean the charger. 1 Turn the power switch off. 5 Place the charger cleaner on the transfer charger and gently slide the cleaner in the direction indicated by the arrow two or three times. If the sheet metal on the transfer charger is smudged with toner, wipe it with a soft, clean cloth.
ページ 年9月 日 木曜日 午前 時 分 ADJUSTING THE DISPLAY CONTRAST The contrast of the display can be adjusted as explained below. 1 2-SIDED COPY Press the [SPECIAL FUNCTION] key. SPECIAL FUNCTION DUPLEX SCAN ACC. The special function screen will appear. SPECIAL FUNCTION SPECIAL MODES ORIG. SIZE ENTER PAPER SIZE SET DISPLAY CONTRAST 4 Adjust the contrast with the [ ] or [ ] key. To reset the contrast to the default setting, press the [C] key. 5 Press the [SPECIAL FUNCTION] key.
ページ 3 4年 月 4日 木曜日 午後6時4分 PERIPHERAL DEVICES AND SUPPLIES Optional equipment and supplies are explained in this chapter. To purchase optional equipment and supplies, contact your authorised service representative. OPTIONAL EQUIPMENT Convenient optional equipment can be installed on the machine as needed. Note • As a part of our policy of continuous improvement, SHARP reserves the right to make design and specification changes for product improvement without prior notice.
ページ 年9月 7日 月曜日 午後 時 分 PERIPHERAL DEVICES AND SUPPLIES REVERSING SINGLE PASS FEEDER / SINGLE PASS FEEDER For the names of the parts of the RSPF / SPF, see "PART NAMES AND FUNCTIONS" (page 12). Specifications Model AR-SP6N Acceptable originals AR-RP6N Weight 56 g/m2 to 90 g/m2 (15 lbs. to 24 lbs.
ページ 年9月 日 木曜日 午前 時 分 PERIPHERAL DEVICES AND SUPPLIES DUAL FUNCTION BOARD A dual function board can be installed to add a variety of copy functions and enable use of the printer driver for the dual function board, which is a more advanced printer driver than the standard printer driver. For copy functions that can be used, see "CONVENIENT COPY FUNCTIONS" (page 64).
ページ 年9月 日 木曜日 午前 時 分 Part 2: Copier Operation 43
ページ 44 年9月 日 木曜日 午前 時 分
ページ 4 年9月 日 木曜日 午前 時 分 COPY FUNCTIONS This chapter explains the basic procedures for making copies, including selection of the copy ratio and other copy settings. NORMAL COPYING This section explains how to make a regular copy. If "Auditing mode" has been enabled (page 23), enter your 5-digit account number. Copying from the document glass 1 Open the SPF and place the original face down on the document glass. Align the upper left-hand corner of the original with the tip of the mark.
ページ 年9月 日 木曜日 午前 時 分 COPY FUNCTIONS 5 Press the [START] key ( copying. WXYZ ) to begin Note The copy will be delivered to the centre tray. @.-_ READ-END • The centre tray can hold a maximum of 250 sheets (150 sheets when the job separator tray kit is installed). • About one minute after copying ends, "Auto clear" (page 18) activates and restores the copy settings to the default settings. The setting for "Auto clear" can be changed in the key operator programs.
ページ 年 月 日 月曜日 午後 時 分 COPY FUNCTIONS Auto paper select mode When auto paper select mode is enabled, "AUTO" appears in the paper size display. This function automatically selects paper that is the same size as the original (A5, B5, B5R, A4, A4R, B4, A3, 5-1/2" x 8-1/2", 8-1/2" x 11", 8-1/2" x 11"R, 8-1/2" x 13", 8-1/2" x 14", 11" x 17" paper). • If a zoom setting is selected after placing the original, the paper size that is appropriate for the zoom setting will be automatically selected.
ページ 年9月 日 木曜日 午前 時 分 COPY FUNCTIONS MAKING A COPY DARKER OR LIGHTER The copy exposure can be adjusted as needed to the original. Three exposure modes are available: "AUTO", "TEXT" and "PHOTO". When "TEXT" or "PHOTO" is selected, the exposure can be manually adjusted to 5 levels. Auto This is the default exposure mode. In this mode, the characteristics of an original being copied are "read" by the exposure system and exposure adjustments are made automatically.
ページ 年9月 日 木曜日 午前 時 分 COPY FUNCTIONS SELECTING THE TRAY By default the auto paper select function (page 47) operates, and thus the appropriate tray is automatically selected when the original is placed on the document glass or in the document feeder tray, or when the original size is specified. If you wish to use a tray other than the automatically selected tray (for example you wish to enlarge or reduce the copy or use the bypass tray), press the [PAPER SELECT] key to select the desired tray.
ページ 年 月 日 木曜日 午後 時 分 COPY FUNCTIONS SELECTING THE ORIGINAL SIZE If you loaded a non-standard size* original or the original size was not correctly detected, set the original size manually. Perform the following steps after placing the document in the document feeder tray or on the document glass. Note 1 2-SIDED COPY * Standard sizes: The following sizes can be detected correctly: A3, B4, A4, A4R, A5 (11" x 17", 8-1/2" x 14", 8-1/2" x 13", 8-1/2" x 11", 8-1/2" x 11"R, 5-1/2" x 8-1/2").
1 ページ 年9月 日 木曜日 午前 時 分 COPY FUNCTIONS USING THE BYPASS TRAY TO COPY A SPECIAL SIZE ORIGINAL When the bypass tray is being used for copying and an original that is placed on the document glass is detected as being a special size, the display will prompt the user to set the original size. To make a copy in this type of situation, follow the steps below. 1 2 Load paper in the bypass tray and place the original on the document glass. Press the [OK] key.
ページ 年9月 日 木曜日 午前 時 分 REDUCING OR ENLARGING A COPY There are three ways to enlarge and reduce copies: • Automatic selection of a ratio according to the paper size: Auto ratio selection • Specifying a ratio from 25% to 400%: Preset ratios/zoom • Selecting the vertical and horizontal ratios separately: XY zoom Note When the SPF is being used, the zoom copy ratio range is 50% to 200%. AUTOMATIC RATIO SELECTION 1 Place the original in the document feeder tray or on the document glass.
ページ 年9月 日 木曜日 午前 時 分 COPY FUNCTIONS 3 Select a preset ratio with the [ ] or [ ] key, or set the ratio (zoom) with the [ ] or [ ] key. GH 4 Press the [OK] key. BACK OK PQR 2-SIDED COPY [ [ [ [ You will return to the base screen.
ページ 年9月 日 木曜日 午前 時 分 SELECTING THE VERTICAL AND HORIZONTAL COPY RATIOS SEPARATELY (XY zoom copying) Separate ratio settings can be selected for the length and width of a copy. Example: Reduction only in the horizontal direction Original Copy • This feature cannot be used with the 2 in 1 / 4 in 1 feature or card shot feature (when the dual function board is installed).
ページ 年9月 日 木曜日 午前 時 分 COPY FUNCTIONS 7 Press the XY ZOOM 115% ZOOM 100% X: 115% 86% Y: 100% [ ]:X Y @.-_ FUNCTION ACC. #-C 11 key. READ-E Select any other copy settings as needed and press the [START] key ( ). WXYZ @.-_ READ-END The vertical ratio can now be selected. 8 Set the vertical ratio with the [ ], [ ], [ ], or [ ] keys. A preset ratio can be selected with the [ ] or [ ] keys. The ratio can be adjusted in increments of 1% with the [ ] or [ ] keys.
ページ 年9月 日 木曜日 午前 時 分 TWO-SIDED COPYING TWO-SIDED COPYING The machine is capable of the following types of automatic two-sided copying. The copy paper is turned over automatically, allowing two-sided copying to be accomplished with ease.
ページ 年9月 日 木曜日 午前 時 分 COPY FUNCTIONS TWO-SIDED COPYING OF ONE-SIDED ORIGINALS • Paper sizes that can be used are A3, B4, A4, A4R, B5, B5R, A5, 11" x 17", 8-1/2" x 14", 8-1/2" x 13", 8-1/2" x 11" and 8-1/2" x 11"R. • Automatic two-sided copying is not possible when the bypass tray is used.
ページ 年9月 日 木曜日 午前 時 分 COPY FUNCTIONS Copying from the document glass 1 Place the original for the front side of the copy on the document glass, and close the SPF. 6 Make sure that the desired paper tray is selected. 7 Set the number of copies and press the [START] key ( ). WXYZ 2 TO GE Press the [2-SIDED COPY] key.
ページ 年9月 日 木曜日 午前 時 分 COPY FUNCTIONS TWO-SIDED COPIES OF TWO-SIDED ORIGINALS (ONLY WHEN USING THE RSPF) • Paper sizes that can be used are A3, B4, A4, A4R, B5, B5R, A5, 11" x 17", 8-1/2" x 14", 8-1/2" x 13", 8-1/2" x 11" and 8-1/2" x 11"R. • Automatic two-sided copying is not possible when the bypass tray is used. • This copy function cannot be used in combination with dual page copy.
ページ 年9月 日 木曜日 午前 時 分 COPY FUNCTIONS ONE-SIDED COPIES OF TWO-SIDED ORIGINALS (ONLY WHEN USING THE RSPF) • Paper sizes that can be used are A3, B4, A4, A4R, B5, B5R, A5, 11" x 17", 8-1/2" x 14", 8-1/2" x 13", 8-1/2" x 11" and 8-1/2" x 11"R. • Automatic two-sided copying is not possible when the bypass tray is used. • This copy function cannot be used in combination with dual page copy.
1 ページ 年9月 日 木曜日 午前 時 分 TWO-SIDED COPIES USING THE BYPASS TRAY Follow the steps below to perform two-sided copying manually. Example: Copying original A and original B onto both sides of the paper 1 1 2 1 If you are using the AR-M165/AR-M206/AR-M207 The AR-M165/AR-M206/AR-M207 is equipped standard with an automatic two-sided copying function that automatically turns over the paper.
ページ 年9月 日 木曜日 午前 時 分 DUAL PAGE COPY (Dual page copy) The dual page copy function produces separate copies of open bound original pages. This function is convenient when you wish to make a separate copy of each page of a book or other bound document. Original • • • • A4 (8-1/2" x 11") paper can be used for dual page copying. When rotation copy is enabled, A4R (8-1/2" x 11"R) paper can also be used. When used in combination with XY zoom copying, enlargement is not possible.
ページ 年9月 日 木曜日 午前 時 分 INTERRUPTING A COPY RUN (Interrupt copying) A copy run can be temporarily interrupted to allow another copy job to be performed. (Interrupt copying) When the other job is finished, the copy run will resume using the original copy settings. • Interrupt copying is not possible when the document glass is being used for a copy job and "NO SORT" is selected. • When 2 in 1 or 4 in 1 is selected, interrupt copying is not possible.
ページ 5 年9月 日 木曜日 午前 時 分 CONVENIENT COPY FUNCTIONS This chapter explains convenient copy functions that can be used when the dual function board (AR-EB9) is installed. Select convenient copy functions after pressing the [COPY] key to select copy mode.
ページ 年9月 日 木曜日 午前 時 分 CONVENIENT COPY FUNCTIONS 1 Place the originals in the document feeder tray or the first original on the document glass. If the originals are placed in the document feeder tray, sort mode will be automatically selected. This can be changed to no sort in the key operator programs. (Page 87) If the first original is placed on the document glass, no sort mode will be automatically selected.
ページ 年9月 日 木曜日 午前 時 分 COPYING MULTIPLE ORIGINALS ONTO A SINGLE SHEET OF PAPER (2 in 1 / 4 in 1 copy) Multiple originals can be copied onto a single sheet of paper in a selected layout. This function is convenient when you wish to present multiple pages in a compact format, or show a view of all pages in a document. One of two layouts can be selected for 2 in 1 copy, and one of four layouts can be selected for 4 in 1 copy. Border line selections are solid line, broken line, or none.
ページ 年9月 日 木曜日 午前 時 分 CONVENIENT COPY FUNCTIONS 5 Select "2in1/4in1" with the [ ] or [ ] key. PQR 6 Select the borderline setting with the [ ] or [ ] key. SPECIAL MODES DUAL PAGE COPY 2in1/4in1 XY ZOOM [OK]:CHANGE GH 2-SIDED COPY 10 SPECIAL FUNCTION 2in1/4in1 OFF 2in1 4in1 [OK]:CHANGE The 2 in 1 / 4 in 1 selection screen will appear. BORDER Select solid line, broken line, or none. Press the [OK] key. OK 2in1 PATTERN 1 11 Press the [OK] key. OK 12 You will return to the base screen.
ページ 年9月 日 木曜日 午前 時 分 CREATING MARGINS WHEN COPYING (Margin shift) The margin shift function shifts the image to create a margin at the edge of the paper. By default the function creates a 10 mm (1/2") margin at the left edge of the paper. Margin (top) Margin (left edge) A A A A Original Copy Original Copy • You can select whether to create a margin at the top edge or at the left edge of the paper.
ページ 年9月 日 木曜日 午前 時 分 ERASING SHADOWS AROUND THE (Erase copy) EDGES OF A COPY This feature is used to erase shadows that appear around the edges of copies of books and other thick originals. (Edge erase) The feature can also erase the shadow that appears down the centre of books and other originals that open up. (Centre erase) Both the shadow lines around the edges of copies and the shadow at the centre can be erased.
ページ 年9月 日 木曜日 午前 時 CONVENIENT COPY FUNCTIONS 7 Select the erasure width with the [ ] or [ ] key. If you select 0 mm (0"), the printed result is the same as when "OFF" is selected. 8 Press the [OK] key. OK 9 Select other copy settings as needed and press the [START] key ( ). WXYZ @.-_ READ-END 70 You will return to the base screen. To cancel an edge erase setting, return to the edge erase settings screen and select "OFF".
1 ページ 年9月 日 木曜日 午前 時 分 CARD SHOT When copying a card, this function allows you to print the front and back sides of the card next to each other on a single sheet of paper. This function creates 2 in 1 images of the front and back side of the card and centres them on the paper. Original Copy CARD CARD Front of card Back of card CARD Example: Landscape A4 size Example: Portrait A4 size • Paper cannot be fed from the bypass tray.
ページ 年9月 日 木曜日 午前 CONVENIENT COPY FUNCTIONS 8 Press the [START] key ( WXYZ ). The front side of the card is scanned. @.-_ READ-END 9 Turn the original over on the document glass. 10 Press the [START] key ( ). Copying will start after both sides of the original have been scanned.
ページ 6 年 月 日 火曜日 午前 時 8分 APPENDIX SPECIFICATIONS Name Digital Multifunctional System AR-M161/AR-M162/AR-M165 AR-M206/AR-M207 Type Desktop Photoconductive type OPC drum Document glass type Fixed Copy system Laser electrostatic method Originals Sheets, bound documents, max. original size A3 (11" x 17") Copy sizes Max. A3 (11" x 17"), min. A5 (5-1/2" x 8-1/2") (A5 (5-1/2" x 8-1/2") can only be fed from tray 1 and the bypass tray) Image loss: Max.
ページ 4年 月 4日 木曜日 午後6時 8分 APPENDIX Overall dimensions 590 mm (W) x 595 mm (D) (23-15/64" (W) x 23-7/16" (D)) (with bypass tray folded) Weight (Not including toner cartridge) AR-M161: Approx. 29.7kg (65.5 lbs.) AR-M162/AR-M165: Approx. 30.0kg (66.2 lbs.) AR-M206: Approx. 33.8kg (74.6 lbs.) AR-M207: Approx. 34.2kg (75.3 lbs.
ページ 7 年9月 日 木曜日 午前 時 分 KEY OPERATOR'S GUIDE PURPOSE OF THE KEY OPERATOR PROGRAMS The key operator programs are used by the administrator of the machine to enable or disable functions to suit the needs of your workplace. This manual explains only the key operator programs that are common to all the functions of the machine, (copy, fax, printer and network scanner functions), as well as key operator programs that are specifically for the copy function.
ページ 年9月 日 木曜日 午前 時 分 PROGRAMMING A KEY OPERATOR CODE 1 2-SIDED COPY Press the [SPECIAL FUNCTION] key. SPECIAL FUNCTION DUPLEX SCAN ACC. The special function screen will appear. 2 Select "KEY OPERATOR PRG." with the [ ] or [ ] key. GH PQR 2-SIDED COPY SPECIAL FUNCTION SPECIAL MODES ORIG. SIZE ENTER PAPER SIZE SET DISPLAY CONTRAST SPECIAL FUNCTION 5 Press the [OK] key. OK KEY OP. # CHANGE PRESENT:22222 NEW :----- The key operator code change screen appears.
ページ 年9月 7日 月曜日 午後 時 分 KEY OPERATOR PROGRAM LIST A list of basic programs used for the machine and a list of programs used for the copy function are shown below. Programs for general use of the machine Program name Programs for Copy Mode Program name Page KEY OPERATOR CODE CHANGE KEY OPERATOR CODE CHANGE 76 ACCOUNT CONTROL AUDITING MODE TOTAL/ACCOUNT RESET ACCOUNT ACC. # CONTROL ACCOUNT LIMIT ACC.
ページ 年9月 日 木曜日 午前 時 分 USING THE KEY OPERATOR PROGRAMS 1 2-SIDED COPY Press the [SPECIAL FUNCTION] key. SPECIAL FUNCTION DUPLEX SCAN ACC. The special function screen will appear. 2 PQR 3 MODE SELECT KEY OP. # CHANGE COPIER PRINTER SCANNER SPECIAL FUNCTION SPECIAL MODES ORIG. SIZE ENTER PAPER SIZE SET DISPLAY CONTRAST Select "KEY OPERATOR PRG." with the [ ] or [ ] key. SPECIAL FUNCTION 6 SPECIAL FUNCTION PAPER SIZE SET DISPLAY CONTRAST TOTAL COUNT KEY OPERATOR PRG. Press the [OK] key.
ページ 年9月 日 木曜日 午前 時 分 KEY OPERATOR'S GUIDE ACCOUNT CONTROL TOTAL/ACCOUNT These programs are used to control use of the machine by account. To access one of these programs, select "ACCOUNT CONTROL" in the mode selection screen, select the desired program in the account control screen, and press the [OK] key. AUDITING MODE This program is used to enable auditing mode for copy, print, and scan mode. To enable auditing mode for fax mode, see the "Operation manual (for facsimile)".
ページ 年9月 日 木曜日 午前 時 分 KEY OPERATOR'S GUIDE Deleting an account number Resetting a single account 1 Select "RESET 1 ACC." with the [ key and then press the [OK] key. 2 Select the desired account with the [ [ ] key. ] 1 Select "DELETE" with the [ ] or [ and then press the [OK] key. ] or 2 If you wish to delete all account numbers, select "DELETE ALL ACC." and press the [OK] key. ] or [ If "---,---" appears for a page limit, a limit has not been set.
ページ 4年 月 4日 金曜日 午後 時 分 KEY OPERATOR'S GUIDE ACCOUNT LIMIT This program is used to set limits for the number of pages that can be printed by each account in print mode and copy mode. Select "ACCOUNT LIMIT" and press the [OK] key. The following screen appears. ACCOUNT LIMIT SINGLE ACC. LIMIT ALL ACC. LIMIT Limiting the number of pages used by an account 1 Select "SINGLE ACC. LIMIT" with the [ ] or [ ] key and then press the [OK] key. 2 Select "COPIER" or "PRINTER" mode with the [ ] or [ ] key.
ページ 年9月 日 木曜日 午前 時 分 KEY OPERATOR'S GUIDE Select "WAITING COPY LAMP SETTING" and press the [OK] key. The following screen will appear. COPY LAMP SETTING ON OFF 1 Select "ON" or "OFF" with the [ key. 2 Press the [OK] key. Select "MEM. FOR PRINTER" and press the [OK] key. The following screen will appear. MEM. FOR PRINTER 30% 40% 50% 60% ] or [ ] 1 Select the desired percentage with the [ or [ ] key. 2 Press the [OK] key.
ページ 年9月 日 木曜日 午前 時 分 KEY OPERATOR'S GUIDE Select "AUTO CLEAR" and press the [OK] key. The following screen will appear. System requirements for USB 2.0 (Hi-Speed mode) AUTO CLEAR The USB port (USB-2) on the machine supports USB 2.0 Hi-Speed mode. The following system is required to use USB 2.0 (Hi-Speed mode): The computer is running Windows XP/2000 and the Microsoft USB 2.0 driver is pre-installed, or the USB 2.
ページ 年9月 日 木曜日 午前 時 分 KEY OPERATOR'S GUIDE Select "MESSAGE TIME" and press the [OK] key. The following screen will appear. MESSAGE SHORT NORMAL LONG TIME (3 sec.) (6 sec.) (9 sec.) 1 Select the desired display time with the [ ] or [ ] key. 2 Press the [OK] key. KEY TOUCH SOUND This program is used to set the volume of the key touch sound that is heard each time a key is pressed. The initial factory setting is "LOW". Select "KEY TOUCH SOUND" and press the [OK] key.
ページ 年9月 日 木曜日 午前 時 分 KEY OPERATOR'S GUIDE To enable the setting, select "DISABLE PAPER SIZE SET" and press the [OK] key so that a checkmark appears in the checkbox. To disable the setting, select "DISABLE PAPER SIZE SET" once again and press the [OK] key so that the checkmark is cleared from the checkbox. ENERGY SAVE These programs are used to configure energy saving settings.
ページ 年9月 日 木曜日 午前 時 分 KEY OPERATOR'S GUIDE COPY SETTINGS These programs are used to enable various copy functions. To access one of these programs, select "COPIER" in the mode selection screen, select the desired program in the copy settings screen, and press the [OK] key. EXPOSURE ADJUST This program is used to adjust the exposure level when "AUTO" is used for the exposure mode. The auto exposure level can be set separately for the document glass and the SPF.
ページ 年9月 日 木曜日 午前 時 分 KEY OPERATOR'S GUIDE Select "DEFAULT TRAY SET" and press the [OK] key. The following screen will appear. DEFAULT TRAY SET TRAY 1 TRAY 2 TRAY 3 TRAY 4 1 2 Select the tray with the [ ROTATION COPY (When the dual function board is installed) If the orientation of the original does not match that of the paper, the image can be rotated. Rotation copy operates when automatic paper selection or automatic ratio selection operates.
ページ 年9月 日 木曜日 午前 時 分 KEY OPERATOR'S GUIDE RESOLUTION IN AUTO/TEXT MODE This program is used to set the resolution used when the exposure mode is set to "AUTO" or "TEXT". When "300dpi" is selected, the first copy time is shorter than when "600dpi" is selected. The factory default setting is "300dpi". Select "LIMIT OF COPIES" and press the [OK] key. The following screen will appear. LIMIT OF COPIES 99 copies 999 copies Select "RESOLUTION IN AUTO/TEXT MODE" and press the [OK] key.
ページ 年9月 日 木曜日 午前 時 分 MATERIAL SAFETY DATA SHEET Page : 1/4 Date Revised : Aug.18, 2003 Date Issued : Jun. 1, 2003 MSDS No. F-01211 1.PRODUCT AND COMPANY IDENTIFICATION AR-202NT / AR-202T / AR-202ST / AR-202FT / AR-202ST-C / AR-203ST-C / AR-016T/ AR-016ST / AR-016FT / AR-016RT (Black Toner) Supplier Identification : Sharp Corporation 22-22 Nagaike-cho, Abeno-ku, Osaka, Japan Local suppliers are listed below. Please contact the nearest supplier for additional information.
ページ 年9月 日 木曜日 午前 時 分 MATERIAL SAFETY DATA SHEET Page : 2/4 Date Revised : Aug.18, 2003 Date Issued : Jun. 1, 2003 MSDS No. F-01211 3.HAZARDS IDENTIFICATION Most Important Hazards and Effects of the Products Human Health Effects : There are no anticipated carcinogenic effects from exposure based on animal tests performed using toner. When used as intended according to instructions, studies do not indicate any symptoms of fibrosis will occur. Environmental Effects : No data are available.
1 ページ 年9月 日 木曜日 午前 時 分 MATERIAL SAFETY DATA SHEET Page : 3/4 Date Revised : Aug.18, 2003 Date Issued : Jun. 1, 2003 MSDS No. F-01211 Exposure Limit Values OSHA-PEL(USA) ACGIH-TLV(USA) Personal Protective Equipment Respiratory Protection Hand Protection Eye Protection Skin Protection Other Protective Equipment 3 : 15mg/m (Total Dust), 3 : 10mg/m (Total Dust), 3 5mg/m (Respirable Dust) 3 3mg/m (Respirable Dust) : Not required under intended use. : Not required under intended use.
ページ 年9月 日 木曜日 午前 時 分 MATERIAL SAFETY DATA SHEET Chronic Effect Page : 4/4 Date Revised : Aug.18, 2003 Date Issued : Jun. 1, 2003 MSDS No.
ページ 年9月 日 木曜日 午前 時 分 MATERIAL SAFETY DATA SHEET Page : 1/4 Date Issued :Jun. 1, 2003 MSDS No. F-31211 1.PRODUCT AND COMPANY IDENTIFICATION : AR-202ND / AR-202DV / AR-202SD / AR-202SD-C (Black Developer) : Sharp Corporation 22-22 Nagaike-cho, Abeno-ku, Osaka, Japan Local suppliers are listed below. Please contact the nearest supplier for additional information. Area (Country) (Name and Telephone Number) U.S.A.
ページ 年9月 日 木曜日 午前 時 分 MATERIAL SAFETY DATA SHEET Page : 2/4 Date Issued :Jun. 1, 2003 MSDS No. F-31211 3.HAZARDS IDENTIFICATION Most Important Hazards and Effects of the Products Human Health Effects : There are no anticipated carcinogenic effects from exposure based on animal tests performed using toner. When used as intended according to instructions, studies do not indicate any symptoms of fibrosis will occur. Environmental Effects : No data are available.
ページ 年9月 日 木曜日 午前 時 分 MATERIAL SAFETY DATA SHEET Page : 3/4 Date Issued :Jun. 1, 2003 MSDS No. F-31211 Exposure Limit Values OSHA-PEL(USA) ACGIH-TLV(USA) Personal Protective Equipment Respiratory Protection Hand Protection Eye Protection Skin Protection Other Protective Equipment 3 : 15mg/m (Total Dust), 3 : 10mg/m (Total Dust), 3 5mg/m (Respirable Dust) 3 3mg/m (Respirable Dust) : Not required under intended use. : Not required under intended use. : Not required under intended use.
ページ 年9月 日 木曜日 午前 時 分 MATERIAL SAFETY DATA SHEET Chronic Effect Page : 4/4 Date Issued :Jun. 1, 2003 MSDS No.
ページ 年9月 日 木曜日 午前 時 分 INDEX Symbols / Numbers D [ ] key .....................................................................15 2 in 1 / 4 in 1 copy .....................................................66 250-sheet paper feed unit / 2 x 250-sheet paper feed unit .....41 [2-SIDED COPY] key ................................................15 2-sided printing..........................................................18 DATA indicator ...................................................
ページ 年9月 日 木曜日 午前 時 分 L R LINE indicator............................................................15 LINE STATUS indicator ............................................15 Loading paper ...........................................................18 Loading paper in the bypass tray ..............................20 [READ-END] key ...................................................... 15 Reducing or enlarging a copy - Automatic ratio selection ....................................
ページ 年9月 日 木曜日 午前 時 分 INDEX BY PURPOSE Convenient copy functions 2 in 1 / 4 in 1 copy .....................................................66 Card shot...................................................................71 Erase copy ................................................................69 Margin shift................................................................68 Rotation copy ............................................................64 Sort mode..........................................
1 100 ページ 年9月 日 木曜日 午前 時 分
1 1 ページ 年9月 日 木曜日 午前 時 分 101
1 102 ページ 年9月 日 木曜日 午前 時 分
1 ページ 年9月 日 木曜日 午前 時 分 KEY OPERATOR CODE NUMBER: FACTORY SETTING The following is the factory setting of the Key Operator Code Number, which must be used to access the Key Operator Program. Factory setting = 00000 This number must be entered when accessing the Key Operator Program for the first time. (Page 76) ✂ Note • The Key Operator Code Number is an important security number allowing the Key Operator to configure the copier's functions and auditor's settings.
1 ページ 年9月 日 木曜日 午前 時 分
1 ページ 年9月 日 木曜日 午前 時 分 This equipment complies with the requirements of Directives 89/336/EEC and 73/23/EEC as amended by 93/68/EEC. Dieses Gerät entspricht den Anforderungen der EG-Richtlinien 89/336/EWG und 73/23/EWG mit Änderung 93/68/EWG. Ce matériel répond aux exigences contenues dans les directives 89/336/CEE et 73/23/CEE modifiées par la directive 93/68/CEE. Dit apparaat voldoet aan de eisen van de richtlijnen 89/336/EEG en 73/23/EEG, gewijzigd door 93/68/EEG.
1 ページ 年9月 日 木曜日 午前 時 分 AR-M161/AR-M162/AR-M165/AR-M206/AR-M207 SHARP CORPORATION This manual has been printed using a vegetable-based soy oil ink to help protect the environment.