
Owner's Manual

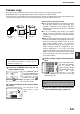
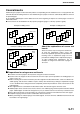
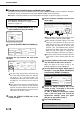
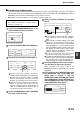
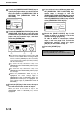
Table Of Contents
- Part 1: General Information
- PRODUCT CONFIGURATIONS
- OPERATION MANUALS
- INSTALLATION REQUIREMENTS
- CAUTIONS
- CONTENTS
- INTRODUCTION
- MAIN FEATURES
- PART NAMES AND FUNCTIONS
- TURNING THE POWER ON AND OFF
- AUDITING MODE
- LOADING PAPER
- Identifying the trays
- Loading paper in paper tray 1 - tray 2
- Loading paper in paper tray 3
- Changing the paper size in paper tray 3
- Changing the paper size in paper tray 4
- Loading paper in paper tray 5 (optional large capacity tray)
- Specifications (optional large capacity tray)
- Loading paper in the bypass tray
- Specifications of paper trays (Types and sizes of paper that can be used in the trays)
- Setting the paper type and paper size
- Setting the paper size when a special size is loaded
- CUSTOM SETTINGS
- REPLACING THE TONER CARTRIDGES
- STORAGE OF SUPPLIES
- MISFEED REMOVAL
- REMOVING AN ORIGINAL MISFEED
- TROUBLESHOOTING
- FINISHER AND SADDLE STITCH FINISHER
- INSERTER
- Part 2: Copier Operation
- AUTOMATIC DOCUMENT FEEDER
- PLACING ORIGINALS
- CHECKING THE SIZE OF A PLACED ORIGINAL
- STORING, DELETING, AND USING ORIGINAL SIZES
- NORMAL COPYING
- ADJUSTING THE EXPOSURE
- REDUCTION/ENLARGEMENT/ZOOM
- SPECIAL PAPERS
- SPECIAL MODES
- General procedure for using special functions
- Margin shift
- Erase
- Dual page copy
- Pamphlet copy
- Job build
- Tandem copy
- Covers/inserts
- About the explanations of covers and inserts
- Preparations for using covers and inserts
- Procedure for inserting front and back cover paper
- Procedure for adding inserts
- Checking, editing, and deleting cover/insert pages
- Examples of covers and inserts
- Symbols used for covers and inserts
- Covers (One-sided copying of one-sided originals)
- Covers (Two-sided copying of one-sided originals)
- Covers (One-sided copying of Two-sided originals)
- Covers (Two-sided copying of two-sided originals)
- Inserts (One-sided copying of one-sided originals)
- Inserts (One-sided copying of two-sided originals)
- Transparency film with insert sheets
- Multi shot
- Book copy
- Tab copy
- Card shot
- Mirror image
- B/W reverse
- STORING, USING AND DELETING JOB PROGRAMS
- INTERRUPTING A COPY RUN
- USER MAINTENANCE
- TROUBLESHOOTING
- OVERVIEW
- TO USE THE DOCUMENT FILING FUNCTION
- SAVING A DOCUMENT IMAGE FILE
- CALLING UP AND USING A FILE
- CUSTOM SETTINGS
- ENTERING CHARACTERS
- TROUBLESHOOTING
- SPECIFICATIONS
- INDEX
SPECIAL MODES
5-10
5
Press the [START] key.
NOTES
● To perform tandem copying, the server machine
and client machine must meet certain conditions.
After the [START] key is pressed on the server
machine, the server machine verifies that the
conditions have been met. If the conditions have
not been met, tandem copying does not begin
and "TANDEM OUTPUT IS NOT ALLOWED.
OUTPUT ALL SETS USING MASTER
MACHINE?" appears in the display. To have the
server machine make all the copies, touch the
[OK] key. To cancel the job, touch the [CANCEL]
key.
• As an example, the following conditions must
be met when a staple finisher is installed on the
server machine and not on the client machine:
(1) If tandem copying is executed for a two-
sided copy job with the number of copies
set to 999 and "Non-staple" is selected,
tandem copying will take place.
(2) If tandem copying is executed for a two-
sided copy job with the number of copies
set to 999 and "Staple" is selected,
tandem copying will not take place
because the client machine does not have
a finisher.
● After the [START] key is pressed, if the client
machine cannot print because it is out of paper or
other reason, the server machine will print its half
of the job. The other half of the job will be stored in
the client machine and the job will be printed when
the client machine is able to print.
● If auditing mode is enabled on both the server and
client machines, the same account number must
be entered on both machines.
● If auditing mode is enabled on the client machine
but not on the server machine, tandem copying
cannot be performed.
To cancel the tandem copy function, touch the
[TANDEM COPY] key on the special modes screen
(step 2). The highlighted display will be canceled.