
Owner's Manual
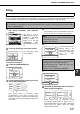

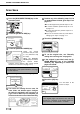


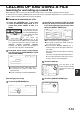

Table Of Contents
- Part 1: General Information
- PRODUCT CONFIGURATIONS
- OPERATION MANUALS
- INSTALLATION REQUIREMENTS
- CAUTIONS
- CONTENTS
- INTRODUCTION
- MAIN FEATURES
- PART NAMES AND FUNCTIONS
- TURNING THE POWER ON AND OFF
- AUDITING MODE
- LOADING PAPER
- Identifying the trays
- Loading paper in paper tray 1 - tray 2
- Loading paper in paper tray 3
- Changing the paper size in paper tray 3
- Changing the paper size in paper tray 4
- Loading paper in paper tray 5 (optional large capacity tray)
- Specifications (optional large capacity tray)
- Loading paper in the bypass tray
- Specifications of paper trays (Types and sizes of paper that can be used in the trays)
- Setting the paper type and paper size
- Setting the paper size when a special size is loaded
- CUSTOM SETTINGS
- REPLACING THE TONER CARTRIDGES
- STORAGE OF SUPPLIES
- MISFEED REMOVAL
- REMOVING AN ORIGINAL MISFEED
- TROUBLESHOOTING
- FINISHER AND SADDLE STITCH FINISHER
- INSERTER
- Part 2: Copier Operation
- AUTOMATIC DOCUMENT FEEDER
- PLACING ORIGINALS
- CHECKING THE SIZE OF A PLACED ORIGINAL
- STORING, DELETING, AND USING ORIGINAL SIZES
- NORMAL COPYING
- ADJUSTING THE EXPOSURE
- REDUCTION/ENLARGEMENT/ZOOM
- SPECIAL PAPERS
- SPECIAL MODES
- General procedure for using special functions
- Margin shift
- Erase
- Dual page copy
- Pamphlet copy
- Job build
- Tandem copy
- Covers/inserts
- About the explanations of covers and inserts
- Preparations for using covers and inserts
- Procedure for inserting front and back cover paper
- Procedure for adding inserts
- Checking, editing, and deleting cover/insert pages
- Examples of covers and inserts
- Symbols used for covers and inserts
- Covers (One-sided copying of one-sided originals)
- Covers (Two-sided copying of one-sided originals)
- Covers (One-sided copying of Two-sided originals)
- Covers (Two-sided copying of two-sided originals)
- Inserts (One-sided copying of one-sided originals)
- Inserts (One-sided copying of two-sided originals)
- Transparency film with insert sheets
- Multi shot
- Book copy
- Tab copy
- Card shot
- Mirror image
- B/W reverse
- STORING, USING AND DELETING JOB PROGRAMS
- INTERRUPTING A COPY RUN
- USER MAINTENANCE
- TROUBLESHOOTING
- OVERVIEW
- TO USE THE DOCUMENT FILING FUNCTION
- SAVING A DOCUMENT IMAGE FILE
- CALLING UP AND USING A FILE
- CUSTOM SETTINGS
- ENTERING CHARACTERS
- TROUBLESHOOTING
- SPECIFICATIONS
- INDEX
SAVING A DOCUMENT IMAGE FILE
7-12
■
■■
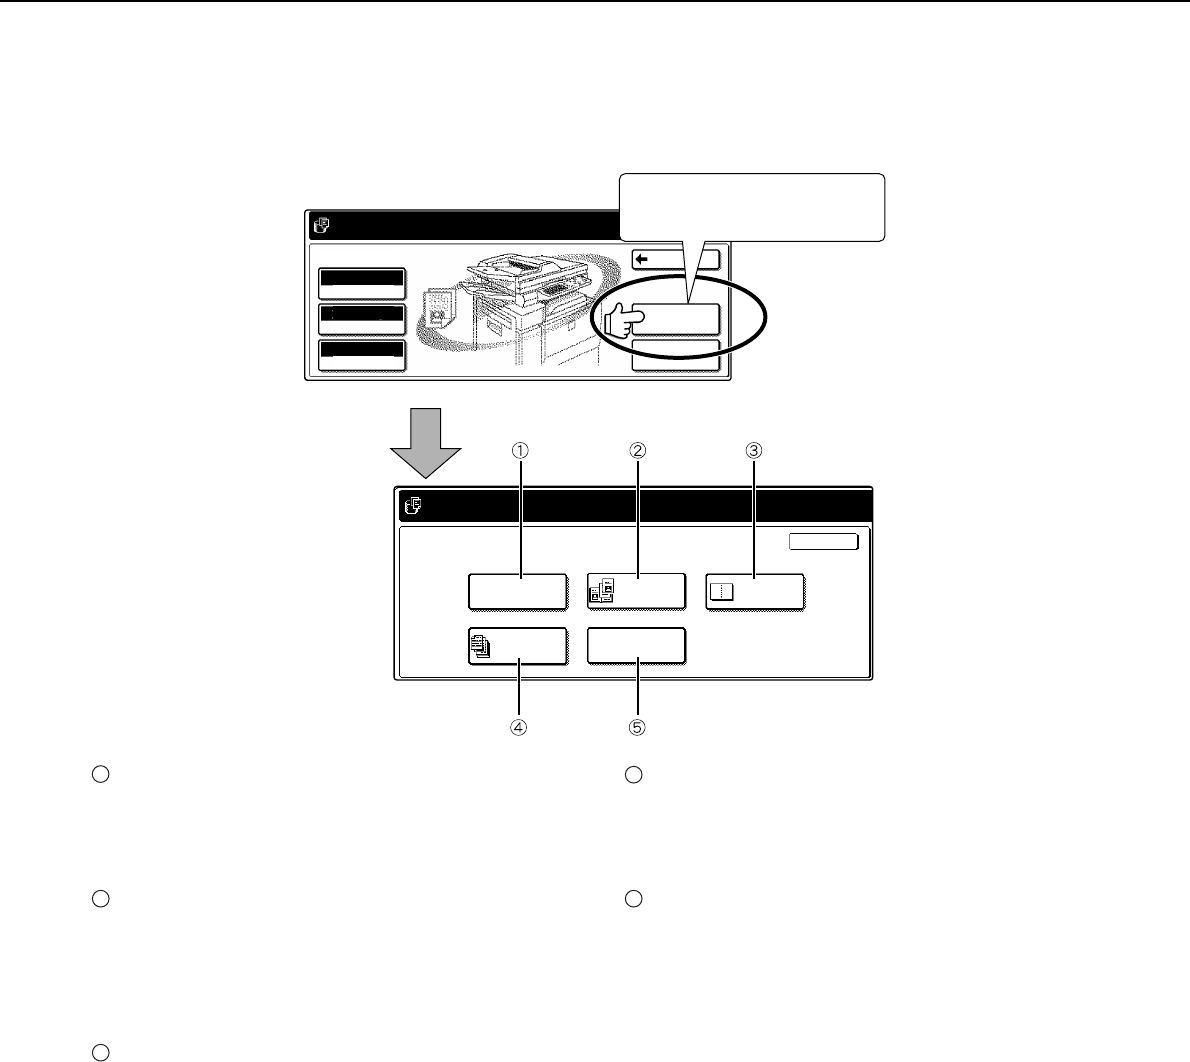
■ Using special functions for scan save.
Touch the [SPECIAL MODES] key in the main scan save screen to display the special modes screen.
The functions below can be selected in this screen.
[ERASE] key (see page 5-4)
Use this function to erase shadows that can appear
around the edges of the image when books and
other thick originals are scanned.
[DUAL PAGE SCAN] key (see page 5-5)
(Equivalent to Dual page copy in copy mode)
This function is used to save the opened pages of
a book in order one page at a time (left page then
right page).
[2in1] key (
see page 5-23
)
(When the fax or network scanner option is
installed, this is equivalent to the 2in1 function
described in the fax and network scanner
manuals. It is also equivalent to the "Multi shot"
function in copy mode; however, only 2in1 is
possible for scan save.)
This function reduces two original pages and
arranges the images on a single page in a uniform
layout.
[JOB BUILD] key (see page 5-8)
When you have more pages than can be placed in
the document feeder at once, this function allows
you to scan the pages in sets.
[CARD SHOT] key (see page 5-28)
This function allows you to save the front and back
side of a card on a single page (instead of saving
each side as a separate file).
ORIGINAL
RESOLUTION
BACK
SPECIAL MODES
FILE
INFORMATION
EXPOSURE
SCAN TO HDD
AUTO
AUTO
READY TO SCAN TO HDD.
PRESS [START] TO SCAN ORIGINAL.
300x300dpi
[READY TO SCAN TO HDD.
PRESS [START] TO SCAN ORIGINAL.
SPECIAL MODES
ERASE
DUAL PAGE
SCAN
CARD SHOT
JOB
BUILD
2in1
21
OK
Touch the [SPECIAL MODES]
key in the main screen.
1
2
3
4
5