
Owner's Manual

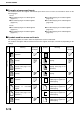
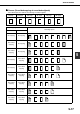
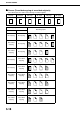
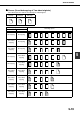
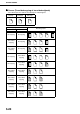
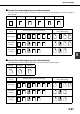
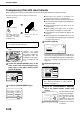
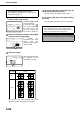
Table Of Contents
- Part 1: General Information
- PRODUCT CONFIGURATIONS
- OPERATION MANUALS
- INSTALLATION REQUIREMENTS
- CAUTIONS
- CONTENTS
- INTRODUCTION
- MAIN FEATURES
- PART NAMES AND FUNCTIONS
- TURNING THE POWER ON AND OFF
- AUDITING MODE
- LOADING PAPER
- Identifying the trays
- Loading paper in paper tray 1 - tray 2
- Loading paper in paper tray 3
- Changing the paper size in paper tray 3
- Changing the paper size in paper tray 4
- Loading paper in paper tray 5 (optional large capacity tray)
- Specifications (optional large capacity tray)
- Loading paper in the bypass tray
- Specifications of paper trays (Types and sizes of paper that can be used in the trays)
- Setting the paper type and paper size
- Setting the paper size when a special size is loaded
- CUSTOM SETTINGS
- REPLACING THE TONER CARTRIDGES
- STORAGE OF SUPPLIES
- MISFEED REMOVAL
- REMOVING AN ORIGINAL MISFEED
- TROUBLESHOOTING
- FINISHER AND SADDLE STITCH FINISHER
- INSERTER
- Part 2: Copier Operation
- AUTOMATIC DOCUMENT FEEDER
- PLACING ORIGINALS
- CHECKING THE SIZE OF A PLACED ORIGINAL
- STORING, DELETING, AND USING ORIGINAL SIZES
- NORMAL COPYING
- ADJUSTING THE EXPOSURE
- REDUCTION/ENLARGEMENT/ZOOM
- SPECIAL PAPERS
- SPECIAL MODES
- General procedure for using special functions
- Margin shift
- Erase
- Dual page copy
- Pamphlet copy
- Job build
- Tandem copy
- Covers/inserts
- About the explanations of covers and inserts
- Preparations for using covers and inserts
- Procedure for inserting front and back cover paper
- Procedure for adding inserts
- Checking, editing, and deleting cover/insert pages
- Examples of covers and inserts
- Symbols used for covers and inserts
- Covers (One-sided copying of one-sided originals)
- Covers (Two-sided copying of one-sided originals)
- Covers (One-sided copying of Two-sided originals)
- Covers (Two-sided copying of two-sided originals)
- Inserts (One-sided copying of one-sided originals)
- Inserts (One-sided copying of two-sided originals)
- Transparency film with insert sheets
- Multi shot
- Book copy
- Tab copy
- Card shot
- Mirror image
- B/W reverse
- STORING, USING AND DELETING JOB PROGRAMS
- INTERRUPTING A COPY RUN
- USER MAINTENANCE
- TROUBLESHOOTING
- OVERVIEW
- TO USE THE DOCUMENT FILING FUNCTION
- SAVING A DOCUMENT IMAGE FILE
- CALLING UP AND USING A FILE
- CUSTOM SETTINGS
- ENTERING CHARACTERS
- TROUBLESHOOTING
- SPECIFICATIONS
- INDEX
SPECIAL MODES
5-24
1
Touch the [MULTI SHOT] key in the special
modes screen (2nd screen).
The MULTI SHOT setting
screen will appear.
A multi shot icon ( ,
etc.) will also appear in
the upper left of the
screen to indicate that
the function is turned on.
2
Select the number of images to be copied
onto one sheet of copy paper.
If needed, the
orientation of the copy
paper and the
orientation of the images
will be rotated.
3
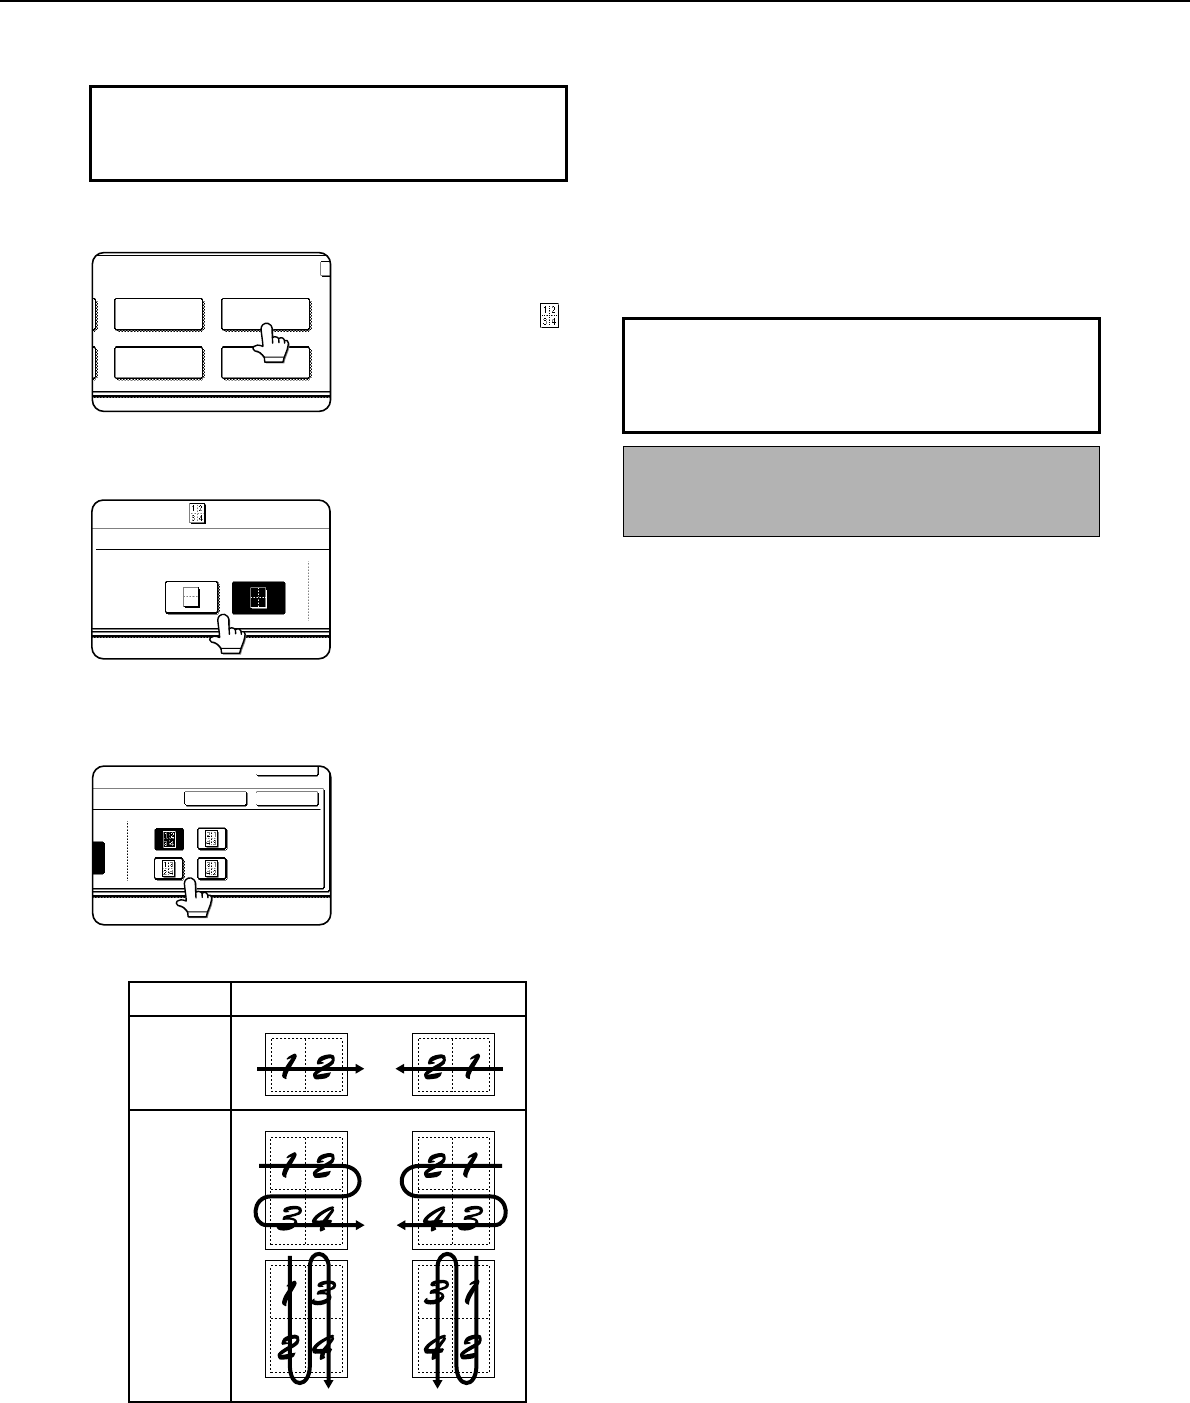
Select the layout.
Select the order in which
the originals will be
arranged on the copy.
The arrows in the above diagram indicate the
directions in which the images are arranged.
4
Touch the [OK] key (inside [OK] key) on
the multi shot setting screen.
You will return to the special modes screen.
5
Touch the [OK] key in the special modes
screen.
You will return to the main screen of copy mode.
To display the special modes screen...
See "General procedure for using special
functions" on page 5-2.
TRANSPARENCY
INSERTS
MULTI SHOT
CARD SHOTTAB COPY
SPECIAL MODES
MULTI SHOT
2in1 4in1
LAYOUT
CANCEL OK
OK
2in1
4in1
Shot number
Layout
About the steps that follow
If an automatic document feeder is being used, see
pages 4-7 through 4-10. If the document glass is
being used, see pages 4-11 through 4-13.
To cancel the multi shot function, touch the [CANCEL]
key in the multi shot setting screen (the screen of step
2).