
Owner's Manual
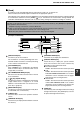
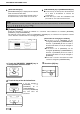

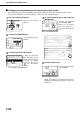
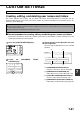
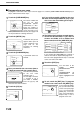

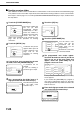
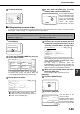
Table Of Contents
- Part 1: General Information
- PRODUCT CONFIGURATIONS
- OPERATION MANUALS
- INSTALLATION REQUIREMENTS
- CAUTIONS
- CONTENTS
- INTRODUCTION
- MAIN FEATURES
- PART NAMES AND FUNCTIONS
- TURNING THE POWER ON AND OFF
- AUDITING MODE
- LOADING PAPER
- Identifying the trays
- Loading paper in paper tray 1 - tray 2
- Loading paper in paper tray 3
- Changing the paper size in paper tray 3
- Changing the paper size in paper tray 4
- Loading paper in paper tray 5 (optional large capacity tray)
- Specifications (optional large capacity tray)
- Loading paper in the bypass tray
- Specifications of paper trays (Types and sizes of paper that can be used in the trays)
- Setting the paper type and paper size
- Setting the paper size when a special size is loaded
- CUSTOM SETTINGS
- REPLACING THE TONER CARTRIDGES
- STORAGE OF SUPPLIES
- MISFEED REMOVAL
- REMOVING AN ORIGINAL MISFEED
- TROUBLESHOOTING
- FINISHER AND SADDLE STITCH FINISHER
- INSERTER
- Part 2: Copier Operation
- AUTOMATIC DOCUMENT FEEDER
- PLACING ORIGINALS
- CHECKING THE SIZE OF A PLACED ORIGINAL
- STORING, DELETING, AND USING ORIGINAL SIZES
- NORMAL COPYING
- ADJUSTING THE EXPOSURE
- REDUCTION/ENLARGEMENT/ZOOM
- SPECIAL PAPERS
- SPECIAL MODES
- General procedure for using special functions
- Margin shift
- Erase
- Dual page copy
- Pamphlet copy
- Job build
- Tandem copy
- Covers/inserts
- About the explanations of covers and inserts
- Preparations for using covers and inserts
- Procedure for inserting front and back cover paper
- Procedure for adding inserts
- Checking, editing, and deleting cover/insert pages
- Examples of covers and inserts
- Symbols used for covers and inserts
- Covers (One-sided copying of one-sided originals)
- Covers (Two-sided copying of one-sided originals)
- Covers (One-sided copying of Two-sided originals)
- Covers (Two-sided copying of two-sided originals)
- Inserts (One-sided copying of one-sided originals)
- Inserts (One-sided copying of two-sided originals)
- Transparency film with insert sheets
- Multi shot
- Book copy
- Tab copy
- Card shot
- Mirror image
- B/W reverse
- STORING, USING AND DELETING JOB PROGRAMS
- INTERRUPTING A COPY RUN
- USER MAINTENANCE
- TROUBLESHOOTING
- OVERVIEW
- TO USE THE DOCUMENT FILING FUNCTION
- SAVING A DOCUMENT IMAGE FILE
- CALLING UP AND USING A FILE
- CUSTOM SETTINGS
- ENTERING CHARACTERS
- TROUBLESHOOTING
- SPECIFICATIONS
- INDEX
CUSTOM SETTINGS
7-22
■
■■
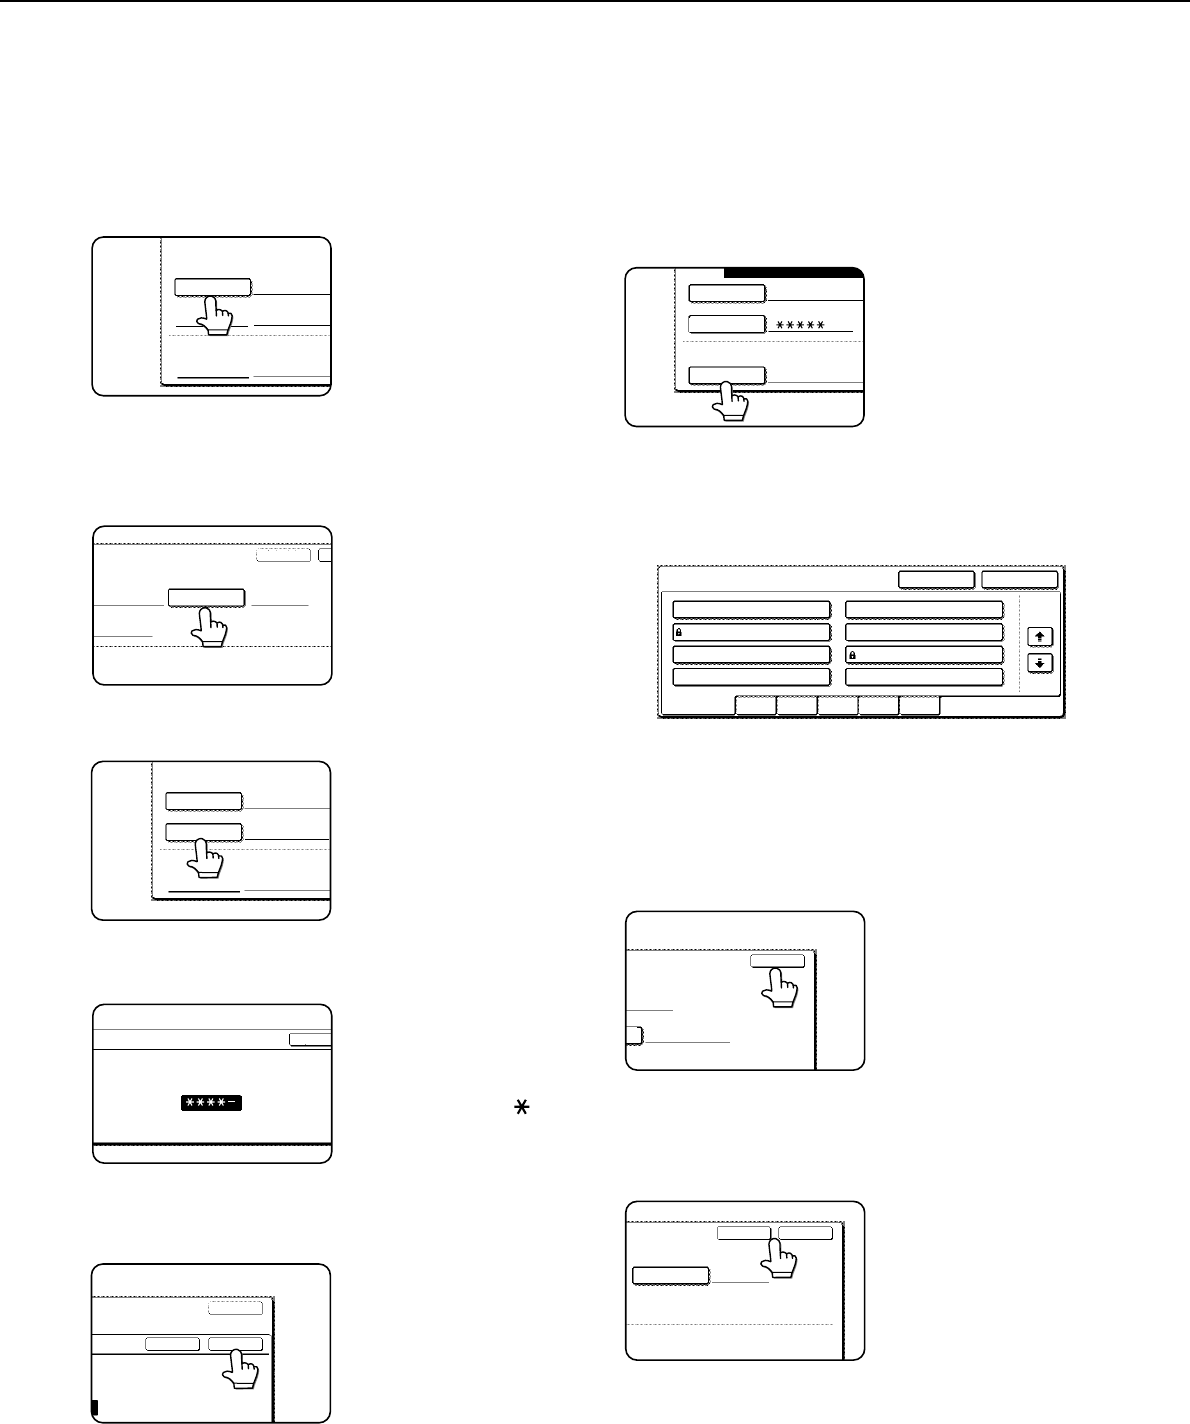
■ Programming a user name
To program a user name, follow steps 1 and 2 on page 7-21, touch the [USER NAME REGISTRATION] key in
step 3, and then follow these steps:
1
Touch the [USER NAME] key.
The lowest number that
has not yet been
programmed appears
automatically in "No.".
Touch the number to
display a character entry
screen and enter a user
name (maximum of 16 characters). See page 7-26
for the procedure for entering characters.
2
Touch the [INITIAL] key.
A character entry screen
appears. Enter up to 10
search characters.
See
page 7-26 for the
procedure for entering
characters.
3
Touch the [PASSWORD] key.
A password cannot be
omitted.
4
Set a password for the user name (enter a
5-digit password with the numeric keys).
This will be the password
for the user name
entered in step 1.
As each digit is entered,
"
-
" changes to " ". If
you make a mistake,
press the [C] key and
then enter the correct number.
5
Touch the [OK] key.
6
If you wish to specify a folder for the user
name, touch the [STORED TO:] key. If you
wish to use the main folder, go to step 8.
7
The folders that have been created appear.
Touch the desired folder. If you wish to
create a new folder, or if no folders have
been created, touch the [ADD NEW] key.
If you touched the [ADD NEW] key, program a
name for the folder as explained on page 7-24.
The user name programmed in step 1 is selected
as the user name of the folder.
8
Touch the [EXIT] key.
You will return to the
"USER NAME
REGISTRATION"
screen.
"REGISTRATION IS
COMPLETED." will
appear highlighted next
to "No.".
9
To exit, touch the [EXIT] key. To program
another user name, touch the [NEXT] key.
If you touched the [EXIT]
key, you will return to the
screen of step 3 on page
7-21. If you touched the
[NEXT] key, a new user
entry screen will appear.
Repeat steps 1 to 9 to
program a new user.
CUSTOM SETTINGS
No.001
USER NAME
PASSWORD
STORED TO:
SELECT THE DEFAULT FOLDER THE F
INITIAL
NEXT
R THE FILE WITH THIS USER NAME IS STORED.
CUSTOM
No.001
USER NAME
PASSWORD
STORED TO:
SELECT THE DEFAULT FOLDER THE FIL
Yamada
CANCEL
ENTER PASSWORD VIA THE 10-KEY PAD.
CANCEL
EXIT
OK
10-KEY PAD.
REGISTRATION IS COMPLETED.
No.001
USER NAME
PASSWORD
STORED TO:
SELECT THE DEFAULT FOLDER THE FILE
Yamada
MAIN FOLDER
STORED TO:
ALL FOLDERS
CUSTOM FOLDER 1
CUSTOM FOLDER 3
CUSTOM FOLDER 5
CUSTOM FOLDER 7
CUSTOM FOLDER 6
CUSTOM FOLDER 4
CUSTOM FOLDER 2
CUSTOM FOLDER 8
ABCD EFGHI JKLMN OPQRS
UVWXY
MAIN FOLDER ADD NEW
1/1
– – – – –
EXIT
INITIAL
EXIT
NEXT
WITH THIS USER NAME IS STORED.
Yamada