00-1_Cover1.
Pegasus-E_Setup_Eng.book 1 ページ 2004年8月19日 木曜日 午後3時46分 Warranty While every effort has been made to make this document as accurate and helpful as possible, SHARP Corporation makes no warranty of any kind with regard to its content. All information included herein is subject to change without notice. SHARP is not responsible for any loss or damages, direct or indirect, arising from or related to the use of this operation manual. © Copyright SHARP Corporation 2004. All rights reserved.
Chapter00.fm 1 ページ 2004年12月3日 金曜日 午後2時4分 INTRODUCTION Thank you for purchasing this product. This manual explains how to install the printer driver and utilities that are required for the printer and scanner functions. The optional network expansion kit (AR-NB3) enables the machine to be used as a network scanner and network printer. The optional PS3 expansion kit (AR-PK1/N) enables the machine to be used as a PostScript compatible printer.
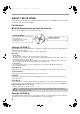
Pegasus-E_Setup_Eng.book 2 ページ 2004年8月19日 木曜日 午後3時46分 ABOUT THE CD-ROMS This product includes CD-ROMs that are provided standard with the machine and CD-ROMs that are provided with the optional network expansion kit (AR-NB3). For Windows ■ CD-ROM provided standard with the machine There are two CD-ROMs that are provided with the machine.
Chapter00.fm 3 ページ 2004年9月1日 水曜日 午後4時30分 ■ CD-ROMS in the network expansion kit (AR-NB3) The optional network expansion kit includes the following four CD-ROMs: 1. "Software CD-ROM (1)" included in the network expansion kit • PCL5e and PCL6 drivers, and PS driver • Printer Status Monitor • Printer Administration Utility • NICManager • Macintosh PPD File 2. "Network Utilities" CD-ROM This CD-ROM contains utilities for using the machine as a network printer and an online manual. 3.
Chapter00.fm 4 ページ 2004年9月1日 水曜日 午後4時30分 3. "Sharpdesk" CD-ROM Sharpdesk is an integrated software environment that makes it easy to manage document and image files, and launch applications. For information on the "Sharpdesk" CD-ROM and how to install Sharpdesk, see the "Sharpdesk installation guide" that accompanies the machine. Sharpdesk (Desktop Document Management Software) Sharpdesk is used to manage images scanned from the machine and files created in various software programs.
Pegasus-E_Setup_Eng.book 5 ページ 2004年8月19日 木曜日 午後3時46分 CONTENTS INTRODUCTION ........................................................................................................................................ 1 ● SOFTWARE LICENSE ..................................................................................................................................... 1 ● ABOUT THE CD-ROMS .......................................................................................................................
Chapter00.fm 6 ページ 2004年9月1日 水曜日 午後4時31分 SETUP IN A MACINTOSH ENVIRONMENT HARDWARE AND SOFTWARE REQUIREMENTS ................................................................................ 32 APPLETALK SETTINGS ......................................................................................................................... 32 INSTALLING THE PPD FILE................................................................................................................... 32 ● INSTALLATION IN MAC OS X ..
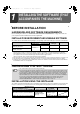
Pegasus-E_Setup_Eng.book 7 ページ 2004年8月19日 1 木曜日 午後3時46分 INSTALLING THE SOFTWARE (THAT ACCOMPANIES THE MACHINE) BEFORE INSTALLATION HARDWARE AND SOFTWARE REQUIREMENTS Before installing the software, see "HARDWARE AND SOFTWARE REQUIREMENTS" on page 43 to make sure your computer meets the hardware and software requirements. INSTALLATION ENVIRONMENT AND USEABLE SOFTWARE The software that can be installed varies depending on your operating system version and type of connection to the machine.
Pegasus-E_Setup_Eng.book 8 ページ 2004年8月19日 木曜日 午後3時46分 INSTALLING THE SOFTWARE (THAT ACCOMPANIES THE MACHINE) INSTALLATION METHOD 1 Use this procedure to install the software in the following environments: 1. The printer is connected by USB cable. 2. Windows version: Windows 98/Windows Me/Windows 2000*/Windows XP* The following procedure uses Windows XP as an example. Follow the same steps to install the software on other operating systems.
Pegasus-E_Setup_Eng.book 9 ページ 2004年8月19日 木曜日 午後3時46分 INSTALLING THE SOFTWARE (THAT ACCOMPANIES THE MACHINE) 8 When the "Finish" screen appears, click the [Close] button. When "Now connect the MFP interface cable to the PC." appears, click the [OK] button. Caution Note 9 If you are using Windows 2000/XP If a warning message regarding the Windows logo test or digital signature appears, be sure to click the [Continue Anyway] or [Yes] button.
Pegasus-E_Setup_Eng.book 10 ページ 2004年8月19日 木曜日 午後3時46分 INSTALLING THE SOFTWARE (THAT ACCOMPANIES THE MACHINE) INSTALLATION METHOD 2 Use this procedure to install the software in the following environments: 1. The printer is connected by USB cable or parallel cable. 2. Windows version: Windows XP Note To install this software, you must have administrator's rights. Custom installation Installation methods 2 through 4 are for custom installations of the software.
Chapter01.fm 11 ページ 2004年9月1日 水曜日 午後4時31分 INSTALLING THE SOFTWARE (THAT ACCOMPANIES THE MACHINE) 10 The files required for installation of the MFP driver are copied (if "MFP Driver" was selected in Step 8). 14 Follow the on-screen instructions. When you are asked how the printer is connected, select [Connected to this computer] and click the [Next] button. Connect the machine to your computer with the interface cable.
Pegasus-E_Setup_Eng.book 12 ページ 2004年8月19日 木曜日 午後3時46分 INSTALLING THE SOFTWARE (THAT ACCOMPANIES THE MACHINE) INSTALLATION METHOD 3 Use this procedure to install the software in the following environments: 1. The printer is connected by USB cable. 2. Windows version: Windows 98/Windows Me/Windows 2000* Note 1 * To install this software, you must have administrator's rights. Make sure that the USB cable is not connected to the machine. If the cable is connected, a Plug and Play window will appear.
Pegasus-E_Setup_Eng.book 13 ページ 2004年8月19日 木曜日 午後3時46分 INSTALLING THE SOFTWARE (THAT ACCOMPANIES THE MACHINE) 8 If you wish to install Button Manager or Sharpdesk, click the [Utility Software] button in step 5. If you do not wish to install either, go to step 10. 9 Click the [Button Manager] or [Sharpdesk] button. • To view information on the software, click the [Display Readme] button. • Follow the on-screen instructions. 10 Note 11 1 Click the [Close] button.
Pegasus-E_Setup_Eng.book 14 ページ 2004年8月19日 木曜日 午後3時46分 INSTALLING THE SOFTWARE (THAT ACCOMPANIES THE MACHINE) INSTALLATION METHOD 4 Use this procedure to install the software in the following environments: 1.The printer is connected by parallel cable. 2.Windows version: Windows 95/Windows 98/Windows Me/Windows NT 4.0*/Windows 2000* Note 1 * To install this software, you must have administrator's rights.
Pegasus-E_Setup_Eng.book 15 ページ 2004年8月19日 木曜日 午後3時46分 INSTALLING THE SOFTWARE (THAT ACCOMPANIES THE MACHINE) 10 Select the printer port and click the [Next] button. 16 Click the [Sharpdesk] button. • To view information on the software, click the [Display Readme] button. • Follow the on-screen instructions. Select [LPT1] for the printer port. Note 17 Note 11 If the dual function board is not installed, be sure to select [For standard model].
Pegasus-E_Setup_Eng.book 16 ページ 2004年8月19日 木曜日 午後3時46分 INSTALLING THE SOFTWARE (THAT ACCOMPANIES THE MACHINE) USING THE MACHINE AS A SHARED PRINTER VIA A SERVER The machine can be used as a shared printer in a Windows 95/98/Me/NT 4.0/2000/XP network environment. Note that the Windows network environment must already be established. Follow these steps to install the printer driver in the client computer. Ask your network administrator for the server name and printer name of the machine on the network.
Pegasus-E_Setup_Eng.book 17 ページ 2004年8月19日 木曜日 午後3時46分 INSTALLING THE SOFTWARE (THAT ACCOMPANIES THE MACHINE) 8 Select the network printer that is shared and click the [OK] button. 1 Note Ask your network administrator for the server name and printer name of the machine on the network. 9 In the printer port selection window, verify the network printer that is shared and click the [Next] button.
Pegasus-E_Setup_Eng.book 18 ページ 2004年8月19日 木曜日 午後3時46分 SETTING UP BUTTON MANAGER Button Manager is a software program that works with the scanner driver to enable scanning from the operation panel of the machine. To scan using the operation panel of the machine, Button Manager must be linked with the destination that appears in the display. Follow the steps below to link Button Manager to machine scanner events.
Pegasus-E_Setup_Eng.book 19 ページ 2004年8月19日 木曜日 午後3時46分 INSTALLING THE SOFTWARE (THAT ACCOMPANIES THE MACHINE) WINDOWS 98/ME/2000 1 Click the [Start] button, select [Settings], and then click [Control Panel]. 2 Double-click the [Scanners and Cameras] icon. Note 3 6 Select [Sharp Button Manager G] in "Send to this application". If the [Scanners and Cameras] icon does not appear in Windows Me, click [view all Control Panel options]. 1 Select [SHARP AR-XXXX] and click the [Properties] button.
Chapter02.fm 20 ページ 2 2004年8月19日 木曜日 午後4時59分 INSTALLING THE SOFTWARE (FOR OPTIONS) INSTALLATION FOR A NETWORK CONNECTION The procedures for installing the software when the machine is used as a network printer using the optional network expansion kit (AR-NB3) are explained in this chapter. Refer to the following table for the installation procedure to follow depending on whether you are using a Windows environment (TCP/IP network) or a Macintosh environment.
Pegasus-E_Setup_Eng.book 21 ページ 2004年8月19日 木曜日 午後3時46分 SETUP IN A WINDOWS ENVIRONMENT HARDWARE AND SOFTWARE REQUIREMENTS Before installing the software, see "HARDWARE AND SOFTWARE REQUIREMENTS" on page 43 to make sure your computer meets the hardware and software requirements. SETTING THE IP ADDRESS OF THE MACHINE Before installing the printer driver, be sure to set the IP address of the machine.
Pegasus-E_Setup_Eng.book 22 ページ 2004年8月19日 木曜日 午後3時46分 SETUP IN A WINDOWS ENVIRONMENT 7 Click the [Administrator Tools] button. 10 Click the [Print Server Card Setup] button. If the machine is being used in a DHCP environment or the IP address has otherwise already been set, go to step 15. 8 11 If the IP address has not been set (the IP address is set to "0.0.0.0"), a message will appear prompting you to set the IP address. Click the [Yes] button.
Pegasus-E_Setup_Eng.book 23 ページ 2004年8月19日 木曜日 午後3時46分 SETUP IN A WINDOWS ENVIRONMENT 17 Configure the settings and then click the [Update] button. Be sure to ask your network administrator for the correct IP address, subnet mask, and default gateway to be entered. 18 Your changes to the settings appear. Make sure that the changes are correct and then click the [OK] button. 19 Restart the machine. 2 Power off the machine and then power it back on. 20 Select [Search] from the [File] menu.
Chapter02.fm 24 ページ 2004年11月26日 金曜日 午後3時18分 INSTALLING THE SOFTWARE INSTALLING THE PRINTER DRIVER (STANDARD INSTALLATION) Note Caution If you wish to install the display font or specify the machine's IP address by direct entry when installing the printer driver, select [Custom installation]. (Page 26) To use the machine as a network printer in Windows NT 4.0, "TCP/IP Protocol" must be installed on your computer. If this is not installed, see Windows NT 4.0 Help to install them.
Pegasus-E_Setup_Eng.book 25 ページ 2004年8月19日 木曜日 午後3時46分 SETUP IN A WINDOWS ENVIRONMENT 9 Printers connected to the network are detected. Select the machine and click the [Next] button. 13 Check the contents of the window and click the [Next] button. Installation of the printer driver begins. Caution If you are using Windows 2000/XP/Server 2003 If a warning message regarding the Windows logo test or digital signature appears, be sure to click the [Continue Anyway] or [Yes] button.
Chapter02.fm 26 ページ 2004年9月1日 水曜日 午後4時32分 SETUP IN A WINDOWS ENVIRONMENT CUSTOM INSTALLATION If you wish to install the display font or specify the machine's IP address by direct entry when installing the printer driver, select [Custom installation]. 1 Insert the network expansion kit "Software CD-ROM (1)" into your computer's CD-ROM drive. 2 Click the [start] button, click [My Computer] ( ), and then double-click the [CD-ROM] icon ( ). In Windows 95/98/Me/NT 4.
Pegasus-E_Setup_Eng.book 27 ページ 2004年8月19日 木曜日 午後3時46分 SETUP IN A WINDOWS ENVIRONMENT 11 12 A confirmation window appears. Check the contents and then click the [Next] button. 16 Installation of the printer driver begins. When the printer driver selection window appears, select the printer driver to be installed and click the [Next] button. Select the checkboxes of the printer drivers to be installed. Check the contents of the window and click the [Next] button.
Pegasus-E_Setup_Eng.book 28 ページ 2004年8月19日 木曜日 午後3時46分 SETUP IN A WINDOWS ENVIRONMENT USING THE MACHINE AS A SHARED PRINTER VIA A SERVER If the printer server in a Windows NT server environment, NetWare server environment, or other environment is configured to share the printer (the machine), follow the steps below to install the printer driver in each client computer. Ask your network administrator for the server name and printer name of the machine on the network.
Pegasus-E_Setup_Eng.book 29 ページ 2004年8月19日 木曜日 午後3時46分 SETUP IN A WINDOWS ENVIRONMENT 9 Select [Shared Printer] and click the [Next] button. 10 For the port to be used, select the machine (configured as a shared printer), and click the [Next] button. You can also click the [Add Network Port] button and select the printer to be shared (the machine) by browsing the network in the window that appears. 13 Follow the on-screen instructions. Note This completes the installation.
Chapter02.fm 30 ページ 2004年9月1日 水曜日 午後4時32分 SETUP IN A WINDOWS ENVIRONMENT INSTALLING THE PS DISPLAY FONTS The fonts used by the PS printer driver are contained in the "PRINTER UTILITIES" CD-ROM that accompanied the PS3 expansion kit (AR-PK1/N). Install these fonts as needed for the PS printer driver. 1 Insert the PS3 expansion kit (AR-PK1/N) "PRINTER UTILITIES" CD-ROM into your computer's CD-ROM drive. If your computer is configured for CD-ROM auto start, the installation window appears. Go to step 4.
Chapter02.fm 31 ページ 2004年9月1日 水曜日 午後4時32分 USING THE PPD FILE The PPD file enables the machine to print using the standard PS driver of the operating system. Install the PPD file as needed. Use the Add Printer Wizard in Windows to install the PPD file. Be sure to read the Readme file (Readme.txt) before installing the PPD file. The Readme file is in the "EnglishA" or "English" folder. For the location of the folder, see step 4.
Chapter02.fm 32 ページ 2004年9月3日 金曜日 午後4時0分 SETUP IN A MACINTOSH ENVIRONMENT HARDWARE AND SOFTWARE REQUIREMENTS Before installing the PPD file for Macintosh, see "HARDWARE AND SOFTWARE REQUIREMENTS" on page 43 to make sure your computer meets the hardware and software requirements. Operating system Mac OS 8.6 to 9.2.2, 10.1.5 and 10.2 to 10.2.8 (excluding 10.2.2), 10.3 to 10.3.4 CPU and RAM The requirements of the operating system must be satisfied.
Pegasus-E_Setup_Eng.book 33 ページ 2004年8月19日 木曜日 午後3時46分 SETUP IN A MACINTOSH ENVIRONMENT 6 Click the [Continue] button. 7 The License Agreement window will appear. Make sure that you understand the contents of the license agreement and then click the [Continue] button. 2 A message will appear asking you if you agree to the terms of the license. Click the [Agree] button. Caution 8 If a different language appears, switch to English.
Chapter02.fm 34 ページ 2004年9月21日 火曜日 午後1時13分 SETUP IN A MACINTOSH ENVIRONMENT INSTALLATION IN MAC OS 8.6 TO 9.2.2 1 Insert the network expansion kit "Software CD-ROM (1)" into your computer's CD-ROM drive. 2 Double-click the [CD-ROM] icon ( on the desktop. 3 Double-click the [MacOS] folder. 4 Double-click the [Installer] icon ( The installer window will appear. 5 Click the [Install] button. Note 6 The License Agreement window will appear.
Pegasus-E_Setup_Eng.book 35 ページ 2004年8月19日 木曜日 午後3時46分 CONFIGURING THE PRINTER DRIVER Follow the steps below to configure the machine's printer driver. MAC OS X V10.2 TO 10.3.4 1 Make sure that the machine is powered on. 2 Select [Applications] from the [Go] menu. 7 Click the machine's model name in the list. 2 3 Double-click the [Utilities] folder. 4 Double-click the [Print Center] icon ( ).
Pegasus-E_Setup_Eng.book 36 ページ 2004年8月19日 木曜日 午後3時46分 SETUP IN A MACINTOSH ENVIRONMENT 10 Click the [Add] button. The machine is added to the list of printers. 11 Click the name of the machine in the "Printer List" window, and select [Show Info] from the [Printers] menu. The "Printer info" window will appear. 12 Select [Installable Options] from the menu. 13 Set the printer configuration based on the options that have been installed, and then click the [Apply Changes] button.
Pegasus-E_Setup_Eng.book 37 ページ 2004年8月19日 木曜日 午後3時46分 SETUP IN A MACINTOSH ENVIRONMENT MAC OS X v10.1.5 1 Make sure that the machine is powered on. 2 Select [Applications] from the [Go] menu. 3 Double-click the [Utilities] folder. 4 Double-click the [Print Center] icon ( ). 7 Click the machine's model name in the list. The name of the machine that appears is the name that was entered in the AppleTalk settings when the network settings were configured.
Pegasus-E_Setup_Eng.book 38 ページ 2004年8月19日 木曜日 午後3時46分 SETUP IN A MACINTOSH ENVIRONMENT MAC OS 8.6 TO 9.2.2 1 Select [Chooser] from the Apple Menu. 2 Click the [LaserWriter 8] icon. • The model name of your network-connected machine ([SCxxxxxx]) appears in the "Select a PostScript Printer" list on the right. The name of the machine that appears is the name that was entered in the AppleTalk settings when the network settings were configured.
Chapter03.fm 39 ページ 3 2004年9月1日 水曜日 午後4時33分 TROUBLESHOOTING AND USEFUL INFORMATION TROUBLESHOOTING If the software does not install correctly or if you need to remove the software, check the following items on your computer. Troubleshooting information can also be found in the README files for each of the software programs. To view a README file for a software program, click the [Display Readme] button in the software selection window that appears during installation.
Chapter03.fm 40 ページ 2004年9月1日 水曜日 午後4時33分 TROUBLESHOOTING AND USEFUL INFORMATION MFP driver does not install (Windows 2000/XP) Plug and play screen does not appear (when using a USB cable) If the MFP driver does not install in Windows 2000/XP, follow these steps to check your computer's settings. If the Plug and Play screen does not appear after you connect the machine to your computer with a USB cable and turn on the machine, follow the steps below to verify that the USB port is available.
Chapter03.fm 41 ページ 2004年9月1日 水曜日 午後4時33分 TROUBLESHOOTING AND USEFUL INFORMATION The MFP driver cannot be correctly installed by Plug and Play (Windows 2000/XP) In Windows 2000/XP, if the MFP driver cannot be correctly installed by Plug and Play (for example, Plug and Play takes place without copying the required files for the MFP driver installation from the installer), follow these steps to remove unneeded devices. To install the MFP driver, see "INSTALLING THE SOFTWARE" (page 7).
Chapter03.fm 42 ページ 2004年9月22日 水曜日 午後1時16分 CONFIGURING THE PRINTER DRIVER After installing the MFP driver (printer driver) or the printer driver for an option, make sure that the printer driver is set as the default printer and that the number of trays on the machine and the paper size of each tray are configured in the printer driver. 1 Click the [start] button, click [Control Panel], click [Printers and Other Hardware], and then click [Printers and Faxes].
Chapter03.fm 43 ページ 2004年9月3日 金曜日 午前10時50分 CHECKING THE IP ADDRESS There are several settings where the IP address must be entered or checked. To check the IP address of the machine, hold down the status button on the network expansion kit for at least 2 seconds to print out a Printer Setting List. Status button Caution HOW TO RESET THE NETWORK EXPANSION KIT To reset the network expansion kit, power on the machine while holding down the status button on the network expansion kit.
Chapter03.fm 44 ページ 2004年9月4日 土曜日 午後5時32分 CONNECTING TO A COMPUTER Connecting a usb cable Please purchase a USB cable (shielded) that complies with the following standard. The USB interface on the machine complies with the USB 2.0*/1.1 standard. * when the dual function board is installed. USB-2: USB 2.0 port USB-1: USB 1.1 port Note • The machine's USB 2.0 port will transfer data at the speed specified by the USB 2.0 only if the Microsoft USB 2.
Pegasus-E_Setup_Eng.
00-4_Cover3_4.fm 2 ページ 2004年9月14日 火曜日 午後12時45分 SOFTWARE SETUP GUIDE SHARP CORPORATION This manual has been printed using a vegetable-based soy oil ink to help protect the environment.