Manuel d’utilisation SHARP B10 Smartphone Modèles : SH-A01 FR
Table des matières Chapitre 1: Mise en route ..................................................................... 1 1.1 Votre appareil .............................................................................................. Vue de face ................................................................................................. Vue arrière .................................................................................................. Vue de gauche ..............................................
.4 Gérer les contacts ..................................................................................... Modifier les Contacts................................................................................. Supprimer les contacts.............................................................................. Envoyer des informations de contact ........................................................ Ajouter un contact à la liste noire .............................................................. 3.
Chapitre 8: Applications Multimédia ..................................................................... 45 8.1 Photos et vidéos........................................................................................ Prendre des photos ................................................................................... Enregistrer des vidéos .............................................................................. Modes de capture ........................................................................
Chapitre 1: Mise en route Chapitre 1: Mise en route REMARQUE : Les captures d'écran dans le manuel de l'utilisateur peuvent apparaître différemment sur votre téléphone. 1.
Chapitre 1: Mise en route Vue de gauche Emplacement Micro SIM1 / Nano SIM2 / Micro SD Vue de droite Bouton de volume (+/) Bouton marche/arrêt 2
Chapitre 1: Mise en route 1.2 Accessoires La boite est livrée avec les éléments suivants. Si l'un d'eux manque, veuillez contacter votre revendeur. Smartphone Guide de démarrage rapide Carte de garantie Câble USB Chargeur Pin 1.3 Installation de la carte SIM et de la carte mémoire Retirer le plateau de la carte 1. Éteindre l'appareil. 2. Insérer la goupille fournie dans le trou du plateau de la carte. 3. Pousser pour éjecter le plateau de la carte.
Chapitre 1: Mise en route Installer la carte mémoire Placer la carte mémoire sur le plateau avec les connecteurs dorés vers le haut. Replacer le plateau de la carte Pousser le plateau de la carte dans la fente pour carte.
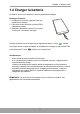
Chapitre 1: Mise en route 1.4 Charger la batterie La batterie fournie avec l'appareil n'est que partiellement chargée. Recharger la batterie 1. La batterie fournie avec l'appareil n'est que partiellement chargée. 2. Connecter l'autre extrémité du câble USB à l'adaptateur secteur. 3. Brancher l'adaptateur secteur sur une prise murale pour commencer à charger. Lorsque la batterie est en charge et que l'appareil est allumé, l'icône s'affiche sur la barre d'état.
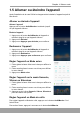
Chapitre 1: Mise en route 1.5 Allumer ou éteindre l'appareil Après l'installation de la carte SIM et le chargement de la batterie, l'appareil est prêt à être allumé. Allumer ou éteindre l'appareil Allumer l'appareil Appuyez sur le bouton Arrêt/Marche et maintenir jusqu'à ce que l'appareil s'allume.. Éteindre l'appareil 1. Appuyer sur le bouton Arrêt/Marche de l'appareil et maintenir jusqu'à ce que l'appareil s'allume. 2. Appuyer sur Éteindre. 3. Appuyer sur Appuyer pour éteindre pour confirmer.
Chapitre 1: Mise en route 1.6 Verrouillage et déverrouillage de l'écran Verrouillez l'écran pour éviter qu'il ne soit accidentellement rallumé. Par défaut, l'écran se verrouille après avoir été inactif pendant un certain temps (voir “Paramètres d'affichage” à la page 65). Verrouiller l'écran Pour verrouiller manuellement l'écran et éteindre l'écran, appuyez sur le bouton Arrêt/Marche. Déverrouiller l'écran 1. Si l'écran est désactivé, appuyez sur le bouton Arrêt/ Marche. 2.
Chapitre 1: Mise en route 1.7 Utiliser les écouteurs Pour une conversation mains libres ou pour écouter de la musique, connectez un adaptateur audio au téléphone, puis branchez des écouteurs à la prise casque. REMARQUE : • Lorsque vous utilisez des écouteurs, votre capacité à entendre les sons extérieurs peut être limitée. • N'utilisez pas d’écouteurs si cela peut vous exposer à des risques. Ne réglez pas le volume du casque au maximum, car cela pourrait affecter votre ouïe. 1.
Chapitre 2: Les bases Chapitre 2: Les bases 2.1 Écran d'accueil À partir de l'écran d'accueil principal, vous pouvez accéder rapidement aux fonctions communes et afficher les notifications d'appels manqués, de messages reçus, de vérification de la batterie et de statut de connexion. Barre d'état • Affiche les icônes d'état et de notification, ainsi que l'horloge. • Les messages, connexions et autres notifications sont Widget Google également affichés ici.
Chapitre 2: Les bases Barre d'état Les icônes de la barre d'état indiquent différents types d'informations. Les icônes de la barre d'état indiquent les informations suivantes : Icône de la batterie Icône d'appel manqué Heure réelle Icône Wi-Fi Icône Description Icône Puissance du signal réseau Description La batterie est pleine. Appels entrants. La batterie est en cours de chargement. Notification d'appel manqué La batterie est complètement déchargée. Nouvelle notification de message texte.
Chapitre 2: Les bases Panneau de notifications Le panneau des notifications affiche les activités, les détails de l'état de l'appareil ou d'autres notifications. Ouvrez le panneau des notifications Appuyez et faites glisser la barre d'état vers le bas. Pour ouvrir des applications associées, appuyez sur une notification. Fermez le panneau des notifications Appuyez et faites glisser la barre d'état vers le haut pour fermer le panneau des notifications.
Chapitre 2: Les bases Panneau de contrôle Appuyez et maintenez votre doigt sur un emplacement vide de l'écran d'accueil pour gérer directement les panneaux de l'écran d'accueil et accéder au panneau de configuration. Sélectionnez Fond d'écran Ajouter un widget Widgets Gagnez du temps avec des mises à jour directement sur l'écran d'accueil et obtenez toutes vos mises à jour personnalisées en un seul endroit. Ajouter un widget 1.
Chapitre 2: Les bases Dossiers Gagnez de l'espace sur votre écran d'accueil, regroupez les applications similaires dans un dossier. Ajouter un dossier 1. Faites glisser une application vers une autre pour les regrouper dans un même dossier. 2. Saisissez le nom du dossier REMARQUE : Le nom de dossier par défaut est « Dossier sans nom ». Modifier un dossier 1. Appuyez pour ouvrir le dossier que vous souhaitez modifier. 2.
Chapitre 2: Les bases Supprimer un dossier Appuyez et maintenez le doigt sur le dossier que vous souhaitez supprimer et faites-le glisser vers X Supprimer. Définir le fond d'écran Personnaliser le fond d'écran de l'appareil. 1. Depuis le panneau de contrôle, appuyez sur FOND D'ÉCRAN. 2. Sélectionnez le fond d'écran à partir de la Galerie, des fonds d'écran animés, des photos ou du dossier Fonds d'écran. 3. Appuyez sur un fond d'écran pour l'utiliser.
Chapitre 2: Les bases Gestion des panneaux d'écran d'accueil Par défaut, votre téléphone dispose d'un écran d'accueil principal. Un nouvel écran d'accueil est ajouté automatiquement lors d'occasions spéciales, par exemple après le téléchargement d'une application à partir de Play Store. Pour ajouter un écran d'accueil supplémentaire, faites simplement glisser l'icône de l'application vers la droite.
Chapitre 3: Contacts Chapitre 3: Contacts Contacts constitue votre répertoire qui vous permet de stocker les noms, numéros de téléphone, adresses e-mail et autres informations. Vous pouvez également ajouter les contacts fréquemment utilisés à la liste des favoris. Voir “Contacts favoris” à la page 20. 3.1 Ajouter des contacts 1. Depuis l'écran d'accueil, appuyez sur Téléphone et sélectionnez l'onglet Contacts. 2.
Chapitre 3: Contacts 3.2 Copier des Contacts Vous pouvez copier des contacts vers et depuis la carte SIM, l'appareil, la carte mémoire ou le stockage USB. 1. Depuis l'écran d'accueil, appuyez sur Téléphoneet sélectionnez l'onglet Contacts. 2. Appuyez sur > Paramètres > Importer des contacts ou Exporter des contacts. 3. Choisissez Importer/exporter des contacts depuis ou vers la carte SIM/mémoire. 4. Sélectionnez les contacts à copier et appuyez sur Terminé. 3.
Chapitre 3: Contacts Envoyer un e-mail à vos Contacts 1. Depuis l'écran d'accueil, appuyez sur Téléphone et sélectionnez l'onglet Contacts. 2. Appuyez sur un contact. 3. Appuyez sur l'adresse e-mail. 4. Composez et envoyez votre e-mail. Voir“Composer et envoyer des e-mails” à la page 33. 3.4 Gérer les contacts Modifier les Contacts 1. Depuis l'écran d'accueil, appuyez sur Téléphone et sélectionnez l'onglet Contacts. 2. Appuyez sur le contact que vous souhaitez modifier. 3. Appuyez sur : 4.
Chapitre 3: Contacts Supprimer les contacts 1. Depuis l'écran d'accueil, appuyez sur Téléphone et sélectionnez l'onglet Contacts. 2. Appuyez sur le contact que vous souhaitez supprimer et maintenez-le. 3. Dans la liste, sélectionnez les autres contacts que vous souhaitez supprimer. 4. Appuyez sur Supprimer. 5. Appuyez sur SUPPRIMER pour confirmer.
Chapitre 3: Contacts 3.5 Contacts favoris Ajoutez les contacts les plus fréquemment appelés aux favoris pour accéder aux contacts rapidement et facilement. Afficher les favoris Depuis l'écran d'accueil, appuyez sur Téléphone et sélectionnez l'onglet Favoris. Ajouter aux favoris 1. Depuis l'écran d'accueil, appuyez sur Téléphone et sélectionnez l'onglet Contacts. 2. Appuyez sur le contact que vous voulez ajouter à la liste des favoris. 3. Appuyez sur : Supprimer des favoris 1.
Chapitre 3: Contacts 3.6 Recherche de contacts Sur l'écran Contacts, effectuez l'une des opérations suivantes pour rechercher facilement des contacts : • Faites glisser votre doigt vers le haut ou le bas de l'écran pour faire défiler la liste des contacts. • Dans la zone de recherche, tapez les premières lettres du contact à rechercher ou entrez un index alphabétique pour afficher les noms de contact commençant par la lettre.
Chapitre 3: Contacts 6. Appuyez sur ajouter des contacts au groupe 7. Appuyez sur les contacts de la liste pour commencer à ajouter des contacts. 8. Appuyez sur Terminé.
Chapitre 4: Utilisation du téléphone Chapitre 4: Utilisation du téléphone Pour ouvrir l'écran Téléphone sur l'écran d'accueil, appuyez sur Téléphone. Appuyez pour configurer les paramètres Numérotation abrégée et Appel. Onglet Composer Liste des appels Composer le numéro de téléphone sur le clavier Appuyez pour cacher le clavier à l'écran. 4.1 Passer un appel Passer un appel à partir de l'écran Téléphone 1. Depuis l'écran d'accueil, appuyez sur Téléphone. 2.
Chapitre 4: Utilisation du téléphone Passer un appel depuis votre liste de Contacts 1. À partir de l'écran d'accueil, appuyez sur Téléphone et sélectionnez l'onglet Contacts. 2. Appuyez sur le nom du contact. 3. Appuyez sur l'icône à côté du numéro de téléphone de contact souhaité pour effectuer un appel. 4. Pour mettre fin à l'appel, appuyez sur . 4.2 Répondre à un appel Lorsqu'un appel entrant est reçu, le téléphone peut sonner ou vibrer et l'écran affiche un message signalant l'appel entrant.
Chapitre 4: Utilisation du téléphone 4.4 Options en cours d'appel • Pour afficher le clavier à l'écran, appuyez sur • Pour couper ou activer le microphone, appuyez sur • Pour utiliser le haut-parleur, appuyez sur • • Pour mettre l'appel en attente, appuyez sur . Pour configurer une conférence téléphonique, appuyez sur . . . et entrez le deuxième numéro de téléphone. 4.5 Journal d'appel L'écran Journal des appels affiche les appels sortants, reçus ou manqués les plus récents.
Chapitre 5: E-mail & Messagerie Chapitre 5: E-mail & Messagerie Utilisez pour envoyer et recevoir des e-mails en utilisant vos comptes de messagerie Internet. Utilisez Gmail pour envoyer et recevoir des messages électroniques en utilisant vos comptes de messagerie Internet. 5.1 Messages texte Un message texte ne peut contenir que des lettres, des chiffres et des symboles. Créer et envoyer des messages texte (SMS) 1. À partir de l'écran d'accueil, appuyez sur Messagerie. 2. Appuyez sur . 3.
Chapitre 5: E-mail & Messagerie Supprimer un fil de message 1. À partir de l'écran d'accueil, appuyez sur Messagerie. 2. Appuyez sur la conversation si vous souhaitez la supprimer. 3. Appuyez sur > Supprimer la conversation. 4. Appuyez sur SUPPRIMER pour confirmer. Supprimer tous les fils de message 1. À partir de l'écran d'accueil, appuyez sur Messagerie. 2. Appuyez et maintenez la conversation. 3. Sélectionnez les conversations que vous souhaitez supprimer. 4. Appuyez sur Supprimer. 5.
Chapitre 5: E-mail & Messagerie 5.2 Message multimédia Un message multimédia ou MMS peut contenir des lettres, des images, un fichier audio ou vidéo. Créer et envoyer des messages MMS 1. À partir de l'écran d'accueil, appuyez sur Messagerie. 2. Appuyez sur . 3. Dans le champ À, saisissez le numéro de téléphone du destinataire. CONSEIL : Pour ajouter des destinataires à partir des contacts, appuyez sur et sélectionnez le(s) contact(s). Appuyez ensuite sur Terminé. 4.
Chapitre 5: E-mail & Messagerie 5.3 Personnaliser les paramètres de messagerie 1. À partir de l'écran d'accueil, appuyez sur Messagerie. 2. Appuyez sur > Paramètres. Les paramètres de message suivants sont disponibles : • Paramètres de harcèlement: Utilisez ce paramètre pour afficher les appels interceptés et gérer la liste noire. • Émissions mobiles : Voir l'historique des messages d'alerte ou d'urgence de votre région.
Chapitre 5: E-mail & Messagerie 5.4 Comptes e-mail L'appareil peut envoyer et recevoir des e-mails comme vous le faites avec un ordinateur. Il prend en charge Google, Outlook, Hotmail, Live, Yahoo, Exchange, Office 365 et plus encore. Avant de configurer le compte de messagerie, assurez-vous que le téléphone est connecté à un réseau sans fil ou à une connexion mobile de données. Configurez votre compte e-mail 1. À partir de l'écran d'accueil, appuyez sur > Gmail.
Chapitre 5: E-mail & Messagerie 6. Sélectionnez un protocole de connexion par e-mail qui correspond le mieux à vos besoins. • Personnel (POP3) : Sélectionnez cette option pour télécharger tous les e-mails du serveur de messagerie et enregistrer localement sur l'appareil. Votre email ne peut pas être accessible par d’autres webmail ou d’autres personnes sur des ordinateurs différents.
Chapitre 5: E-mail & Messagerie Sélectionnez des comptes e-mail 1. À partir de l'écran d'accueil, appuyez sur 2. Appuyez sur > Gmail. . 3. Appuyez sur le compte e-mail actuel. 4. Appuyez sur le compte auquel vous souhaitez accéder. Supprimer des comptes e-mail 1. Depuis l'écran d'accueil, appuyez sur Paramètres > Comptes > Google (dépend du type de compte). 2. Sélectionnez le compte que vous souhaitez supprimer. 3. Appuyez sur > Supprimer le compte. 4.
Chapitre 5: E-mail & Messagerie 5.5 Utiliser le courrier électronique Composer et envoyer des e-mails 1. À partir de l'écran d'accueil, appuyez sur > Gmail. 2. Appuyez sur . 3. Dans le champ À, saisissez l'adresse e-mail du destinataire. REMARQUE : Appuyez sur à côté du champ À pour saisir les adresses e-mail des destinataires supplémentaires à Cc et/ou les lignes Bcc. 4. Appuyez sur Sujet puis saisissez un sujet. 5. Composez votre e-email. 6. Appuyez sur . Ajouter des pièces jointes aux e-mails 1.
Chapitre 5: E-mail & Messagerie Lire et répondre aux e-mails La boîte de réception affiche les en-têtes de messagerie. Ouvrez l'email pour voir le contenu complet. Télécharger les pièces jointes 1. À partir de l'écran d'accueil, appuyez sur > Gmail. 2. Dans l'écran Boîte de réception, appuyez sur un e-mail pour l'ouvrir. 3. Effectuez l'une des opérations suivantes : • Appuyez sur l'icône sur la pièce jointe pour télécharger directement la pièce jointe sur la mémoire du téléphone.
Chapitre 5: E-mail & Messagerie Répondre ou transférer des e-mails 1. Ouvrir le message. 2. Effectuez l'une des opérations suivantes : • Au bas du message, appuyez sur Répondre, Répondre à tous ou Réexpédier. • Appuyez sur ou appuyez sur tous pour répondre à l'e-mail. • Appuyez sur > Répondre à > Réexpédier. 3. Composez votre message. 4. Appuyez sur . Marquer l'e-mail comme non lu 1. Ouvrir le message. 2. Appuyez sur . Gérer les dossiers d'e-mail Supprimer des e-mails 1.
Chapitre 5: E-mail & Messagerie Déplacer les e-mails vers d'autres dossiers 1. À partir de l'écran d'accueil, appuyez sur > Gmail. 2. Dans l'écran Boîte de réception, appuyez et maintenez le message que vous souhaitez déplacer. 3. Appuyez sur > Déplacer vers pour voir la liste des dossiers. 4. Faites défiler la liste des dossiers jusqu'à ce que vous trouviez le dossier dans lequel vous souhaitez déplacer l'e-mail et appuyez sur le dossier souhaité. Gérer les e-mails 1.
Chapitre 5: E-mail & Messagerie Personnaliser les paramètres de messagerie Vous pouvez configurer les paramètres de votre compte de messagerie, tels que le nom du compte, la fréquence de vérification des e-mails, le compte par défaut, les notifications et les paramètres du serveur. Configurer un compte paramètres 1. À partir de l'écran d'accueil, appuyez sur > Gmail > > Paramètres, puis appuyez sur un compte de messagerie. 2.
Chapitre 5: E-mail & Messagerie Paramètres généraux 1. À partir de l'écran d'accueil, appuyez sur > Gmail > > Paramètres > Paramètres généraux. 2. Appuyez sur les options pour configurer l'action par défaut, les options de regroupement de conversations, les actions de balayage, etc.
Chapitre 6: Utilisation d'Internet Chapitre 6: Utilisation d'Internet 6.1 Connexion Internet L'appareil se connecte à Internet via : • • Wi-Fi Réseaux de données cellulaires Wi-Fi Activer le Wi-Fi 1. Depuis l'écran d'accueil, appuyez sur Paramètres ou faites glisser la barre d'état et appuyez sur . 2. Appuyez sur Wi-Fi. 3. Appuyez sur Paramètres. pour activer le Wi-Fi via le menu Connectez-vous à un réseau Wi-FI 1. Activez le Wi-Fi. 2. Les réseaux disponibles sont répertoriés.
Chapitre 6: Utilisation d'Internet Ajouter un réseau Wi-Fi 1. Depuis l'écran d'accueil, appuyez sur Paramètres ou faites glisser la barre d'état et appuyez sur . 2. Appuyez sur Wi-Fi et activez-le. 3. Si le réseau auquel vous souhaitez vous connecter ne figure pas dans la liste, faites défiler jusqu'au bas de la liste, puis appuyez sur Ajouter un réseau. 4. Suivez les instructions à l'écran et entrez les informations nécessaires, puis appuyez sur enregistrer les paramètres.
Chapitre 6: Utilisation d'Internet Réseau de données cellulaires Vérifiez la disponibilité du service et planifiez les tarifs des connexions de données avec votre fournisseur de services réseau. Personnaliser les paramètres du réseau 1. Depuis l'écran d'accueil, appuyez sur Paramètres > Config SIM. 2. Sélectionnez la carte SIM que vous souhaitez configurer (si deux cartes SIM sont insérées). Une seule Carte SIM Deux cartes SIM 3.
Chapitre 6: Utilisation d'Internet 6.2 Parcourir une page Web 1. Depuis l'écran d'accueil, appuyez sur Chrome. 2. Appuyez sur la barre de recherche. 3. Saisissez l'URL, puis appuyez sur Go. Barre d'adresse Appuyez pour afficher les pages Web actives dans les fenêtres. Afficher la page • • • Pour faire défiler la page, faites glisser votre doigt vers le haut ou vers le bas.
Chapitre 6: Utilisation d'Internet Le tableau suivant répertorie les options de configuration. Selon la fonction, certaines options peuvent ne pas être disponibles. Menu Description Nouvel onglet Chargez un nouvel onglet de page. Nouvel onglet de navigation privée Chargez un nouvel onglet de page. Marque-pages Pour accéder à une page de favoris Onglets récents Voir les onglets des dernières pages ouvertes. Historique Afficher les pages visitées.
Chapitre 7: Utiliser le Bluetooth Chapitre 7: Utilisation du Bluetooth Pour activer la connexion Bluetooth 1. Depuis l'écran d'accueil, appuyez sur Paramètres ou faites glisser la barre d'état et appuyez sur . 2. Appuyez sur Bluetooth. 3. Appuyez sur via Paramètres. pour activer le menu du Bluetooth 4. Pour changer le nom du périphérique, appuyez sur Nom du périphérique et tapez le nom désiré qui sera affiché sur d'autres appareils. 5.
Chapitre 8: Applications Multimédia Chapitre 8: Applications Multimédia 8.1 Photos et vidéos Cet appareil est équipé de caméras arrière et avant pour prendre des photos et des vidéos. Par défaut, votre appareil utilise l'appareil photo arrière pour prendre des photos ou enregistrer des vidéos.
Chapitre 8: Applications Multimédia • Pour effectuer un zoom avant sur le sujet, écartez les doigts l'un de l'autre à l'endroit de l'écran où vous souhaitez effectuer un zoom avant. • Pour effectuer un zoom arrière sur le sujet, rapprochez vos doigts à l'endroit de l'écran où vous voulez effectuer un zoom arrière. 3. Appuyez sur pour prendre la photo.
Chapitre 8: Applications Multimédia • Pour effectuer un zoom arrière sur le sujet, rapprochez vos doigts à l'endroit de l'écran où vous voulez effectuer un zoom arrière. 4. Appuyez sur pour arrêter l'enregistrement. Modes de capture Tout en prenant des photos, vous pouvez basculer entre plusieurs modes de capture. Pour accéder au mode, appuyez sur le mode dans l'écran de l'application Caméra. Les modes disponibles sont les suivants : • • • • Time-lapse : Utilisez ce mode pour prendre des vidéos rapides.
Chapitre 8: Applications Multimédia 2. Appuyez sur PANO sur l'écran d'application de la caméra. 3. Dirigez l'appareil sur le sujet. 4. Appuyez sur pour commencer à photographier. 5. Commencez lentement à déplacer l'appareil dans une direction et continuez à vous déplacer vers les indicateurs de prise de vue. 6. Lorsque les indicateurs de prise d'images arrivent au stade final du point de prise, la prise d'images s'achève. Vous pouvez également arrêter manuellement l'enregistrement en appuyant sur .
Chapitre 8: Applications Multimédia Vérifier des vidéos Après avoir enregistré une vidéo, appuyez sur la mini fenêtre pour prévisualiser la dernière vidéo enregistrée sur l'écran. • Pour revenir au mode Caméra, appuyez sur . • Pour partager la vidéo via Gmail, Messagerie, Google Maps, Bluetooth, Google Drive, Photos ou YouTube, appuyez sur . • Pour supprimer la vidéo, appuyez sur . Lorsqu'un message de confirmation apparaît, tapez sur SUPPRIMER pour confirmer la suppression.
Chapitre 8: Applications Multimédia Paramètres Options disponibles PIP Vous permet de prendre une photo en utilisant les caméras avant et arrière en même temps. La photo obtenue aura 2 prises de vue différentes. Artistique Vous permet d'ajouter un motif artistique prédéfini sur l'image à capturer. Faites glisser la sélection pour faire défiler les motifs. Filigrane Vous permet d'ajouter un filigrane prédéfini sur l'image à capturer. Appuyez sur Plus de filigrane pour sélectionner le filigrane.
Chapitre 8: Applications Multimédia 8.2 Afficher des photos et des vidéos 1. Depuis l'écran d'accueil, appuyez sur Galerie. 2. Appuyez sur un dossier pour afficher les images capturées ou les fichiers enregistrés dans les vignettes. 3. Appuyez sur une image ou une vidéo pour l'afficher en plein écran. ASTUCES : Vous pouvez faire l'une des choses suivantes : a Pour voir vos photos et vidéos, appuyez sur l'onglet Photos pour basculer sur l'affichage de photos ou l'onglet Albums pour basculer en vue albums.
Chapitre 9: Programmes Chapitre 9: Programmes Cet appareil est livré avec les programmes pré-installés suivants. 9.1 Chrome Depuis l'écran d'accueil, appuyez sur Chrome pour afficher les pages Web. Voir “Connexion Internet” à la page 39. 9.2 Calculatrice Avec la Calculatrice, vous pouvez effectuer des fonctions arithmétiques de base sur cet appareil. Depuis l'écran d'accueil, appuyez sur > Calculatrice. 9.3 Caméra Capturez des images avec cet appareil. Voir“Photos et vidéos” à la page 45. 9.
Chapitre 9: Programmes 9.5 Gestionnaire de Fichiers Gestionnaire de Fichiers vous permet de parcourir le contenu de votre téléphone. 1. Depuis l'écran d'accueil, appuyez sur Gestionnaire de Fichiers. > 2. Appuyez sur la liste des dossiers et appuyez sur le dossier que vous souhaitez explorer. Ou appuyez sur le chemin du fichier pour sélectionner la mémoire à gérer.
Chapitre 9: Programmes 9.6 Horloge Utilisez l'horloge pour ajouter des horloges mondiales, configurer des alarmes ou utiliser les appareils comme minuterie et chronomètre. Ajouter des horloges mondiales 1. Depuis l'écran d'accueil, appuyez sur l'onglet Horloge et sélectionnez Horloge. > 2. Pour ajouter une horloge mondiale, appuyez sur . 3. Faites défiler la liste et appuyez pour sélectionner la ville ou le type d'élément et recherchez la ville souhaitée. 4.
Chapitre 9: Programmes Utiliser la minuterie 1. Depuis l'écran d'accueil, appuyez sur sélectionnez l'onglet Minuterie. > Horloge et 2. Appuyez sur à partir d'une activité prédéfinie pour régler automatiquement la minuterie. Ou, faites glisser les chiffres pour régler l'heure et les minutes. 3. Appuyez sur DÉMARRER pour démarrer la minuterie. Utiliser le chronomètre 1. Depuis l'écran d'accueil, appuyez sur sélectionnez l'onglet Chronomètre. > Horloge et 2. Appuyez sur DÉMARRER pour démarrer le compteur.
Chapitre 9: Programmes 9.7 Utiliser la lampe torche Lorsque vous utilisez cet appareil dans un environnement sombre, vous pouvez utiliser ce périphérique en guise de lampe torche. 1. Depuis l'écran d'accueil, faites glisser la barre d'état vers le bas. 2. Appuyez sur pour allumer la torche. Appuyez sur encore une fois pour éteindre la torche. 9.8 Messagerie Utilisez Messagerie pour envoyer ou recevoir des messages texte et MMS. Voir“Messages texte” à la page 26. 9.
Chapitre 9: Programmes 9.13 Enregistreur Utilisez Enregistreur pour enregistrer un mémo vocal. Pour enregistrer une note vocale 1. Depuis l'écran d'accueil, appuyez sur Enregistreur. > L'écran d'enregistrement est affiché. 2. Appuyez sur voix. pour commencer à enregistrer la 3. Pour arrêter l'enregistrement, appuyez sur . • Pour suspendre l'enregistrement, appuyez sur . • Pour marquer l'enregistrement, appuyez sur 4. Tapez le nom de l'enregistrement, puis appuyez sur Terminé pour enregistrer.
Chapitre 9: Programmes 9.14 Remarque : Utilisez Note pour taper des notes. 1. Depuis l'écran d'accueil, appuyez sur > Note. 2. Pour créer une nouvelle note, appuyez sur . 3. Tapez la note. 4. Lorsque cela est fait, appuyez sur pour enregistrer. 9.15 Calendrier Utilisez Calendrier marquer les événements importants et définir des rappels. 1. Depuis l'écran d'accueil, appuyez sur > Calendrier. 2. Pour créer un nouvel événement, appuyez sur . 3.
Chapitre 10: Gérer votre téléphone Chapitre 10: Gérer votre téléphone 10.1 Paramétrage de l'appareil Depuis l'écran d'accueil, appuyez sur Paramètres ou faites glisser la barre d'état et appuyez sur pour afficher et ajuster les paramètres de votre appareil. Paramètre Description Wi-Fi Gérer les connexions Wi-Fi, numériser et se connecter aux réseaux Wi-Fi disponibles. Bluetooth Gérer les connexions Bluetooth, définir le nom de l'appareil et se connecter à d'autres appareils Bluetooth.
Chapitre 10: Gérer votre téléphone Paramètre Description Son & Vibration Sonnerie de message Définir votre sonnerie de message par défaut. Sonnerie de notification par défaut Définir votre sonnerie de notification de message par défaut. Utiliser également le vibreur pour les appels Activer ou désactiver les vibrations lors de la réception d'un appel. L'écran vibre lors de la pression du doigt Activer ou désactiver les vibrations lors de la sélection d'éléments sur l'écran.
Chapitre 10: Gérer votre téléphone Paramètre Description S Renforcer Accélération intelligente Optimiser les performances du système. Défragmentation Défragmenter le stockage. Gestion des applications de fond Activer ou désactiver des applications en cours d'exécution lorsque l'écran est éteint et activer ou désactiver un thème. Gestion du démarrage automatique Activer ou désactiver les applications de démarrage automatique et activer ou désactiver un thème.
Chapitre 10: Gérer votre téléphone Paramètre Description Verrouiller l'écran et l'empreinte digitale Verrouillage d'écran Réglez l'écran de verrouillage en faisant glisser l'écran ou avec un schéma de déverrouillage, un code PIN ou un mot de passe. Empreinte digitale Configurer la reconnaissance d'empreinte digitale. Smart Lock Cette option devient disponible après avoir défini un verrouillage d'écran. Réglez votre téléphone déverrouillé lorsqu'il est en sécurité avec vous.
Chapitre 10: Gérer votre téléphone 10.2 Modification des paramètres de base Date et heure Pour régler automatiquement la date et l'heure 1. Depuis l'écran d'accueil, appuyez sur Paramètres ou faites glisser la barre d'état et appuyez sur . 2. Appuyez sur Autres paramètres > Date & heure. 3. Appuyez sur Date et heure automatiques pour régler automatiquement la date et l'heure en fonction du réseau. REMARQUE : Pour régler manuellement la date et l'heure, appuyez sur le curseur Marche/Arrêt.
Chapitre 10: Gérer votre téléphone Paramètres d'affichage Les paramètres d'affichage de l'appareil affectent la batterie et le niveau de puissance externe. Éteignez le rétroéclairage lorsque le téléphone est inactif 1. Depuis l'écran d'accueil, appuyez sur Paramètres ou faites glisser la barre d'état et appuyez sur . 2. Appuyez sur Afficher. 3. Appuyez sur Veille. 4. Sélectionnez la durée souhaitée. Votre réglage est automatiquement sauvegardé. Ajuster la luminosité 1.
Chapitre 10: Gérer votre téléphone 10.3 L'utilisation du réseau sans fil et du réseaux Votre téléphone vous permet de gérer le Wi-Fi, les données mobiles, Bluetooth, le mode avion et le hotspot. 1. Depuis l'écran d'accueil, faites glisser la barre d'état vers le bas, puis faites glisser à nouveau vers le bas pour afficher toutes les autres icônes liées au réseau. 2. Effectuez l'une des actions suivantes (si nécessaire) : • Pour activer ou désactiver le Wi-Fi, appuyez sur Wi-Fi.
Chapitre 10: Gérer votre téléphone 10.5 Configuration de la limite d’utilisation des données mobiles Vous pouvez définir la limitation de l'utilisation des données et définir un rappel lorsque vous atteignez la limite maximale. 1. Depuis l'écran d'accueil, appuyez sur Paramètres ou faites glisser la barre d'état et appuyez sur . 2. Appuyez sur Config SIM > Contrôle du trafic de données. 3. Balayez vers la gauche ou la droite pour sélectionner la carte SIM, puis appuyez sur . 4.
Chapitre 10: Gérer votre téléphone 6. Pour afficher l'utilisation des données utilisée par les applications, sur l'écran Contrôle du trafic de données, appuyez sur Classement de l'utilisation des données. 10.6 Réinitialiser l'appareil Vous pouvez réinitialiser votre téléphone à ses paramètres d'usine par défaut. 1. Depuis l'écran d'accueil, appuyez sur Paramètres ou faites glisser la barre d'état et appuyez sur . 2. Appuyez sur Autres paramètres > Sauvegarde et réinitialisation. 3.
Chapitre 11: Données techniques Chapitre 11: Données techniques Élément Descriptions Système opérateur Android 7.0 Écran LCD 5.
Chapitre 11: Données techniques Liste des logiciels Version du système d'exploitation du téléphone portable Version du système d'exploitation du PC 7,0 Windows 10 32bit/64 bit Aucun besoin Pris en charge Windows 7 32bit/64 bit Aucun besoin Pris en charge Windows Vista 32bit/64 bit Aucun besoin Pris en charge Windows XP 32bit SP3 Installez le pilote fourni. Pris en charge Windows XP 32bit SP1/SP2 1. Mise à jour Windows XP Service Pack 3 2. Installez le pilote fourni.
Chapitre 11: Données techniques 71
Chapitre 11: Données techniques Installation du pilote 1. Allumez votre appareil et connectez-le à votre ordinateur à l'aide du câble USB. 2. À partir du bureau Windows, double-cliquez sur Mon ordinateur et localisez le Lecteur CD. 3. Parcourez et double-cliquez sur setup.exe. 4. Suivez les instructions à l'écran pour terminer l'installation du pilote.
Informations importantes Veuillez lire avant de continuer • • • • • • • • • • • • • • • • • • • • Veillez à garder la broche d'éjection de la carte SIM hors de la portée des enfants. Une ingestion accidentelle pourrait provoquer une suffocation ou des blessures. NE placez PAS d'objets tranchants sur l'appareil, car ils pourraient rayer l'écran. NE laissez PAS tomber votre appareil et ne le soumettez pas à des chocs violents.
• • • • • • • La température de l'appareil peut augmenter pendant que le processeur est occupé à gérer des activités consommatrices de ressources telles que le décodage vidéo haute résolution. Le mécanisme de protection SW assurera l'arrêt de la charge lorsque la température dépassera le seuil prédéfini et préparera l'arrêt si nécessaire. Ne vous inquiétez pas. Utilisez un système mains-libres sans fil (écouteurs, casque) avec un équipement Bluetooth basse consommation.
Informations sur le droit d'auteur • • • • • • Copyright© Sharp Corporation, 2012. Tous droits réservés. Ce produit dispose d'une plate-forme Android ™ basée sur Linux, qui peut être étendue par une variété d'applications SW basées sur JME. Android est une marque commerciale de Google LLC.
Informations sur les droits de propriété intellectuelle Le droit à l'ensemble des technologies et des produits qui composent cet appareil appartient à leurs propriétaires d'origine. Ce produit dispose d'une plate-forme Android basée sur Linux, qui peut être étendue par une variété de logiciels d'application basés sur Java-Script. La marque et les logos Bluetooth® sont des marques déposées appartenant à BluetoothSIG, Inc. et toute utilisation de ces marques par SHARP Corporation est sous licence.
électriques au moment de l'élimination nous permettra de contribuer à la conservation des ressources naturelles. De plus, un recyclage adéquat des équipements électroniques et électriques permettra d'assurer la sécurité de la santé humaine et de l'environnement.
Puissance d'émission maximale Mode Unité d'alimentation dirigée maximale (dBm) GSM900 33.00 GSM1800 30.50 AMCR large bande Bande I 23.00 AMCR large bande Bande VIII 23.00 LTE Bande 1 23.00 LTE Bande 3 23.00 LTE Bande 7 23.00 LTE Bande 8 23.00 LTE Bande 20 23.00 2.4GHz Wi-Fi 18,00 v3.0+ EDR 6,00 v4.0 LE -0,50 Fabricant : UMC Poland sp. z o.
UMC Poland Sp. z o.o. Ostaszewo 57B, 87-148 Łysomice, Poland SHARP CORPORATION OSAKA, JAPAN SMP/MAN/0004 www.sharpconsumer.