ENGLISH BD-HP20U FRANÇAIS BD-HP20U MODE D'EMPLOI MANUAL DE OPERACIÓN Sharp Plaza, Mahwah, New Jersey 07430-2135 SHARP CORPORATION Printed in Malaysia Imprimé en Malaisie Impreso en Malasia TINS-D348WJQZ 07P09-MA-NG OPERATION MANUAL MODE D'EMPLOI MANUAL DE OPERACIÓN ESPAÑOL OPERATION MANUAL SHARP ELECTRONICS CORPORATION BLU-RAY DISC PLAYER LECTEUR DE DISQUE BLU-RAY REPRODUCTOR DE DISCOS BLU-RAY
OPERATION MANUAL ENGLISH
ENGLISH DEAR SHARP CUSTOMER Thank you for your purchase of the Sharp Blu-ray Disc Player. To ensure safety and many years of trouble-free operation of your product, please read the Important Safety Instructions carefully before using this product. IMPORTANT SAFETY INSTRUCTIONS Read these instructions. Keep these instructions. Heed all warnings. Follow all instructions. Do not use this apparatus near water. Clean only with dry cloth. Do not block any ventilation openings.
IMPORTANT SAFETY INSTRUCTIONS • Water and Moisture — Do not use this product near water - for example, near a bath tub, wash bowl, kitchen sink, or laundry tub; in a wet basement; or near a swimming pool; and the like. • Stand — Do not place the product on an unstable cart, stand, tripod or table. Placing the product on an unstable base can cause the product to fall, resulting in serious personal injuries as well as damage to the product.
IMPORTANT SAFETY INSTRUCTIONS • To prevent fire or shock hazard, do not place the AC cord under the product or other heavy items. • Turn off the main power and unplug the AC cord from the wall outlet before handling. • To clean the outer cabinet, periodically wipe it with a soft cloth. • Do not use chemicals for cleaning. It may damage the cabinet finish. n Introduction 3 BD-HP20U_en_a.
Contents n Introduction DEAR SHARP CUSTOMER ....................... 1 IMPORTANT SAFETY INSTRUCTIONS .... 1 Contents ..................................................... 4 What would you like to do with this Player? ...................................................... 5 About Discs .......................................... 6 – 7 About Disc Contents ................................. 8 Important Information ............................... 9 Getting Started ........................................
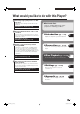
What would you like to do with this Player? Watching high quality movies on Bluray discs This Player offers full high-definition Blu-ray disc playback. BD/DVD Video Playback (p. 24) Enjoying different kinds of discs and contents Refer to “Getting Started” (p. 10) to prepare for watching your discs. nIntroduction (pp. 1-12) n Use this Player to enjoy various types of optical discs such as DVDs and CDs that contain various multimedia content.
About Discs A Quick Reference for Selecting Discs The following is a quick reference to see what discs can/ cannot be used with this Player. Each disc has a compatible Recording Format(s) which may present some constraints. For detailed and exact information, read the explanation in pages 6 and 7. ■ Can Play Back BD Video (with Region code “A” and “ALL” only) BD-RE Ver.2.1 1L (finalized disc only) BD-R Ver.1.
About Discs Discs that Cannot Be Used with This Player ■ The following discs cannot be played back or will not play back properly on this Player. If such a disc is mistakenly played back, speaker damage may occur. Never attempt to play back these discs. CDG, Video CD, Photo CD, CD-ROM, CD-TEXT, SVCD, SACD, PD, CDV, CVD, DVD-RAM, DVD-Audio BD-RE Ver. 1.0, BD-RE DL, CD-MP3, CD-WMA ■ Discs with unusual shapes cannot be played.
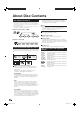
About Disc Contents MPEG Title, Chapter and Track • Blu-ray discs and DVDs are divided into “Titles” and “Chapters”. If the disc has more than one movie on it, each movie would be a separate “Title”. “Chapters”, on the other hand, are subdivisions of titles. (See Example 1.) • Audio CDs are divided into “Tracks”. You can think of a “Track” as one tune on an Audio CD. (See Example 2.
Important Information Disc Precautions Be Careful of Scratches and Dust • BD, DVD and CD discs are sensitive to dust, fingerprints and especially scratches. A scratched disc may not be able to be played back. Handle discs with care and store them in a safe place. Proper Disc Storage Place the disc in the center of the disc case and store the case and disc upright. Avoid storing discs in locations where there are large amounts of dust or moisture. U.S. Patent Nos.
Getting Started Step 1: Unpacking Make sure the following accessories are provided with the product. Remote control unit “AAA” size battery (g2) AC cord AV cable Step 2: Selecting equipment to connect Connection varies with the equipment used. Refer to Connection (Pages 14-19). Turn off the devices before connecting. Step 3: Playing back discs Play back a Blu-ray disc after connecting the Player to your favorite equipment. Refer to Disc Playback.
Major Components Main Unit (Front) 1 2 3 7 6 POWER (p. 22) Remote control sensor (p. 20) Disc tray (p. 24) OPEN/CLOSE (p. 24) DVD/CD mode indicator (p. 22) BD mode indicator (p. 22) 7 8 9 Introduction 9 8 1 2 3 4 5 6 n 5 4 ON indicator (p. 22) STANDBY indicator (p. 22) Front panel display (p. 22) Main Unit (Rear) 9 1 2 3 4 1 2 3 4 5 6 7 10 5 COMPONENT VIDEO OUT jacks (p. 15) S-VIDEO output jack (p. 16) VIDEO output jack (p. 16) 2CH AUDIO output jacks (p. 19) 5.1CH AUDIO OUT jacks (p.
Major Components Remote Control Unit 1 16 2 3 17 18 4 19 5 6 7 8 9 10 11 12 13 14 15 20 21 22 23 24 25 26 27 28 29 32 Buttons under the cover 30 1 2 3 4 5 6 7 8 9 10 11 12 13 14 15 16 17 18 19 20 21 22 23 24 25 26 27 28 29 30 31 31 32 33 POWER (p. 22) OPEN/CLOSE (p. 24) TOP MENU, TITLE LIST (pp. 25, 26) DISPLAY (p. 21) Cursor buttons (a/b/c/d), ENTER (pp. 22, 36) EXIT (pp. 22, 36) A (Red), B (Green), C (Blue), D (Yellow) (p. 27) AUDIO (p. 29), SUBTITLE (p. 29), ANGLE (p.
Introduction to Connections This Player is equipped with the terminals/jacks listed below. Find the corresponding terminal/jack on your video equipment. Using the supplied cable or commercially available cables, connect the video first. Then connect the audio.
Video Connections Connecting to the HDMI Terminal You will enjoy high quality digital picture and sound through the HDMI terminal. When you use AQUOS LINK, make sure to use a certified HDMI cable. STEPS 1: Be sure to turn off this Player and the equipment before making any connections. 2: Firmly connect an HDMI cable (commercially available) to the HDMI terminals (1 and 2). Caution: • HDMI output and Component Video output can not be used at the same time.
Video Connections Connecting to the Component Jacks You will enjoy accurate color reproduction and high quality images through the component jacks. STEPS 1: Be sure to turn off this Player and the equipment before making any connections. 2: Firmly connect a component video cable (commercially available) to the component jacks (1 and 2). Caution: • HDMI output and Component Video output can not be used at the same time.
Video Connections Connecting to the S-video or Video Jack You will enjoy the images through the S-video or video jack. STEPS 1: Be sure to turn off this Player and the equipment before making any connections. 2: Firmly connect an S-video cable (commercially available) or AV cable (supplied) to the S-video or video jacks (1 and 2, or 3 and 4). This Player (Yellow) VCR Connect directly Blu-ray Disc Player 3 1 2 To S-VIDEO jack To VIDEO jack NOTE • Connect the Blu-ray disc player to LCD TV directly.
Audio Connections Connecting 5.1 ch Speakers through an Amplifier You can connect up to 5 speakers and a subwoofer to the 5.1CH AUDIO OUT jacks using an amplifier. STEPS 1: Be sure to turn off this Player and the equipment before making any connections. 2: Firmly connect the audio cables to the 5.1CH AUDIO OUT jacks.
Audio Connections Connecting to the Digital Audio Terminal or Jack You can connect audio equipment to the DIGITAL AUDIO OUT terminal or jack. STEPS 1: Be sure to turn off this Player and the equipment before making any connections. 2: Firmly connect an optical digital cable (commercially available) to the optical digital audio terminals or a coaxial digital cable (commercially available) to the coaxial digital audio jacks (1 and 2, or 3 and 4). This Player • When using COAXIAL/OPTICAL output, 5.
Audio Connections Connecting the Audio Jacks You can connect audio equipment or the TV to the 2CH AUDIO output jacks. STEPS 1: Be sure to turn off this Player and the equipment before making any connections. 2: Firmly connect the AV cable (supplied) to the audio jacks (1 and 2). This Player o Connection (Red) (White) 1 To 2CH AUDIO output jacks AV cable (supplied) To audio input jacks 2 (White) (Red) TV Amplifier Audio equipment with audio jacks After connecting • Load a disc and start playback.
Before Starting Playback Loading the Batteries in the Remote Control Approximate operating range of remote control Remote control sensor 1 Press down on the tab in the direction of the arrow to remove the battery cover. 30º 30º 7m Remote control unit 2 Load the two R-03 size batteries (“AAA” size, UM/SUM-4) supplied with the remote control unit. Make sure that the battery poles m and n are positioned as indicated.
Before Starting Playback Setting the Remote Control Code • 3 types of remote control codes operate this Player: RC-1, RC-2 and RC-3. If you operate this Player by remote control along with another SHARP Blu-ray Disc Player or DVD Player placed next to it simultaneously, switching the remote control code (both the Player and remote control) to one of the signals (RC-1, RC-2 or RC-3) will let you operate only with this Player. • Make sure to set the Player and remote control to the same remote code.
Before Starting Playback Turning the Power On Turning the power on Press POWER on the remote control or on the Player to turn on the power of the Player. Entering standby Language Setting Changing the on-screen display language 1 Press SETUP to display the SETUP MENU screen. 2 Press a/b/c/d to select “ON SCREEN LANGUAGE”, then press ENTER. Press POWER on the remote control or on the Player to enter standby. • If you press POWER again immediately after entering standby, the Player may not turn on.
Before Starting Playback Turning Off the LCD Backlight and Indications If you feel that the indicators on the Player are too bright when watching movies, you can turn them off except for the ON indicator. Quick operation Press LIGHT to turn the LCD backlight on or off. SETUP MENU operation 1 Press SETUP to display the SETUP MENU screen. 2 Press a/b/c/d to select “SETTINGS”, then press ENTER. 3 MENU Press a/b to select “FRONT DISPLAY/LED”, then press ENTER.
BD/DVD/CD Playback This section explains playback of commercially available BD Video and DVD Video discs (like movies), CDs, and recorded DVD-RW/R discs. Loading a Disc 1 2 BD VIDEO 1 Press OPEN/CLOSE to open the disc tray. OPEN/CLOSE DVD VIDEO Load a disc. • Playback may begin automatically, depending on the disc. Press POWER to turn on the power. POWER 3 BD/DVD Video Playback 2 Press dPLAY. • Playback begins from the first title. • The menu may be displayed first, depending on the disc.
BD/DVD/CD Playback Using the disc menu BD/DVD Menus BD VIDEO Example: Select “SUBTITLE LANGUAGE”. 1 DVD VIDEO • This section explains how to play back a BD/DVD video disc with a top menu or disc menu. • The titles listed in the top menu and a disc guide (for options like subtitles and audio languages) are given in the disc menu. Press POP-UP MENU. • The disc menu screen is displayed. 2 Press a/b to select “SUBTITLE LANGUAGE”, then press ENTER.
BD/DVD/CD Playback BD-R/-RE/DVD-R/-RW Playback BD-R BD-RE DVD-RW DVD-R You can play back a disc recorded. (finalized disc only) Playback from the beginning 1 2 Load a disc recorded in Video mode. Press dPLAY. • Playback begins from title 1. Playback by selecting a title 1 2 Load a disc recorded in Video mode. Press TOP MENU. • The TITLE LIST screen is displayed.
BD/DVD/CD Playback Playback by selecting a PLAY LIST Playing back the title you stopped while being played. 1 Load a disc recorded in Video mode. 1 2 Press TOP MENU. • The TITLE LIST screen is displayed. 3 Press C (Blue), then press ENTER. • The PLAY LIST screen is displayed. MENU 5/21 MENU 5/21 FRI 9:30 AM PROGRAM 1 110 MIN. FRI FRI PROGRAM 1 110 MIN. PLAYLIST FROM CONTINUED 110 MIN. 110 MIN. D Press a/b to select the title, then press ENTER Press H STOP to stop playback.
Playback Functions BD VIDEO BD-R DVD VIDEO BD-RE DVD-R Repeat Playback of a Title or Chapter (Repeat Playback) DVD-RW AUDIO CD Fast Forward/Reverse (Search) Fast Forward/Reverse functions when G REV or J FWD is pressed during playback. Example: When J FWD is pressed • The search speed will cycle as follows each time you press the button. When playing back a DVD • You cannot fast forward or fast reverse from one title and continue to another title (except when playing audio CDs).
Playback Functions Partial Repeat Playback (Repeat Playback of a Specified Part) 1 2 Press REPEAT during playback. Press c/d to select “SCENE SELECTION”, then press ENTER. Switching Audio You can change the audio output channel using AUDIO. Each time AUDIO is pressed, the audio channels change as follows: BD VIDEO DVD VIDEO The audio track currently being played back will be displayed.
Playback Functions Switching the Angle If multiple angles are recorded, you can switch between them. 1 Press ANGLE during playback. • The display indicates the angle number currently being played back. Each time you press ANGLE, the angle switches. • “– –” is displayed if a disc is recorded with only one angle. VID. 1 –– To return to the previous angle, press ANGLE to cycle through the angles until you return to the original angle.
Settings During Playback Function control operation procedure Function Control This allows you to adjust various settings at once, like subtitles, angle settings and the title selection for Direct Playback. You can adjust the video and audio to suit your preferences. The operations are the same for BD and DVD. 1 • The Function Control screen is displayed on the TV. BD VIDEO 1/3 5 / 25 00 : 20 : 30 2 ENGLISH 1 1 5 . 1c h OFF Function control screen 1 BD VIDEO 1/3 5 / 25 00 : 20 : 30 2 ENGLISH 1 1 5 .
Settings During Playback Functions which can be set Title Number (Direct Title Skip) • Shows the title number being played back. You can skip to the start of the title. • To skip to the start of a selected title, press the Number buttons to enter the title number when this option is highlighted. Chapter Number (Direct Chapter Skip) • Shows the chapter number being played back. You can skip to the start of the chapter.
SETTINGS AUDIO VIDEO SETTINGS TV ASPECT RATIO • If you switch your TV (i.e. because you have bought a new one) and the screen aspect ratio of the connected TV changes, you will have to change the “TV ASPECT RATIO” setting. • You can set the screen aspect ratio of the connected TV, and adjust the video output. • Select “TV ASPECT RATIO” from “AUDIO VIDEO SETTINGS”.
SETTINGS HDMI AUTO DETECTION • This automatically sets the player’s video output to HDMI when it detects this signal.
SETTINGS 2 This sets the audio output mode for DIGITAL AUDIO OUT (COAXIAL jack / OPTICAL terminal) when selecting OPTICAL/COAXIAL DIGITAL OUTPUT or 2ch AUDIO OUTPUT MENU DOLBY DIGITAL [AUDIO VIDEO SETTINGS - AUDIO OUT] TV ASPECT RATIO COMPONENT VIDEO OUT HDMI VIDEO OUT HDMI AUTO DETECTION AUDIO OUT DYNAMIC RANGE CONTROL DOLBY DIGITAL BITSTREM DTS BITSTREM AAC BITSTREM DTS AAC PCM (STEREO) PCM (STEREO) PCM (STEREO) BITSTREAM PCM (STEREO) CONFIRM Selected item DOLBY DIGITAL Description BITSTREAM •
SETTINGS Basic Operation for AUDIO VIDEO SETTINGS 4 Press a/b to select “TV ASPECT RATIO”, then press ENTER. 5 Press c/d to select the desired item, then press ENTER. Example: Setting “TV ASPECT RATIO” under “AUDIO VIDEO SETTING” MENU 1 Press SETUP to display the SETUP MENU screen. 2 Press a/b/c/d to select “SETTINGS”, then press ENTER.
SETTINGS Basic Operation for SPEAKER SETTINGS SPEAKER SETTINGS About speakers You can use your speakers with this Player through an amplifier. You can set the speaker size, distance from the viewer, and output level for each speaker. 1 Press SETUP to display the SETUP MENU screen. Using multi channel speakers 2 Press a/b/c/d to select “SETTINGS”, then press ENTER.
SETTINGS 5 Press a/b/c/d to select the speaker, then press ENTER. MENU [SPEAKER SETTINGS] 0dB SW 12t/0dB R 12ft/0dB C LS 6ft/0dB 12t/0dB R RS 6ft/0dB SIZE DISTANCE LEVEL LARGE 12ft 0dB Selectable size L/R LARGE*, SMALL C/RS/LS LARGE*, SMALL, NONE SW YES*, NO 12t/0dB R FINISH NOTE • The speakers L and R, LS and RS move relative to one another. • The speakers L and R are automatically set to “LARGE” when the subwoofer SW is set to “NO”, even after speakers L and/or R are set to “SMALL”.
SETTINGS Resetting the setup • When the sound volume of each speaker is uneven, reset the settings separately. • As for a subwoofer, you can adjust LEVEL only. 9 Press ENTER while the TEST sound is present from the speaker that you want to reset the setting. 10 Press c/d to select the “LEVEL”, then press a/b to preferred setting, then press ENTER. 11 Repeat steps 9 and 10 until each speaker is reset. Completing the settings 12 Press a/b/c/d to select “FINISH”, then press ENTER.
SETTINGS QUICK START • This turns the QUICK START function on and off. • When the QUICK START function is on, the startup time of the player is reduced when resuming playback from standby. • However, power consumption will increase.
SETTINGS PLAYBACK SETTING PARENTAL CONTROL • This lets you set the Parental Control depending on the disc content. • For DVD-video: 8 and OFF: All DVD-video can be played. 1-7: Prohibits play of DVD-video with corresponding ratings recorded on them. • For BD-ROM: NO LIMIT: All BD-video can be played. 0-99 year(s): Prohibits play of BD-video with corresponding ratings recorded on them. • Parental Control Level cannot be set if a password has not been set.
SETTINGS Country Code List USA UK HOLLAND HONG KONG TAIWAN CANADA ITALY NORWAY SINGAPORE PHILIPPINE JAPAN SPAIN DENMARK THAILAND AUSTRALIA GERMANY SWISS FINLAND MALAYSIA RUSSIA FRANCE SWEDEN BELGIUM INDONESIA CHINA KK Kazakh OM Afan (Oromo) SW Swahili Language Code List AA Afar EU Basque AB Abkhazian FA Persian KL Greenlandic OR Oriya TA Tamil AF Afrikaans FI Finnish KM Cambodian PA Panjabi TE Telugu AM Ameharic FJ Fiji KN Kannada PL Polish TG Tajik AR Arabic FO
SETTINGS Basic Operation for PLAYBACK SETTING 6 Example: Setting “PARENTAL CONTROL” under “PLAYBACK SETTING”. Press c/d to select parental control level for DVD video, then press ENTER. Press c/d to select parental control level for BD-ROM, then press ENTER. Press c/d to select the country code, then press ENTER. 1 Press SETUP to display the SETUP MENU screen. MENU 2 Press a/b/c/d to select “SETTINGS”, then press ENTER.
SETTINGS FRONT DISPLAY/LED • If you feel that the indicators on the Player are too bright when watching movies, you can turn them off except for the ON indicator. MENU [FRONT DISPLAY / LED] MENU ON, OFF [FRONT DISPLAY/LED] AUDIO VIDEO SETTINGS SPEAKER SETTINGS QUICK START AUTO POWER OFF AQUOS LINK PLAYBACK SETTING FRONT DISPLAY / LED VERSION SOFTWARE UPDATE SYSTEM RESET ON OFF VERSION • When you select “VERSION”, the system software version is displayed.
SETTINGS SOFTWARE UPDATE This function allows software updates by inserting a USB memory device with the update file into the SERVICE terminal on this player. Regarding how to obtain the software update file, please call 1-800-BE-SHARP. CAUTION • Do not remove the USB memory device or unplug the AC cord while the software is being updated. 1 Insert the USB memory device with the update file into the SERVICE terminal on rear of this player. 2 Press SETUP to display the SETUP MENU screen.
SETTINGS 8 Press ENTER to start updating. • The screen becomes dark for a while until the update screen can be displayed. Please wait for the update screen to appear. Do not unplug the AC cord. THE PICTURE WILL TEMPORARILY GO DARK UNTIL THE SOFTWARE UPDATE DISPLAY APPEARS. WAIT SEVERAL MINUTES AND DO NOT UNPLUG THE AC CORD. OK NOW UPDATING * DO NOT UNPLUG AC CORD.
Troubleshooting The following problems do not always suggest a defect or malfunction of this Player. Refer to the problems and lists of possible solutions below before calling for service. The Player power cannot be turned on. • Is the power cord firmly plugged into the AC outlet? • When the power cord is plugged into an AC outlet, press and hold POWER on the Player until “ ” appears on the front panel display. Then, after the STANDBY indicator is lit, turn on the power.
Troubleshooting Square noise (mosaic) appears on the screen. • Blocks in images may be visible in scenes with rapid movement due to the characteristics of digital image compression technology. Video stops. • Has the Player been subjected to shock or impact? Are you using it in an unstable location? The Player will stop if it senses shock or vibration. Left and right channels of audio are reversed, or sound comes out of only one side.
On-screen Error Messages Messages Relating to BD and DVD • The following messages appear on the TV screen in case the disc you tried to playback is not appropriate or the operation is not correct. Error message Possible Error CANNOT PLAY. • The disc cannot be played back with this Player. INCOMPATIBLE DISC. • If you load a disc which cannot be played with this Player (i.e. a scratched disc), or if you load a disc upside down, this message will appear, and the disc tray will automatically pop out.
Glossary BD-J application DTS The BD-ROM format supports Java for interactive functions. “BD-J” offers content providers almost unlimited functionality when creating interactive BD-ROM titles. This is a digital sound system developed by DTS, Inc. for use in cinemas. This system uses 6 audio channels and provides accurate sound field positioning and realistic acoustics. (By connecting a DTS Digital Surround decoder, you can also listen to DTS Digital Surround sound.
Glossary Linear PCM Sound Resume playback (page 24) Linear PCM is a signal recording format used for Audio CDs and on some DVD and Blu-ray discs. The sound on Audio CDs is recorded at 44.1 kHz with 16 bits. (Sound is recorded between 48 kHz with 16 bits and 96 kHz with 24 bits on DVD video discs and between 48 kHz with 16 bits and 192 kHz with 24 bits on BD video discs.
Specifications General Power supply AC 120V, 60Hz Power consumption (Normal) 25 W Power consumption (Standby) 0.5 W (When “FRONT DISPLAY/LED” is set to “ON”) Dimensions Approx. 16 59/64 X 2 11/16 X 13 3/16 inch (W x H x D) Weight Approx. 4.0 kg Operating temperature 5°C to 35°C Storage temperature –20°C to 55°C Operating humidity 10 % to 80 % (no condensation) TV systems NTSC system, 525 lines, 60 fields Playback Playable discs BD-ROM, BD-RE (Ver. 2.1 1L), BD-R (Ver. 1.
CONSUMER LIMITED WARRANTY (Valid for warranty service in the U.S.
54 BD-HP20U_en_f.
OPERATION MANUAL ENGLISH
ENGLISH BD-HP20U FRANÇAIS BD-HP20U MODE D'EMPLOI MANUAL DE OPERACIÓN Sharp Plaza, Mahwah, New Jersey 07430-2135 SHARP CORPORATION Printed in Malaysia Imprimé en Malaisie Impreso en Malasia TINS-D348WJQZ 07P12-MA-NG OPERATION MANUAL MODE D'EMPLOI MANUAL DE OPERACIÓN ESPAÑOL OPERATION MANUAL SHARP ELECTRONICS CORPORATION BLU-RAY DISC PLAYER LECTEUR DE DISQUE BLU-RAY REPRODUCTOR DE DISCOS BLU-RAY