ENGLISH BD-HP24U BD-HP24U Printed in China Impreso en China Imprimé en Chine TINS-E549WJQZ 10P01-CH-NG MANUAL DE MANEJO MODE D'EMPLOI FRANÇAIS SHARP CORPORATION OPERATION MANUAL ESPAÑOL Sharp Plaza, Mahwah, New Jersey 07495-1163 OPERATION MANUAL / MANUAL DE MANEJO / MODE D’EMPLOI SHARP ELECTRONICS CORPORATION BLU-RAY DISC/DVD PLAYER REPRODUCTOR DE DISCO BLU-RAY/DVD LECTEUR DE DISQUES BLU-RAY/DVD
OPERATION MANUAL ENGLISH ENGLISH • This Player is classified as a CLASS 1 LASER product. • The CLASS 1 LASER PRODUCT label is located on the rear cover. • This product contains a low power laser device. To ensure continued safety do not remove any cover or attempt to gain access to the inside of the product. Refer all servicing to qualified personnel.
Introduction Contents Introduction Contents ............................................................................. 2 What would you like to do with this Player? ................... 3 DEAR SHARP CUSTOMER ............................................... 4 IMPORTANT SAFETY INSTRUCTIONS ........................ 4–5 About Media Types ........................................................ 6–8 Blu-ray Disc ..................................................................
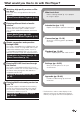
What would you like to do with this Player? Watching high quality movies on Bluray discs This Player offers full high-definition Blu-ray disc playback. Video/Picture/Music Playback (p. 24) Enjoying different kinds of media sources Use this player to enjoy video, picture or music content from various types of media sources such as DVDs, USB memory devices and via the internet. What to do first: Refer to “Getting Started” (p. 10) to prepare for using this player. Introduction (pp.
DEAR SHARP CUSTOMER Thank you for your purchase of the SHARP Blu-ray Disc Player. To ensure safety and many years of trouble-free operation of your product, please read the Important Safety Instructions carefully before using this product. IMPORTANT SAFETY INSTRUCTIONS Electricity is used to perform many useful functions, but it can also cause personal injuries and property damage if improperly handled. This product has been engineered and manufactured with the highest priority on safety.
IMPORTANT SAFETY INSTRUCTIONS Introduction • Water and Moisture—Do not use this product near water - for example, near a bath tub, wash bowl, kitchen sink, or laundry tub; in a wet basement; or near a swimming pool; and the like. • Stand—Do not place the product on an unstable cart, stand, tripod or table. Placing the product on an unstable base can cause the product to fall, resulting in serious personal injuries as well as damage to the product.
About Media Types Blu-ray Disc Blu-ray Disc is the ultimate next generation optical media format, offering the following key features: • Largest capacity (25 GB single layer – 50 GB dual layer) – with over 5 times the amount of content possible with current DVDs, particularly well suited for high definition feature films with extended levels of interactive features • Pristine picture quality with the capability for full high definition 1920 x 1080p resolution • Best audio possible with uncompressed surround
About Media Types The following CD-RW/R discs cannot be played. • Discs on which data has not been recorded cannot be played back. • Discs recorded in a format other than an Audio CD and JPEG/MP3 file format cannot be played back. • Discs may not be played back depending on their recording status or the status of the disc itself. • Discs may not be played back depending on their compatibility with this Player.
About Media Types About Disc Contents DTS BD Video Linear PCM DTS is a digital sound system developed by DTS, Inc. for use in cinemas. Enjoy BD-specific functions including BONUSVIEW (BD-ROM Profile 1 Version 1.1), such as picture-in-picture, and BD-LIVE (page 26). For the BD video discs compatible with BONUSVIEW/BDLIVE, you can enjoy additional contents by copying the data from the discs or downloading it via the internet.
Important Information Disc Precautions Be Careful of Scratches and Dust • BD, DVD and CD discs are sensitive to dust, fingerprints and especially scratches. A scratched disc may not be able to be played back. Handle discs with care and store them in a safe place. Proper Disc Storage Place the disc in the center of the disc case and store the case and disc upright. Do not drop discs or subject them to strong vibrations or impacts.
Getting Started Step 1: Unpacking Make sure the following accessories are provided with the product. Remote control unit “AA” size battery (g2) AC cord Page 19 Page 19 AV cable Page 12 and 19 Page 16 and 17 Step 2: Selecting equipment to connect Connection varies with the equipment used. Refer to Connection (Pages 13–18). Turn off the devices before connecting.
Major Components Main Unit (Front) 1 2 3 5 6 7 8 9 10 11 12 AQUOS PURE MODE indicator (pp. 20, 22) 10 Remote control sensor (p. 19) 11 Front panel display (p. 20) 12 BD/DVD/CD mode indicator (p. 20) 9 1 2 3 4 OPEN/CLOSE (p. 24) Door flap Disc tray (p. 24) ON/STANDBY indicator (p. 20) 5 6 7 8 POWER (p. 20) d PLAY (p. 24) H STOP (p. 24) F PAUSE (p. 29) Introduction 4 Main Unit (Rear) HDMI OUT terminal (p. 14) ETHERNET terminal (p. 18) BD STORAGE/SERVICE terminal BD STORAGE (pp.
Major Components Remote Control Unit 1 2 3 16 17 4 5 6 7 8 9 10 18 19 20 21 22 11 12 23 1 2 3 4 5 6 7 8 9 10 11 12 13 14 15 16 17 18 19 20 21 22 23 24 25 POWER (p. 20) m OPEN/CLOSE (p. 24) AUDIO (p. 36), SUBTITLE (p. 36) Number buttons (p. 39) REPEAT (p. 35) T SKIP/k (pp. 27, 34) U SKIP/l (pp. 27, 34) F PAUSE (pp. 29, 34) d PLAY (p. 24) TOP MENU/TITLE LIST (pp. 25, 27) Cursor buttons (a/b/c/d), ENTER (pp. 21, 40) EXIT (pp. 20, 40) A (Red), B (Green), C (Blue), D (Yellow) (pp.
Connection Introduction to Connections This Player is equipped with the terminals/jacks listed below. Find the corresponding terminal/jack on your video equipment. Using the supplied cable or commercially available cables, connect the video first. Then connect the audio.
Video Connections Connecting to the HDMI Terminal • You can enjoy high quality digital picture and sound through the HDMI terminal. • See page 52 for information on the output of next generation audio formats. • When you use AQUOS LINK, make sure to use a certified HDMI cable. STEPS 1 Be sure to turn off this Player and the equipment before making any connections. 2 Firmly connect an HDMI cable (commercially available) to the HDMI terminals (1 and 2).
Video Connections Connecting to the Component Jacks You can enjoy accurate color reproduction and high quality images through the component jacks. STEPS 1 Be sure to turn off this Player and the equipment before making any connections. 2 Firmly connect a component video cable (commercially available) to the component jacks (1 and 2).
Video Connections Connecting to the Video Jack You can enjoy the images through the video jack. STEPS 1 Be sure to turn off this Player and the equipment before making any connections. 2 Firmly connect an AV cable (supplied) to the video jacks (1 and 2). This Player (Yellow) Yellow VCR Connect directly Blu-ray Disc Player 1 To VIDEO output jack NOTE • Connect the Blu-ray disc player to LCD TV directly. If you play back the image via VCR, the image may deteriorate due to the copy guard function.
Audio Connections Connecting to the Digital Audio Terminal or Audio Jacks • You can connect audio equipment or the TV to the DIGITAL AUDIO OUT terminal or 2CH AUDIO output jacks. • See page 52 for information on the output of next generation audio formats. STEPS 1 Be sure to turn off this Player and the equipment before making any connections.
Broadband Internet Connection Connecting to the ETHERNET terminal • By connecting this player to the internet, you can enjoy a variety of content on your TV using BD-LIVE functions, the RSS reader function and Netflix streaming service. • This player can update the software from Sharp’s server using the internet. • When using the internet, a broadband internet connection as shown below is required. STEPS 1 Be sure to turn off this Player and the equipment before making any connections.
Playback Before Starting Playback Loading the Batteries in the Remote Control 1 Hold in the tab on the battery cover and pull the cover towards the direction of the arrow. 2 Load the two “AA” size batteries (R-06 size, UM/SUM-3). Place batteries with their terminals corresponding to the m and n indications in battery compartment.
Before Starting Playback Turning the Power On Entering standby Press POWER on the remote control or on the Player to enter standby. • If you press POWER again immediately after entering standby, the Player may not turn on. If this happens, wait for 10 seconds or more and then turn on the power again. NOTE • When the ON/STANDBY indicator is blinking (may take some time), the Player cannot be turned on.
Before Starting Playback Language Setting Operating a SHARP TV Using the Remote Control The Universal Remote Control may operate the basic functions of the SHARP TV. TV function control • • • • Changing the on-screen display language 1 Press SETUP to display the Menu screen. TV Power: POWER TV-AV Selector: INPUT TV Volume up/down: VOL e/f TV Channel up/down: CH r/s • The same operation can be performed by pressing ENTER after selecting the MENU icon on the Wall Paper screen.
Before Starting Playback Using AQUOS LINK Controlling the Blu-ray disc player using AQUOS LINK What is AQUOS LINK? Using the HDMI CEC (Consumer Electronics Control), with AQUOS LINK you can interactively operate this player with your SHARP AQUOS TV. What you can do with AQUOS LINK When you connect this player to the LCD TV compatible with AQUOS LINK using an HDMI cable, you can perform the functions listed below. (See page 14 for connecting to the HDMI terminal).
Before Starting Playback Major functions of each button icon Control Panel This function allows you to operate this player using the TV remote control by displaying the control panel on the TV screen. POP-UP MENU • To operate this function, connect this player to a TV compatible with HDMI CEC (Consumer Electronics Control) using an HDMI cable (See page 14). Make sure that “Control Panel” is set to “Yes” (See page 42). When the settings are completed, perform the following operations.
Video/Picture/Music Playback To stop playback Loading a Disc Press H STOP. Resume playback function POWER OPEN/CLOSE • If you press d PLAY next, playback will resume from the point where the Player was previously stopped. To playback from the beginning, cancel resume mode by pressing H STOP, then press d PLAY. (This may not work depending on the type of disc. In this case, open the disc tray or enter standby.) NOTE 1 2 3 Press POWER to turn on the power. Press OPEN/CLOSE to open the disc tray.
Video/Picture/Music Playback BD/DVD Menus Using the disc menu • This section explains how to play back a BD/DVD video disc with a top menu, disc menu or pop-up menu. • The titles listed in the top menu and a disc guide (for options like subtitles and audio languages) are given in the disc menu. DVD VIDEO Example: Select “SUBTITLE LANGUAGE”. 1 Press TOP MENU/TITLE LIST. • The disc menu screen is displayed if present on the DVD video disc. 2 Press a/b to select “SUBTITLE LANGUAGE”, then press ENTER.
Video/Picture/Music Playback Enjoying BONUSVIEW or BD-LIVE 1 Press PinP during playback to show the 2picture screen. BD VIDEO This Player is compatible with additional functions of BD-Video, BONUSVIEW (BD-ROM Profile 1 Version 1.1) and BD-LIVE. For BD-Video discs compatible with BONUSVIEW, the functions of Picture in Picture and Virtual Package are available. For BD-LIVE compatible discs, you can enjoy a variety of functions via the internet in addition to the BONUSVIEW functions.
Video/Picture/Music Playback DVD-R/-RW (VR format) / BD-RE/-R (BDAV format) Playback DVD-R DVD-RW BD-RE BD-R Playback by selecting a title 1 Load a recorded disc. • The Title List screen is displayed. Example: Thumbnail screen You can play back a recorded disc (DVD: VR format finalized disc only / BD: BDAV format disc only). Program 1 • For a description of other playback functions, refer to ”Playback Functions” on pages 34–35. 5/21 Fri 9:30 AM 110 Min.
Video/Picture/Music Playback About Title List • The Title List can be displayed in two types, Thumbnail and Title Name. • Each time you press A (Red), the screen changes between Thumbnail and Title Name. Thumbnail Sorting the titles Each time you press B (Green) while the Title Name screen is displayed, the Title Name display changes between displaying the newest title first and the oldest title first. Program 1 1 5/21 Fri 9:30 AM 110 Min.
Video/Picture/Music Playback Audio CD Playback Playback by selecting a track 1 AUDIO CD This Player can play back audio CDs. • For a description of other playback functions, refer to “Playback Functions” on pages 34–35. Press a/b to select the track, then press ENTER during playback or when playback is stopped. • Playback of the selected track will begin.
Video/Picture/Music Playback Audio Data (MP3 File) Playback CD-R CD-RW DVD-R DVD-RW 5 Press ENTER to play back the selected file. • Playback of the selected file will begin. USB Track 01.mp3 This Player can play back audio data (MP3 files) recorded on CD-R/RW discs, DVD-R/RW discs and USB memory devices. 5:16 0:00 1 2 3 4 5 6 • For details on the audio data that you can play using this player, refer to page 7. Track 01.mp3 Track 02.mp3 Track 03.mp3 Track 04.mp3 Track 05.mp3 Track 06.
Video/Picture/Music Playback Displaying Still Images (JPEG files) CD-R CD-RW DVD-R DVD-RW 5 Press ENTER to display the selected file. • The selected still image appears on the screen. USB 1/77 This Player can display still images (JPEG files) recorded on CD-R/RW discs, DVD-R/RW discs and USB memory devices. • For details on the still images that you can display using this player, refer to page 7.
Video/Picture/Music Playback Playing Netflix streaming content Please check that the most current software is loaded on this player by selecting auto update on the player menu screen (See pages 48–51) or by visiting http://www.sharpusa.com/products/support/ to check for a download of the newest software version. This function allows you to enjoy Netflix service through the internet. Netflix is an online DVD and Blu-ray Disc rental service, offering rental-by mail and online streaming to customers.
Video/Picture/Music Playback 6 You will see the following window. 10 • The activation code is displayed. The screen of this player shown on the TV The movie you selected is displayed. • To return to the step 9, press a. Press a/b to select “play”, then press ENTER or d PLAY to start playback. The screen of this player shown on the TV 7 Using your PC, visit http://www.netflix.com/activate, and then enter the activation code displayed in step 6.
Playback Functions Pause/Frame Advance Playback BD VIDEO DVD VIDEO BD-R DVD-R BD-RE DVD-RW The Pause function is enabled when F PAUSE is pressed during playback. (If you are playing back an audio CD, audio data [MP3 files] or still images [JPEG files], these will also pause.) The Frame Advance Playback function is enabled when L SKIP/l is pressed during pause. • Frame Advance Playback may not function properly with discs other than DVD-RW/R (VR format).
Playback Functions Repeat Playback of a Title or Chapter (Repeat Playback) BD VIDEO DVD VIDEO BD-R DVD-R BD-RE DVD VIDEO DVD-R DVD-RW AUDIO CD DVD-RW AUDIO CD 1 2 3 Partial Repeat Playback (Repeat Playback of a Specified Part) Play back the title or chapter you want to repeat. Press REPEAT. Press a/b to select the type of Repeat Playback. 1 2 Press REPEAT during playback. Press a/b to select “Scene Selection”, then press ENTER. • “Set Start Point” displays.
Playback Functions Switching Subtitles BD VIDEO DVD VIDEO If subtitles are provided in multiple languages, you can switch between them. Press SUBTITLE during playback. • The display indicates the subtitle number currently being played back, and the subtitles appear. Each time SUBTITLE is pressed, the subtitles change. • “–” is displayed if a disc has no subtitles. • You can also select “Off”. NOTE • Settings for subtitles can also be changed in the Function Control screen (Page 38).
Playback Functions Switching the Angle BD VIDEO BD VIDEO DVD VIDEO If multiple angles are recorded, you can switch between them. 1 Press FUNCTION during playback. • The Function Control screen is displayed on the TV. 2 Displaying the Angle Mark Press a/b to select the Angle Number column, then press ENTER. DVD VIDEO You can change settings so that Angle Mark appears in the right bottom part of the screen when multiple angles are recorded.
Settings During Playback Function control operation procedure Function Control BD VIDEO DVD VIDEO BD-R BD-RE DVD-RW DVD-R AUDIO CD This allows you to adjust various settings at once, like subtitles, angle settings and the title selection for Direct Playback. You can adjust the video and audio to suit your preferences. The operations are the same for BD and DVD. Function Control screen BD-VIDEO 1 1/3 5 / 25 00 : 20 : 30 2 English 1 1 5 . 1ch Off 2 1 Press FUNCTION during playback.
Settings During Playback Functions which can be set Title/Track Number (Direct Title/Track Skip) • Shows the title number being played back (or track number when playing back an audio CD). You can skip to the start of the title (or track). • To skip to the start of a selected title (or track), press the Number buttons to enter the title (or track) number when this option is highlighted. Chapter Number (Direct Chapter Skip) • Shows the chapter number being played back.
Settings SETTINGS Common operations The “Menu” enables various audio/visual settings and adjustments on the functions using the remote control unit. You need to call up the On Screen Display to perform settings for this player. The following is the explanation for the basic operations of the “Menu”. Example: Setting “AQUOS LINK” 1 Movie Picture Music e-Contents Settings 3 2 Display the Menu screen Press SETUP to display the Menu screen.
SETTINGS Audio Video Settings TV Aspect Ratio You can set the screen aspect ratio of the connected TV, and adjust the video output. If you switch your TV (i.e. because you have bought a new one) and the screen aspect ratio of the connected TV changes, you will have to change the “TV Aspect Ratio” setting. Video Out Select Dual video output is possible simultaneously from the COMPONENT VIDEO OUT jacks and the HDMI OUT terminal with the following settings.
SETTINGS Audio Out Dynamic Range Control You can set the audio output when connecting to SURROUND equipment. 1 This sets the audio output connected to SURROUND equipment. Item Item HDMI Output: Select this when you connect using HDMI OUT terminal. Digital Output: Select this when you connect using DIGITAL AUDIO OUT terminal (OPTICAL). 2ch Audio Output: Select this when you do not use SURROUND sound equipment. 2 You can set the audio output mode for each output terminal.
SETTINGS AQUOS LINK This lets you set the Player to receive the control signal from the AQUOS LINK remote control via the HDMI cable. Item Yes, No Angle Mark Display This lets you turn the Angle Mark Display on or off when BD/DVD video recorded with multiple angles is played back. (The Angle Mark is displayed in the lower right screen.) Item Yes, No NOTE • For details, refer to the operation manual of TV. • If “Component” is selected from the “Video Out Select” menu, AQUOS LINK is not available.
SETTINGS Version When you select “Version” the system software version and Netflix ESN are displayed. System Communication Setup This allows you to perform and/or change the communication setting. This setting is required to use BD-LIVE functions, the RSS reader function, Netflix service and software updates that connect to the internet. System Reset You can reset all settings to the factory presets. Item Reset, Not Reset Netflix Deactivate You can deactivate your Netflix information on the player.
SETTINGS 5 For setting the IP address, press c/d to select “Yes” or “No”, then press ENTER. 11 Do you obtain the IP address automatically? Yes • Normally select “No”, then press ENTER. • The Ethernet connection speeds can be set when you select “Yes”, then press ENTER. • As automatic detection is made (factory preset mode), this setting is not normally necessary. If a situation occurs in which the Ethernet connection fails, etc.
SETTINGS 3 The operation procedure for inputting characters manually Press c/d to select a number/character, then press ENTER. Repeat the step 3 to display all of the desired characters/numbers in the input field. 4 NOTE • Numeric characters such as IP address can be entered on the input screen either by selecting each of the characters in the “Numeric” mode or using the Number buttons on the remote control.
SETTINGS Before using the USB memory device CAUTION: • Do not remove the USB memory device or unplug the AC cord while the operations for “USB Memory Management” or “Software Update (Manual Update from USB memory device)” are being performed. • Do not use a USB extension cable when connecting a USB memory device to the BD STORAGE/SERVICE terminal of the player. − Using a USB extension cable may prevent the player from performing correctly. 2 3 4 Press SETUP to display the Menu screen.
SETTINGS Software Update Settings Update process 1 In this player, the software version can be updated using either one of the following methods. When this player is turned on, the internet connection starts automatically. • “Accessing...” blinks on the screen.
SETTINGS Manual Update from Network 6 During access to the network and checking the latest version of firmware, “Accessing” blinks. • The current version of this unit software and the latest version of the update file on the network are displayed when latest version of firmware has been found. To update this player software with update file, select “Yes”, and go to step 7.
SETTINGS Manual Update from USB memory device This function allows software updates by inserting a USB memory device with the update file into the BD STORAGE/SERVICE terminal on this player. • When a software update is performed, the software update data must be written onto the USB memory device in advance using a PC. • The USB memory device must be clear of all files except software update data to allow new software uploading. To check for the availability of a software update, visit www.sharpusa.
SETTINGS • The current version of this unit software and the version of the update file on the USB memory device are displayed. To update this player software with update file, select “Yes”, and press ENTER. Software update file is detected in the USB memory device. Start update? Current Ver. : Update Ver. : xxxxxxxxxx yyyyyyyyyy Yes No • If the USB memory device is not properly installed or the correct update file cannot be found on the USB memory device, an error message is displayed.
SETTINGS Country Code List USA / CANADA / JAPAN / GERMANY / FRANCE / UK / ITALY / SPAIN / SWISS / SWEDEN / HOLLAND / NORWAY / DENMARK / FINLAND / BELGIUM / HONG KONG / SINGAPORE / THAILAND / MALAYSIA / INDONESIA / TAIWAN / PHILIPPINE / AUSTRALIA / RUSSIA / CHINA Language List English / Français / Deutsch / Italiano / Español / Japanese / Svenska / Nederlands Language Code List AA Afar / AB Abkhazian / AF Afrikaans / AM Ameharic / AR Arabic / AS Assamese / AY Aymara / AZ Azerbaijani / BA Bashkir / BE Byelo
Appendix Troubleshooting The following problems do not always suggest a defect or malfunction of this Player. Refer to the problems and lists of possible solutions below before calling for service. Power Problem Possible causes and solutions The Player power cannot be turned on. • Is the power cord firmly plugged into the AC outlet? (Page 19) • When the power cord is plugged into an AC outlet, press and hold POWER on the ” appears on the front panel display.
Troubleshooting Picture (Continued) Problem Possible causes and solutions Screen freezes and operation buttons do not work. • Turn off the power and turn on the power again. • If the power is not turned off, perform a reset. (Page 55) • Is the disc damaged or dirty? Check the condition of the disc. (Page 9) There is just audio with no video.
Troubleshooting Other Problem Possible causes and solutions The TV operates incorrectly. • Some TVs with wireless remote control capability may operate incorrectly when using the remote control of this Player. Use such TVs away from this Player. The Player heats up during use. • When using this Player, the console cabinet may heat up depending on the usage environment. This is not a malfunction. ON/STANDBY indicator will remain lit.
Specifications General Power supply AC 120V, 60Hz Power consumption (Normal) 14 W Power consumption (Standby) 0.4 W (When “Quick Start” is set to “No”) Dimensions Approx. 17 1/16 g 2 5/16 g 8 11/16 inch (W g H g D) Approx. 432 mm g 58 mm g 220 mm (W g H g D) Weight Approx. 4.9 lbs. (2.
Glossary AVCHD (page 6) Control Panel (page 23) AVCHD (Advanced Video Codec High Definition) refers to a recording format (specification) for digital video cameras which can record to a disc such as 8 cm DVD disc and play back digital high definition images. This function allows you to operate this player using the TV remote control by displaying the control panel on the TV screen. BDAV (page 6) This function prevents copying.
Glossary DVD video (pages 6, 24) Linear PCM Sound A disc format that contains up to eight hours of moving pictures on a disc the same diameter as a CD. A single-layer single sided DVD holds up to 4.7 GB; a double layer single-sided DVD, 8.5 GB; a single layer double-sided DVD, 9.4 GB; double-layer double-sided DVD, 17 GB. The MPEG 2 format was adopted for efficient video data compression.
Glossary Progressive format Compared to the Interlace format that alternately shows every other line of an image (field) to create one frame, the Progressive format shows the entire image at once as a single frame. This means that while the Interlace format can show 30 frames/60 fields in one second, the Progressive format can show 60 frames in one second. The overall picture quality increases and still images, text, and horizontal lines appear sharper.
Network Service Disclaimer This Sharp device facilitates the access to content and services provided by third parties. The content and services accessible via this device belong to and may be proprietary to third parties. Therefore, any use of such third party content and services must be in accordance with any authorization or terms of use provided by such content or service provider. Sharp shall not be liable to you or any third party for your failure to abide by such authorization or terms of use.
About Software License Information on the Software License for This Product Software composition The software included in this product is comprised of various software components whose individual copyrights are held by SHARP or by third parties.
CONSUMER LIMITED WARRANTY (Valid for warranty service in the U.S.
ENGLISH BD-HP24U BD-HP24U Printed in China Impreso en China Imprimé en Chine TINS-E549WJQZ 10P01-CH-NG MANUAL DE MANEJO MODE D'EMPLOI FRANÇAIS SHARP CORPORATION OPERATION MANUAL ESPAÑOL Sharp Plaza, Mahwah, New Jersey 07495-1163 OPERATION MANUAL / MANUAL DE MANEJO / MODE D’EMPLOI SHARP ELECTRONICS CORPORATION BLU-RAY DISC/DVD PLAYER REPRODUCTOR DE DISCO BLU-RAY/DVD LECTEUR DE DISQUES BLU-RAY/DVD