
Operation Manual, User's Manual
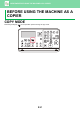
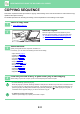
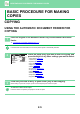
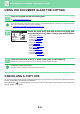
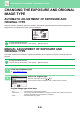
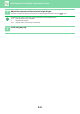
Table Of Contents

2-3
COPIER►BEFORE USING THE MACHINE AS A COPIER
COPYING SEQUENCE
This section explains the basic procedure for copying. Select settings in the order shown below to ensure that the copy
operation takes place smoothly.
For detailed procedures for selecting the settings, see the explanation of each setting in this chapter.
1
Switch to copy mode.
► COPY MODE (page 2-2)
2
Place the original.
Place the original in the document feeder tray of the
automatic document feeder, or on the document glass.
► AUTOMATIC DOCUMENT FEEDER
(page 1-31)
► DOCUMENT GLASS (page 1-33)
3
Select functions.
Specify the original scan size, exposure, resolution, etc.
If necessary, you can refer to the following functions for the setting.
• Paper Select ►page 2-4
• 2-Sided Copy ►page 2-7
• Exposure ►page 2-8
• Copy Ratio ►page 2-10
• Original ►page 2-12
• Output ►page 2-17
• ID Card Copy ►page 2-19
•N-Up ►page 2-21
• Card Shot ►page 2-24
• RGB Adjust ►page 2-25
• Sharpness ►page 2-27
• Suppress BG ►page 2-28
4
Press the [COLOUR START] or [B/W START] key to start copying.
When making only one set of copies, you do not need to specify the number of copies.
• To cancel all settings, press the [CA] key.
When the [CA] key is pressed, all settings selected to that point are cleared and you will return to the base screen.
• To cancel a copy job, press the [C] key or [CA] key. If you press the [C] key, the copy settings are retained. If you
press the [CA] key, the settings are cancelled. If you press the [STOP] key ( ) while copying is in progress, a
confirmation screen appears asking if you want to cancel the copy job.
• To make two or more sets of copies:
Press the copies display key to specify the number of copies.