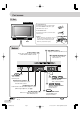
OPERATION MANUAL MODEL MODEL SX66NF100 SX76NF100 COLOUR TELEVISION (SX66NF100) (SX76NF100) Please read this operation manual carefully before using the colour television. SX66NF(Front) Page 1 03.7.30, 8:55 AM Adobe PageMaker 6.
Safety precautions Damage Turn off the power and unplug the power cord from the wall outlet immediately if the TV set begins to make any unusual noises or gives off smoke or an unusual smell. Then call your dealer for service. Servicing To reduce the risk of electric shock, do not remove the back of the cabinet. This TV set contains dangerous voltage. Unstable surface and shocks Liquid entry Do not place this TV set on an unstable cart, stand, shelf, or table.
Moisture To prevent electrical shock, do not use the TV set in an excessively damp place. To prevent electrical shock, do not subject the AC power cord to damage by bending or twisting it, or by placing heavy items on top of it and do not place the AC power cord under the TV set. If the AC power cord becomes damaged, unplug it from the wall outlet immediately and call your dealer for service.
Contents Preparation Safety precautions ....................................................2 Accessories .............................................................. 5 Easy setup ............................................................... 6 Part names ............................................................... 7 Installing batteries in the remote control unit ........ 7 Antenna connections .............................................. 11 Watching TV Watching a TV programme ...................
Dear SHARP Customer Thank you for buying SHARP’s Colour Television. We hope you will have many years of enjoyment from this television set. To ensure proper operation, please read this manual carefully, and keep it in a safe place for future reference. Accessories The following accessories are included with this television. Remote control Size-AA batteries Operation manual 5 SX66NF(02-07) Page 5 03.7.30, 8:57 AM Adobe PageMaker 6.
Easy setup To use your TV set, perform the easy setup procedure below. The mark indicates the page number with more detailed information. Connect the antenna. • See 11 to connect the antenna. 1 Connect any video equipment. • See 40 , 41 to connect video equipment. • See the operation manual of your video equipment when connecting it to the TV set. 2 Insert the batteries into the remote control. • Use the two batteries included with the TV. 3 • See 7 . Insert the AC plug to the power outlet.
Part names The mark indicates the page number with more detailed information. Infrared transmitter window Aim this window at the infrared sensor window on your TV set. Remote control 28 Turns the TV on or set it to Standby mode. 15 14 14 Displays the channel and timer settings on the screen. 14 Changes Picture and Sound setting. STANDARD, MOVIE, MUSIC, NEWS SURROUND 12 Number buttons Select the channels and input numbers. 23 12 Produces a more spacious sound.
Part names TV Set SX66NF100 To open the door Using the projection located under the "PULL-OPEN" indication, pull and lift the door open. To close the door Using the projection, lower the door until closed. Door Caution: • When opening or closing the door, do not insert your fingers into the gap between the door and front panel. This may result in an injury. Bottom 31 ON TIMER indicator Lights up red when the On Timer is set.
Top MENU/PRESET 18 MENU/PRESET button Used for MENU setup. Tunes the channels. / 13 13 Volume Up/Down buttons / CH CH Channel Up/Down buttons Adjust the volume. Used for Preset. Select the channels. Tune or set the channels. SX76NF100 To open the door Using the projection located under the "PULL-OPEN" indication, pull and lift the door open. To close the door Using the projection, lower the door until closed.
Part names SX66NF100 SX76NF100 Rear terminals 40 COMPONENT IN/AUDIO IN terminals Antenna In terminal 11 Connects to an antenna. Connect to a DVD player, etc. S-VIDEO (AV-1 IN) terminal 41 Connects to a VCR, etc. 41 AV-2 IN VIDEO/AUDIO (L/R) terminals Connect to a VCR, etc. VIDEO/AUDIO (L/R) OUT terminals 41 Connect to a VCR, etc. 41 AV-1 IN VIDEO/AUDIO (L/R) terminals Connect to a VCR, etc. 10 SX66NF(08-15) Page 10 03.7.30, 8:59 AM Adobe PageMaker 6.
Antenna connections Connecting to an antenna To enjoy a clearer picture, use an outdoor antenna. The following is a brief explanation of the types of connections that are used for coaxial and feeder cables. If your outdoor antenna uses a 75-ohm coaxial cable with a standard DIN45325 plug (IEC 169-2), plug it into the Antenna In terminal at the rear of the TV set.
Watching TV Watching a TV programme Simple operations for watching a TV programme TV Set (Bottom) 1 Turn on power. • When the Power indicator (see 8 and 9 ) is off, press . on the remote • When the Power indicator lights up red, press control. The Power indicator changes to green and a picture appears. 2 Remote Control Select channel. With / CH CH (on remote control) • Press CH , and channels change as shown below. 1 / 2 / ... / 98 / 99 / 0 / 1 / 2 ...
Operating the TV buttons Simple operation of the TV set TV Set (Top) Using / Press to increase volume. Press to decrease volume. VOLUME 15 CH CH Using CH / CH Press CH , and channels change as shown below. 1 / 2 / ... / 98 / 99 / AV1 (or SAV1) / AV2 / AV3 (or SAV3) / COMPONENT / 0 / 1 / 2 ... 5 PAL B/G Press CH , and channels change as shown below. 1 / 0 / COMPONENT / AV3 (or SAV3) / AV2 / AV1 (or SAV1) / 99 / 98 / ... / 2 / 1 / 0 ...
Useful features Channel/Timer display Displays the current channel number, the timer, and other settings on the screen. 1 Press • The time remaining on the Off Timer, On Timer, Reminder, and the channel number and colour/sound system indications appear on the screen. • When no timer is set, the channel number and colour/sound system indications appear on the screen. Press again to turn off these indications. AV MODE 2 5 . Press PAL B/G 0 2 : 30 0 8 : 00 0 1 : 50 OFF ON 5 again.
Channel recall Switches back to the channel you were watching just before the current channel. Press TV/VIDEO . 5 • The channel previously viewed returns to the screen. PAL B/G Example: 7 If, after switching from channel 5 to channel is pressed, the channel will 7, again change to channel 5. Press to return to channel 7. PAL B/G 5 PAL B/G 7 PAL B/G TV/Video selection Switches between TV broadcasts and AV input programmes.
Selecting menu items This TV set allows you to adjust the picture and sound, and set the channels and other features using the on-screen display with the remote control or from the TV set. Select the desired menu item by following the steps below and then refer to the indicated pages for details. Selecting a menu item Remote control CH CH 1 MENU 2 MENU P I CTURE SOUND FEATURE T I MER CH–SETT I NG Press MENU / MENU/PRESET to call MENU screen. Press CH / CH to select desired menu item.
Settings and adjustments On-screen display language selection The on-screen display language can be set to English, Chinese, French, Russian, Malay or Arabic. TV Set (Top) TV set 1 MENU/PRESET ENGL I SH Press and hold down MENU/PRESET for more than two seconds. • The Language Select screen appears. CH FRANÇ A I S BAHAS A MELAYU CH 2 ENGL I SH Press CH / CH select desired language. to FRANÇ A I S BAHAS A MELAYU • Pressing MENU/PRESET changes the screen as shown below.
Settings and adjustments Manual channel tuning Enables manual channel tuning to a desired TV station. (e.g. tuning the TV to a VCR, tuning in an additional TV station.) NOTE: This TV is already tuned into 2, 7, 9, 10 and 28. TV Set (Top) 1 ENGL I SH Press and hold down MENU/PRESET for more than two seconds. FRANÇ A I S BAHAS A MELAYU • The Language Select screen appears. MENU/PRESET CH CH 2 Press MENU/PRESET twice to display MANUAL mode screen. MANUA L ( B G ) 1 VHF 48 .
Auto channel tuning Automatically tunes in and presets receivable TV stations, using consecutive channel numbers (e.g. 2, 7, 9, 10 will be stored as 1, 2, 3, 4) TV Set (Top) 1 ENGL I SH Press and hold down MENU/PRESET for more than two seconds. FRANÇ A I S BAHAS A MELAYU • The Language Select screen appears. MENU/PRESET 2 Press MENU/PRESET again to display AUTO mode screen. AUTO ( B / G ) 1 VHF 48 . 25MHz • Pressing MENU/PRESET changes the screen as shown below.
Settings and adjustments Channel setting Enables individual channel setting. 1 2 CH 3 CH 4 MENU 5 Press screen. MENU P I CTURE SOUND FEATURE T I MER CH–SETT I NG to call MENU MENU Press CH / CH select “CH-SETTING”. to CH–SETT I NG POS I T I ON COLOUR SOUND SK I P F I NE N I CAM A2 Press / to display CH-SETTING menu. Press CH / CH select desired item. to Each time you press / individual items changes as follows: CH 2 7 AUTO B G OFF 1 68 .
Picture adjustment 1 2 Press screen. MENU Adjustable individually for each AV mode MENU P I CTURE SOUND FEATURE T I MER CH–SETT I NG to call MENU Press CH / select “PICTURE”. to CH CH 3 CH 4 Press / display PICTURE menu. to Press CH / CH select adjustment items. to P I CTURE CONTRAS T COLOUR BR I GHTNESS T I NT SHARPNESS P I CTURE NR WH I TE TEMP MENU NORMAL 5 Adjust using .
Settings and adjustments Sound adjustment 1 2 Press screen. MENU Adjustable individually for each AV mode MENU P I CTURE SOUND FEATURE T I MER CH–SETT I NG to call MENU Press CH / select “SOUND”. CH to Press / display SOUND menu. to Press CH / CH select adjustment items. to CH CH 3 4 MENU NORMAL 5 Adjust using .
Surround sound Produces a virtual surround sound from the TV’s speakers. Each time you press SURROUND , the mode toggles between ON and OFF. SURROUND OFF: Produces normal sound. ON: Produces surround sound. SURROUND 20 OFF SURROUND 0 ON SURROUND 0 ON SURROUND 20 ON RED GREEN YELLOW BLUE CH Surround effect level adjustment CH 1 2 Press SURROUND until the SURROUND ON mode screen is displayed. Press / to adjust the surround effect level.
Settings and adjustments Wide mode Selects the width of the picture. Wide mode selection Each time you press shown below. (See page 25.) PANORAMA FULL , the width of the picture changes as NORMAL ZOOM (14:9) CINEMA V-SIZE/V-SCROLL adjustment CH CH When PANORAMA, ZOOM (14:9), or CINEMA Adjustment menu is selected, the V-SIZE and V-SCROLL PANORAMA adjustment menu appears on the screen. V-SIZE adjustment: 1 Press CH / CH to select “V-SIZE”. 2 Press / to adjust the vertical size.
Detail information on each wide mode 4:3 16 : 9 PANORAMA Adapts the broadcast picture to 16:9 format without changing the centre of view. This is especially useful for programmes like the news when the speaker in the centre of the picture needs to be seen clearly. FULL Adapts the broadcast picture to 16:9 format while also stretching the centre of view. This is an advantage, for example, when you are watching sports games where there is no real fixed centre of the picture.
Settings and adjustments Blue screen Automatically turns the screen blue if a broadcast signal is not received. 1 2 Press screen. MENU to call MENU Press CH / CH select “FEATURE ”. MENU P I CTURE SOUND FEATURE T I MER CH–SETT I NG to CH CH CH : SELECT 3 MENU 4 5 6 Press / display FEATURE menu. to Press CH / CH select “BLUE BACK”. to Press / select “ON” or “OFF”.
Auto select When video equipment, such as a video game system or camcorder, is connected to the front (AV-3 IN) terminals, this TV set automatically selects the input mode (AV3) when the video equipment is turned on. 1 2 Press screen. MENU to call MENU Press CH / CH select “FEATURE ”. to CH MENU P I CTURE SOUND FEATURE T I MER CH–SETT I NG CH : SELECT : ENTER MENU : RETURN CH 3 MENU 4 5 6 Press / display FEATURE menu.
Settings and adjustments Save This function reduces the picture brightness to create a softer image while saving electricity. Using remote control POWER SAVE 1 2 CH Press POWER SAVE to display the SAVE mode screen. Each time you press POWER SAVE , the mode toggles between “ON” and “OFF”. • When SAVE is set to “ON”, the POWER SAVE indicator on the TV set lights up red. • When SAVE is set to “OFF”, the POWER SAVE indicator on the TV set turns off.
Headphones volume Adjusts the headphones volume. 1 2 Press screen. MENU to call MENU MENU P I CTURE SOUND FEATURE T I MER CH–SETT I NG Press CH / CH select “FEATURE ”. to Press / display FEATURE menu. to FEATURE BLUE BA CK AUTO SELECT SAVE Press to ROTAT I ON to CH : SELECT CH 3 CH 4 CH / CH OF F ON OFF 20 0 select “ ”. MENU 5 6 Press / adjust the volume. Press MENU : ADJUST MENU : RETURN until normal screen appears.
Settings and adjustments Off timer Automatically turns power off after a set length of time has passed. 1 2 Press screen. MENU MENU P I CTURE SOUND FEATURE T I MER CH–SETT I NG to call MENU Press CH / select “TIMER”. CH to CH CH 3 4 Press / display TIMER menu. to Press CH select “OFF to / ”. CH T I MER OFF ON POS I T I ON VOLUME –– : –– –– : –– –– : –– MENU : ADJUST MENU : RETURN CH : SELECT NORMAL 5 Press / set time for TV to turn off.
On timer Automatically turns power on after a set length of time has passed. 1 2 Press screen. to call MENU MENU Press CH / select “TIMER”. CH to MENU P I CTURE SOUND FEATURE T I MER CH–SETT I NG CH 3 CH 4 MENU 5 NORMAL Press / display TIMER menu. to Press CH select “ON to / CH 6 7 ON TIMER indicator (Red) 8 9 Press / set time for TV to turn on. to 10 Press CH / CH select “POSITION”. to Press / set the channel. to Press CH / select “VOLUME”. Press set volume.
Settings and adjustments Reminder on-screen timer Lets you know when a preset length of time has passed by displaying a countdown timer on the screen. This is useful for timer cooking while you watch TV. 1 2 Press screen. MENU MENU P I CTURE SOUND FEATURE T I MER CH–SETT I NG to call MENU Press CH / select “TIMER”. CH to CH CH 3 4 MENU Press / display TIMER menu. to Press CH select “ ”.
Broadcast features NICAM broadcasts Enables selection of reception mode when receiving a NICAM-I, -B/G, or -D/K signal. Stereo MPX Each time you press the mode switches between NICAM STEREO and MONO. 49 NICAM , STEREO 49 MONO MPX 49 NICAM Bilingual MPX Each time you press , the mode switches between M1 (main sound), M2 (sub sound), and MONO. M1 49 NICAM M2 49 MONO Monaural MPX Each time you press the mode switches between NICAM MONO and MONO.
Broadcast features A2 stereo system broadcasts Enables selection of reception mode when receiving an A2 stereo signal (B/G). Stereo MPX Each time you press , the mode switches between STEREO and MONO. 49 STEREO MPX 49 MONO Bilingual MPX Each time you press , the mode switches between MAIN and SUB. 49 MAIN 49 SUB • The setting can be selected individually for each channel position. • A2 stereo-B/G: National and regional broadcast system used in Malaysia, Thailand and Australia.
Teletext broadcasts Teletext is an information service, organised like a magazine, which is provided by some television stations in addition to regular television broadcasting. Your television receives special Teletext signals broadcast by a TV station, processes the information and displays it graphically on the screen. News, weather and sports information, stock exchange prices, programme previews and closed captioning for the deaf are among the many services available through Teletext.
Broadcast features Other features (Text/Mix/Picture) Each time you press the button, the display mode changes as shown below. TV mode Teletext mode Mixed mode TV mode: Current TV programme screen. TV mode Current Programme Teletext mode Teletext mode: Teletext screen. Mixed mode Mixed mode: The Teletext broadcast is superimposed onto the current TV programme screen. (Half page) Each time you press the button, the upper/lower half of the Teletext page is magnified and displayed on the screen.
(Clock) In TV mode: When a TV signal with Teletext data is received, press to display the real time information on the top left area of the screen. Number buttons In Teletext mode: When a selected Teletext page has hidden sub-pages, you can see them by performing the following procedure: 1 LIST Press . • “= = = =” appears on the screen. 2 3 Enter a desired sub-page number (4 digits) with 0-9 Number 0 0 2 1 buttons. (Ex. Press , , , to select sub-page 21.) Wait until the selected sub-page appears.
Broadcast features LIST mode Teletext page memory list Your TV has 40 Teletext page number memories for fast recall of Teletext information. In programme positions 1 through 9, four Teletext page numbers can be stored in each position; a total of 36 pages. In programme positions 10 through 99, only one programme with 4 page numbers can be stored. If you try to store more than 4 page numbers in a programme position between 10 and 99, the previously stored page numbers will be erased.
Fast page selection (LIST mode) 1 Colour buttons 2 Select an appropriate programme channel. P 100 Press to select the Teletext mode. FLOF Teletext RED News GREEN YELLOW 3 BLUE Sports LIST Press to change from FLOF system to LIST mode. Movie Weather LIST P 100 LIST LIST Teletext 4 100 200 To recall a page number displayed in the coloured brackets, simply press the corresponding Colour button. 315 400 YELLOW P 315 5 LIST Press again to return to FLOF mode.
Connections Connecting to a DVD player The DVD input terminals (COMPONENT IN) on the rear of the TV can be used to input high-quality images from a DVD player. • The COMPONENT IN terminals support progressive video signal input for playback on the screen.
Connecting to video equipment Enjoy playback from a video disc player, VCR or other video equipment by connecting them to this TV set using the Audio/Video In terminals.
Troubleshooting Increase the volume. CONTRAST or BRIGHTNESS setting in picture mode might be all the way to the minus side. Try fine tuning to correct. Check batteries in the remote control. Adjust COLOUR control. Turn OFF using the Power switch, then turn ON again after a minute. Check for local interference. If outside antenna is used, check for broken wires. Antenna not connected to terminal at the rear of the TV set. Power switch of TV not ON. Problems TV not plugged in. Outlet power OFF.
Specifications MODEL SX66NF100 SX76NF100 Receiving System TV broadcasts/ VCR playback PAL-I PAL-B/G PAL-D/K SECAM-B/G SECAM-D/K NTSC-M (NTSC standard) VCR playback NTSC 4.43/5.5 MHz 60 Hz NTSC 4.43/6.0 MHz 60 Hz NTSC 4.43/6.5 MHz 60 Hz Laserdisc player playback (Using RF-in terminal) PAL 5.5 MHz/60 Hz PAL 6.0 MHz/60 Hz PAL 6.
WARRANTY Consumer Electronic Products Congratulations on Your Purchase! This Sharp product is warranted against faults in materials and manufacture for a period of twelve (12)* months from the date of original purchase. If service is required during the warranty period, please contact your nearest Sharp Approved Service Centre. These repairs would be carried out at no charge to the owner, subject to the conditions specified herein.