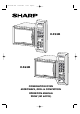
R-953/963M O/M 16/03/2000 10:49 Page A 10min. 1min. ROAST BEEF / LAMB 10sec. ROAST PORK CHICKEN PORTIONS ROAST POULTRY R-953M STEAK / CHOPS 1 Chilled Ready Meals 2 Frozen Ready Meals 3 Crispy Crum b Foods 4 Oven Ready Pizza 5 Oven Chips 6 Baked Potato es 7 Rice / Pasta 8 Cake Time DOWN UP LESS MORE GRILL CONV. DUAL CONV./ GRILL Kg / Lb AUTO STAR T STOP CLEAR START AUTO MINUTE R-953 10min. 1min. ROAST BEEF / LAMB R-963M 10sec.
R-953/963M O/M 16/03/2000 10:49 Page B
R-953/963M O/M 16/03/2000 10:49 Page 1 CONTENTS Oven and Accessories . . . . . . . . . . . . . . . . . . . . . . . . . . . . . . . . . . . . . . . . . . . . . . . . . 2 Control Panel . . . . . . . . . . . . . . . . . . . . . . . . . . . . . . . . . . . . . . . . . . . . . . . . . . . . . . . . . 3 Safety: Installation . . . . . . . . . . . . . . . . . . . . . . . . . . . . . . . . . . . . . . . . . . . . . . . . . . . . . . . . . .4 Important Safety Instructions . . . . . . . . . . . . . . . . . . . .
R-953/963M O/M 16/03/2000 10:49 Page 2 OVEN AND ACCESSORIES 1 Grill heating element 2 Oven lamp 3 Control panel 4 Shelf runners 5 Waveguide cover 6 Oven cavity 7 Coupling 8 Door seals and sealing surfaces 9 Door opening handle 10 Air-vent openings 11 Outer cabinet 12 Power cord 2 1 3 9 4 8 7 6 5 10 Fig.
R-953/963M O/M 16/03/2000 10:50 Page 3 CONTROL PANEL R-953M R-963M 2 3 1 2 3 4 5 1 6 4 1min. 10min. 1min. 10min. 10sec. 10sec.
R-953/963M O/M 16/03/2000 10:50 Page 4 INSTALLATION BUILDING-IN-KIT. Inspect the Oven: • Check the oven carefully for damage before and regularly after installation. • Make sure the door closes properly, that it is not misaligned or warped. • Check the hinges and door safety latches are not broken or loose. • Ensure the door seal and sealing surfaces are not damaged. • Inspect the oven interior and door for dents. Important: If any damage is apparent, do not operate the oven in any way.
R-953/963M O/M 22/03/2000 07:33 Page 5 IMPORTANT SAFETY INSTRUCTIONS IMPORTANT SAFETY INSTRUCTION READ CAREFULLY AND KEEP FOR FUTURE REFERENCE Oven Use: • The oven is for domestic food preparation only. Never operate when empty, except as directed in the operation manual (see page 10). • Do not leave or store anything inside the oven when not in use. • Never attempt to use the oven with the door open. It is important not to force or tamper with the door safety latches.
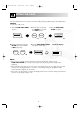
R-953/963M O/M 16/03/2000 10:50 Page 6 MICROWAVING - INTRODUCTION NOTES: • Microwaves pass through non-metallic dishes and utensils and heat the food inside the dishes. • Microwaves are reflected by metal. • The oven is lined with metal and has a fine metallic mesh in the door to prevent microwave leakage. • Metallic dishes are not suitable for microwaving. • Never use the square shelves for microwave cooking and dual cooking as this may cause arcing. • See SUITABLE COOKWARE, page 28-29.
R-953/963M O/M 16/03/2000 10:50 Page 7 BEFORE OPERATION Your oven has an “Energy Save” mode. 1. Plug in the oven. Nothing will appear in the display at this time. 2. Open the door. The display will flash the message shown opposite. NOTE: If the display shows different messages from ENERGY SAVE MODE, the oven may be set in demo mode. Close the door, see page 34 to cancel the demo mode. 3. Close the door. The oven display wil show “.0”. If you set the clock “Energy Save” mode will be off.
R-953/963M O/M 16/03/2000 10:50 Page 8 SETTING THE CLOCK Your oven is fitted with a 12 hour clock. To set the time of day, follow the guidelines given in the example below: EXAMPLE: To set the time of day, 12:35. 1. Press the AUTO START/CLOCK key once. AUTO START CLOCK x3 x1 x2 x1 4. Enter the minutes by pressing the 10 MIN key three times and the 1 MIN key five times. 3. Press the AUTO START/ CLOCK key again. AUTO START CLOCK 1min. 10min. x1 10min. 2.
R-953/963M O/M 16/03/2000 10:50 Page 9 HOW TO OPERATE THE OVEN Opening and closing the door: • To open the oven door, pull the door opening handle. • The oven lamp will light when the door is open. • Close the door firmly and the lamp will go out. MICROWAVE COOKING: EXAMPLE: To cook on 10% (LOW) power for 2 minutes. 1. Enter the heating time 2. Press the by pressing the 1 MIN MICROWAVE key twice. POWER LEVEL key five times to select 10%. 3. Press the START/AUTO MINUTE key once to start cooking.
R-953/963M O/M 16/03/2000 10:50 Page 10 GRILLING The Grill heating element at the top of the oven cavity has one power setting only. It is efficient and economical. The efficiency of the grill is assisted by the turntable which rotates simultaneously to ensure even browning. The grill is ideal for cooking bacon, gammon steak, fish fingers and tea cakes. Use the high rack for grilling small items of food such as bacon and sausages, turn over halfway through grilling.
R-953/963M O/M 16/03/2000 10:51 Page 11 CONVECTION COOKING Your oven can be used as a conventional oven using the convection mode. CONV. The temperatures available in degrees Centigrade are: 250°C, 230°C, 220°C, 200°C, 180°C, 160°C, 130°C, 100°C, 70°C, 40°C. NOTES: • CONVECTION cooking is ideal for cooking Victoria sandwich cakes, buns, biscuits, scones and for proving bread at 40˚C. • When using the CONVECTION facility, all metal cookware can be used. See SUITABLE COOKWARE page 28-29.
R-953/963M O/M 16/03/2000 10:51 Page 12 DUAL COOKING The DUAL CONVECTION/GRILL function combines any one of the microwave power levels with convection or the grill. DUAL CONVECTION/GRILL is programmed with microwave power level 30% (MED LOW). Press the MICROWAVE POWER LEVEL key if you wish to adjust the power level.
R-953/963M O/M 16/03/2000 10:51 Page 13 EXPRESS COOK This function allows you to cook 4 popular menus from either frozen or chilled. (See chart on page 14) When cooking from frozen (-18°C) press the desired menu key once. When cooking from chilled (5°C) press the desired menu key twice. ROAST BEEF / LAMB ROAST PORK ROAST POULTRY When freezing foods for Express Cook, ensure food is fresh and of good quality. Example 1: To cook medium Roast Beef from frozen weighing 1.0kg. 1.
R-953/963M O/M 16/03/2000 10:51 Page 14 EXPRESS COOK CHART WEIGHT RANGE: • Food weight should be rounded up to the nearest 0.1kg or 1oz, for example, 0.65kg to 0.7kg and 12.5oz to 13oz. • You are restricted to enter a weight within the range (see the chart below). • To cook weights above or below that range, or foods not included in the chart below, refer to the charts in the Cookery Book.
R-953/963M O/M 16/03/2000 10:51 Page 15 EXPRESS DEFROST/AUTO COOK EXPRESS DEFROST/AUTO COOK enables you to defrost or cook foods listed on the control panel and the charts on pages 16-18. Follow the example below for details on how to operate these functions. When defrosting, press the desired EXPRESS DEFROST key. The display will show the selected menu. When cooking, press the AUTO COOK key until the desired menu number is displayed.
R-953/963M O/M 16/03/2000 10:51 Page 16 EXPRESS DEFROST/AUTO COOK CHART EXPRESS DEFROST (R-953M & R-963M) MENU WEIGHT RANGE COOKING PROCEDURE Chicken Portions 0.3kg - 1.2kg Approx. weight of each portion: leg portions = 300g breast with wing portions= 400g • Place the portions best side up in a flan dish on the turntable. • Turn over and rearrange when the oven indicates. • Stand, wrapped in foil, for 15-30 minutes until evenly defrosted. Steaks, Chops 0.2kg - 1.
R-953/963M O/M 16/03/2000 10:51 Page 17 AUTO COOK CHART (R-953M) AUTO COOK (R-953M Continued) No. MENU WEIGHT RANGE COOKING PROCEDURE 4 Oven Ready Pizza 0.2 - 0.8kg • Place the pizza directly on the low rack. NOTE: Use the MORE ( ) key for frozen pizza. 5 Oven Chips 0.1 - 0.4kg • Spread the frozen chips evenly in a large flan dish, and place on the high rack. • Turn the chips over when the oven indicates. NOTE: Use the MORE ( ) key for thick chips and the LESS ( ) key for thin chips.
R-953/963M O/M 16/03/2000 10:51 Page 18 AUTO COOK CHART (R-963M) AUTO COOK (R-963M) MENU No. WEIGHT RANGE COOKING PROCEDURE 1 Oven Ready Pizza 0.2 - 0.8kg • Place the pizza directly on the low rack. NOTE: Use the MORE ( ) key for frozen pizza. 2 Crispy Crumb Foods (ie fish fingers, chicken nuggets) 0.1 - 0.4 kg • Place the crispy crumb foods in a flan dish on the high rack. • Turn the food over when the oven indicates. NOTE: Use the MORE ( ) key for frozen crispy crumb foods.
R-953/963M O/M 16/03/2000 10:52 Page 19 SensNcook (R-963M) SensNcook, can be used for cooking a range of foods using special SensNcook technology. Simply press the chosen food key and the oven will do the rest for you. Always refer to the SensNcook charts on pages 20-21 before operating this function. Press the selected key once and the programme will automatically start to cook after 2-3 seconds. If food requires manipulation (i.e.
R-953/963M O/M 16/03/2000 10:52 Page 20 SensNcook CHART (R-963M) MENU WEIGHT RANGE MENU INCLUDES UTENSILS Chilled 0.3kg - 0.8kg Stirrable: e.g. Tagliatelle Ready Meals Carbonara Spaghetti Bolognese Non-stirrable: e.g. Lasagne Cannelloni Cottage Pie COOKING PROCEDURE Plate for • For one section containers, use a skewer bag types to pierce film in five places. • For two section containers, pierce using a skewer. Pierce meat/main portion three times and rice/pasta portion twice.
R-953/963M O/M 16/03/2000 10:52 Page 21 SensNcook CHART (R-963M) MENU WEIGHT RANGE MENU INCLUDES Canned Food 0.2kg - 0.8kg Fresh Fish 0.1kg - 0.6kg Fillets Steaks Whole Baked beans Chilli Curry Stew Macaroni Ravioli Soup UTENSILS COOKING PROCEDURE Casserole Dish recommended size: 1.0L 1.5L 2.0L • Empty the contents of the can into a suitable sized dish. • Cover the dish with cling film.
R-953/963M O/M 16/03/2000 10:52 Page 22 CONVENIENT FUNCTIONS 1. MULTIPLE SEQUENCE COOKING This facility enables continued and uninterrupted operation of up to four different sequences: 1. ENTER COOKING TIME • To programme a series of sequences: input the cooking time followed by the desired cooking mode. 2. INPUT COOKING MODE • Repeat this procedure to a maximum of four sequences. REPEAT 1. AND 2. (to a maximum of 3 more times) • Finally, press the START/AUTO MINUTE key to start sequence cooking.
R-953/963M O/M 16/03/2000 10:52 Page 23 CONVENIENT FUNCTIONS 3. LESS ( ) and MORE ( The LESS ( ) and MORE ( programmes. ) ) keys allow you to cook food for more or less time than the preset For Example: If you prefer Jacket Potatoes which are cooked but still crisp, use the LESS ( Alternatively, if you prefer Jacket Potatoes softer, use the MORE ( ) key. ) key.
R-953/963M O/M 16/03/2000 10:52 Page 24 CONVENIENT FUNCTIONS 4. GUIDE ON/OFF (R-953M) This will assist you to determine: • The next action towards completing any programme (manual or automatic). • Weight ranges for automatic programmes. When you plug the oven in for the first time, the auto setting for the interactive display guide is ON. The selected guide on/off setting will not change even if the electrical power supply is interrupted.
R-953/963M O/M 16/03/2000 10:52 Page 25 CONVENIENT FUNCTIONS 5. INTERACTIVE DISPLAY (R-963M) This will assist you to determine: • The next action towards completing any programme (manual or automatic). • Weight ranges for automatic programmes. The INFO key provides a step-by-step interactive guide which illuminates the display. When you plug the oven in, the auto setting for the interactive display is ON.
R-953/963M O/M 16/03/2000 10:53 Page 26 CONVENIENT FUNCTIONS 6. AUTO START • Once the oven is programmed for AUTO START the display will show the auto start time. If you press the AUTO START/CLOCK key and hold, the time of day will be displayed until you release your finger from the key. • If you want to cancel an AUTO START programme, press the STOP/CLEAR key. • The AUTO START time can only be entered in multiples of 10 minutes.
R-953/963M O/M 16/03/2000 10:53 Page 27 CONVENIENT FUNCTIONS 7. KITCHEN TIMER You can use the KITCHEN TIMER for timing where microwave cooking is not involved. For example, to time a boiled egg cooked on a conventional hob, to monitor the standing time for microwaved food or to remind you of the time when making a phone call. Example: To set the kitchen timer for 5 minutes: 1. Press the KITCHEN TIMER key once. 2. Press the 1 MIN key 5 times. 1min.
R-953/963M O/M 16/03/2000 10:53 Page 28 SUITABLE COOKWARE For microwaving, use only those utensils suitable for microwave cookery as indicated below. A variety of cookware can be used for microwaving. Round/oval dishes rather than square/oblong ones are recommended, as food in the corners tends to overcook. COOKWARE SUITABLE FOR MICROWAVING GRILL CONVECTION DUAL COOKING Heat resistant glass, (e.g. Pyrex®, Fire King®, Corning Ware ®). YES YES YES YES Microwave-safe plastic cookware.
R-953/963M O/M 16/03/2000 10:53 Page 29 SUITABLE COOKWARE COOKWARE SUITABLE FOR MICROWAVING Aluminium foil & foil containers, made from "Micro Foil®". YES/NO Use small pieces of aluminium foil to shield food from overheating. Keep foil at least 2cm from the oven walls. Foil containers are not recommended unless specified by the manufacturer, eg. MicroFoil ®, follow instructions carefully. High rack & low rack. YES Square shelves.
R-953/963M O/M 16/03/2000 10:53 Page 30 FOOD HANDLING & PREPARATION Piercing Food with skin (such as potatoes, apples, fish, chicken), or with membrane (such as the white and yolk of eggs, including boiled eggs), must be pierced in several places before cooking or reheating. If not, steam will build up and may cause food to explode. Note: Eggs in their shells and whole hard boiled eggs should not be heated in the microwave ovens since they may explode even after microwaving has ended.
R-953/963M O/M 16/03/2000 10:53 Page 31 ADVICE FOR DEFROSTING Meat joints Place in a flan dish, turn over at least 4-5 times during defrosting, shield any warm areas with small, flat pieces of foil. After defrosting, wrap in foil and allow meat to stand for 60-90 minutes, until thoroughly defrosted. Poultry Place in a flan dish, turn over at least 3-4 times during defrosting, shield any warm areas with small, pieces of foil.
R-953/963M O/M 16/03/2000 10:54 Page 32 ADVICE FOR REHEATING WARNINGS: Oil & Fat: Never heat oil or fat for deep frying as this may lead to overheating and fire. Stand back when opening the oven door to allow heat or steam to disperse. When removing covers (such as cling-film), opening roasting bags or popcorn packaging, direct steam away from face and hands. Never heat liquids in narrow-necked containers, as this could result in the contents erupting from the container and may cause burns.
R-953/963M O/M 16/03/2000 10:54 Page 33 CLEANING AND MAINTENANCE OVEN INTERIOR Clean the microwave oven cavity after each use with a mild detergent solution on a soft cloth, pay special attention to the waveguide cover. Built up splashes may overheat and begin to smoke or catch fire, and cause arcing. After Grill, Convection, Dual, AutoCook and Express Cook modes the oven cavity, door, cabinet and accessories will become very hot. Before cleaning, ensure that they have cooled down.
R-953/963M O/M 16/03/2000 10:54 Page 34 TROUBLESHOOTING NOTES: The following cooking conditions should not cause concern: COOKING MODE 1. If you cook food for more than the standard time (see chart opposite) at the same power level, the oven’s safety mechanisms will automatically activate. The microwave power level will be reduced and the grill heating elements will turn on and off. Grill cooking STANDARD TIME Microwave 100% cooking 20 MINUTES 15 MINUTES Dual cooking 2.
R-953/963M O/M 16/03/2000 10:54 Page 35 TO REPLACE THE MAINS PLUG The wires in the mains cable are colour coded as shown opposite: green and yellow stripes = blue = brown = As the colours of the cores in the mains lead of your oven may not correspond with the coloured marking identifying the terminals in your plug, connect the wires as shown opposite: Make sure the terminal screws are tight and the cable is held securely by the cable grip where it enters the plug.
R-953/963M O/M 16/03/2000 10:54 Page 36 GUARANTEE Subject to the conditions listed below, SHARP Electronics (U.K.) Ltd (hereafter called “the Company”), guarantee to provide for the repair of, or, at its option replace this SHARP equipment, or any component thereof, (other than Glass Turntables), which is faulty or below standard, as a result of inferior workmanship or materials.
R-953/963M O/M 16/03/2000 10:54 Page 37 SPECIFICATIONS AC Line Voltage . . . . . . . . . . . . . . . . . . . . . . . . . . . . . .Single phase 230-240 V, 50 Hz AC Power requried: Microwave . . . . . . . . . . . . . . . . . . . . . . . . . . . . . . . . .1.55kW Convection . . . . . . . . . . . . . . . . . . . . . . . . . . . . . . . . .2.85kW Grill . . . . . . . . . . . . . . . . . . . . . . . . . . . . . . . . . . . . . .2.85kW Convection/Microwave . . . . . . . . . . . . . . . . . . . . . . .2.
R-953/963M O/M 16/03/2000 10:54 Page 38 SHARP ELECTRONICS (U.K.) LTD Manchester, U. K. 0990 274 277.