C218 WJ COLOR TELEVISION MODEL 32SC260 H OPERATION MANUAL H Products that have earned the ENERGY STARb are designed to protect the environment through superior energy efficiency. CONTENTS PAGE • IMPORTANT INFORMATION/IMPORTANT SAFEGUARDS ..................................................... 2–4 • Trademarks ............................................................... 5 • Supplied Accessories ............................................... 5 • Before Operating Your Television ..........................
Welcome to the SHARP Family. We are pleased that you are now the owner of a SHARP Color Television – built for outstanding quality, reliability and performance. Every SHARP Color Television set is tuned and adjusted for proper color and sound, and has passed through the most stringent quality control tests at the factory. We have prepared this OPERATION MANUAL so that you may adjust the picture and color to your personal viewing preference.
IMPORTANT INFORMATION (Continued) CAUTION: • Do not place the AC power cord under the TV set or other heavy items. • To prevent fire, never place any type of candle or naked flames on the top or near the TV set. • To prevent fire or shock hazard, do not expose this products to dripping or splashing. No objects filled with liquids, such as vases, should be placed on the product.
IMPORTANT SAFEGUARDS (Continued) 13. Follow all warnings and instructions marked on the television equipment. 14. If an outside antenna is connected to the television equipment, be sure the antenna system is grounded so as to provide some protection against voltage surges and built-up static charges.
Trademarks Dolby and the double-D symbol are registered trademarks of Dolby Laboratories. �� ���� ������� ���� ��� � �� ����� � �� ��� � ��������� � � � � � � � ����� � ����� � Supplied Accessories Size AA Dry Batteries Infrared Remote Control Before Operating Your Television Location • For normal operation, your TV should be located in an area of the room where cool adequate ventilation is provided.
Antenna Connections Antennas • The antenna requirements for good color television reception are more important than those for black & white television reception. For this reason, a good quality outdoor antenna is strongly recommended. The following is a brief explanation of the type of connections that are provided with the various antenna systems: F-type connector 1. A 75-ohm system is generally a round cable with F-type connector that can easily be attached to a terminal without tools (not supplied).
Antenna Connections (Continued) NOTICE F-type connector should be finger-tightened only. When connecting the RF cable to the TV set, do not tighten F-type connector with tools. If tools are used, it may cause damage to your TV set. (The breaking of internal circuit, etc.) F-type connector 75-ohm coaxial cable CABLE TV (CATV) CONNECTION • A 75 ohm coaxial cable connector is built into the set for easy hookup.
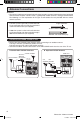
• Quick Reference Control Operation Part Names Front Panel POWER Press � On. Press again � Off. VIDEO/AUDIO IN 2 TERMINALS REMOTE CONTROL SENSOR MENU Press � Accesses MAIN MENU. Press again � Exits MAIN MENU. VOLUME UP/DOWN ( ) Increases sound. ( ) Decreases sound. CHANNEL UP/DOWN ( ) Selects next higher channel. ( ) Selects next lower channel. Basic Remote Control Functions Infrared transmitter Window POWER Press � On. Press again � Off. INPUT Press � Switches to external video INPUT 1 mode.
EZ SETUP during First Use • 1 When you turn on the TV for the first time, it will automatically memorize the broadcasting channels. Please perform the following instructions before pressing the POWER button. (1) Insert the batteries into the remote control. (See page 5) (2) Connect the antenna cable to the TV set. (See pages 6, 7) (3) Plug in the AC POWER cord to the wall outlet.
EZ SETUP during First Use (Continued) 5 2 Once EZ SETUP is complete, the lowest channel number memorized will be displayed. (e.g. Channel 2) Note: • If EZ SETUP does not memorize all the channels in your region, please refer to pages 33–35 for more information on manually memorizing the channels using CHANNEL SETTING. • It may be difficult to PRESET when the broadcast signals are weak, the channel cycle frequency is incorrect or frequency jamming is occurring around the area.
Antenna Setup - DIGITAL (Continued) H CHANNEL STRENGTH Make sure the signal strength of each channel received is finely adjusted. (i) Press CH a/s to select “CHANNEL STRENGTH”. ���������������������� (ii) Input channel number (2–69) using REMOTE KEYPAD (0–9) button. (iii) Adjust the direction of the antenna to obtain the signal strength level 60 or higher.
Changing Viewing Channel • Please note: your new Television is capable of receiving the full range of AIR-TV channels available today, from the most advanced digital channels, to the more traditional analog channels. As the transition toward full digital TV continues, some AIR-TV systems in the USA will have a mixture of analog and digital channels in their lineups. VOLUME (�� )/(� ) CHANNEL UP ( )/ DOWN ( ) MENU H You can change channels in several ways.
Language • The language for the ON SCREEN DISPLAY can be set to ENGLISH, SPANISH or FRENCH. 1 Press MENU to access the MAIN MENU screen. MENU SLEEP T I MER V I DEO ADJ UST AUD I O SEL ECT D I G I T AL AUD I O CC CLOSED CAPT I ON PARENT CONTROL ES ENERGY SAVE SET UP (MAIN MENU screen) 2 MENU Press CH a/s to move the “E” mark to “SET UP”.
Video Adjust Selected item PICTURE TINT COLOR BRIGHT SHARP COLOR TEMP. RESET 1 2 VOL k button VOL l button To increase contrast To decrease contrast To make skin tones greenish To make skin tones purplish To increase color intensity To decrease color intensity To increase brightness To decrease brightness To increase sharpness To decrease sharpness To choose a LOW, ML, MH or HIGH color tone. To return all adjustments to factory preset levels.
Audio Select H MTS (Multichannel TV Sound) (For Analog Channel only) This function allows reception of stereo or bilingual TV sound. You can enjoy Hi-Fi stereo sound or SAP broadcasts where available. Stereo broadcasts Live television broadcasts of sports, shows, concerts, etc. can be received in dynamic stereo sound. SAP broadcasts Television broadcast can be received with either MAIN or SAP sound. MAIN sound: The normal program soundtrack. (Monaural or stereo where available.
Audio Select (Continued) H AUDIO ADJUST When the “E” mark is at “AUDIO ADJUST”, press VOL k/l to access the AUDIO ADJUST screen. To access the desired item, press CH a/s. To adjust the audio setting, press VOL k/l. TREBLE 6 BASS BALANCE RESET Selected item VOL k button VOL l button TREBLE To increase treble response. To decrease treble response. BASS BALANCE To increase bass response. To emphasize the right speaker’s volume. To decrease bass response. To emphasize the left speaker’s volume.
Digital Audio • This feature allows you to select the Primary and Secondary language and as well the type of audio transmitted in a digital broadcast. If the viewing channel is an analog channel, Digital Audio cannot be selected. 1 2 Press MENU to access MAIN MENU screen. Press CH a/s to move the “E” mark to “DIGITAL AUDIO”.
Closed Caption • How to set CLOSED CAPTION • Your TV is equipped with an internal Closed Caption decoder. “Closed Caption” is a system which allows conversations, narration, and sound effects in TV programs and home videos to appear as captions on the TV screen (see the illustration). • Not all the programs and videos will offer closed captioning. Please look for the “ ” symbol to ensure that captions will be shown. • Closed Caption broadcast for Analog Channel can be viewed in two modes: CAPTION and TEXT.
Closed Caption (Continued) H During viewing digital channel 1 2 3 Repeat steps 1 to 2 of During viewing analog channel. Press VOL k/l to access the CLOSED CAPTION screen. Press CH a/s to select “CLOSED CAPTION SERVICE” or “CLOSED CAPTION PREFERENCE” and then press VOL k/l to enter to the selected mode screen.
Parent Control (V-CHIP Operation) H V-CHIP • This function allows you to restrict TV programs and also allows you to control TV usage based on FCC data. This function is to prevent your children from watching violence or sexual scenes that may be harmful. • Restriction of TV programs includes two characters that contain information about the program’s MPAA rating and the TV Parental Guidelines. MPAA is restricted by age. TV Parental Guidelines are restricted by age and contents.
Parent Control (V-CHIP Operation) (Continued) • TV PARENTAL GUIDELINES (Example) Example 1.1 : Age Based setting Clear V s (block) from each “AGE” box for all ratings. This will automatically unblock everything. TV–Y TV–Y 7 TV–G TV–PG TV– 1 4 TV–MA AG E D – – – L – – – S – – – – V FV – – – – – – – – : V I EW V : B LOCK MENU : RETURN Example 1.2 : Age Based setting For “TV-G” put a V in the “AGE” box.
Parent Control (V-CHIP Operation) (Continued) [3] Canadian Rating Systems • The TV rating systems in Canada are based on the Canadian Radio-Television and Telecommunications Commission (CRTC) policy on violence in television programming. • While violence is the most important content element to be rated, the structure developed takes into consideration other program content like language, nudity, sexuality and mature themes.
Parent Control (V-CHIP Operation) (Continued) • How to set V-CHIP [1] MPAA RATING VOLUME (�� )/( ) CHANNEL UP ( )/ DOWN ( ) MENU 1 Press MENU to access the MAIN MENU screen. MENU SLEEP T I MER V I DEO ADJ UST AUD I O SEL ECT D I G I T AL AUD I O CC CLOSED CAPT I ON PARENT CONTROL ES ENERGY SAVE SET UP (MAIN MENU screen) 2 Press CH a/s to move the “E” mark to “PARENT CONTROL”. CH CH 3 Press VOL k/l to access the PARENT CONTROL screen.
Parent Control (V-CHIP Operation) (Continued) 7 Press MENU, then “INPUT SECRET No.” will be displayed. Note: I NPUT SECRET No . – – – – • If SECRET No. is already set, skip to step 9. 8 Enter a 4-digit SECRET No. using the REMOTE KEYPAD. 9 � � � � � � � � � I NPUT SECRET No . 1 2 3 4 When done, press MENU to exit. Note: • If you set “G” to BLOCK , all ratings are automatically blocked. • If you set “X” to BLOCK, “G”, “PG”, “PG-13”, “R” and “NC-17” are not blocked.
Parent Control (V-CHIP Operation) (Continued) • How to set Canadian Rating System Setting for Canadian English ratings and Canadian French ratings. 1 2 Repeat steps 1 to 4 of [1] MPAA RATING. Press CH a/s to move the “E” mark to “Cdn. English Ratings”, then press VOL k/l. CH CH 3 VOL — VOL + Press CH a/s to move the “E” mark to “PG” then press VOL k/l to select Block. If you set “PG” to block, “14 +” and “18 +” are automatically blocked.
Parent Control (V-CHIP Operation) (Continued) • Activating the V-CHIP BLOCK 1 2 Repeat steps 1 to 4 of [1] MPAA RATING. Press CH a/s to move the “E” mark to “STATUS”. Press VOL k/l to activate the V-CHIP BLOCK. (If STATUS is OFF, V-CHIP BLOCK will not operate.) CH CH 3 → VOL — VOL + MPAA TV GU I DE L I NES Cd n . E n g l i s h R a t i n g s Cd n . F r e n c h Ra t i n g s STATUS : ON (V-CHIP select screen) Press MENU, then “INPUT SECRET No.” will be displayed. Note: I NPUT SECRET No .
Parent Control (V-CHIP Operation) (Continued) • To change the V-CHIP BLOCK after registering a secret No. 1 Repeat steps 1 to 4 of [1] MPAA RATING, then “INPUT SECRET No.” will be displayed. I NPUT SECRET No . – – – – 2 Enter the 4-digit secret No. using the REMOTE KEYPAD and the V-CHIP select screen will be displayed. Set V-CHIP BLOCK again. � � � � � � � � � I NPUT SECRET No . • If you forget or need to change your secret No., clear the original secret No. and set up a new one.
Parent Control (VIEW TIMER) H VIEW TIMER This function allows you to restrict TV viewing time and also allows you to control TV usage. This function is to prevent your children from watching too much TV. VIEWING TIME (an accumulative timer: counts only the time duration while the TV power is on.) • VIEWING TIME can be set from 30M (30 minutes) to 10H00M (10 V I EW T I MER hours) in 30 minutes intervals.
Parent Control (VIEW TIMER) (Continued) 9 Enter a 4-digit secret No. using the REMOTE KEYPAD. � � � 10 Press MENU to exit. � � � � � � I NPUT SECRET No . 1 2 3 4 → Example: • To restrict anybody from watching TV for more than 5 hours, after watching the TV for 2 hours, your settings would look like the one on the right. • You can choose to watch the 2 hours of TV as you wish.
Parent Control (VIEW TIMER) (Continued) • To cancel the VIEW TIMER setting or change the secret No. (If you forget the SECRET No.) 1 Repeat steps 1 to 4 of How to set VIEW TIMER. Press VOL k/l, and “INPUT SECRET No.” will be displayed. I NPUT SECRET No . – – – – VOL — 2 VOL + Press and hold both VOL k and CH a on the TV set simultaneously until the VIEW TIMER access screen is displayed. Now you can cancel the VIEW TIMER settings or change the secret No. while “INPUT SECRET No.” is displayed.
Energy Save H SCREEN This feature lets you lower the power consumption of your TV set which in turn saves you money and minimizes the impact on the environment. When this feature is turned on, it reduces the brightness of the TV to a level that consumes approximately 20 percent less energy than when the feature is turned off. The reduction in brightness will be less noticeable under low room lighting conditions.
Set Up H EZ Setup By operating the channel preset functions, you can preset your TV to the desired channels for viewing. VOLUME (�� )/( ) CHANNEL UP ( )/ DOWN ( ) ����� MENU 1 2 Press MENU to access the MAIN MENU screen. Press CH a/s to move the “E” mark to “SET UP”.
Set Up (Continued) 7 2 Once EZ SETUP is complete, the lowest channel number memorized will be displayed. H Channel Setting If EZ SETUP does not memorize all the channels in your region, follow the instructions below to manually memorize the channel. 1 2 Press MENU to access the MAIN MENU screen. Press CH a/s to move the “E” mark to “SET UP”. MENU CH → 3 4 Press VOL k/l to access the SET UP screen. Press CH a/s to move the “E” mark to “CH SETTING”.
Set Up (Continued) H ANALOG CH SEARCH Saving ANALOG broadcast TV channels into memory 1 Repeat step 1 to step 5 of Channel Setting. (See page 33) Press CH a/s to move the “E” mark to “ANALOG CH SEARCH”. CH �� ���� � �� �� ����� � � � � ������ ���� � ������ �� ������ � � � � ��� �� ������ �� ������ ������� ����� � � � � ��� CH (CH SETTING screen) 2 Press VOL k/l to access the ANALOG CH SEARCH screen. VOL — To stop: Press VOL l.
Set Up (Continued) H CH MEMORY Adding weak or additional channels or erasing unwanted channels from TV memory 1 Repeat step 1 to step 5 of Channel Setting. (See page 33) Press CH a/s to move the “E” mark to “CH MEMORY”. CH CH �� ���� � �� �� ����� � � � � ������ ���� � ������ �� ������ � � � � ��� �� ������ �� ������ ������� ����� � � � � ��� (CH SETTING screen) 2 3 Press VOL k/l to access the CH MEMORY screen. Use CH a/s to select each desired channel to add or erase.
Set Up (Continued) H BLUE SCREEN Automatically turns the screen blue if a broadcast signal is not received. After 15 minutes of non-reception, the TV will turn off automatically. VOLUME (�� )/( ) CHANNEL UP ( )/ DOWN ( ) MENU 1 2 Press MENU to access the MAIN MENU screen. Press CH a/s to move the “E” mark to “SET UP”. MENU CH → 3 CH Press VOL k/l to access the SET UP screen.
Auto Input • The unit is preset to switch to the INPUT 2 screen automatically when VIDEO equipment is connected to the INPUT 2 terminal. Do the following to switch this feature off: VOLUME (�� )/( ) CHANNEL UP ( )/ DOWN ( ) ����� MENU 1 2 MENU Press MENU to access the MAIN MENU screen. Press CH a/s to move the “E” mark to “SET UP”.
Screen Format • The format of the picture can be adjusted to either of the three screen formats. (This function allows you to view 16:9 pictures recorded on DVD or by camcorders that are once saved using the 4:3 aspect ratio to be played back in the original high-density 16:9 format.) VOLUME (k)/(l) PERSONAL PREFERENCE A B C D CH VOL — VOL + CH MUTE MENU CATV TV DVD VCR CHANNEL UP (a)/ DOWN (s) MENU 1 2 Press MENU to access the MAIN MENU screen.
Screen Format 6 Press MENU o exit. Note: • The STRETCH and 16:9 screen format will be cancelled when the power is turned off. ������������������������������� ������������ ������� ��������������� ���������������� ��������� ���������������� �������������� Note: • The STRETCH and 16:9 screen format will be cancelled when the AC power cord is unplug. • If STRETCH mode is selected, the quality of picture might be poor.
Using the Video and Audio Input Terminals • Connecting video equipment for playback of video material.
Using the Video and Audio Input Terminals (Continued) Notes: • COMPONENT terminals are DVD compatible, allows you to enjoy the highest quality playback image than the image from IN 1 S-VIDEO terminal. • The IN 1 S-VIDEO terminal is used to obtain a higher quality image by importing image signals. • The S-VIDEO terminal is for the video image only. To receive an audio signal, connect the audio cable to the IN 1 AUDIO terminals (left and right).
Using the Audio Output Terminals • These terminals are used for connecting an external audio amplifier. The STEREO/MONO/SAP, VOLUME, MUTE and FAO functions can all be controlled via the television’s remote control or directly on the TV itself. These terminals relay the audio signal of all programs being displayed on the TV screen. (AUDIO OUTPUT terminals are located on the rear of the cabinet.
Before Calling for Service POSSIBLE REMEDY No Playback of VCR and Disc Player No Picture or Sound from External Video/Audio Products Remote Control Doesn’t Work Bars on Screen Picture Distorted Picture Rolls Vertically No Color Poor Reception on Some Channels Weak Picture Lines or Streaks in Picture Ghosts in Picture Picture Blurred Sound OK, Picture Poor Picture OK, Sound Poor No Picture or Sound Dark and Blank Picture External Electrical Noise Interfering with TV’s Operation Color on Part of the Screen
Warning message for Digital broadcasting H The warning message about reception of digital broadcast The example of an warning message displayed on a screen Possible Solution • Failed to receive broadcast. • Check the antenna cable. Check that the antenna is correctly antenna setup. • No broadcast now. • Check the broadcast time in the program guide.
(ESPAÑOL) Lea estas instrucciones cuidadosamente y consérvelas a la mano para consultarlas en el futuro. IMPORTANTE Sírvase anotar el modelo del televisor y los números de serie en el espacio provisto, para ayudar a reportar en caso de pérdida o robo. Los números están ubicados en la parte posterior del televisor.
INFORMACIÓN IMPORTANTE (Continuación) PRECAUCIÓN: • No coloque el cable de alimentación de CA debajo del televisor u otro elemento pesado. • Para impedir un incendio, no ponga nunca ningún tipo de vela o llama al descubierto encima o cerca del televisor. • Para impedir un incendio o una descarga eléctrica, no exponga este aparato al goteo ni a las salpicaduras.
MEDIDAS DE SEGURIDAD IMPORTANTES (Continuación) 13. 14. Cumpla con todos los avisos y las instrucciones marcados en el televisor. Si se conecta una antena exterior al televisor, asegúrese de que el sistema de antena esté conectado a tierra para obtener cierta protección ante los aumentos de voltaje y la acumulación de cargas estáticas.
Referencia rápida de los controles de operación Funciones Básicas Del Control Remoto • Nombres de los componentes (ESPAÑOL) Panel Delantero Terminal IN 2 (vídeo/audio) ALIMENTACION (POWER) Pulsando → Enciende (On). Pulsando nuevamente → Apaga (Off). SENSOR DE CONTROL REMOTE MENU (MENU) Pulsando → Accede al MENU PRINCIPAL. Pulsando nuevamente → Sale del MENU PRINCIPAL. AUMENTO/DISMINUCION DEL VOLUMEN (VOL) (k) Aumenta el sonido. (l) Disminuye el sonido.
Antes de llamar al servicio de reparaciones POSIBLE SOLUCIÓN Pruebe con otro canal y si todo está bien, el problema puede ser de la emisora. Está conectado el televisor? Llega electricidad al tomacorrientes? Está conectado el interruptor del televisor? Está conectado la antena al terminal del panel posterior del televisor? Si utiliza una antena exterior, cerciórese de que el cable no esté dañado. Compruebe si hay interferencia local.
(FRANÇAIS) Lisez attentivement ces instructions et gardez-les à proximité pour toute référence ultérieure. IMPORTANT Afin de vous aider en cas de perte ou de vol, inscrivez les numéros de série et de modèle du téléviseur dans les espaces fournis à cet effet. Ces numéros sont situés à l’arrière du téléviseur.
INFORMATIONS IMPORTANTES (Suite) ATTENTION: • Ne placez pas le cordon d’alimentation sous le téléviseur ou sous tout autre objet lourd. • Ne placez pas de bougies ni de flammes nues sur le téléviseur ou à sa proximité, afin d’éviter les incendies. • Veillez à ne pas éclabousser ni faire tomber de l’eau sur ces appareils afin d’éviter les incendies ou les électrocutions. Ne placez jamais d’objets remplis de liquide, comme des vases, sur ces appareils.
Référence rapide sur les commandes Fonctions de base de la télécommande • Nomenclature (FRANÇAIS) Panneau Avant ALIMENTATION (POWER) Appuyer → Pour mettre sous tension. Appuyer de nouveau → Pour mettre hors tension. CAPTEUR DE TÉLÉCOMMANDE RÈGLAGE (MENU) Appuyer → Pour mettre sous tension. Appuyer de nouveau → Pour mettre hors tension. PRISÉS D’ENTRÉE VIDÉO/ AUDIO IN 2 AUGMENTATION/RÉDUCTION DU VOLUME SONORE (VOL) (k) Pour augmenter le volume du son. (l) Pour diminuer le volume du son.
Avant d’appeler un réparateur Image affaiblie Lignes ou rayures dans l’image Images fantômes Image brouillée Son normal, image médiocre Image normale, son médiocre Ni son, ni image Image sombre et vide Bruit électrique extérieur interférant avec le fonctionnement du téléviseur La couleur sur une partie de l’écran semble altérée SOLUTION POSSIBLE Pas de reproduction d’un magnétoscope ou lecteur de disque Pas d’image ou de son d’un appareil vidéo/audio externe La télécommande ne fonctionne pas Barres sur l’
Limited Warranty CONSUMER LIMITED WARRANTY SHARP ELECTRONICS CORPORATION warrants to the first consumer purchaser that this Sharp brand product (the “Product”), when shipped in its original container, will be free from defective workmanship and materials, and agrees that it will, at its option, either repair the defect or replace the defective Product or part thereof with a new or remanufactured equivalent at no charge to the purchaser for parts or labor for the period(s) set forth below.