Thank you for purchasing this SHARP product. To obtain the best performance from this product, please read this manual carefully. It will guide you in operating your SHARP product. MUSIC SYSTEM FOR iPod® The illustrations printed in this operation manual are for the model DK-A1H.
DK-A1H DK-A1H(BK) Special notes NOTES FOR USERS IN THE U.K. AND IRELAND The mains lead of this product is fitted with a non-rewireable (moulded) plug incorporating a 3A fuse. Should the fuse need to be replaced, a BSI or ASTA approved BS 1362 fuse marked or and of the same rating as above, which is also indicated on the pin face of the plug must be used. Important Instruction Always refit the fuse cover after replacing the fuse. Never use the plug without the fuse cover fitted.
DK-A1H DK-A1H(BK) Information on Proper Disposal A. Information on Disposal for Users (private households) Attention: Your product is marked with this symbol. It means that used electrical and electronic products should not be mixed with general household waste. There is a separate collection system for these products. 1.
DK-A1H DK-A1H(BK) Special Note Contents General Information Supply of this product does not convey a license nor imply any right to distribute content created with this product in revenue-generating broadcast systems (terrestrial, satellite, cable and/or other distribution channels), revenue-generating streaming applications (via Internet, intranets and/or other networks), other revenue-generating content distribution systems (pay-audio or audio-on-demand applications and the like) or on revenue-generat
Precautions DK-A1H DK-A1H(BK) General 10 cm (4") Use the unit on a firm, level surface free from vibration. Do not remove the outer cover, as this may result in electric shock. Refer internal service to your local SHARP service facility. Keep the unit away from direct sunlight, strong magnetic fields, excessive dust, humidity and electronic/electrical equipment (home computers, facsimiles, etc.) which generate electrical noise.
DK-A1H DK-A1H(BK) Controls and indicators Top panel 13 14 15 16 17 18 General Information 1 2 3 4 5 6 7 8 9 10 11 12 6 Reference page 1. iPod Dock. . . . . . . . . . . . . . . . . . . . . . . . . . . . . . . . . . . . . . . . 15 2. ON/STAND-BY Button . . . . . . . . . . . . . . . . . . . . . . . 12, 17, 28 3. Clock Button . . . . . . . . . . . . . . . . . . . . . . . . . . . . . . . . . . . . . 13 4. iPod Button . . . . . . . . . . . . . . . . . . . . . . . . . . . . . . . . . . . 14, 15 5.
DK-A1H DK-A1H(BK) Display 2 3 4 5 6 7 8 Reference page 1. Alarm Indicator . . . . . . . . . . . . . . . . . . . . . . . . . . . . . . . . . . . 24 2. Sleep Indicator . . . . . . . . . . . . . . . . . . . . . . . . . . . . . . . . . . . 25 3. iPod Indicator . . . . . . . . . . . . . . . . . . . . . . . . . . . . . . . . . . . . 14 4. Aux Indicator . . . . . . . . . . . . . . . . . . . . . . . . . . . . . . . . . . . . 26 5. FM Stereo Mode Indicator . . . . . . . . . . . . . . . . . . . . . . . . . .
DK-A1H DK-A1H(BK) Controls and indicators (continued) Remote control 9 1 2 FUNCTION 3 CLOCK VOL SLEEP SNOOZE/ DIMMER ALARM 4 General Information DISPLAY 5 E SOUND /DEMO 6 PLAY MODE TUNING CLEAR RDS 7 ASPM MEMORY 8 EQ PTY DISPLAY 10 11 12 13 14 15 16 17 18 19 20 21 Reference page 1. Remote Control Transmitter . . . . . . . . . . . . . . . . . . . . . . . . 11 2. Function Button . . . . . . . . . . . . . . . . . . . . . . . . . . . . . . . . . . 12 3. On/Stand-by Button . . . . . . . .
System connections DK-A1H DK-A1H(BK) Aerial connection Supplied FM aerial: Connect the FM aerial wire to the FM 75 OHMS socket and position the FM aerial wire in the direction where the strongest signal can be received. Supplied AM loop aerial: Connect the AM loop aerial to the AM and GND terminals. Position the AM loop aerial for optimum reception. Place the AM loop aerial on a shelf, etc., or attach it to a stand or a wall with screws (not supplied).
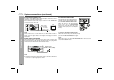
DK-A1H DK-A1H(BK) System connections (continued) Connecting iPod to TV iPod photo and 5th Generation iPod with photo and video can be viewed by connecting to TV/monitor. If the TV/monitor has a video input, connect it to the VIDEO OUT socket on the rear of the unit. Video cable (not supplied) TV Preparation for Use To video input socket Note: Please make sure to set the iPod unit, to either NTSC or PAL to match your TV signal. Please visit Apple's homepage for further information.
Remote control DK-A1H DK-A1H(BK) Battery installation This product contains a CR Coin Lithium Battery which contains Perchlorate Material – special handling may apply. California residents, see www.dtsc.ca.gov/hazardouswaste/perchlorate/ 1 Whilst pushing the locking tab towards the centre of the remote control, slide out the battery holder. Back of remote control Notes concerning use: Replace the battery if the operating distance is reduced or if the operation becomes erratic.
DK-A1H DK-A1H(BK) General control E SOUND control When the E SOUND/DEMO button is pressed, the current mode setting will be displayed. To change the setting, press the E SOUND/ DEMO button repeatedly to toggle ON or OFF. When ON is selected, the unit will enter the E SOUND mode and adjust low bass and high frequency automatically according to volume input. Equaliser Basic Operation When the EQ button is pressed, the current mode setting will be displayed.
Setting the clock DK-A1H DK-A1H(BK) 4 AUX TUNER ALARM ALARM ON/OFF SNOOZE DIMMER In this example, the clock is set for the 12-hour (12:00 AM) display. 1 2 Press the CLOCK button for more than 2 seconds. Press the or button to select 12-hour or 24-hour display and then press the CLOCK button. “12:00 AM” “0:00 AM” “0:00” 3 The 12-hour display will appear. (12:00 AM - 11:59 PM) The 12-hour display will appear. (0:00 AM - 11:59 PM) The 24-hour display will appear.
DK-A1H DK-A1H(BK) Listening to the iPod Supported iPod models: iPod nano (software 1.0 above) iPod photo (software 1.0 above) iPod mini (software 1.2 above) 5th Generation iPod (software 1.0 above) (Dock connector equipped Click Wheel model) 4th Generation iPod (software 3.0.2 above) (Dock connector equipped Click Wheel model) 3rd Generation iPod (software 2.2 above) (Dock connector equipped Click Wheel model) iPod Caution: Please update your iPod unit to the latest software version before using it.
DK-A1H DK-A1H(BK) To insert iPod adaptor To remove iPod adaptor 1. Push the iPod sliding door until end. Hold this tip and pull as direction shown to remove adaptor. EQ - iPod E SO AUX + E SO UN UN iPod playback iPod iPod (bottom) Dock connector 1 2 Press the ON/STAND-BY button to turn the power on. 3 Open the iPod terminal door and insert iPod unit in iPod dock of main unit. Press the iPod button on main unit once or FUNCTION button on remote control repeatedly to select iPod function.
DK-A1H DK-A1H(BK) Listening to the iPod (continued) Various iPod functions iPod Function Main unit Remote control Operation Play Press in the pause mode. Pause Press in the playback mode. Track up/ down Press in the playback or pause mode. If you press the button in the pause mode, press the / button to start the desired track. Press and hold down in the playback mode. Release the button to resume playback. Fast forward/ reverse Display ____ iPod back light ON.
Listening to the radio DK-A1H DK-A1H(BK) Tuning AUX TUNER SNOOZE ALARM ON/OFF DIMMER Auto power on function: When you press any of the following buttons, the unit turns on. TUNER button (main unit): The unit turns on and the TUNER function is activated. / button (main unit and remote control): The unit turns on and playback of the last function starts (iPod, TUNER, AUX). Press the ON/STAND-BY button to turn the power on.
DK-A1H DK-A1H(BK) Listening to the radio (continued) Memorising a station Radio You can store 40 AM and FM stations in memory and recall them at the push of a button. (Preset tuning) 1 2 Perform steps 1 - 3 in “Tuning” on page 17. 3 Within 1 minute, press the or button to select the preset channel number. Store the stations in memory, in order, starting with preset channel 1. 4 Within 1 minute, press the MEMORY button on remote control to store that station in memory.
Using the Radio Data System (RDS) RDS is a broadcasting service which a growing number of FM stations provide. These FM stations send additional signals along with their regular programme signals. They send their station names, and information about the type of programme such as sport, music, etc. When tuned to an RDS station, “RDS” and the station name will be displayed.
DK-A1H DK-A1H(BK) Using the Radio Data System (RDS) (continued) Using the Auto Station Programme Memory (ASPM) Advanced Features Whilst in the ASPM operation mode, the tuner will automatically search for new RDS stations. Up to 40 stations can be stored. If you have already stored some stations in memory, the number of new stations you can store will be less. 20 1 Press the TUNER button on main unit or FUNCTION button on remote control repeatedly to select the FM band.
DK-A1H DK-A1H(BK) Notes for RDS operation If any of the following events occur, it does not mean that the unit is faulty: “PS”, “NO PS” and a station name appear alternately, and the unit does not operate properly. If a particular station is not broadcasting properly or a station is conducting tests, the RDS reception function may not work properly. When you receive an RDS station whose signal is too weak, information like the station name may not be displayed.
DK-A1H DK-A1H(BK) Using the Radio Data System (RDS) (continued) Advanced Features Notes: If the display has stopped flashing, start again from step 2. If the unit finds a desired programme type, the corresponding channel number will flash for about 4 seconds, and then the station name will flash for 7 seconds, which will remain lit. If you want to listen to the same programme type of another station, press the RDS PTY button whilst the channel number or station name is flashing.
DK-A1H DK-A1H(BK) CLASSICS OTHER M WEATHER FINANCE CHILDREN SOCIAL RELIGION PHONE IN TRAVEL LEISURE JAZZ Classical music for general, rather than specialist appreciation. Examples of music in this category are instrumental music, and vocal or choral works. Performances of major orchestral works, symphonies, chamber music, etc., and including Grand Opera. Musical styles not fitting into any of the other categories.
DK-A1H DK-A1H(BK) Alarm and sleep operation Alarm The unit turns on and play desired source (iPod, TUNER or AUX) or Buzzer sound for 30 minutes. Before setting the alarm: 1 Check that the clock is set to the correct time. (refer page 13) If it is not set, you cannot use the alarm function. 2 For iPod playback: insert iPod to the unit. (refer page 15) 3 For TUNER: Set preset memory.
DK-A1H DK-A1H(BK) To turn off the alarm function During alarm or snooze, press the ALARM ON/OFF button to turn it off. Sleep operation The radio and iPod can be turned off automatically. 1 2 Playback the desired sound source. Press the SLEEP button on remote control to select sleep time. To confirm the remaining sleep time: 1 Whilst “SLEEP” is indicated, press the SLEEP button once to select “SLEEP XXX”. “XXX” is sleep remaining time. The remaining sleep time is displayed for about 10 seconds.
DK-A1H DK-A1H(BK) Enhancing your system Listening to the playback sounds from VCR, DVD, etc. The connection lead is not included. Purchase a commercially available lead as shown below. 1 White When using video equipment, connect the audio output to this unit and the video output to a television. VCR, DVD, etc. Red Advanced Features To the line output sockets White Red 2 3 Press the ON/STAND-BY button to turn the power on. 4 Play the connected equipment.
Troubleshooting chart General Symptom The clock is not set to the correct time. Tuner Symptom The radio makes unusual noises continuously. Possible cause Is the unit placed near the TV or computer? Is the FM aerial or AM loop aerial placed properly? Move the aerial away from the AC power lead if it is located nearby. Possible cause Is the Summer Time switch set to the correct setting? (Refer to page 13) Did a power failure occur? Reset the clock.
DK-A1H DK-A1H(BK) Troubleshooting chart (continued) If trouble occurs When this product is subjected to strong external interference (mechanical shock, excessive static electricity, abnormal supply voltage due to lightning, etc.) or if it is operated incorrectly, it may malfunction. If such a problem occurs, do the following: 1 Set the unit to the stand-by mode and turn the power on again. 2 If the unit is not restored in the previous operation, unplug and plug in the unit, and then turn the power on.
Specifications As part of our policy of continuous improvement, SHARP reserves the right to make design and specification changes for product improvement without prior notice. The performance specification figures indicated are nominal values of production units. There may be some deviations from these values in individual units. General Power source DK-A1H DK-A1H(BK) *This power consumption value is obtained when the demonstration mode is cancelled in the power stand-by mode.
MEMO
MEMO
TERMS OF GUARANTEE Sharp Electronics (UK) Ltd. (“Sharp”) guarantees to provide for the repair, or at its option the replacement, of this product subject to the conditions listed below:1. This guarantee shall only apply to faults which are due to inferior workmanship or materials. It does not cover faults or damage caused by accident, misuse, fair wear and tear, neglect, tampering with the product, or repair other than by a Service Facility appointed by Sharp. 2.