
Specifications


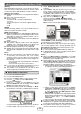

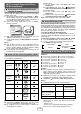

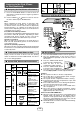
Table Of Contents
- Special Notes
- Accessories
- Precaution
- Remote control
- System connections
- General control
- Wi-Fi network Setup for AirPlay / DLNA
- Listening to the iPod, iPhone or iPad
- Listening to a CD or MP3/WMA disc
- Listening to USB mass storage device/MP3 player
- Advanced USB playback
- Listening to the radio
- Using the Radio Data System (RDS)
- Setting the clock (Remote control only)
- Timer and sleep operation (Remote control only)
- Enhancing your system
- Troubleshooting chart
- Maintenance
- Specifications

7
Connection of an AirPlay device to the
same Wi-Fi network
■
You can add other AirPlay devices to join the same Wi-Fi
network as the unit.
On the iPod touch/iPhone/iPad, select ‘Settings’ --> ‘Wi-Fi’.
On the PC/Mac, enter the list of available wireless networks.
For other DLNA compatible devices, turn on the Wi-Fi. For
more details, refer to your devices’ manual.
Select your router SSID from the list of available
wireless networks.
Wait until successful Wi-Fi connection from the
additional AirPlay devices to the router.
Continue with step 8 to 9 in ‘Direct wireless connection’
of page 5.
Notes:
This product may face some irregularities due to
various unforseen reasons from other devices in the
process of Wi-Fi pairing. Should this happen, unplug
the AC power lead, and plug it back in.
If the Network function operates incorrectly, do the
Network reset (refer page 20).
Various function control during AirPlay / DLNA
■
Various function can be controlled from the remote control
or your AirPlay / DLNA device.
Function Main unit Remote
control
AirPlay
device
Volume
up/down
Play/pause
Next/
previous
track
Mute
Display
Repeat
Shufe
(press and
hold)
Notes:
For DLNA compatible devices, the function control
may vary depending on DLNA application used.
To enable this unit to control iTunes software, the
setting below is required.
�
�
3�
�
●
●
●
●
For Mac iTunes:
On the toolbar menu, click iTunes and select
Preferences.
Under Devices tab, check the ‘
Allow iTunes
audio control from remote control speakers’ box.
For Window iTunes:
On the toolbar menu, click Edit and select
Preferences.
Under Devices tab, check the ‘
Allow iTunes
control from remote control speakers’ box.
�
�
�
�
Note: For more details, refer to the iTunes guide.
Network Stand-by mode■
On: Network Stand-by mode is enabled.
During stand-by mode, if you select DK-KP95PH speakers
through AirPlay icon and tap/click PLAY on AirPlay device,
the unit will automatically power on and stream the music
from your AirPlay device. For other DLNA compatible
devices, refer to your devices’ manual.
To enable the Network Stand-by mode:
During Stand-by mode, press DEMO button on remote
control to select the Network Stand-by mode on or off.
(refer page 3)
To check the IP address of the router / Mac ID / SSID:
Press iPod MENU button on the remote control.
Press
/ button on the remote control repeatedly.
The display will toggle as below:
Mac ID
Wi-Fi Setup
SSID
(when using router)
IP address
Listening to the iPod, iPhone or iPad
Made for:
iPod touch (4
th
generation)
iPod touch (3
rd
generation)
iPod touch (2
nd
generation)
iPod touch (1
st
generation)
iPod classic
iPod nano (6
th
generation)
iPod nano (5
th
generation)
iPod nano (4
th
generation)
●
●
●
●
●
●
●
●
iPod nano (3
rd
generation)
iPod nano (2
nd
generation)
iPhone 4
iPhone 3GS
iPhone 3G
iPhone
iPad 2
iPad
●
●
●
●
●
●
●
●
Caution:
Please update your iPod, iPhone and iPad unit to the
latest software version before using it. Please visit
Apple’s homepage to download the latest version for
your iPod, iPhone and iPad.
Unplug all accessories for the iPod or iPhone before
inserting it into the docking station or USB connector.
Stop button (
) at main unit is invalid during iPod function.
Notes:
Charging terminal for iPod, iPhone and iPad:
Condition DOCK USB
USB function YES YES
(without iPod
or
iPhone docking)
Other function
(iPod / CD / Network /
Tuner / Audio In)
YES NO
Stand-by YES NO
The message “This accessory is not made to work
with iPhone” or similar, may appear on the iPhone
screen when:
- battery is low.
- the iPhone is not properly docked (eg. slanting).
If this occurs, remove and re-dock the iPhone.
�
�
●
●
●
●
●
Wi-Fi network Setup for AirPlay /
DLNA (continued)