Phantom 575 Pro EB ORDERCODE 40184 V2
Congratulations! You have bought a great, innovative product from Showtec. The Showtec Phantom brings excitement to any venue. Whether you want simple plug-&-play action or a sophisticated DMX show, this product provides the effect you need. You can rely on Showtec, for more excellent lighting products. We design and manufacture professional light equipment for the entertainment industry. New products are being launched regularly. We work hard to keep you, our customer, satisfied.
Showtec Showtec Phantom™ Product Guide Warning.................................................................................…...……………..…………………………….…………. Safety-instructions………………………………………………………………………………………………………. Operating Determinations.…………………………………………………………………………………………… Rigging.…………………………………………………………………………………………………………………… Return Procedure……………………………………………………………………………...................................... Claims…………………………………………………………………………….........................................................
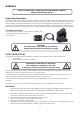
WARNING FOR YOUR OWN SAFETY, PLEASE READ THIS USER MANUAL CAREFULLY BEFORE YOUR INITIAL START-UP! Unpacking Instructions Immediately upon receiving this product, carefully unpack the carton and check the contents to ensure that all parts are present, and have been received in good condition. Notify the dealer immediately and retain packing material for inspection if any parts appear damaged from shipping or the carton itself shows signs of mishandling. Save the carton and all packing materials.
Never lift the fixture by holding it at the projector-head, as the mechanics may be damaged. Always hold the fixture at the transport handles. Never place any material over the lens. Never look directly into the light source. Never leave any cables lying around. Never unscrew the screws of the rotating gobo, as the ball bearing will otherwise be opened. Do not insert objects into air vents. Do not connect this device to a dimmerpack.
OPERATING DETERMINATIONS • This device is not designed for permanent operation. Consistent operation breaks will ensure that the device will serve you for a long time without defects. • The minimum distance between light-output and the illuminated surface must be more than 1 meter. • The maximum ambient temperature ta = 45°C must never be exceeded. • If this device is operated in any other way, than the one described in this manual, the product may suffer damages and the warranty becomes void.
Connection with the mains Connect the device to the mains with the power-plug. Always pay attention, that the right color cable is connected to the right place. International EU Cable UK Cable US Cable Pin L BROWN RED YELLOW/COPPER FASE N BLUE BLACK SILVER NUL YELLOW/GREEN GREEN GREEN EARTH Make sure that the device is always connected properly to the earth! Return Procedure Returned merchandise must be sent prepaid and in the original packing, call tags will not be issued.
Description of the device Features The Showtec Phantom 575 Pro is a moving-head with high output and great effects.
Backside 2 3 4 Fig. 2 5 6 7 8 9 10 11 2) DMX signal connector (IN) 5-pin 3) DMX signal connector (OUT) 5-pin 4) Fuse 7A 5) Menu Buttons 6) LCD Display 7) DMX LED 8) DMX signal connector (IN) 3-pin 9) DMX signal connector (OUT) 3-pin 10) Powercon 10) ON / OFF Installation Installing the Lamp The Showtec Phantom uses the HMI 575 (ordercode 80901O) bulb as manufactured by all popular manufacturers. Use only the appropriate lamp for your unit.
Lamp Adjustment You can adjust the lamp’s position by turning the screws A, B, C, D. The lamp position is set in the factory. As the lamps, which can be used, differ from manufacturer to manufacturer, it can be necessary to readjust the position. The lamp must be readjusted e.g., if the light does not seem to be evenly distributed within the ray of light. Ignite the lamp and focus the ray of light on an even surface (wall).
Set Up and Operation Follow the directions below, as they pertain to your preferred operation mode. Before plugging the unit in, always make sure that the power supply matches the product specification voltage. Do not attempt to operate a 120V specification product on 230V power, or vice versa. One / Multiple Phantom(s) DMX Control 1. Fasten the effect light onto firm trussing (Use a 30-kg rated or stronger C-clamp fastened onto the Phantom ). Leave at least 1 meter on all sides for air circulation. 2.
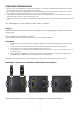
Fixture Linking You will need a serial data link to run light shows of one or more fixtures using a DMX-512 controller or to run synchronized shows on two or more fixtures set to a master/slave operating mode. The combined number of channels required by all the fixtures on a serial data link determines the number of fixtures the data link can support. Important: Fixtures on a serial data link must be daisy chained in one single line.
The Phantom can be operated with a controller in control mode or without the controller in stand-alone mode. Control Panel When the indicator light is on, means the Phantom is working Fig. 7 A. LCD Display B. MODE button C. Up Button D. Down Button E. ENTER Button Control Mode The fixtures are individually addressed on a data-link and connected to the controller. The fixtures respond to the DMX signal from the controller.
Menu Overview 12
Control Panel Functions For synchronous operation of multiple fixtures the fixtures must all be connected on a data-link. Note: Disconnect the fixtures from the DMX controller before operating, otherwise data collisions can occur and the fixtures will not work properly! It’s necessary to insert the XLR termination plug (with 120 Ohm ) into the input of the first fixture and into the output of the last fixture in the data-link, in order to ensure proper transmission on the data link.
DMX Protocol 23 Channels (BASIC) Channel 1 - Horizontal movement (Pan) Push the slider up, in order to move head horizontally (PAN). Gradual head adjustment from one end of the slider to the other (0-255, 128-center). The head can be turned by 540° and stopped at any position you wish. Channel 2 - Pan fine 16 bit Channel 3 - Vertical movement (Tilt) Push the slider, up in order to move head vertically (TILT). Gradual head adjustment from one end of the slider to the other (0-255, 128-center).
136-139 140-143 144-147 148-151 152-155 156-159 160-163 164-209 210-255 Pink Red Color Correction 3200 º K Color Correction 5600 º K Bright Blue Light Pink Dark Blue Forwards rainbow effect from fast to slow Backwards rainbow effect from fast to slow Channel 9 – Iris 0-63 64-191 192-255 Iris zoom out to zoom in Pulse Iris from slow to fast from in to out Iris Effect from slow to fast Channel 10 – Static Gobo-wheel 1 + Gobo Shake 0-7 8-15 16-23 24-31 32-39 40-47 48-55 56-63 64-71 72-79 80-87 88-95 96-10
Channel 12 – Rotation Gobo 0-63 64-127 128-191 192-255 Gobo-indexing Forwards and backwards gobo rotation from slow to fast Forwards gobo rotation from slow to fast Backwards gobo rotation from slow to fast Channel 13 – Focus 0-255 Continuous adjustment from far to near Channel 14 – Zoom 0-255 From Zoom out to Zoom in Channel 15 – Prism rotating control 0-3 4-63 64-126 127-191 192-255 No Prism Prism Index Forwards and backwards prism rotation from slow to fast Forwards rotation from slow to fast Bac
DMX Protocol 38 Channels (ADVANCED) Channel 1 - Horizontal movement (Pan) Push the slider up, in order to move head horizontally (PAN). Gradual head adjustment from one end of the slider to the other (0-255, 128-center). The head can be turned by 540° and stopped at any position you wish. Channel 2 - Pan fine 16 bit Channel 3 - Vertical movement (Tilt) Push the slider, up in order to move head vertically (TILT). Gradual head adjustment from one end of the slider to the other (0-255, 128-center).
Channel 11 – Colourwheel Linear color change following the movement of the slider. Between 164 - 255, the color-wheel rotates continuously the so-called “Rainbow” effect.
Channel 16 – Rotating Gobo-wheel 2 + Gobo Shake 0-9 10-19 20-29 30-39 40-49 50-59 60-69 70-71 72-80 81-89 90-98 99-107 108-116 117-127 128-191 192-255 Open / White Metal Gobo 1 Metal Gobo 2 Metal Gobo 3 Metal Gobo 4 Glass Gobo 5 Glass Gobo 6 Open / White Gobo Shake 1 from slow to fast Gobo Shake 2 from slow to fast Gobo Shake 3 from slow to fast Gobo Shake 4 from slow to fast Gobo Shake 5 from slow to fast Gobo Shake 6 from slow to fast Forwards rainbow effect from slow to fast Backwards rainbow effect fro
Channel 28 – Cyan 0-255 Gradual adjustment Cyan from 0 – 100% Channel 29 – Cyan Fine Channel 30 – Magenta 0-255 Gradual adjustment Magenta from 0 – 100% Channel 31 – Magenta Fine Channel 32 – Yellow 0-255 Gradual adjustment Yellow from 0 – 100% Channel 33 – Yellow Fine Channel 34 – Animation wheel Channel 35 – Animation wheel Fine Channel 36 – Animation Rotation 0-63 64-127 128-191 192-255 Prism Index Forwards and backwards prism rotation from slow to fast Forwards rotation from slow to fast Backwar
Channel settings 21
Maintenance The operator has to make sure that safety-relating and machine-technical installations are to be inspected by an expert after every year in the course of an acceptance test. The operator has to make sure that safety-relating and machine-technical installations are to be inspected by a skilled person once a year. The following points have to be considered during the inspection: 1.
Replacing a Gobo Gobo-wheel with rotating gobo’s 1. Disconnect mains power supply and set the switch to OFF. 2. Make sure that the gobo you want to insert has the same size. For the right size, see below. Fig. 8 3. Loosen the 4 screws on top of the housing. Remove the maintenance cap. 4. Turn the gobo wheel, with the gobo you want to remove, to the upside. 5. Gently lift up the gobo holder 10º and then gently pull out the gobo from its position. 6.
Static Gobo-wheel 1 Rotating Gobo-wheel 2 Color-wheel 1 Troubleshooting No Light, No Movement - All Products This troubleshooting guide is meant to help solve simple problems. If a problem occurs, carry out the steps below in sequence until a solution is found. Once the unit operates properly, do not carry out following steps. If the light effect does not operate properly, refer servicing to a technician. Response: Suspect three potential problem areas: the power supply, the lamp, the fuse. 1.
Problem One or more fixtures are completely dead. Fixtures reset correctly, but all respond erratically or not at all to the controller. Probable cause(s) No power to the fixture Remedy · Check that power is switched on and cables are plugged in. Primary fuse blown. · Replace fuse. The controller is not connected. 3-pin XLR Out of the controller does not match XLR Out of the first fixture on the link (i.e. signal is reversed). · Connect controller.
Product Specification Model: Showtec Phantom 575 Pro Voltage: 240V-50Hz (CE) Fuse: 7A / 250V Dimensions: 530x500x665mm (LxWxH) Weight: 40 kg Operation and Programming Signal pin OUT: pin 1 earth, pin 2 (-), pin 3 (+) Set Up and Addressing: LED control panel DMX Channels: 23 or 38 Signal input 3-pin + 5-pin XLR male Signal output 3-pin + 5-pin XLR female Lamp Allowed lamp models*: Osram HMI 575 (1000 hr) ordercode 80901O Control: Automatic and DMX remote ON / OFF Electro-mechanical effects Automatic Pan/T