DV-L88W Portable DVD Video Player DV-L88W OPERATION MANUAL OPERATION MANUAL SHARP CORPORATION Osaka, Japan • This Operation Manual explains the operation for the above model which is available for two different areas listed below. Please make sure to carefully read the instructions for your particular area. 1. Southeast Asia: Region Number 3 2. Australia and New Zealand: Region Number 4 ENGLISH ................ ................
GENERAL INFORMATION ENGLISH OPERATION MANUAL • All mentions of “the Player” refer to the DV-L88W Portable DVD Video Player. • All mentions of “the Remote” refer to the remote control unit. • The following table describes the icons used in this Operation Manual.
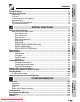
OTHER INFORMATION SPECIAL FUNCTIONS BASIC OPERATIONS SETTING UP GENERAL INFORMATION Contents GENERAL INFORMATION SAFETY INFORMATION ............................................................................................................... 4 Disc Handling and Maintenance ................................................................................................. 9 Features ..........................................................................................................................
Playing MP3 Discs ..................................................................................................................... 71 Other Disc Play Features .......................................................................................................... 73 Chapter skip ......................................................................................................................... 73 Track skip .........................................................................................
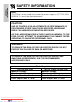
GENERAL INFORMATION SAFETY INFORMATION Note: This Player can be used only where the power supply is AC 110V-240V, 50/60Hz. It cannot be used elsewhere. CAUTION: USE OF CONTROLS OR ADJUSTMENTS OR PERFORMANCE OF PROCEDURES OTHER THAN THOSE SPECIFIED HEREIN MAY RESULT IN HAZARDOUS RADIATION EXPOSURE. AS THE LASER BEAM USED IN THIS PLAYER IS HARMFUL TO THE EYES, DO NOT ATTEMPT TO DISASSEMBLE THE CABINET. REFER SERVICING TO QUALIFIED PERSONNEL ONLY.
• This Player is classified as a CLASS 1 LASER product. • “CLASS 1 LASER PRODUCT” label is located at the bottom of the Player. • The laser caution labels are located at the bottom of the Player and printed in the disc compartment. • This product contains a low power laser device. To ensure continued safety do not remove any cover or attempt to gain access to the inside of the product. Refer all servicing to qualified personnel.
GENERAL INFORMATION SAFETY INFORMATION Power Cord Protection To avoid any malfunctions of the Player, and to protect against electric shock, fire or personal injury, please observe the following. • Hold the plug firmly when connecting or disconnecting the AC power cord. • Keep the AC power cord away from heating appliances. • Never put any heavy object on the AC power cord. • Do not attempt to repair or reconstruct the AC power cord in any way.
Condensation Moisture may form on the pickup lens in the following conditions: • immediately after a heater has been turned on. • in a steamy or very humid room. • when the Player is suddenly moved from a cold environment to a warm one. If moisture forms inside this Player, it may not operate properly. In this case, turn on the power and wait about one hour for the moisture to evaporate.
GENERAL INFORMATION SAFETY INFORMATION Apparatus Claims of U.S.Patent Nos. 4,631,603, 4,577,216, 4,819,098 and 4,907,093 licensed for limited viewing uses only. This Player incorporates copyright protection technology that is protected by method claims of certain U.S. patents and other intellectual property rights owned by Macrovision Corporation and other rights owners.
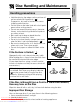
Disc Handling and Maintenance GENERAL INFORMATION Handling precautions • Hold the disc by the edges so the surface will not be soiled with fingerprints. ( A ) Fingerprints, dirt and scratches can cause skipping and distortion. • Do not write on the label side with a ball-point pen or other writing utensils. • Do not use record cleaning sprays, benzine, thinner, static electricity prevention liquids or any other solvent. • Be careful not to drop or bend the disc. • Do not install more than 1 disc.
GENERAL INFORMATION Features This Player can play back DVD video discs, VIDEO CDs and Audio CDs. • CD-R/CD-RW recorded in MP3 file format can also be played. 8" LCD Screen and Stereo Speakers • A big 8" LCD screen and built-in stereo speakers provide exciting DVD viewing, even without connecting to a TV. 2-Way Power Supply • A 2-way power supply allows operation using the supplied AC adapter for indoor play, or the battery pack (optional accessory) for outdoor play.
*1 QSURROUNDTM is a trademark of QSound Labs, Inc. *2 Manufactured under license from Dolby Laboratories. “Dolby” and the ) are trademarks of Dolby Laboratories. Confidential double-D symbol( Unpublished Works. ©1992–1997 Dolby Laboratories, Inc. All rights reserved. 3 * “DTS” and “DTS Digital Surround” are trademarks of Digital Theater Systems, Inc. Downloaded From Disc-Player.
GENERAL INFORMATION Accessories ■ Supplied Accessories Remote control unit INPUT OPERATE /DVD SHIFT ENTER SETUP VIDEO ADJ.
Types of Discs that Can Be Played on Your Player DVD [8cm (3") disc/ 12cm (5") disc] 1 2 (See page 16.) VIDEO CD [8cm (3") disc/ 12cm (5") disc] • Supports until version 2.0. Audio CD [8cm (3") disc/ 12cm (5") disc] 2 (See page 16.) CD-R/CD-RW [8cm (3") disc/ 12cm (5") disc] • Discs recorded in MP3 file format or Audio format. * Depending on the recording, some CD-Rs can be played back and some cannot.
GENERAL INFORMATION Types of Discs that Can Be Played on Your Player The region number for this Player is 4. Sample disc display: 4 14 .... 1 4 6 ........ 1 2 3 456 ALL Disc playable in all regions As for the list of the region number 4 countries and the world map for all region numbers, refer to pages 113 and 114. Discs that Cannot be Played The following types of discs cannot be played back on this Player.
Discs that Cannot be Played The following types of discs cannot be played back on this Player. In many cases, attempting to play back such discs may result in malfunction and/or damage to this Player.
GENERAL INFORMATION Types of Discs that Can Be Played on Your Player Icons Used on DVD Discs Sample Icons 2 1. English 2. Chinese Number of recorded audio tracks 2 1. English 2. Chinese Type of subtitles recorded 16:9 LB 2 123 456 Screen Region code Disc with aspect ratio multiple camera indicator recorded (see pages angles 13 and 14) 2 • This Player supports 2-channel (L/R) audio and 5.1ch (Multi-channel) MPEG Audio 1/2 (only when the OPTICAL DIGITAL OUT jack is used for connection).
• The Player can play back discs recorded by NTSC using the modified PAL system, such as Video CD, DVD-region 3, but cannot play back discs for the use in U.S.A. (region No. 1). • Region numbers cannot be changed in this system. • This Player also has a built-in system converter which makes it possible to view discs (Video CD, DVD-region 3) recorded by the NTSC system using a PAL TV. (See “NTSC disc playback on a PAL TV” below.
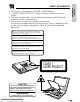
GENERAL INFORMATION Quick Start Guide This Quick Start Guide provides only the most basic information for operating your Player. See the other sections of this Operation Manual for full details about operational procedures, precautions, and other information. • Connections and initial settings ... on pages 30 to 67 • To play a disc ............................... on pages 68 to 100 • To view images from a VCR or other external equipment ............. on page 101 1 Install the battery in the Remote.
2 Connect the AC adapter to the Player. 1 Plug the AC cord into the power socket of the AC adapter (1). 2 Plug the DC output plug into the DC IN jack of the Player (2). 3 Plug the other end of the AC cord into a household power outlet (3).
GENERAL INFORMATION Quick Start Guide 4 Prepare the disc you want to play. Before loading a disc, check to make sure that it is one that is supported by the Player.
6 Load the disc and start play. After confirming that the disc is compatible, you can load it into the Player and play it. To load a disc into the Player 1 Press îOPEN to open the disc compartment cover. • The disc compartment cover moves within a range of 0 to 60 degrees. Never try to force the cover to move outside this range. Doing so can damage the cover. 2 Gently press down on the disc in the vicinity of the centre hole so it seats properly into place.
GENERAL INFORMATION Quick Start Guide INPUT OPERATE /DVD – VOLUME + TITLE FUNCTION MENU SHIFT ENTER SETUP VIDEO ADJ. ZOOM RETURN PROGRAM DISPLAY VIEW MODE LCD ON/OFF DVD VIDEO PLAYER To play a disc 1 Press INPUT/DVD to select “DVD”. Startup screen • The Startup screen appears after a few moments. • For information about how to turn on power and load a disc, see page 19 and 21 respectively. 2 Press û (PLAY). • This starts play of the disc.
INPUT OPERATE /DVD – VOLUME + TITLE FUNCTION MENU SHIFT ENTER SETUP VIDEO ADJ. ZOOM RETURN PROGRAM DISPLAY VIEW MODE LCD ON/OFF DVD VIDEO PLAYER Disc play operations To use chapter (track) skip While a disc is playing, press à (SKIP) or À (SKIP). • à (SKIP) skips to the next chapter (track). • À (SKIP) skips to the beginning of the current chapter (track). Press À (SKIP) again to skip to the previous chapter (track).
GENERAL INFORMATION Quick Start Guide To fast forward and fast reverse 1 While a disc is playing, press è (FWD) or È (REV). • è (FWD) starts fast forward. • È (REV) starts fast reverse. 2 To stop a fast forward or fast reverse operation, press û (PLAY). • This returns to normal play. 1/5 1/3‰ ‰‰:‰2:36 1 DVD • You may not be able to use fast forward and fast reverse with some discs. • Holding down the Player’s à (SKIP) or À (SKIP) for about two seconds also performs the search operation.
Player - Right side Numbers in refer to the main pages in this Operation Manual where the topic is explained. S-VIDEO input/output 31 jack 41 OPERATE switch VIDEO input/output 30, 31 jack (yellow) Only PAL signal can be input. (NTSC signal cannot be input.) AUDIO (L) 31, 32 input/output jack (white) AUDIO (R) 31, 32 input/output jack (red) Player - Rear 35 Downloaded From Disc-Player.
GENERAL INFORMATION General Guide Player - Front Numbers in refer to the main pages in this Operation Manual where the topic is explained. Display panel angle range: 0°-180° LCD screen Speakers 21 180° Disc compartment cover 48, 77, 100 SETUP/ADJ. 0° 73 75 70 68 37, 41 Downloaded From Disc-Player.
Important! • The range of movement for the display panel is 0° to 180°. Never try to force it open past 180°. Doing so can seriously damage the display panel and Player. • The range of movement for the disc compartment cover is 0° to 60°. Never try to force it open past 60°. Doing so can seriously damage the disc compartment cover and Player. Player - Bottom 36 Battery pack compartment (inside) 39 36 Downloaded From Disc-Player.
GENERAL INFORMATION General Guide Remote Control Unit Numbers in refer to the main pages in this Operation Manual where the topic is explained. Select/Enter Mode • The operation buttons have the following Select/Enter functions when Setup screen, Function control screen or another type of setting screen is on the display. ENTER INPUT/DVD 47 OPERATE 42 INPUT OPERATE /DVD TITLE FUNCTION MENU 99 MENU VIDEO ADJ. 100 SHIFT ENTER SETUP VIDEO ADJ. RETURN SETUP 48 (F.
You can connect the earphones supplied with the Player or commercially available headphones with a stereo mini plug to the PHONES jack and listen to the audio output. To use the supplied earphones 1 Connect the earphones supplied with the Player to the PHONES jack. • The PHONES jack is a stereo mini jack. PHONES Important! • Lower the volume level to minimum before you plug the supplied earphones or commercially available headphones.
Connecting to External Equipment for Input SETTING UP Selecting the INPUT mode using INPUT/DVD on the Player automatically switches the function of its video and audio input/output jacks to input. Then you can view images from a connected VCR or camcorder on the screen of your Player.
Connecting a TV with External Terminals You can use a commercially available S-video cable to connect your Player to a television equipped with an S-video input jack and enjoy viewing high-quality images on the TV screen. • Be sure to turn both the Player and the TV equipment off before connecting them.
Connecting to Audio Equipment Connecting the Player to audio equipment provides normal stereo sound plus powerful stereo sound enhanced by Dolby Digital (5.1 channel), DTS and MPEG Audio. Playing 2 channel audio SETTING UP ■ Analogue Connection Jack and Plug Colours AUDIO (L) AUDIO (R) Audio Left: White Audio Right: Red (No need to connect) Audio cable (supplied) To amplifier audio input jacks (White) ANALOG INPUT L R (Red) Amplifier of stereo system, etc.
Connecting to Audio Equipment ■ Digital Connection DIGITAL OUT (OPTICAL) DIGITAL IN Audio equipment with optical digital input jack COAXIAL OPTICAL After making the above connection 1 Set the “ DIGITAL” in “AUDIO SETUP” to “D-PCM” (see page 58). ■ Digital Connection to Audio Equipment or MD Player without a Dolby Digital Decoder • Audio CD or VIDEO CD Play the disc as you normally would, with the audio mode set to “L+R” (see page 84).
Connecting to Audio Equipment Playing Dolby Digital (5.1 channel), DTS and MPEG audio SETTING UP • Connecting an amplifier with a Dolby Digital/DTS/MPEG Audio digital surround processor or a Dolby Digital/DTS/MPEG Audio digital surround decoder to your Player’s optical digital jack provides richer, more powerful audio play. • To use DTS digital surround, use the Disc Menu screen (page 99) or the Function control screen (page 81) to select DTS audio.
Using the AC Adapter AC Adapter (supplied) Power socket AC cord (supplied) DC cord To power socket SETTING UP For Hong Kong To DC IN jack DC output plug To household power outlet For other Southeast Asia For Australia and New Zealand Important! • Make sure that the Player’s power is turned off before attaching or detaching the AC adapter. • Use only the AC adapter specified for the Player. Use of another type of AC adapter can cause damage to and malfunction of the Player.
Using the Battery Pack CAUTION SETTING UP • Use only SHARP model “BT-L300S” battery pack with this Player. Use of another battery may present a risk of fire or explosion. To install a battery pack in the Player 1 Make sure that the Player is turned off and then unplug the DC cord. 2 To open the battery pack compartment cover, while pressing at the mark, slide the cover forwards (1), and raise it upwards (2).
Using the Battery Pack Important! To charge the battery pack Use the AC adapter that comes with the Player to charge the battery pack. • Before charging the battery pack, make sure that the battery pack is firmly installed in the Player. See “To install a battery pack in the Player” on page 36. 1 2 3 1 Plug the AC cord into the power socket of the AC adapter (1). • Push the cord straight into the AC adapter as far as it can go. Plug the other end of the AC cord into a household power outlet (2).
Using the Battery Pack SETTING UP Important! • Make sure that the Player’s power is turned off before attaching or detaching the AC adapter. • A battery pack that is installed in the Player does not charge while the Player is turned on. Turn power off in order to charge the battery pack. • When not using the battery pack, remove it from the Player. • Before storing a battery pack, fully discharge it by using it to power Player operation.
Using the Battery Pack To remove the battery pack from the Player 1 Make sure the Player’s power is turned off and then unplug the DC cord. 2 To open the battery pack compartment cover, while pressing at the mark, slide the cover forwards (1), and raise it upwards (2). 2 3 While holding the “ RELEASE” tab to the right, pull out the battery pack in the direction indicated by the arrow.
SETTING UP Battery Capacity Indicator • The battery capacity indicator appears only while the display mode is “on”. The indicator appears for a short while and then disappears. • Battery condition, temperature, and operational conditions affect the remaining capacity of a battery. Because of this the battery capacity indicator is intended to be for reference purposes only. • Regardless of the display mode, the low battery warning appears on the display whenever the battery is about to go dead.
Turning Power On and Off To turn power on and off OPERATE Indicator lamp INPUT OPERATE /DVD – VOLUME + TITLE FUNCTION MENU SHIFT ENTER For Hong Kong ZOOM RETURN PROGRAM DISPLAY VIEW MODE LCD ON/OFF DVD VIDEO PLAYER For other Southeast Asia Slide the OPERATE switch to “ON”. For Australia and New Zealand • With the OPERATE switch, you can change the power mode to “ON” or “OFF”.
Turning Power On and Off Standby mode SETTING UP The Player goes into the Standby mode (Indicator lamp lights red) in the following cases. • When you use the OPERATE button on the Remote to turn off the Player. Press again the OPERATE button on the Remote to cancel the Standby mode. • When you leave the Player in the DVD mode without a disc inside or playback is stopped for more than 5 minutes. • When no video signal is received for more than 5 minutes in INPUT mode.
Using the Remote Control Installing the battery in the Remote 1 Holding the release tab to the 2 Place a lithium battery into the left, slide the battery holder from the Remote with your fingernail catching the slit. Release tab Operating range of the Remote Important! • Do not subject the Remote to strong impact. • Do not allow the Remote to become wet and keep it out of areas subject to high humidity. Remote sensor 15° 15° 5m • The Remote may fail to work properly after you replace its battery.
Using the Remote Control Notes on the Use of the Lithium Battery SETTING UP REPLACE BATTERY WITH TOSHIBA OR HITACHI MAXELL TYPE CR2025 ONLY. USE OF ANOTHER BATTERY MAY PRESENT A RISK OF FIRE OR EXPLOSION. WARNING • KEEP THIS BATTERY AWAY FROM CHILDREN. IF SWALLOWED, CONSULT A PHYSICIAN IMMEDIATELY FOR EMERGENCY TREATMENT. • BATTERY MAY EXPLODE IF MISTREATED. DO NOT RECHARGE, DISASSEMBLE OR DISPOSE OF IN FIRE. • Do not short-circuit, recharge, disassemble, or heat the lithium battery.
Switching Operation Buttons to Select/Enter Buttons You can use the operation buttons of the Remote to select options and to enter the currently selected option on a menu screen or Function control screen. Each press of SHIFT cycles the button function. Screen type and button functions Each press of SHIFT cycles the button functions as shown below. ENTER ENTER ENTER Press SHIFT. Operation button functions Remote Control Screen Operation buttons Press SHIFT.
Switching Operation Buttons to Select/Enter Buttons ■ Button Functions SETTING UP Operation buttons Select/Enter buttons Number input buttons Playback Enter Enter Stop " Move down " Move down Still/Pause ' Move up ' Move up Skip forward | Move right – Skip back \ Move left – • The above operations are not possible with certain types of discs.
Operation Modes Your Player has two operation modes. Select the one that suits the operation you want to perform. • DVD mode for disc playback • INPUT mode for input from external equipment INPUT OPERATE /DVD – VOLUME + MENU SHIFT ENTER SETUP VIDEO ADJ. ZOOM SETTING UP TITLE FUNCTION RETURN PROGRAM DISPLAY VIEW MODE LCD ON/OFF DVD VIDEO PLAYER To select an operation mode 1 Slide the OPERATE switch to “ON”. 2 Press INPUT/DVD.
Setup INPUT OPERATE /DVD – VOLUME + TITLE FUNCTION MENU SHIFT ENTER SETTING UP SETUP VIDEO ADJ. ZOOM RETURN PROGRAM DISPLAY VIEW MODE LCD ON/OFF DVD VIDEO PLAYER Initial setup (OSD LANGUAGE SETUP) When you use the Player for the first time, you should set the language to be used for the OSD (On Screen Display). 1 Press INPUT/DVD a number of times until you enter the DVD mode. 2 Press SETUP while a disc is stopped. OSD LANGUAGE SETUP” screen • “ appears.
Setup TV MODE SETUP setting The following describes how to select the DVD playback display format. Viewing on the Player Screen or a Wide Screen TV Using a 16:9 Wide Image for wide DVD video output. • A wide image size is output when playing a wide image disc. • When playing a 4:3 image disc, you can select the image size you want for the Player screen or connected TV (see page 64). 16 : 9 Viewing on a 4:3 Size TV Using Pan Scan Select 4:3 PS for wide DVD video output.
Setup INPUT OPERATE /DVD – VOLUME + TITLE FUNCTION MENU SHIFT ENTER SETTING UP SETUP VIDEO ADJ. ZOOM RETURN PROGRAM DISPLAY VIEW MODE LCD ON/OFF DVD VIDEO PLAYER Setting the TV MODE 1 While a disc is stopped, press SETUP to display the Setup screen. 2 Use ' or " to select the “ SETUP”. TV MODE TV MODE SETUP TV MODE: 3 Press ENTER to display the items you can select. 4 Use ' or " to select “ “ 16: 9 ”.
Setup PARENTAL SETUP setting Parental level This Player supports the following parental level settings. PARENTAL LEVEL .... Defines the parental level, which controls the types of scenes that are played back from a disc. CODE ....................... Allows selection of a country code available on a disc. • You can use the parental lock function only with DVDs that are equipped with the parental lock feature. • The parental level depends on countries.
Setup Country Codes This Player supports country codes for the following countries. SETTING UP Country Code List USA SWEDEN MALAYSIA CANADA HOLLAND INDONESIA JAPAN NORWAY TAIWAN GERMANY DENMARK PHILIPPINE FRANCE FINLAND AUSTRALIA UK BELGIUM RUSSIA ITALY HONG KONG CHINA SPAIN SINGAPORE – SWISS THAILAND – Passwords The parental level setting of the Player can be protected by a password against unauthorized changes.
Setup 1 While a disc is stopped, press SETUP to display the Setup screen. 2 Use ' or " to select the “ 3 Press ENTER to display the password specification screen. PARENTAL SETUP”. PARENTAL SETUP PASSWORD: 1 2 3 4 ???? 5 7 8 OFF SETTING UP CHINA CODE: 4 6 Use ', ", \ or | to enter a 4-digit password. • Press ' or " to select the number. • Press \ or | to move to the place where you enter the number.
SETTING UP Setup 7 Press " to select “CODE” and then use \ or | to select the desired country code. (See page 52.) 8 Press ENTER to confirm the setting. • To exit the Setup screen and return to the Startup screen, press SETUP or RETURN. Important! • Be sure to try playing back the disc to confirm that the parental level setting is working correctly. If it is not working correctly, try changing the country code.
Setup Temporary parental level setting Some DVDs will prompt the viewer to temporarily change the parental level. In this event, the following screen appears. PARENTAL SETUP TEMPORARY CHANGE? When this screen appears, use the procedure described below to temporarily change the level. 1 Use ' or " to select “YES” or “NO”. YES: Temporarily changes the parental level (sets the level to a value other than the current setting (page 53)).
Setup AUDIO SETUP setting SETTING UP COMPRESSION .......... Use this setting for increasing the average volume of Dolby Digital audio when playing a DVD. DIGITAL/MPEG .... Use these settings for specifying the type of digital output when playing a disc recorded using Dolby Digital/MPEG Audio.
Setup INPUT OPERATE /DVD – VOLUME + TITLE FUNCTION MENU SHIFT ENTER SETUP VIDEO ADJ. SETTING UP ZOOM RETURN PROGRAM DISPLAY VIEW MODE LCD ON/OFF DVD VIDEO PLAYER 1 While a disc is stopped, press SETUP to display the Setup screen. 2 Use ' or " to select the “ SETUP”. AUDIO AUDIO SETUP ON COMPRESSION: DIGITAL: BITSTREAM BITSTREAM MPEG: 3 Press ENTER and then use ' or " to select “COMPRESSION”. 4 Press ENTER to display the settings you can select.
Setup Setting the DIGITAL OUT When playing a disc recorded using Dolby Digital (5.1ch)/MPEG Audio (5.1ch), you can specify either “BITSTREAM” or “D-PCM”/“PCM” as the digital type output. SETTING UP Setting the DOLBY DIGITAL 1 While a disc is stopped, press SETUP to display the Setup screen. 2 Use ' or " to select the “ 3 Press ENTER and then use ' or " to select “ 4 Press ENTER to display the settings you can select. AUDIO SETUP”. DIGITAL”.
Setup Setting the MPEG 1 While a disc is stopped, press SETUP to display the Setup screen. 2 Use ' or " to select the “ 3 Press ENTER and then use ' or " to select “MPEG”. 4 Press ENTER to display the settings you can select. AUDIO SETUP”. COMPRESSION: ON DIGITAL: BITSTREAM MPEG: BITSTREAM BITSTREAM PCM 5 Use ' or " to select “BITSTREAM” or “PCM”. BITSTREAM: PCM: 6 Use this setting for a digital connection of a receiver (amplifier) equipped with an MPEG Audio decoder.
Setup INPUT OPERATE /DVD – VOLUME + TITLE FUNCTION MENU SHIFT ENTER SETTING UP SETUP VIDEO ADJ. ZOOM RETURN PROGRAM DISPLAY VIEW MODE LCD ON/OFF DVD VIDEO PLAYER DISC LANGUAGE setting Use this setting for selecting languages of subtitle, audio track and disc menu. • Note that the language you select is not displayed or does not sound if it is not recorded on the disc you are playing.
Setup 5 Select the language you want to use with (Example) Selecting ', ", \ or |. “FRENCH” • If you want to use any languages DISC LANGUAGE SUB TITLE:ENGLISH which are not on OSD, proceed to step ENGLISH CHINESE 1 under “Selecting a language from FRENCH SWEDISH OTHER” below. GERMAN DUTCH ITALIAN SPANISH OTHER (––) SETTING UP 6 Press ENTER to confirm the setting. 7 Repeat steps 3 to 6 above to go on with other “DISC LANGUAGE” settings in succession.
Setup SETTING UP Language code list for Disc Language Code Language Name Code Language Name Code Language Name Code Language Name AA Afar FY Frisian MG Malagasy SL Slovenian AB Abkhazian GA Irish MI Maori SM Samoan AF Afrikaans GD Scots Gaelic MK Macedonian SN Shona AM Ameharic GL Galician ML Malayalam SO Somali AR Arabic GN Guarani MN Mongolian SQ Albanian AS Assamese GU Gujarati MO Moldavian SR Serbian AY Aymara HA Hausa MR Marathi SS Siswat
Setup INPUT OPERATE /DVD – VOLUME + TITLE FUNCTION MENU SHIFT ENTER SETUP VIDEO ADJ. SETTING UP ZOOM RETURN PROGRAM DISPLAY VIEW MODE LCD ON/OFF DVD VIDEO PLAYER OSD LANGUAGE SETUP setting 1 While a disc is stopped, press SETUP to display the Setup screen. 2 Use ' or " to select the “ 3 Press ENTER to display the languages you can select. OSD LANGUAGE SETUP”.
Screen Size Setting When viewing a DVD on your Player screen, you select the screen size that best suits the image you are viewing. To set the screen size Wide 4:3 4:3 Letter Box SMART STRETCH Full Screen Image is stretched by its four corners. Image is stretched by its four corners. Top and bottom remain black. STRETCH Full Screen Mode SETTING UP Software Type ZOOM Above screen stretched Screen stretched horizontally to fit. Top and bottom remain black. horizontally to fit.
Screen Size Setting INPUT OPERATE /DVD – VOLUME + TITLE FUNCTION MENU SHIFT ENTER SETUP VIDEO ADJ. SETTING UP ZOOM RETURN PROGRAM DISPLAY VIEW MODE LCD ON/OFF DVD VIDEO PLAYER 1 Press VIEW MODE. SMAR T S TRE TCH • Each press of VIEW MODE cycles through the screen size settings in the following sequence: STRETCH ZOOM SIDE BAR SMART STRETCH • The ZOOM mode uses a special process to stretch the image vertically.
Changing the Display Mode SETTING UP To change the display mode 1 Press DISPLAY. • Each press of DISPLAY cycles through the display mode settings in the following sequence: on off auto auto ......... Display indicators appear for about three seconds and then disappear. INPUT OPERATE /DVD – VOLUME + TITLE FUNCTION MENU SHIFT ENTER SETUP VIDEO ADJ. RETURN on ............ Display indicators remain displayed. off ............ Display indicators are not displayed.
Changing the Display Mode DVD mode operation indicators The following are examples of display indicators that appear during DVD playback. Player Status Play attempted without a disc Loading (data being read from disc) 2/5 NO DISC ‰1:23:4‰ SETTING UP Play attempted with a non-compatible disc Display Indicators 2/5 WRONG DISC TYPE 2/5 NOW LOADING... Stop DVD Play 1/5 8/3‰ ‰1:23:4‰ DVD Appears when display mode is “on”. Pause 1/5 8/3‰ ‰1:23:4‰ DVD Appears when display mode is “on”.
Playing a Disc This Player can play a DVD, VIDEO CD, or Audio CD using the procedure described below. INPUT OPERATE /DVD – VOLUME + TITLE FUNCTION MENU SHIFT ENTER SETUP VIDEO ADJ. ZOOM RETURN PROGRAM DISPLAY VIEW MODE LCD ON/OFF BASIC OPERATIONS DVD VIDEO PLAYER DVD VIDEO CD CD To play a disc 1 Slide the OPERATE switch to “ON” to turn on the Player. 2 Press INPUT/DVD to display the Startup screen shown on the right. 3 Load the disc you want to play into the Player. 4 Press û (PLAY).
Playing a Disc CAUTION • Never try to open the disc compartment cover and look inside the disc compartment at the laser while a disc is playing. Doing so creates the danger of serious eye damage. • Do not leave the Player on your lap for a long time. Heat generated by the Player can cause low-temperature burning of the skin over time. • • • • Playing VIDEO CDs with Playback Control (PBC) • Pressing û (PLAY) begins PBC playback. Time display is not shown for some discs.
Playing a Disc To adjust the volume level Press – VOLUME or VOLUME + to adjust the volume level of the audio within a range of 0 to 20. • A safety feature automatically turns off Player power if you set the volume level too high while playing certain types of discs. If this happens, lower the volume level and restart play. To stop disc play 1 Press Ë (STOP).
Playing MP3 Discs This Player is able to play CD-R or CD-RW discs recorded in MP3 format. Regarding MP3 discs • MP3 files are audio data compressed in MPEG1 Audio layer 3 file format. “MP3 files” have “.mp3” as extensions. • Some files that have “.mp3” extensions or files that have not been recorded in MP3 format will produce noise or cannot be played. • Some discs cannot be played depending on the actual CD-R/CD-RW disc condition, the recording equipment and the disc’s recording.
Playing MP3 Discs INPUT OPERATE /DVD – VOLUME + TITLE FUNCTION MENU SHIFT ENTER SETUP VIDEO ADJ. ZOOM RETURN PROGRAM DISPLAY VIEW MODE LCD ON/OFF BASIC OPERATIONS DVD VIDEO PLAYER To play MP3 discs 1 Slide the OPERATE switch to “ON”. 2 Press INPUT/DVD to enter the DVD mode. 3 Load the MP3 recorded CD-R or the CD-RW. • The folder selection screen will be displayed as well as the “SELECT/ ENTER button”. 4 Select the folder you want to play by using ', ", \ or | and press ENTER.
Other Disc Play Features This section explains how to use skip, resume, slow motion, and other play features. INPUT OPERATE /DVD – VOLUME + TITLE FUNCTION SHIFT ENTER MENU SETUP VIDEO ADJ. ZOOM RETURN PROGRAM DISPLAY VIEW MODE LCD ON/OFF DVD VIDEO PLAYER BASIC OPERATIONS DVD Chapter skip 1 While a disc is playing, press à (SKIP) or 1/5 1/3‰ À (SKIP). ‰‰:‰1:23 • à (SKIP) skips to the next chapter. • À (SKIP) skips to the beginning of the current chapter.
Other Disc Play Features INPUT OPERATE /DVD – VOLUME + TITLE FUNCTION MENU SHIFT ENTER SETUP VIDEO ADJ. ZOOM RETURN PROGRAM DISPLAY VIEW MODE LCD ON/OFF BASIC OPERATIONS DVD VIDEO PLAYER DVD To resume disc play after stopping 1 While the disc is playing, press Ë (STOP) at the location where you want to stop. • The Player stores the location where you stopped. 2 To restart play, press û (PLAY). • Play resumes from a point slightly before the point where it was stopped.
Other Disc Play Features INPUT OPERATE /DVD – VOLUME + TITLE FUNCTION MENU SHIFT ENTER SETUP VIDEO ADJ. ZOOM RETURN PROGRAM DISPLAY VIEW MODE LCD ON/OFF DVD VIDEO PLAYER VIDEO CD Slow-motion play 1 While a disc is playing, press BASIC OPERATIONS DVD (SLOW). • Three speeds are available. Each time (SLOW) is pressed, the speed of slow-motion playback changes in the following sequence: 1 (about ×1/2) 2 2 (about ×1/8) 3 (about ×1/16) Press û (PLAY) to return to the normal playback.
Other Disc Play Features 2 To cancel still picture and return to normal play, press û (PLAY). DVD • You may not be able to use still picture and frame advance with some discs. • Frame advance cannot be used with Audio CDs. • This operation performs the Audio CD PAUSE function. DVD VIDEO CD CD Fast forward/Fast reverse 1 Press è (FWD) or È (REV) while a disc is Scanning speed selection BASIC OPERATIONS playing. • The disc begins fast scan at ×2 speed (1). 1 DVD Fast scan image appears here.
Using the Function Control About the Function control screen Using Function control, you can check at a glance and change the current settings of the following items: SUBTITLE, ANGLE, AUDIO, VIRTUAL DOLBY, DIGITAL GAMMA and DIGITAL SUPER PICTURE. Function control also allows you three ways of direct skips (title,chapter and time). • While the disc is playing, press FUNCTION to display the screen shown below. • During playback, you can also use SETUP/ADJ. on the Player to display the Function control screen.
Using the Function Control 2 Direct chapter skip 80 • The number of the chapter currently played back is displayed. • You can skip directly to the desired chapter. 3 Direct time skip 81 • Elapsed time from the beginning of the disc is displayed. • You can skip directly to the point from which you want to start playback. 4 Subtitle language setting 82 • The subtitle number and language currently selected are displayed. (When a disc with only one subtitle is played back, “xx” is displayed.
Using the Function Control VIDEO CD DVD CD Direct title/track skip INPUT OPERATE /DVD – VOLUME + TITLE FUNCTION MENU SHIFT ENTER SETUP VIDEO ADJ. ZOOM RETURN PROGRAM DISPLAY VIEW MODE LCD ON/OFF DVD VIDEO PLAYER 1 3 4 Use ' or " to select ENTER. and then press Use ' or " to select the title/track number to which you want to skip. (Example) Selecting title 5 2/5 8/3‰ ‰1:3‰:‰8 2 ENGLISH 1 51ch 1 . ON ON ON DVD –/5 DVD 5/5 DVD Press ENTER.
Using the Function Control • The number of titles or tracks you can input depends on that of the titles or tracks recorded on a disc you play. • The Direct title skip function does not operate on discs on which no titles are recorded. • The Direct track skip function does not operate during PBC playback of a VIDEO CD. Use the function while disc playback is stopped. DVD Direct chapter skip Use the following procedure to perform the Direct chapter skip. 1 Press FUNCTION during playback.
Using the Function Control DVD VIDEO CD CD Direct time skip Use the following procedure to perform the Direct time skip. 1 Press FUNCTION during playback. • The Function control screen appears. 2 Use ' or " to select ENTER. and then press DVD ––:––:–– 3 4 Use ', ", \ or | to input the time to which you want to skip. • Press ' or " to input the time. • Press \ or | to select the place where you want to input the time.
Using the Function Control DVD Subtitle language setting Use the following procedure to perform the Subtitle language setting. 1 Press FUNCTION during playback. • The Function control screen appears. 2 Use ' or " to select ENTER. and then press DVD 2 ENGLISH 3 Press ' or " to select the subtitle language you want to use. • You can set the subtitle setting to “OFF”. • You can also toggle the setting between “ON” and “OFF” by pressing \ or |.
Using the Function Control DVD Angle setting You can change the angle of view when playing a DVD video disc that contains scenes recorded from multiple angles. Use the following procedure to perform the Angle setting. 1 Press FUNCTION during playback. • The Function control screen appears. 2 Use ' or " to select ENTER. and then press DVD 1 3 4 Press ' or " to select the angle number you want. • The number of recorded angles differs depending on the disc used.
Using the Function Control DVD VIDEO CD CD Audio setting A number of different methods are used to record audio onto a DVD video disc, including multi-channels (used for voiceovers in other languages), Dolby Digital (5.1ch), DTS, and Linear PCM. Your Player provides a number of different audio modes from which you can choose to suit the type of disc you are playing. Use the following procedure to perform the Audio setting. 1 Press FUNCTION during playback. • The Function control screen appears.
Using the Function Control DVD VIRTUAL DOLBY (QSURROUND) setting This function allows you to enjoy a “surround sound” effect when you are using an analogue connection (using AUDIO OUT on the Player) to 2-channel audio equipment (TV, etc.). Preparation: To use the VIRTUAL DOLBY (QSURROUND) function • Set the “COMPRESSION” setting in “AUDIO SETUP” to “OFF” (see page 56). Refer to the table below about the types of audio format with which VIRTUAL DOLBY (QSURROUND) works.
Using the Function Control 3 Press ' or " to toggle VIRTUAL DOLBY between “ON” and “OFF”. 4 While “ON” is selected, use \ or | to change the level setting. DVD ON 5 Press ENTER to confirm the setting. • You can exit the Function control screen by pressing FUNCTION or RETURN. SPECIAL FUNCTIONS • VIRTUAL DOLBY (QSURROUND) does not operate on VIDEO CDs and Audio CDs. • VIRTUAL DOLBY (QSURROUND) does not operate when you set the “COMPRESSION” setting in “AUDIO SETUP” to “ON”.
Using the Function Control DVD VIDEO CD DIGITAL GAMMA setting DIGITAL GAMMA is a digital image quality enhancement function that gives a richer image by brightening the darker and more obscure portions of the image without altering the brightness of the brighter portions, thereby making the entire image easier to see. Use the following procedure to change the setting to “ON” or “OFF”, and change the level for the DIGITAL GAMMA setting when “ON” is selected. 1 Press FUNCTION during playback.
Using the Function Control DVD VIDEO CD DIGITAL SUPER PICTURE setting DIGITAL SUPER PICTURE is a digital image quality enhancement function that gives a clearer image by sharpening the details and outlines in the image and reducing the amount of picture noise. Use the following procedure to change the setting between “ON” and “OFF”, and the level for the DIGITAL SUPER PICTURE setting. 1 Press FUNCTION during playback. • The Function control screen appears. 2 Use ' or " to select ENTER.
Zoom Function DVD To zoom an image 1 While a disc is playing, press ZOOM. • Each press of ZOOM cycles through ZOOM : 1 the zoom settings in the following sequence: ZOOM 1 (×1.2) → ZOOM 2 (×1.5) → ZOOM 3 (×2.0) → Off. ZOOM indicator Note that all of the above zoom factors are approximate only. • When playing a pan scan disc while 4:3 PS is selected as the “TV MODE” setting on the “TV MODE SETUP” screen, each press of ZOOM cycles through zoom settings in the following sequence: ZOOM 1 (×1.2) → ZOOM 2 (×1.
Repeat Playback INPUT OPERATE /DVD – VOLUME + SHIFT TITLE FUNCTION ENTER MENU SETUP VIDEO ADJ. ZOOM RETURN PROGRAM DISPLAY VIEW MODE LCD ON/OFF DVD VIDEO PLAYER DVD Chapter repeat Example: To repeat play the chapter you are currently viewing SPECIAL FUNCTIONS 1 2 Play the chapter you want to repeat. Press (REPEAT) and then press û (PLAY) to start repeat play of the chapter. • To cancel repeat play, press (REPEAT) again. This clears the “ ” indicator from the display.
Repeat Playback VIDEO CD CD Track/Disc repeat Example: To repeat play a disc 1 While a disc is playing, press (REPEAT) twice to flash “ ” on the screen and then press û (PLAY) to start repeat play. • To cancel repeat play, press (REPEAT) again. This clears the “ ” indicator from the display. VCD • To perform track repeat playback, press (REPEAT) once during playback to flash “ ” on the screen and then press û (PLAY). • You cannot use repeat play with PBC (playback control) play of a PBC VIDEO CD.
Programmed Playback You can program your Player to play titles, tracks, or chapters in the sequence you want. INPUT OPERATE /DVD – VOLUME + TITLE FUNCTION MENU SHIFT ENTER SETUP VIDEO ADJ. ZOOM RETURN PROGRAM DISPLAY VIEW MODE LCD ON/OFF DVD VIDEO PLAYER DVD Title programmed playback This function can be used only with a disc that has been played once, even partially. SPECIAL FUNCTIONS 1 2 Turn on the Player, start play of the disc, and then stop play. Next, press PROGRAM.
Programmed Playback 3 After you have specified all title numbers PROGRAM /9 you want, press | to move the highlighting DVD to the next. Then press ENTER to start play in the sequence you specified. • Titles are played in the sequence you specified. • When entering title numbers that do not exist on the disc in step 2, this operation is disabled. • Press RETURN if you want to exit the above screens. • You cannot program the play sequence while a disc is playing.
Programmed Playback INPUT OPERATE /DVD – VOLUME + TITLE FUNCTION MENU SHIFT ENTER SETUP VIDEO ADJ. ZOOM RETURN PROGRAM DISPLAY VIEW MODE LCD ON/OFF DVD VIDEO PLAYER If you have a DVD that includes chapter data, you can program your Player to play chapters in the sequence you want. DVD Chapter programmed playback SPECIAL FUNCTIONS This function can be used only with a disc that has been played once, even partially. 1 Turn on the Player, start play of the disc, and then stop play.
Programmed Playback 3 Use ' and " to cycle through numbers at CHAPTER PROGRAM =TITLE: 12 =CHAPTER the currently selected (highlighted) ‰ position, and then press | to move the highlighting to the right. For example, to play the 15th chapters CHAPTER PROGRAM =TITLE: 12 =CHAPTER first: ‰1 • Pressing | while “-” is displayed for a digit enters “0” for the third digit.
Programmed Playback INPUT OPERATE /DVD – VOLUME + TITLE FUNCTION MENU SHIFT ENTER SETUP VIDEO ADJ. ZOOM RETURN PROGRAM DISPLAY VIEW MODE LCD ON/OFF DVD VIDEO PLAYER VIDEO CD CD Track programmed playback This function can be used only with a disc that has been played once, even partially. SPECIAL FUNCTIONS 1 2 Turn on the Player, start play of the disc, and then stop play. Next, press PROGRAM. • The track programming screen is TRACK PROGRAM =TRACK displayed.
Programmed Playback 3 After you have specified all track numbers PROGRAM /9 you want, press | to move the highlighting VCD to the next. Then press ENTER to start play in the sequence you specified. • Tracks are played in the sequence you specified. • When entering track numbers that do not exist on the disc in step 2, this operation is disabled. • Press RETURN if you want to exit the above screens. • You cannot program the play sequence while a disc is playing.
Selecting Titles from the Title Menu Some DVDs have a title menu that you use to select the title you want to play. INPUT OPERATE /DVD – VOLUME + TITLE FUNCTION MENU SHIFT ENTER SETUP VIDEO ADJ. ZOOM RETURN PROGRAM DISPLAY VIEW MODE LCD ON/OFF DVD VIDEO PLAYER DVD To select a title from the title menu SPECIAL FUNCTIONS This function can be used only with a disc that has been played once, even partially. 1 2 3 While the disc is stopped, press TITLE to display its title menu.
Setting Play Parameters Using the Disc Menu Some DVDs include a disc menu that you can use to select subtitle set, audio channel, and Dolby Digital (5.1 channel) or DTS audio. You can also turn disc menu on and off. INPUT OPERATE /DVD – VOLUME + TITLE FUNCTION MENU SHIFT ENTER SETUP VIDEO ADJ. ZOOM RETURN PROGRAM DISPLAY VIEW MODE LCD ON/OFF DVD VIDEO PLAYER DVD To use the disc menu to turn on subtitling This function can be used only with a disc that has been played once, even partially.
Adjusting Display Use the procedures described here to adjust the brightness and contrast of the colours that appear on the display, and the overall brightness of the display. INPUT OPERATE /DVD – VOLUME + TITLE FUNCTION MENU SHIFT ENTER SETUP VIDEO ADJ. ZOOM RETURN PROGRAM DISPLAY VIEW MODE LCD ON/OFF DVD VIDEO PLAYER To adjust display colours 1 Press VIDEO ADJ.. SPECIAL FUNCTIONS • Alternatively, you could hold down SETUP/ADJ. on the Player for about two seconds.
Viewing Images from an External Equipment Use the following procedure to set up the Player for use as a monitor for viewing images from a VCR or camcorder. INPUT OPERATE /DVD – VOLUME + TITLE FUNCTION MENU SHIFT ENTER SETUP VIDEO ADJ. ZOOM RETURN PROGRAM DISPLAY VIEW MODE LCD ON/OFF DVD VIDEO PLAYER To view images from an external equipment 1 2 3 4 Turn on the external equipment. Turn on the Player. Press INPUT/DVD to enter the INPUT mode.
References Precautions Use & Care • Avoid magnetic sources. Using the Player near strong fluorescent lights, motors, televisions, or other magnetic sources may adversely affect recorded images. • Remember to remove the disc, turn off the power when the Player is not in use. • Using the Player near a broadcasting station or other powerful transmission source may cause buzzing or picture deterioration. • Avoid shocks and dropping.
References • Do not leave the Player on your lap for a long time during use. Heat generated by the Player can cause low-temperature burning of the skin over time. Moving and shipment • Remove the disc before packing the Player for moving or shipment. It is also a good idea to remove the disc and turn off power whenever you are not using the Player. Saving power • Help save power by turning off the Player when you are not using it.
References AC Adapter • The supplied AC adapter is compatible with 50Hz and 60Hz electrical systems in the range of 110 V to 240 V AC. • The AC adapter may interfere with reception if used near a radio. • Prevent flammables, liquids, and metal objects from entering the adapter. • The adapter is sealed unit. Do not attempt to open and modify it. • Do not damage, drop, or subject the adapter to vibration. • Do not leave the adapter in direct sunlight.
References Warning! 1. Never drop the battery pack or otherwise subject it to strong impact. 2. Use and store the battery pack in areas that is out of the reach of small children. 3. Never place the battery pack inside a microwave oven or a washing machine. 4. Fluid from inside the battery pack getting into the eyes can cause loss of eyesight. Wash out the eyes thoroughly with plain water and then contact a doctor immediately. Battery pack fluid on clothing or skin can cause skin irritation.
Troubleshooting Whenever you are having problems with your Player, check the following points before requesting service. Problem Power does not turn on or suddenly turns off. Recommended Action Page • Make sure the power plug of the AC adapter is plugged into a power outlet. 35 • Try turning power off and then back on again. 41 Power does not • Check if the battery pack is charged. If not, turn on or charge it. suddenly turns off under battery power.
Troubleshooting Problem Nothing appears on the screen. Recommended Action • Make sure the “PICTURE” setting of “VIDEO ADJUST” is not set to “0”. 100 • Make sure LCD display is turned on. 70 No audio is output. • Make sure the display panel is open. Audio is not output through the Player speakers while the display panel is closed. INPUT mode 31 • Check the volume setting. If it is at zero, press VOLUME + to turn up the volume. 29, 70 • Make sure headphones are not connected to the headphones jack.
Troubleshooting DVD mode Problem Recommended Action No image from • Make sure the channel of the connected TV is the Player set to VIDEO or AV. appears on the • Make sure video and audio cables are screen of a connected correctly. connected device. 31 The volume of • Change the “COMPRESSION” setting to “ON”. This setting compensates for the relatively low Dolby Digital average volume level of Dolby Digital, which is audio from a used to provide the widest possible dynamic DVD is too low. range.
Troubleshooting Battery Pack Operation Problem Indicator lamp is flashing orange at high speed. Cannot record to an MD. Recommended Action Page • If the battery pack is installed in the Player, try disconnecting the AC adapter DC cord from the Player and then reconnecting it. – • Try charging another battery pack. The same symptom occurring with another battery pack may indicate a problem with the AC adapter.
Error Indicators and Warnings The error indicators and warnings described below appear on the display whenever there is a disc play problem, operational problem, etc. Display Meaning 2/5 WRONG DISC TYPE REGION CODE ERROR • The disc you are attempting to play is not compatible with this Player. • The region number of the DVD you are attempting to play is not 3 or ALL. • The region number of the DVD you are attempting to play is not 4 or ALL.
Specifications Product Model Signal System Supported Disc Types Video Input/Output S-Video Input/Output Audio Input/Output Digital Audio Interface Audio Output Headphones Output Display Speakers Light Source Video Signal Audio Signals OTHER INFORMATION Downloaded From Disc-Player.
Specifications Power Requirements AC Adapter: 10V DC Battery Pack: 7.4V DC Power Consumption Main Power On: 16.5W average (12.5W without AC Adapter) Main Power Off: 0.1W (without AC Adapter) Standby mode: 1.1W (with AC Adapter) Dimensions 211 (W) × 174 (D) × 42.3 (H) mm (except for projections) Weight (approx.
Glossary Region number Number identifying a geographic region of compatibility for a DVD. The list below shows the countries covered by region number 3.
Glossary The world map for all region numbers ;;;;; ; ;;;;; ;; ;;; ;;;;; ;;; ;;; ;;;;;;; ;;; ;;;;;;;;;;; ;;; ;; ; ; ;;;; ;;;;;;; ;;; ;;;;;; ;;;; ;;;;; ; ;; ;;;;;;; ;; ;;;;;; ;;;;;;; ;;; ;;;;;; ;;;; ;; ;; ; ;; ;;;;;; ;; ;;;; ;; ;;; ;;;; ;;;;;; ;; ;; ; ;;; ; ;;; ;; ;; ;;; ;; ; ;;; ;;; ;;;;;;;;; ;;;;;;;;; ;;;; ;;;;;;;;; ;;; ; ;; ;;;; ;;;;;;;;; ;;;;; ;;;;;;;; ;;;;;; ;;; ;; ;;;; ;;;; ;;;;; ;;;;;;;;; ;;;;;; ;;;;;;;; ;;;; ;;;;; ;;;; ;;;;; ;; ;;;;;; ;;;;;;;; ;;;;;;;;;;;;;;;;;;;;;;;;;;;;;;;;;;;;;;;;;;; ;;;;;;;; ;;
Glossary DTS Theater audio system by Digital Theater Systems, Inc. Six audio channels are used to create accurate sound field positioning and realistic sound. Linear PCM audio Audio signal recording system used for Audio CDs. Parental level Setting that makes it possible to control the types of scenes that can be played by the Player. This setting helps to keep children from viewing adult material.
Glossary Settings for controlling the backlight brightness, colour brightness, tint, and contrast of image colours. Backlight Built-in fluorescent light that supplies screen illumination. Title menu This is a menu displayed by some DVDs for selection of chapters and subtitle set. The title menu is also called a “top menu”. Playback control (PBC) This VIDEO CD system allows selection of scenes or information from an on-screen menu.