
Specifications


31EN
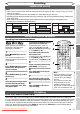
Recording Disc Playback EditingBefore you start Connections Getting started
Changing the
Setup menu
Others
Recording
ZOOM
DISPLAY
SETUP
TOP MENU
MENU/LIST
REC MODE
REC/OTR
PAUSESKIP SKIP
PLAY
CM SKIP
AUDIO
OPEN/CLOSE
FWD
REV
CLEAR
1
2
3
4
5
6
7
8
9
SPACE
0
A
HG
ENTER
PROG.
RETURN
.@/:
ABC
DEF
GHI
JKL
MNO
PQRS
TUV
WXYZ
B
C
{
B
K
L
h
g
F
STOP
RAPID PLAY
NB034
TIMER
PROG
.
OPERATE
DVD RECORDER
Timer Recording
You can set the unit to record up
to 8 programmes, up to a month
in advance. Daily or weekly
programme recordings are also
available.
• Be sure to set the clock before
entering a timer programming.
Insert a recordable disc.
1
In stop mode, press [TIMER
PROG.].
Timer Programming list will
appear.
Timer Programming
2. - - -
3. - - -
4. - - -
1. - - -
Date Start End CH Mode
2
Select a programme that is not
set using [Cursor K / L], then
press [ENTER].
3
Enter the date using [Cursor
K / L], then press [Cursor B].
Timer Programming
2. - - -
3. - - -
4. - - -
Date Start End CH Mode
1. 01/01 --:-- --:-- P01
Each time you press [Cursor L]
at the current date, the timer
recording date will change as
follows.
e.g., 1st January
Daily
M-F
(Mon.-Fri.)
01/01
31/01
W-SAT
W-FRI
W-SUN
L
L
L
L
L
L
L
4
Enter the time to start and to
end using [Cursor K / L], then
press [Cursor B].
Timer Programming
2. - - -
3. - - -
4. - - -
Date Start End CH Mode
1. 01/01 12:00 --:-- P01
5
Select the channel number to
record using [Cursor K / L],
then press [Cursor B].
Timer Programming
2. - - -
3. - - -
4. - - -
Date Start End CH Mode
1. 01/01 12:00 13:00 P01
To record from the external input,
select “AV1”, “AV2”, “AV3” or
“AV4”.
6
Select the recording mode using
[Cursor K / L]. (See page 23.)
Timer Programming
2. - - -
3. - - -
4. - - -
Date Start End CH Mode
1. 01/01 12:00 13:00 P01 XP
7
Press [ENTER] when all informa-
tion required is entered.
Your programme setting is
stored.
• To set another programme,
repeat steps 2 to 7.
• To exit, press [TIMER PROG.].
• If the recording times of two
or more programmes overlap,
“Overlap” and overlapped
programme numbers are
displayed. (See pages 32 - 33.)
8
Press [ OPERATE].
The icon will appear on the
front panel display and the unit
enters to the timer-standby
mode.
Note
• If you have not set the clock,
the clock setting window will
appear instead of the Timer
Programming list. Continue
from step 4 in “Clock
Setting” on page 21 before
programming the timer.
• Press [Cursor { / B] to
move the cursor in the Timer
Programming list.
1
2
3
4
5
6
7
7
8
Downloaded From Disc-Player.com Sharp Manuals