
Specifications


35EN
Recording Disc Playback EditingBefore you start Connections Getting started
Changing the
Setup menu
Others
Recording
Satellite Link (cont’d)
Note
• If you have not set the clock, the clock setting window will appear at step 3. Follow to step 4 in “Clock
Setting” on page 21.
• You cannot set the End time for the Satellite Link Timer Recording on this unit.
• Recording picture will be distorted if the copy protection signal is being detected during Satellite Link
Timer Recording.
• When a regular Timer Recording and the Satellite Link Timer Recording are overlapped, those
recordings are recorded as illustrated below.
Example 2
Actual
Recording
Timer
Recording
Satellite Link
Example 3
Actual
Recording
Timer
Recording
Satellite Link
Example 1
Timer
Recording
Actual
Recording
Satellite Link
Settings for external equipment
Recording from external equipment
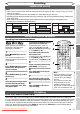
ZOOM
DISPLAY
SETUP
TOP MENU
MENU/LIST
REC MODE
REC/OTR
PAUSESKIP SKIP
PLAY
CM SKIP
AUDIO
OPEN/CLOSE
FWD
REV
CLEAR
1
2
3
4
5
6
7
8
9
SPACE
0
A
HG
ENTER
PROG.
RETURN
.@/:
ABC
DEF
GHI
JKL
MNO
PQRS
TUV
WXYZ
B
C
{
B
K
L
h
g
F
STOP
RAPID PLAY
TIMER
PROG
.
OPERATE
5
2
3
Before recording from external
equipment, see page 14 for
connection instructions.
1
Press [ OPERATE] to turn on
the unit.
Turn on the TV and be sure to
select the input to which the unit
is connected.
2
Press [OPEN/CLOSE A] to open
the disc tray, then place the
disc to record on.
3
Press [OPEN/CLOSE A] to close
the disc tray.
4
Select the external input mode
to which the external equip-
ment is connected. (AV1, AV2,
AV3, AV4 or AV5)
To use the Scart terminal or input
jacks on the rear of this unit;
To select the “AV1”, “AV2” or
“AV3”, press [0], [0], [1] or [0],
[0], [2] or [0], [0], [3] accordingly
or use [PROG. K / L].
To use the input jacks on the
front of this unit;
To select “AV4”, press [0], [0], [4]
or use [PROG. K / L].
To select “AV5”, use [PROG. K / L].
5
Select a recording mode using
[REC MODE]. (See page 23.)
6
Press [REC/OTR] on the unit to
start recording.
7
Press the PLAY button on the
external recording component.
8
Press [STOP C] on the unit to
stop recording.
4
1
Note
• During recording, if a signal
other than PAL is detected
(such as NTSC), recording is
paused.
• If you want to monitor the
programme that you are
recording, make sure the
device such as STB is turned off
when it is connected to AV2.
DV dubbing
Guide to DV and On-Screen Display
This function helps you to easy dubbing if you have the Digital Video camcorder that has DV output jack.
You can control basic operations of the DV from the remote control of this unit such as playback, fast forward
or reverse and stop all operations if the DV camcorder is in Playback mode. Use the DV cable that has 4-pin
input jack and is compliance with the IEEE 1394 standards. When you connect to DV input jack on the front
of this unit, select “AV5” position by using [PROG. K / L] and press [DISPLAY] to show the DV dubbing
information for the operating your DV camcorder.
Downloaded From Disc-Player.com Sharp Manuals