Before you start Connections VCR/DVD RECORDER COMBINATION Getting started DV-RW340U DV-RW350U OPERATION MANUAL Recording Please read this Operation Manual carefully before using your VCR/DVD RECORDER COMBINATION. INSTRUCCIONES EN ESPAÑOL INCLUIDAS. Playing discs The region number for this unit is 1.
Before you start Precautions For future reference, record the model and serial numbers (located on the rear of the Unit) in the space provided. Model No.: Serial No.: WARNING: TO REDUCE THE RISK OF FIRE OR ELECTRIC SHOCK, DO NOT EXPOSE THIS APPLIANCE TO RAIN OR MOISTURE. CAUTION:TO PREVENT ELECTRIC SHOCK, MATCH WIDE BLADE OF PLUG TO WIDE SLOT, FULLY INSERT.
Before you start Important Safeguards information with regard to proper grounding of the mast and supporting structure, grounding of the lead-in wire to an antenna discharge unit, size of grounding conductors, location of antenna-discharge unit, connection to grounding electrodes, and requirements for the grounding electrode. (Fig.
Before you start Precautions (cont’d) Location and Handling Location and Handling • Do not cover or place the unit in enclosed spaces to prevent excessive temperature build up. • Do not place the unit in direct sunlight, or near heat sources. • Depending on the use environment, the temperature of the unit may increase slightly.This is not a malfunction. • Keep the unit away from strong magnetic objects. • Do not stand the unit vertically. Install the unit in a horizontal and stable position.
Before you start Before you start Precautions (cont’d) Others It is the intent of Sharp that this product be used in full compliance with the copyright laws of the United States and that prior permission be obtained from copyright owners whenever necessary. Connections “Licensed under one or more of U.S. Pat. 4,972,484, 5,214,678, 5,323,396, 5,530,655, 5,539,829, 5,544,247, 5,606,618, 5,610,985, 5,740,317, 5,777,992, 5,878,080, or 5,960,037.
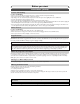
Before you start Table of contents Before you start . . . . . . . . . . . . . . . . . . .2 Precautions . . . . . . . . . . . . . . . . . . . . . . . . . . . . . .2 Table of contents . . . . . . . . . . . . . . . . . . . . . . . . . .6 Features . . . . . . . . . . . . . . . . . . . . . . . . . . . . . . . .7 Functional overview . . . . . . . . . . . . . . . . . . . . . . .8 Installing batteries in the remote control . . . . . . . . .10 Using a remote control . . . . . . . . . . . . . . . . . . . . . .
Before you start Before you start Features This unit not only plays DVDs, CDs and VHS tapes but also offers features for you to record to DVD discs and edit them after that.The following features are offered with this unit. DVD mode Setting/Clearing chapter markers: You can easily add chapter markers anywhere in your recordings for easy editing. (VR mode) Making your own Playlist: With the original remains as it is, you can edit titles on Various playlist as you prefer. Putting names on titles.
Before you start Functional overview 3* 4 5 2 Front Panel 6 OPEN/CLOSE (*) The unit can also be turned on by pressing these buttons. POWER STOP/EJECT REW F.FWD PLAY VCR STOP DVD PLAY S-INPUT VIDEO L(MONO) - AUDIO - R REC/OTR REC/OTR CHANNEL (TRACKING) 1 20 21 19 18 17 16 1. POWER button / indicator (DVD/VCR) Press to turn the unit on and off. If timer programmings have been set, press to set the unit in timer-standby mode. Press to cancel the timer standby mode, then turn the unit on.
Before you start Remote Control POWER REC MODE REC SPEED AUDIO ABC DEF 2 3 OPEN/CLOSE 1 .@/: 1 GHI JKL MNO 4 5 6 PQRS TUV WXYZ 8 9 7 15* 16 CH VIDEO/TV SLOW SPACE 0 4 3 DISPLAY 12 8 9 11 19 PAUSE PLAY 23 STOP REC/OTR SETUP TIMER PROG. ENTER REC MONITOR MENU/LIST TOP MENU CLEAR/C.RESET ZOOM SEARCH MODE 25 CM SKIP RETURN SKIP SKIP 27 28 29 20 22* 24* 26 30 13 Editing Changing the SETUP menu VCR functions Others Español 9 Playing discs 1.
Before you start Functional overview (cont’d) Installing batteries in the remote control Using a remote control Install two “AA” size batteries (supplied) matching the polarity indicated inside battery compartment of the remote control. Keep in mind the following when using the remote control: • Make sure that there is no obstacle between the remote control and the remote sensor of the unit. • Use within the operating range and angle as shown.
Before you start Before you start Functional overview (cont’d) Guide to Displays on screen menu This unit uses the following on screen menu for most operations: SETUP/DISC/CD menu, Title list, and DISPLAY menu.They allow you to change the playing status of disc during play. The DISPLAY menu also gives you information on the status of the disc or a videotape. Press SETUP button to display the setup main menu, then choose either of SETUP/DISC/CD by pressing { / B buttons.
Before you start Functional overview (cont’d) DISPLAY menu DVD mode First: DVD Press DISPLAY button to call up the display menu.This menu will give you the information on the playing disc. Some operations are available while disc is playing. Details are on page 43. 4 1 1 1 00:00:00 DVD-RW Video mode SP 1:25 Rem. 5 CH 1 STEREO 2 3 1. Indicates a disc type and a format mode. Note: In some descriptions on this manual, only one disc type is indicated as an example. 2.
Before you start Before you start Functional overview (cont’d) Front Panel Display Guide 4 2 Connections 1 3 7 6 3. Recording mode/speed Indicates the recording speed of the disc or a videotape. 4. Title/Track and Chapter mark : Appears when indicating a title/track number. : Appears when indicating a chapter number. 5.
Connections Connection to a TV Antenna (Back of TV) or Antenna (Back of TV) Cable Signal Cable Signal 3 or Connect Round Coaxial Cable (supplied) 1 Disconnect DIGITAL AUDIO AUDIO OUT OUT DVD S-VIDEO COMPONENT VIDEO OUT Y L COAXIAL PB/CB IN R DVD/VCR AUDIO IN AUDIO OUT ANTENNA IN L L R R VIDEO IN VIDEO OUT 2 OUT PR/CR Connect OUT (Back of this unit) 4 Plug in the AC power cord of this unit.
Connections Before you start Connection to a cable box or satellite box Connection A (Cable box or Satellite box) OUT ANTENNA IN OUT Round Coaxial Cable Cable Signal Connections IN (Back of this unit) DVD/VCR E (supplied) (Back of TV) Getting started Select this connection when you want to view or record a scrambled channel.With this connection, channels cannot be changed on this unit.You can view or record ONLY the channels you have selected on the cable box or the satellite box.
Getting started Connection to an Audio System • When you change the connections, all devices should be turned off. • Refer to the operation manual accompanying external devices for more information.
Getting started Before you start Easy DVD recording The following will help you to understand easily how to record to DVD discs. Note: Make sure batteries are in the remote control and you have connected this unit and the TV correctly. Step 1: Choose a disc type Step 2: Insert a blank disc Remote Control POWER 1 REC MODE REC SPEED AUDIO .
Getting started Easy DVD recording (Cont’d) Step 3: Select the Recording speed 1 Step 4: Select the desired channel Step 5: Record to DVD discs To select the DVD mode 1 2 3 GHI JKL MNO 4 5 6 PQRS TUV WXYZ 8 9 7 SPACE CH VIDEO/TV SLOW 0 DISPLAY POWER REC MODE REC SPEED AUDIO .@/: 1 ABC DEF 2 3 GHI JKL MNO 4 5 6 PQRS TUV WXYZ 8 9 7 OPEN/CLOSE SPACE 2 REC MODE REC SPEED AUDIO .
Getting started Before you start Channel setting 4 POWER Select “SETUP” using { / B buttons, then press ENTER button. SETUP menu will appear. Getting channels automatically 1 REC MODE REC SPEED AUDIO .@/: 1 ABC 2 3 GHI JKL MNO 4 5 6 TUV WXYZ 8 9 PQRS 7 OPEN/CLOSE DEF SPACE CH Connections All channels are stored in the unit when purchased.We recommend that you get available channels in your area stored using “Auto Preset” in the Channel Preset of the SETUP menu.
Getting started Channel setting (cont’d) Adding/deleting channels The channels you no longer receive or seldom watch can be deleted from the memory.You also may add channels into memory. 4 Select “Manual Preset” using K / L buttons, then press ENTER button. Manual Preset menu will appear. 1 REC MODE REC SPEED AUDIO .
Getting started Before you start Selecting the TV stereo or SAP You can select a sound channel to output from TV. “Stereo” has been selected as the default. Press SETUP button to display SETUP/DISC menu. SETUP/DISC menu will appear. Screen: Select “TV Audio Select” using K / L buttons, then press ENTER button. Option window will appear. Setup > Channel Preset VCR POWER REC MODE REC SPEED .
Getting started Setting the clock Set the clock before you try the timer recording. If a Public Broadcasting Station (PBS) is available in your area, follow Auto Clock Setting below. If not, follow Manual Clock Setting on pages 23-24. Auto Clock Setting 4 Select “Auto Clock Setting” using K / L buttons, then press ENTER button. Option window will appear. Make sure • The antenna/cable TV connections are correct.
Getting started Before you start Setting the clock (cont’d) Manual Clock Setting 4 1 Select “Clock Setting” using K / L buttons, then press ENTER button. A clock setting window will appear. POWER REC MODE REC SPEED AUDIO .@/: 1 ABC 2 3 GHI JKL MNO 4 5 6 PQRS TUV WXYZ 8 9 7 DEF SPACE Setup > Clock OPEN/CLOSE Connections Press SETUP button to display SETUP/DISC menu. SETUP/DISC menu will appear.
Getting started Setting the clock (cont’d) 7 Press K / L buttons to select AM or PM, then press ENTER button. Clock menu will appear, then the settings will be activated. 8 Press SETUP button to exit. Although seconds are not displayed, they begin counting from zero. POWER REC MODE REC SPEED AUDIO .
Getting started Before you start Setting the clock (cont’d) Setting the daylight saving time Select “Daylight Saving Time” using K / L buttons, then press ENTER button. Daylight Saving Time options will appear. POWER REC MODE REC SPEED AUDIO .
Getting started Selecting the TV aspect ratio You can select the TV aspect ratio to match the formats of what you are playing with the unit and your TV screen (4:3 standard or 16:9 widescreen TV). “4:3 Letter Box” has been selected as the default. 4 Select “TV Aspect” using K / L buttons, then press ENTER button. Option window will appear. Setup > Playback 1 POWER REC MODE REC SPEED .
Recording Information Recording speed This unit can record to DVD-RW and DVD-R discs. When recording, you will need to select a recording format between Video mode and VR mode depending on the disc format.When recording to DVDRW, a recording format will be “Video mode” or “VR mode” because a disc format is available between “Video Recording format” and “Video format” for DVD-RW. On the other hand, the disc format for DVD-R is always “Video format,” so a recording format will be “Video mode”.
Recording Information on DVD recording (cont’d) Information on copy control Some satellite broadcasts include copy-protected information. For recording these, refer to the following. Disc type / format Making discs playable in other DVD player (Finalize) After recording, you must finalize the disc in order to play on other unites. (Refer to page 41.) Copy-free Copy-once Copyprohibited Finalizing* ver.1.1 DVD-RW ver.1.1 CPRM compatible VR DVD-RW ver.1.1 ver.1.1 CPRM compatible DVD-R ver.2.
Recording Before you start Formatting a disc Choosing the recording format of a blank disc Video VR DVD-RW DVD-RW 4 POWER Select “DVD-RW Recording Format” using K / L buttons, then press ENTER button. Option window will appear. REC MODE REC SPEED AUDIO .@/: 1 ABC 2 3 GHI JKL MNO 4 5 6 PQRS TUV WXYZ 8 9 7 OPEN/CLOSE Connections When inserting a blank disc, the unit starts to initialize the blank disc.
Recording Formatting a disc (cont’d) Reformatting a disc Video VR DVD-RW DVD-RW If you are using a DVD-RW disc, by default it will be VR mode.You can change this to Video mode from SETUP menu. 1 4 POWER Select “Yes” using { / B buttons, then press ENTER button. Option window will appear. REC MODE REC SPEED AUDIO .@/: 1 ABC 2 3 GHI JKL MNO DEF 4 5 6 PQRS TUV WXYZ 8 9 7 OPEN/CLOSE SPACE CH VIDEO/TV SLOW 0 Disc Press SETUP button to display SETUP/DISC menu.
Recording Before you start Basic recording Video VR DVD-RW DVD-RW DVD-R DVD Select a desired channel to record using CH K / L buttons or number buttons. POWER 4 REC MODE REC SPEED AUDIO .@/: 1 ABC 2 3 GHI JKL MNO 4 5 6 PQRS TUV WXYZ 8 9 7 OPEN/CLOSE DEF SPACE CH 4 VIDEO/TV SLOW 0 1 DISPLAY CH 1 PAUSE STOP 5 This operation may take a while to be recognized. 5 PLAY REC/OTR SETUP TIMER PROG. REC MONITOR MENU/LIST TOP MENU CLEAR/C.
Recording Basic recording (cont’d) Checking the recording picture quality Video VR DVD-RW DVD-RW DVD-R You can confirm the recording picture quality with the recording speed you have selected before attempting to record to a DVD disc. First: 2 1 Press REC MONITOR button again to exit. REC MODE REC SPEED AUDIO .
Recording Before you start One-touch timer recording Video VR DVD-RW DVD-RW DVD-R 1 2 POWER REC MODE REC SPEED .@/: 1 ABC 2 3 GHI JKL MNO 4 5 6 PQRS TUV WXYZ 8 9 7 5 AUDIO OPEN/CLOSE DEF SPACE CH 4 VIDEO/TV SLOW 0 Press REC/OTR button, then press REC/OTR button repeatedly until a desired recording time (30 minutes to 8 hours) appears on the TV screen. Recording will start. DISPLAY DVD VCR PAUSE PLAY STOP 5 REC/OTR SETUP TIMER PROG.
Recording Timer recording Video VR DVD-RW DVD-RW DVD-R VCR You can program the unit to record up to 8 programs, up to a year in advance. Daily or weekly program recordings are also available. • Be sure to set the clock before making a timer programming. • Insert a recordable disc or a videotape with a record tab. 4 Select “Timer Programming” using K / L buttons, then press ENTER button. Timer Programming list will appear. You can choose the timer programming menu by pressing TIMER PROG. button.
Recording Before you start Timer recording (cont’d) 8 10 Select the channel number to Select a recording speed using K / L buttons. Setup > Recording > Timer Programming Date Start JAN/12 10:00PM --- Setup > Recording > Timer Programming Date Start JAN/12 10:00PM --- DVD End CH VCR Speed 10:30PM CH8 DVD To record from external input, L1 or L2. using K / L buttons, then press B button.
Recording Timer recording (cont’d) Hints for timer recording • If there is a power failure or this unit has been unplugged for more than 30 seconds, the clock setting and all timer settings will be lost. • If a disc is not on the tray, the DVD indicator on the front panel flashes and timer recording cannot be performed. Please insert a recordable disc. • If a videotape with a record tab is not in the cassette compartment, the VCR indicator on the front panel flashes and timer recording cannot be performed.
Recording Connection to an external source Video VR DVD-RW DVD-RW DVD-R VCR OUTPUT S- VIDEO L OUTPUT Another source (VCR camcorder etc.) VIDEO AUDIO R S- VIDEO VIDEO AUDIO L R Getting started or or S-Video cable Video cable S-Video cable Audio cable Connections Connect the external source properly to the unit by using input jacks either LINE2 (Front) or LINE1 (Rear). When you record on a videotape, use either the DVD/VCR VIDEO IN jack (Rear) or VIDEO IN jack (Front).
Recording Settings for an external source (cont’d) Recording from an external source Video VR DVD-RW DVD-RW DVD-R VCR Before recording from an external source, see the instructions for the connection on page 37. 1. Turn the TV and the unit on, and be sure to select the input of the TV to which the unit is connected. DVD 5 1 2. When you want to record to the disc: Press: Press OPEN/CLOSE A button to open the disc tray, then place the disc to record properly.
Recording Before you start Dubbing Mode Video VR DVD-RW DVD-RW DVD-R VCR Select “SETUP” using { / B buttons, then press ENTER button. SETUP menu will appear. Setup REC MODE REC SPEED AUDIO .@/: 1 ABC 2 3 GHI JKL MNO 4 5 6 PQRS TUV WXYZ 8 9 7 OPEN/CLOSE DEF SPACE CH VIDEO/TV SLOW 0 DISPLAY DVD VCR PAUSE 1 STOP REC/OTR SETUP 3 TIMER PROG. ENTER REC MONITOR MENU/LIST TOP MENU Setup > Recording DVD-RW Recording Format Auto Chapter CLEAR/C.
Recording Dubbing Mode (cont’d) VCR to DVD DVD to VCR 5-a Select “VCR ⇒ DVD” using K / L buttons, then press ENTER button. REC MODE REC SPEED AUDIO .@/: 1 ABC DEF 2 3 GHI JKL MNO 4 5 6 PQRS TUV WXYZ 7 8 9 POWER 5-b Select “VCR ⇐ DVD” using K / L buttons, then press ENTER button.
Recording Before you start Finalizing the discs Video VR DVD-RW DVD-RW DVD-R POWER 1 REC MODE REC SPEED AUDIO .@/: 1 ABC 2 3 GHI JKL MNO 4 5 6 PQRS TUV WXYZ 8 9 7 OPEN/CLOSE DEF SPACE Connections You will need to finalize the discs recorded in Video mode to play in other DVD players. tons, then press ENTER button. Finalizing will start. CH VIDEO/TV SLOW 0 DISPLAY 58% STOP To cancel finalizing... Disc Edit Format Finalize Disc Protect OFF ON Finalizing is complete.
Recording Setting a disc to protect VR DVD-RW To prevent accidental recording, editing, or erasing the titles, you can protect them from DISC menu. 3 Select “Disc Protect OFF ➔ ON” using K / L buttons, then press ENTER button. Option window will appear. POWER REC MODE REC SPEED .@/: 1 ABC 2 3 GHI JKL MNO 4 5 6 TUV WXYZ 8 9 SPACE DISPLAY SLOW DVD VCR PAUSE Edit Format Finalize PLAY Disc Protect OFF ON STOP Yes No REC/OTR 1 SETUP TIMER PROG.
Playing discs Before you attempt to play DVD discs, read the following information. Color systems This unit is compatible to play the following discs. To play a DVD, make sure that it meets the requirements for Region Codes and Color Systems as described below. Discs that have the following logos will play on the unit. Other Disc types are not guaranteed to play. DVDs are recorded in different color systems throughout the world.
Playing discs Basic playback Playback Video VR DVD-RW DVD-RW DVD-R Video DVD+RW DVD+R 1 Press POWER button, then press DVD button. When you are playing a DVD, turn the TV on and be sure to select the input to which the unit is connected. 5 Press TOP MENU button to display the title menu. You can change “Original” or “Playlist” of VR mode using MENU / LIST button. Video mode: POWER 1 REC MODE REC SPEED AUDIO ABC DEF 2 3 .
Playing discs DVD-V CD MP3 1 Press POWER button, then ton to open the disc tray. The disc tray will open. POWER 1 REC MODE REC SPEED AUDIO ABC DEF 2 3 .@/: 1 GHI If you are playing a DVD-Video disc, a menu may appear. Refer to pages 46-47 for details about a disc menu. JKL MNO 4 5 6 PQRS TUV WXYZ 8 9 7 SPACE OPEN/CLOSE 2 CH VIDEO/TV SLOW 0 DVD VCR DISPLAY PAUSE PLAY 5 Press STOP C button to stop STOP REC/OTR playing. SETUP TIMER PROG.
Playing discs Basic playback (cont’d) Playing discs using the disc menu DVD-V A DVD disc contains a disc menu that describes the contents or allows you to customize the playback. For example, the menu may offer choices for subtitle languages, special features, or chapter selection. Sometimes these are displayed automatically when you start playback, otherwise only appear when you press MENU / LIST button. First: DVD 1 Press MENU / LIST button. The DVD main menu will appear.
Playing discs Before you start Basic playback (cont’d) Playing discs using the title menu DVD-V DVD Press TOP MENU button. The title menu will appear. If the feature is not available, may appear on the TV screen. Select a title to play using the K / L / { / B buttons, then press ENTER button. Playback will begin at the title you selected. POWER 2 REC MODE REC SPEED AUDIO .
Playing discs Special playback Resume play Video VR DVD-V DVD-RW DVD-RW DVD-R DVD+RW 2 Video CD DVD+R Press PLAY B button. In a few seconds, playback will resume from the point at which it stopped last.You can resume play at the same point even if you turn off the unit. MP3 You can resume play from where you stopped playing the disc last. 1 REC MODE REC SPEED POWER AUDIO .
Playing discs Before you start Special playback (cont’d) Skipping TV commercials during play Video VR DVD-RW DVD-RW DVD-R e.g. Press CM SKIP button once SPACE SLOW 0 Video DVD+R DVD+RW PLAY STOP REC/OTR CM Skip 30 sec. SETUP TIMER PROG. ENTER REC MONITOR MENU/LIST TOP MENU 1 CLEAR/C.RESET ZOOM (forwarding 30 seconds.) SEARCH MODE RETURN SKIP SKIP Getting started CM SKIP 1 Recording During playback, press CM SKIP button.
Playing discs Special playback (cont’d) Step by step playback DVD-V Video VR DVD-RW DVD-RW DVD-R DVD+RW SPACE 2 Video DVD+R During playback, press PAUSE F button. Playback will pause and sound will be muted. DVD VCR DISPLAY Press SKIP G button repeatedly. The playback will advance one frame (or step) at a time when you press the SKIP G button with the sound muted. 1 SLOW 0 PAUSE PLAY STOP REC/OTR SETUP TIMER PROG. ENTER REC MONITOR MENU/LIST TOP MENU RETURN CLEAR/C.
Playing discs Zoom REC/OTR DVD-V Video VR DVD-RW DVD-RW Video DVD-R DVD+RW DVD+R 1 x1.2 01:23:45 x1.5 1 SKIP SKIP CM SKIP Select a desired zoom position using K / L / { / B buttons, then press ENTER button. The zoom play will start. • When selecting a smaller factor than the current one, the zoom area will not be displayed. • To remove the zoom menu, press ZOOM button again at step 1. • To cancel the zoom function, select x1.0 using { / B buttons, then press ENTER button.
Playing discs Search Title/Chapter search DVD-V Video VR DVD-RW DVD-RW Video DVD-R DVD+RW DVD+R POWER Using SKIP H / G buttons 1 During playback, press SKIP G button to skip the current title or chapter and move to the next. The title or chapter will move forward one at a time. REC MODE REC SPEED AUDIO .@/: 1 ABC 2 3 GHI JKL MNO 4 5 6 PQRS TUV WXYZ 8 9 7 OPEN/CLOSE DEF SPACE CH VIDEO/TV SLOW 0 To go back to the previous title or chapter, press SKIP H button.
Playing discs Before you start Search (cont’d) Track search CD MP3 Using SKIP H / G buttons REC/OTR SETUP TIMER PROG. ENTER REC MONITOR MENU/LIST TOP MENU During playback, press SKIP G button to skip the current track and move to the next. The track will move forward one at a time. RETURN CLEAR/C.RESET ZOOM SEARCH MODE SKIP SKIP CM SKIP 1 Using DISPLAY button SPACE Getting started To go back to the previous track, press SKIP H button.The track will move backward one at a time.
Playing discs Repeat/Random/Program play Repeat play Video VR DVD-V DVD-RW DVD-RW DVD-R DVD+RW Video CD DVD+R MP3 1 During playback, press DISPLAY button. The display menu will appear. 1 1 01:23:45 DVD-Video 2 Select icon using { / B buttons, then press ENTER button. Repeat menu will appear. Screen: 1 1 01:23:45 DVD-Video OFF Title Chapter A-B 2 00:00:30 Audio CD OFF Track All A-B 114 00:00:30 MP3 OFF Track All Group REC MODE REC SPEED AUDIO .
Playing discs Before you start Repeat/Random/Program play (cont’d) Program play CD DVD 1 3 Select “Program Play” using K / L buttons, then press ENTER button. Program play list will appear. POWER 4 REC MODE REC SPEED AUDIO .
Playing discs Selecting the format of audio and video You can select the format of audio and video as you prefer depending on the contents of the disc you are playing. Switching audio soundtrack VR DVD-V DVD-RW When playing a DVD-Video disc recorded with two or more soundtracks (these are often in different languages), you can switch between them anytime during playback. On DVD-RW discs recorded in VR mode, you can switch to main (L), sub audio (R) or a mix of both (L/R).
Playing discs Before you start Selecting the format of audio and video (cont’d) CD MP3 1 2 POWER Select icon using { / B buttons, then press ENTER button. Audio menu will appear. REC MODE REC SPEED AUDIO .@/: 1 ABC 2 3 GHI JKL MNO 4 5 6 PQRS TUV WXYZ 8 9 7 OPEN/CLOSE Connections When playing Audio CDs or MP3 files you can switch between stereo, just the left channel or just the right channel.
Playing discs Selecting the format of audio and video (cont’d) Switching camera angles DVD-V Some DVD Video discs feature scenes shot from two or more angles, check the case for details: it should be marked with an angle icon if it contains multi-angle scenes. 2 1 1 01:23:45 REC MODE REC SPEED AUDIO .@/: 1 ABC 2 3 GHI JKL MNO 4 5 6 PQRS TUV WXYZ 8 9 7 OPEN/CLOSE DEF SPACE CH VIDEO/TV SLOW 0 1 During playback, press DISPLAY button. The display menu will appear.
Editing Editing discs in Video mode Title list allows you to check the titles recorded on the disc easily.You can choose a title to play from this screen and easily edit the titles as you prefer. You can edit discs in Video mode for the following items. Be sure that once you edit titles, they will not remain as recorded originally.
Editing Information on disc editing (cont’d) Editing discs in VR mode For discs in VR mode, you can edit from “Original” menu or “Playlist” menu, which is created from the original. Editing original titles Editing playlists The following items can be used to edit the original titles.
Editing Before you start Editing DVD-RW discs in Video mode Deleting titles Video DVD-RW 3 Select a desired title using K / L / { / B buttons, then press ENTER button. Edit menu will appear. 2 3 JKL MNO 4 5 6 PQRS TUV WXYZ 8 9 DISPLAY 1 DEF CH VIDEO/TV SLOW DVD VCR PAUSE PLAY XP 1 6 STOP REC/OTR SETUP MENU/LIST TOP MENU CLEAR/C.
Editing Editing DVD-RW discs in Video mode (cont’d) Putting names on titles Video DVD-RW You can put title names on the titles and change the names from this menu. The names you put on the titles will be displayed on a titlelist. First: DVD 4 Select “Edit Title Name” using K / L buttons, then press ENTER button. A window for entering a title name will appear. POWER 5 REC MODE REC SPEED AUDIO .
Editing Before you start Editing DVD-RW discs in Video mode (cont’d) 6 POWER REC MODE REC SPEED AUDIO .@/: 1 ABC 2 3 GHI JKL MNO 4 5 6 PQRS TUV WXYZ 8 9 7 OPEN/CLOSE Connections Select “Yes” using { / B buttons, then press ENTER button. The name you entered will be activated for the title. DEF SPACE CH VIDEO/TV SLOW 0 DISPLAY DVD VCR PAUSE Disc > Edit > Edit Title Name ABC abc 123 @!? Yes No PLAY 7 STOP REC/OTR SETUP TIMER PROG.
Editing Editing DVD-RW discs in Video mode (cont’d) Setting or clearing chapter markers Video DVD-RW You can put chapter markers in each title. Once a chapter is marked, you can use it for the chapter search feature. You can set chapter markers at a specified time you selected for titles with more than 5 minutes. First: 4 POWER Select “Chapter Mark” using K / L buttons, then press ENTER button. Option window will appear. 3 MNO 4 5 6 PQRS TUV WXYZ 8 9 Disc > Edit DISPLAY Press SETUP button.
Editing Before you start Editing DVD-RW discs in VR mode (Original) Deleting titles VR DVD-RW 4 Select a desired title using K / L / { / B buttons, then press ENTER button. Original menu will appear. POWER REC MODE REC SPEED .@/: 1 ABC 2 3 GHI JKL MNO 4 5 6 PQRS TUV WXYZ 8 9 7 DISPLAY Press SETUP button. Select “DISC” using { / B buttons, then press ENTER button. DISC menu will appear.
Editing Editing DVD-RW discs in VR mode (Original) (cont’d) Deleting parts of titles VR DVD-RW You can delete part of a title, the disc space to record will be increased. Be advised that the parts once deleted cannot be brought back to the disc. First: 4 Select a desired title using K / L / { / B buttons, then press ENTER button. Original menu will appear.
Editing Before you start Editing DVD-RW discs in VR mode (Original) (cont’d) 7 POWER ABC 2 3 GHI JKL MNO 4 5 6 TUV WXYZ 8 9 7 OPEN/CLOSE DEF CH VIDEO/TV SLOW 0 1 Title Delete Scene Delete Start Edit Title Name End Chapter Mark Preview Index Picture Delete Protect OFF Yes JAN/ 1 1:00AM CH12 No No PAUSE PLAY 9 STOP REC/OTR SETUP TIMER PROG. ENTER REC MONITOR XP Writing to Disc XP DVD VCR DISPLAY MENU/LIST TOP MENU RETURN 0:01:25 CLEAR/C.
Editing Editing DVD-RW discs in VR mode (Original) (cont’d) 3 Select “Original” using { / B buttons, then press ENTER button. Original list will appear. 6 To enter a title name, follow the steps of "Guide to edit title name" on this page. character set POWER 6 REC MODE REC SPEED AUDIO .
Editing Before you start Editing DVD-RW discs in VR mode (Original) (cont’d) Setting or clearing chapter markers VR DVD-RW 4 Select a desired title using K / 1 Format Finalize Disc Protect OFF ON XP 0:01:25 1 2 3 JAN/1 1:00AM JAN/1 2:00AM JAN/1 3:00AM JAN/ 1 1:00AM CH12 SLOW DISPLAY DVD VCR PAUSE 6 PLAY 1 STOP REC/OTR SETUP TIMER PROG. ENTER CLEAR/C.
Editing Editing DVD-RW discs in VR mode (Original) (cont’d) : This operation may take a while to be completed. Disc > Edit > Original POWER 1 Chapter 2/2 F Title Delete Scene Delete Edit Title Name ChapterAdd Mark Delete Index Picture Protect OFF ON Yes JAN/ 1 1:00AM CH12 No XP The chapter marker which you selected will be deleted. : REC MODE REC SPEED .
Editing Before you start Editing DVD-RW discs in VR mode (Original) (cont’d) 3 POWER Select “Yes” using { / B buttons, then press ENTER button. A picture for thumbnail will be set.
Editing Editing DVD-RW discs in VR mode (Original) (cont’d) Setting titles to protect VR DVD-RW To prevent accidental editing or erasing the titles, you can protect them from the original menu. First: DVD 4 Select a desired title using K / L / { / B buttons, then press ENTER button. Original menu will appear. POWER REC MODE REC SPEED .
Editing Before you start Editing DVD-RW discs in VR mode (Original) (cont’d) Releasing titles from protecting VR DVD-RW First: DVD 4 POWER Select a desired title using K / L / { / B buttons, then press ENTER button. Original menu will appear. 1 REC MODE REC SPEED AUDIO .@/: 1 ABC 2 3 GHI JKL MNO DEF 4 5 6 PQRS TUV WXYZ 8 9 7 OPEN/CLOSE Connections You are allowed to release the titles protecting feature once protected.
Editing Editing DVD-RW discs in VR mode (Playlist) Deleting titles VR DVD-RW In VR mode, even when a title is deleted from a Playlist, the original title will remain in an Original list. The disc space to record will not be increased. First: 4 POWER Select a desired title using K / L / { / B buttons, then press ENTER button. Playlist menu will appear. REC MODE REC SPEED .
Editing Before you start Editing DVD-RW discs in VR mode (Playlist) (cont’d) Deleting parts of titles VR DVD-RW 4 Select a desired title using K / L / { / B buttons, then press ENTER button. Playlist menu will appear.
Editing Editing DVD-RW discs in VR mode (Playlist) (cont’d) Part of a title will be deleted. 7 Yes JAN/ 1 1:00AM CH12 Yes JAN/ 1 1:00AM CH12 0:01:25 6 TUV WXYZ 8 9 CH VIDEO/TV SLOW DVD VCR No PAUSE PLAY XP STOP 9 REC/OTR SETUP TIMER PROG. ENTER REC MONITOR This operation may take a while to be completed. RETURN MENU/LIST TOP MENU CLEAR/C.RESET ZOOM SEARCH MODE SKIP SKIP CM SKIP 7 8 9 After writing to disc is completed, press SETUP button to exit DISC menu.
Editing Before you start Editing DVD-RW discs in VR mode (Playlist) (cont’d) 4 POWER Select “Yes” using { / B buttons, then press ENTER button. The name you entered will be activated for the title. 2 3 JKL MNO OPEN/CLOSE DEF 4 5 6 PQRS TUV WXYZ 8 9 SPACE CH VIDEO/TV SLOW 0 VCR DVD PAUSE Disc > Edit > Playlist > Edit Title Name 1 XP ABC abc 123 @!? Yes 0:01:25 PLAY STOP 8 REC/OTR No SETUP abc TIMER PROG. ENTER REC MONITOR MENU/LIST TOP MENU CLEAR/C.
Editing Editing DVD-RW discs in VR mode (Playlist) (cont’d) Setting or clearing chapter markers VR DVD-RW You can put chapter markers in each title. Once a chapter is marked, you can use it for the chapter search feature. You can put a chapter marker anywhere you want. When the number of chapter markers in the playlist comes to 999 in total, you cannot add any more chapter markers.
Editing Before you start Editing DVD-RW discs in VR mode (Playlist) (cont’d) : This operation may take a while to be completed. Disc > Edit > Playlist 1 F Yes JAN/ 1 1:00AM CH12 No XP POWER The chapter marker which you selected will be deleted. : REC MODE REC SPEED .
Editing Editing DVD-RW discs in VR mode (Playlist) (cont’d) 3 Select “PlayList” using { / B buttons, then press ENTER button. Playlist will appear. 6 POWER Select “Yes” using { / B buttons, then press ENTER button. A picture for thumbnail will be set.
Editing Before you start Editing DVD-RW discs in VR mode (Playlist) (cont’d) Adding titles to a Playlist VR DVD-RW DVD 4 POWER Select “Add New Title” using K / L / { / B buttons, then press ENTER button. Original list will appear. REC MODE REC SPEED AUDIO .@/: 1 ABC 2 3 GHI JKL MNO DEF 4 5 6 PQRS TUV WXYZ 8 9 7 OPEN/CLOSE Connections You can add or delete a title in the playlist as you prefer. You can add titles to a Playlist up to 99.
Editing Editing DVD-RW discs in VR mode (Playlist) (cont’d) Deleting a Playlist VR DVD-RW A Playlist can be deleted if no longer needed. First: DVD 1 4 POWER Select “Delete Playlist” using K / L / { / B buttons, then press ENTER button. Option window will appear. REC MODE REC SPEED AUDIO .@/: 1 ABC 2 3 GHI JKL MNO DEF 4 5 6 PQRS TUV WXYZ 8 9 7 OPEN/CLOSE SPACE CH VIDEO/TV SLOW 0 Press SETUP button. Select “DISC” using { / B buttons, then press ENTER button.
Editing Before you start Editing DVD-R discs Deleting titles DVD-R Disc > Edit 1 JAN/ 1 1:00AM CH12 Title Delete Edit Title Name Chapter Mark POWER XP REC MODE REC SPEED .@/: 1 ABC 2 3 GHI JKL MNO OPEN/CLOSE DEF 4 5 6 PQRS TUV WXYZ 8 9 7 0:01:25 AUDIO Connections You can delete titles which you do not need, however the disc space to record on the disc will not be changed. Be aware to know that the titles once deleted cannot be brought back to the disc.
Editing Editing DVD-R discs (cont’d) Putting names on titles DVD-R You can put names on the titles and change the names from this menu. The names you put on the titles will be displayed on a titlelist. First: 4 Select “Edit Title Name” using K / L buttons, then press ENTER button. A window for entering a title name will appear. POWER 5 REC MODE REC SPEED .@/: 1 ABC 2 3 GHI JKL MNO 4 5 6 TUV WXYZ 8 9 7 SPACE 1 1 Press SETUP button.
Changing the SETUP menu Before you start Tour of the SETUP menu The following table is the contents which you can set and the default settings. Refer to the following table for useful operation. SETUP menu Audio Language Original English French Set the language for audio. Subtitle Language OFF English French Set the language for subtitle. OSD Background Transparency 100% Set the background transparency of OSD screen. OSD Background Color 1 2 3 35% 25% Set the OSD screen color.
Changing the SETUP menu Language setting Press STOP button if you are playing a disc. POWER 1 Press SETUP button to display SETUP/DISC menu. SETUP/DISC menu will appear. 4 REC MODE REC SPEED AUDIO .@/: 1 ABC 2 3 GHI JKL MNO 4 5 6 TUV WXYZ 8 9 PQRS 7 OPEN/CLOSE DEF SPACE CH VIDEO/TV SLOW 0 DISPLAY DVD VCR PAUSE PLAY 1 5 Setup Menu 2 STOP REC/OTR SETUP TIMER PROG. ENTER REC MONITOR MENU/LIST TOP MENU CLEAR/C.
Changing the SETUP menu Before you start Language setting (cont’d) Disc Menu Language (Default : English) Set the language for Disc Menu.
Changing the SETUP menu Display setting Press STOP button if you are playing a disc. POWER 1 Press SETUP button to display SETUP/DISC menu. SETUP/DISC menu will appear. REC MODE REC SPEED AUDIO .@/: 1 ABC 2 3 GHI JKL MNO 4 5 6 TUV WXYZ 8 9 PQRS 7 OPEN/CLOSE DEF SPACE CH VIDEO/TV SLOW 0 DISPLAY DVD VCR PAUSE PLAY 1 5 Setup Menu 2 Playback Setting 3 Select “Display” using K / L / { / B buttons, then press ENTER button. Option window will appear.
Changing the SETUP menu Setup > Display DVD OSD Background Transparency 35% OSD Language 1 English Screen Saver 10 minutes DVD OSD Background Transparency 35%100% 85% OSD Background Color 1 70% OSD Language English 50% Screen Saver 10 minutes 35% 25% 10% 0% • Select a setting using K / L buttons, then press ENTER button. Your setting will be activated.
Changing the SETUP menu Audio setting Choose the appropriate Audio settings for your equipment. It will only affect DVD discs during playback. Press STOP button if you are playing a disc. POWER 1 Press SETUP button to display SETUP/DISC menu. SETUP/DISC menu will appear. REC MODE REC SPEED AUDIO .@/: 1 ABC 2 3 GHI JKL MNO 4 5 6 TUV WXYZ 8 9 PQRS 7 OPEN/CLOSE DEF SPACE CH VIDEO/TV SLOW 0 DISPLAY DVD VCR PAUSE PLAY 1 5 Setup Menu STOP REC/OTR SETUP TIMER PROG.
Changing the SETUP menu A Settings for PCM (Default : Auto) OFF PCM Auto 48kHz ON Dolby Digital 96kHz DTSOFF ntrol udio Settings for Dolby Digital (Default : Stream) OFF ntrol udio C PCM ON Dolby Digital PCM Stream DTSOFF • Select a setting using K / L buttons, then press ENTER button. Your setting will be activated. ON : Outputs DTS signals. When your amplifier/decoder is compatible with DTS, set to “ON”. OFF : No DTS signal is output.
Changing the SETUP menu Settings for Parental lock level Some DVD-Video discs feature a Parental Lock level. Playback will stop if the ratings exceed the levels you set, it will require you to enter a password before the disc will playback.This feature prevents your children from viewing inappropriate material. Press STOP button if you are playing a disc. POWER 4 REC MODE REC SPEED AUDIO .
Changing the SETUP menu Before you start Settings for Parental lock level (cont’d) Parental Lock (Default : All) Set the Parental Lock level.
VCR functions Playback VCR 3 1 Press POWER button on the remote control or the front panel of the unit. When you are playing a videotape, turn the TV on and be sure to select the input to which the unit is connected. Press: VCR During playback, press PAUSE F button. Playback will pause and sound will be muted. Insert a prerecorded videotape, then press PLAY B button to begin playback. POWER REC MODE REC SPEED 4 Press PLAY B button to resume play. AUDIO .
VCR functions One-touch timer recording PLAY VCR VCR During normal recording, press REC/OTR button to begin one-touch timer recording. You can select a fixed recording time by pressing the REC/OTR button repeatedly. (0:30) (1:00) (8:00) (7:30) 1 REC/OTR SETUP TIMER PROG. 1 ENTER Note When one-touch timer recording is finished, the unit will turn off automatically. To change the recording length during the one-touch timer recording, press REC/OTR repeatedly until the desired length appear.
VCR functions Search (cont’d) Time search POWER VCR This feature allows you to go to a specific point on a videotape by entering the exact amount of time you wish to skip in order to reach the point. First: TIME SEARCH 2:50 2 REC MODE REC SPEED AUDIO .@/: 1 ABC 2 3 GHI JKL MNO DEF 4 5 6 PQRS TUV WXYZ 8 9 7 OPEN/CLOSE SPACE CH VIDEO/TV SLOW 0 DISPLAY DVD VCR PAUSE VCR 1 Press SEARCH MODE button repeatedly so that the Time search menu appears.
Others Before you start Troubleshooting Before requesting service for this unit, check the table below for a possible cause of the problem you are experiencing. Some simple checks or a minor adjustment on your part may eliminate the problem and restore proper operation. Symptom • Check that the AC power cord is connected securely. • (In case of power failure) Check the braker. There is no picture. • Re-connect the connecting cord securely. • The connecting cords are damaged.
Others Troubleshooting (cont’d) Symptom D V D 98 Remedy There is no picture. • The Setup Display appears. Press RETURN button to turn off the display. • Check if the INTERLACE/PROGRESSIVE mode is set correctly according to your TV. See page 14. Picture noise appears. • The disc is dirty or flawed.
Others Symptom The disc tray does not open when you press OPEN/CLOSE A button. "Repairing" appears on the display. Repairing Picture noise appears. The tape does not play. Recording does not start immediately after you press REC/OTR button. The remote control does not function. The motor rotates even when playback / recording is stopped. Disc Error --- Please eject the disc. --Playback feature may not be available on this Disc.
Others Troubleshooting (cont’d) Error message Cause Solution Recording Error You cannot record more than 99 titles on one disc. (The maximum is 99) You are trying to record onto the disc on which the number of recording titles comes up to the maximum (99). Delete unnecessary titles (pages 61, 65, 74). Recording Error You cannot record more than 999 chapters on one disc.
Others VCR functions Others Español 101 Changing the SETUP menu Code 6467 6559 6553 6547 5350 6564 6554 6566 6660 6560 6550 6555 6565 6557 6558 6561 5165 6567 6569 6568 6658 6653 6647 6666 6651 6654 4861 6655 6661 6665 6664 6657 6669 6757 6764 6772 6855 6861 4971 6961 7054 5655 7161 7267 Editing Language Russian Samoan Sangho Sanskrit Scots Gaelic Serbian Serbo-Croatian Sesotho Setswana Shona Sindhi Singhalese Siswat Slovak Slovenian Somali Spanish Sundanese Swahili Swedish Tagalog Tajik Tamil Tatar T
Others Glossary Analog audio An electrical signal that directly represents sound. Compare this to digital audio which can be an electrical signal, but is an indirect representation of sound. See also Digital audio. Aspect ratio The width of a TV screen relative to its height. Conventional TVs are 4:3 (in other words, the screen is almost square); widescreen models are 16:9 (the screen is almost twice as wide as it is high).
Others General System Recording format Recordable discs Video recording format Sampling frequency Compression format Audio recording format Sampling frequency Compression format Video Recording format (DVD-RW only), Video format (DVD-RW, DVD-R) DVD-ReWritable, DVD-Recordable 13.
Español Precaciones Para futura referencia, anote los números de modelo y de serie (indicados en la parte posterior esta unidad) en el espacio provisto. No. de modelo: No. de serie: AVISO: PARA REDUCIR EL RIESGO DE INCENDIO O ELECTROCHOQUE NO EXPONGA ESTE APARATO A LA HUMEDAD. PRECAUCIÓN: PARA EVITAR DESCARGAS ELÉCTRICAS, HAGA QUE LA PALETA ANCHA DEL ENCHUFE COINCIDA CON LA RANURA ANCHA E INTRODÚZCALA HASTA EL FONDO.
Español Importantes Medidas de Seguridad y Precauciones unidad de descarga de la antena, conexión a los electrodos tierra, y requerimientos de los electrodos tierra (Fig. A). FIGURA A EJEMPLO DE CONEXIÓN A TIERRA DE ANTENA DE ACUERDO CON EL CÓDIGO ELÉCTRICO NACIONAL. CABLE DE COBRE PARA LA ANTENA. ABRAZADERA DE LA ANTENA.
Español Fácil grabación de DVD Estas instrucciones le ayudarán a entender fácilmente cómo grabar discos DVD. Nota: Asegúrese que las pilas están en el mando a distancia y que ha conectado correctamente esta unidad y el TV. Paso 1: Elija un tipo de disco Paso 2:Coloque un disco en blanco Mando a distancia Puede elegir entre distintos tipos de discos DVD grabables. Elija un tipo de disco DVD grabable de acuerdo con sus necesidades de reproducción/grabación.
Español Paso 3: Seleccione la velocidad de grabación Para seleccionar el modo DVD Paso 5: Grabe en discos DVD PQRS 7 POWER REC MODE REC SPEED AUDIO OPEN/CLOSE POWER GHI AUDIO 2 5 6 PQRS TUV WXYZ 7 8 9 SPACE 2 3 0 JKL MNO 5 6 TUV WXYZ 8 9 SPACE CH VCR DISPLAY VCR VIDEO/TV SLOW DVD VCR PAUSE DEF CH PLAY VIDEO/TV STOP REC/OTR SLOW DVD SETUP TIMER PROG.
Español Reproducción con videograbadora VCR 3 1 Presione el botón POWER en el mando a distancia o el panel frontal de la unidad. Cuando reproduzca una cinta, conecte el TV y asegúrese de seleccionar la entrada donde se conecta la unidad. Presione: VCR 2 Coloque una cinta pregrabada y presione el botón PLAY B para empezar la reproducción. Durante la reproducción, presione el botón PAUSE F. Se hará una pausa de reproducción y se silenciará el sonido. POWER REC MODE REC SPEED AUDIO .
Español Before you start Grabación y grabación con temporizador de un toque (VCR) Grabación VCR VCR 6 WXYZ 8 9 SPACE CH VIDEO/TV SLOW 0 1 DISPLAY Presione el botón REC/OTR para empezar la grabación. Para detener temporalmente la grabación o continuarla, presione el botón PAUSE F. Después de que la unidad haya estado en el modo de pausa durante 5 minutos, se detendrá automáticamente para proteger al cinta y el cabezal de video contra cambios.
Note 110
Note 111
CONSUMER LIMITED WARRANTY (Valid for warranty service in the U.S.