MODEL: DX-B350P DX-B450P LASER PRINTER Installation Manual
Contents 1 Introduction.............................................................................................................. 1-1 Conventions ....................................................................................................................................... 1-1 General Safety Guidelines.................................................................................................................. 1-1 Safety Precautions............................................................
TOC-2 Installation Manual
Chapter 1: Introduction This manual is intended to provide guidance for the proper installation of your printer. If you require more information to install your printer, consult the User’s Guide located on the CD-ROM. For further help, please contact your dealer or responsible representative.
General Safety Guidelines Introduction Handling the Printer • The weight of the printer without toner cartridge and paper is about 22 kg/ 48 lbs. Never attempt to lift the printer alone. • To lift the printer, have two individuals facing each other from the front and the rear of the printer grasp the recessed areas on each side of the printer. Do not lift the printer by grasping any area other than these recessed areas.
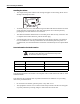
Printer Orientation Introduction Printer Orientation Throughout this manual, the four sides of the printer are referred to as front, rear, right, and left. The front of the printer is the side near the Operator Panel, and the rear of the printer is opposite the front. The left and right sides of the printer are defined as the sides to the left and right, respectively, of a person who is facing the front of the printer.
Warranty Introduction Declaration of Conformity SHARP Laser Printer, DX-B350P/DX-B450P This device complies with Part 15 of the FCC Rules. Operation is subject to the following two conditions: (1) This device may not cause harmful interference, and (2) this device must accept any interference received, including interference that may cause undesired operation.
Warranty Introduction Compliance Products that have earned the ENERGY STAR® are designed to protect the environment through superior efficiency. DX-B450P model requires the optional DX-DUX2 duplex module to fully qualify for ENERGY STAR®. The EcoLogo Program guidelines are applied to only the products in Canada. The products that meet the EcoLogo Program guidelines carry the logo shown to the left. The products without the logo may not meet the EcoLogo Program guidelines.
Supplies Introduction Supplies Standard supplies for this product that can be replaced by the user include paper and toner cartridges. Be sure to use only SHARP-specified products for the toner cartridges. Storage of Supplies 1. Store the supplies in a location that is: • clean and dry, • at a stable temperature, • not exposed to direct sunlight. 2. Store paper in the wrapper and lying flat. 3. Paper stored in packages standing up or out of the wrapper may curl or become damp, resulting in paper misfeeds.
Chapter 2: Basic Installation Checking Your Package Before installing the printer, check that all the items are contained in the package. Should any components be missing or damaged, contact your dealer.
Preparing a Location for the Printer Basic Installation • • • • Do not place the printer in a location with poor ventilation, or high level of dust, otherwise a fire hazard or electric shock may result. Do not place the printer near heaters or similar objects, otherwise a fire hazard may result. Never block the ventilation openings of the printer, otherwise the internal temperature will build up and cause a fire hazard.
Installation Procedure Basic Installation Installation Procedure Removing the Tape When the printer is first taken out of the packaging box, the covers of the printer are taped as shown in the diagram. Remove the tapes. Remove the fuser locking device by pushing the tabs as shown on the instructions at the rear of the printer. NOTE: The small lever to back of the unit is used for an optional part that is not available on this printer. The lever should remain in the down position.
Installation Procedure Basic Installation • • • A drum shutter protects the photosensitive drum from light. Do not open the drum shutter. Toner is not harmful to the human body, but if some toner has come into contact with your skin, you can wash it off with cold water and soap. If toner gets on your clothing, you should try to immediately remove it with a vacuum cleaner which has a fine filter. Avoid inhaling possibly escaped toner dust. 1. Open the top cover.
Installation Procedure Basic Installation 4. Hold the Toner Cartridge by the grip and insert it into the slot inside the printer. NOTE: Do not touch any parts inside the printer. Ensure that the Toner Cartridge is firmly set. 5. Close the top cover securely. Loading Paper See the User’s Guide on CD-ROM for details on the type and size of paper that can be loaded in the paper tray. 1. Place the paper tray on a flat surface.
Installation Procedure Basic Installation 2. Remove the lid of the tray. 3. If the base plate of the paper tray is raised, push it down. 4. Squeeze the length guide and slide it to the desired paper size. 5. Squeeze the right width guide and slide it to the desired paper size.
Installation Procedure Basic Installation 6. Fan the paper and then load the paper with the side to be printed facing up and with all 4 corners aligned. Make sure that the right width guide is correctly aligned with the paper size. Do not place paper over the right width guide. If the paper is larger than A4 or letter, go to step 7. If not, skip to step 8. 7. Slide the right and left lock tabs in the paper tray outwards to unlock them.
Installation Procedure Basic Installation Connecting an Interface The following four interfaces are available to directly connect the printer or to connect to a network. USB2 Port Serial RS 232 Cable Connection Ethernet 10/100 Base-Tx Connection Parallel Cable Connection Connecting the Power Cord 1. Connect the power cord to the power cord connector at the back of the printer. 2.
Using the Operator Panel Basic Installation Turning the Printer On 1. Press the power switch to the position to turn the power on. NOTE: The printer motors run for 2 or 3 minutes when you first turn the power on. The printer displays a series of messages and then displays READY when it is available for use. NOTE: While turned on, the printer will go into the standby state if it remains idle for a period of time.
Selecting a Display Language Basic Installation Selecting a Display Language The default language for all LCD display messages, the Configuration Summary, and the Test Page is English. You can change to one of several languages. Navigate through the System Menu to select the desired language: NOTE: The language that you select will be reflected on all LCD display messages, and also the content of the Configuration Summary.
Driver Installation Basic Installation Driver Installation 1. Load the CD into the drive. 2. After the installer program auto loads, select I Accept to the License Agreement on the opening screen. 3. Follow the instructions on the screen. NOTE: The installer and driver will automatically use the language currently configured by Microsoft on the PC in use. If the driver or installer does not support the language in use, it will use English.
Driver Installation Basic Installation 2-12 Installation Manual
Chapter 3: Specifications General Specification Specification DX-B350P DX-B450P Printing speed Up to 35 ppm Letter Up to 34 ppm A4 Up to 45 ppm Letter Up to 43 ppm A4 Processor MIPS RM7035 533MHz Memory 128 MB expandable to 640 MB, User Flash 12 MB Maximum of 17 seconds from power on at 71.6 F (22° C) Warm-up time First Page Output Time Approximately 9 seconds Approximately 8 seconds Exact speed varies depending on system configuration, software programs, and document complexity.
General Specification Specifications Specification DX-B350P DX-B450P Tray Module (Trays 3 and 4) 550 sheets DX-CSX1 DX-CSX2 Offset Catch Tray 500 sheets Duplex Module DX-TEX1 DX-DUX1 DX-DUX2 Orderable Toner Cartridge DX-B35DTH 18K per ISO standard Declared yield value in accordance with ISO/IEC 19752 DX-B45DTH 21K per ISO standard Declared yield value in accordance with ISO/ IEC 19752 Starter Toner Cartridge 6K @ 5% coverage A4/Letter 10K @ 5% coverage A4/Letter Supplies Connectivity Interfa
General Specification Specifications Specification DX-B350P DX-B450P Compliance ENERGY STAR® Qualified Products that have earned the ENERGY STAR® are designed to protect the environment through superior efficiency. DX-B450P model requires the optional DX-DUX2 duplex module to fully qualify for ENERGY STAR®. EcoLogo (Canada) The EcoLogo Program guidelines are applied to only the products in Canada. The products that meet the EcoLogo Program guidelines carry the logo.
General Specification Specifications 3-4 Installation Manual
DX-B350P/DX-B450P Installation Manual SHARP ELECTRONICS CORPORATION 1 Sharp Plaza, Mahwah, New Jersey 07495-1163. www.sharpusa.com SHARP ELECTRONICS OF CANADA LTD. 335 Britannia Road East, Mississauga, Ontario, L4Z 1W9 This manual has been printed using a vegetable-based soy oil ink to help protect the environment.