MODEL UX-21/UX-41/UX-61 FO-11/FO-51/FO-71/GQ-56 FACSIMILE OPERATION MANUAL 1. 2. 3. 4. 5. 6. 7. 8. 9. 10.
all.book Page 1 Wednesday, August 28, 2002 9:36 AM Introduction Welcome, and thank you for choosing a Sharp facsimile! The features and specifications of your new Sharp fax are shown below. Automatic dialling Rapid Key Dialling: 5 numbers Speed Dialling: 35 numbers Fax paper Initial starter roll (included with machine): 10 m Replacement roll (not included): FO-20PR 30 m (12.
all.book Page 2 Wednesday, August 28, 2002 Display 9:36 AM 16-digit LCD display Applicable telephone line Public switched telephone network Compatibility ITU-T (CCITT) G3 mode Input document size Automatic feeding: Width: 148 to 210 mm Length: 140 to 297 mm Manual feeding: Width: 148 to 210 mm Length: 140 to 600 mm Effective scanning width 210 mm max. Effective printing width 210 mm max. Contrast control Automatic/Dark selectable Reception modes TEL/FAX, TEL, FAX, A.M. (Note: A.M.
all.book Page 3 Wednesday, August 28, 2002 9:36 AM Important safety information Do not disassemble this machine or attempt any procedures not described in this manual. Refer all servicing to qualified service personnel. Do not install or use the machine near water, or when you are wet. For example, do not use the machine near a bath tub, wash bowl, kitchen sink or laundry tub, in a wet basement, or near a swimming pool. Take care not to spill any liquids on the machine.
all.book Page 4 Wednesday, August 28, 2002 9:36 AM Table of Contents A Look at the Operation Panel 6 1. Installation 8 Unpacking Checklist . . . . . . . . . . . . . . . . . . . . . . . . . . . . . . . . . . . . . . 8 Connections . . . . . . . . . . . . . . . . . . . . . . . . . . . . . . . . . . . . . . . . . . . . 9 Loading the Thermal Paper . . . . . . . . . . . . . . . . . . . . . . . . . . . . . . . 13 Entering Your Name and Fax Number . . . . . . . . . . . . . . . . . . . . . . .
all.book Page 5 Wednesday, August 28, 2002 9:36 AM Table of Contents 6. Answering Machine Connection 48 Connecting an Answering Machine . . . . . . . . . . . . . . . . . . . . . . . . . 48 Using the Answering Machine Connection . . . . . . . . . . . . . . . . . . . . 49 Optional A.M. Mode Settings . . . . . . . . . . . . . . . . . . . . . . . . . . . . . . 51 7. Special Functions 54 Caller ID (Requires Subscription to Service) . . . . . . . . . . . . . . . . . .
all.book Page 6 Wednesday, August 28, 2002 9:36 AM A Look at the Operation Panel 2 1 3 4 RECEPTION MODE FUNCTION TEL FAX TEL 5 6 7 RESOLUTION FAX DOWN VOLUME UP A.M. TEL/FAX A.M.
all.book Page 7 Wednesday, August 28, 2002 9:36 AM 8 START key Press this key to begin transmission when using Speed Dialling, Direct Keypad Dialling, or Normal Dialling. 9 STOP key Press this key to cancel an operation before it is completed. 10 COPY/HELP key When a document is in the feeder, press this key to make a copy. At any other time, press this key to print out the Help List, a quick reference guide to the operation of your fax machine.
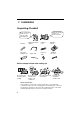
all.book Page 8 Wednesday, August 28, 2002 9:36 AM 1. Installation Unpacking Checklist If any are missing, contact your dealer or retailer. Before setting up, make sure you have all of the following items. Handset Fax paper (Sample roll) Original document support Handset cord Paper shaft Paper roll shims Operation manual Telephone line cord Points to keep in mind when setting up Do not place the machine in direct sunlight. Do not place the machine near heaters or air conditioners.
9:36 AM Connections Connections Connecting the handset Connect the handset as shown and place it on the handset rest. ♦ The ends of the handset cord are identical, so they will go into either socket. Make sure the handset cord goes into the socket marked with a handset symbol on the side of the machine! Use the handset to make ordinary phone calls, or to transmit and receive faxes manually. Removing the packing paper 1 Grasp the finger hold and open the operation panel.
all.book Page 10 Wednesday, August 28, 2002 3 9:36 AM Remove the packing paper. UX-61 FO-71 GQ-56 UX-21 UX-41 FO-11 FO-51 4 Flip down the front paper guide and then close the operation panel. UX-21 UX-41 FO-11 FO-51 UX-61 FO-71 GQ-56 Connecting the power cord Plug the power cord into a 220 - 240 V, 50/60 Hz, earthed AC (3-prong) outlet. ♦ When disconnecting the fax, unplug the telephone line cord before unplugging the power cord.
9:36 AM Connections Connecting the telephone line cord Insert one end of the line cord into the socket on the back of the machine marked TEL. LINE. Insert the other end into a wall telephone socket. Dial mode: The fax machine is set for tone dialling. If you are on a pulse dial line, you must set the fax machine for pulse dialling. Press the keys on the operation panel as follows: 1 Press FUNCTION once and 4 once. TE SEL. T TE LINL.
all.book Page 12 Wednesday, August 28, 2002 9:36 AM Connections Moving your fax and reconnecting If it is necessary to move your fax to a new location, first disconnect the telephone line cord before disconnecting the power cord. When reconnecting, it is necessary to connect the power cord before connecting the telephone line cord. Attaching the original document support Attach the original document support as shown below.
9:36 AM Loading the Thermal Paper Loading the Thermal Paper The fax machine’s print head creates text and images by applying heat to the thermal paper. Your fax machine prints incoming faxes on a special kind of paper called thermal paper. 1 Grasp the finger hold as shown and pull up to open the operation panel. 2 Flip up the front paper guide. UX-61 FO-71 GQ-56 UX-21 UX-41 FO-11 FO-51 Press the knob to make sure the front side of the metal guide is down.
all.book Page 14 Wednesday, August 28, 2002 9:36 AM Loading the Thermal Paper 4 Unwrap the roll of thermal paper and insert the paper shaft. 5 Place the roll of thermal paper in the compartment, making sure the ends of the paper shaft fit into the notches on each side of the compartment. • Important: The roll must be placed so that the leading edge of the paper unrolls as shown. (The paper is only coated on one side for printing.
9:36 AM Loading the Thermal Paper UX-61 FO-71 GQ-56 8 Close the operation panel, making sure it clicks into place. • UX-21/UX-41/FO-11/FO-51: A short length of the paper will feed out. Grasp the paper by the edge and pull upward to tear it off. Click • UX-61/FO-71/GQ-56: A short length of the paper will be cut off. Replacing the thermal paper When the paper runs out, OUT OF PAPER will appear in the display. Reception and copying will no longer be possible.
all.book Page 16 Wednesday, August 28, 2002 9:36 AM Entering Your Name and Fax Number Entering Your Name and Fax Number Before you can begin sending faxes, you must enter your name and fax (telephone) number. You also need to set the date and time. Once you enter this information, it will automatically appear at the top of each fax page you send. TEL FAX TEL/FAX A.M.
9:36 AM Entering Your Name and Fax Number 5 Press 6 Enter your name by pressing number keys for each letter as shown in the chart below. Up to 24 characters can be entered. START to enter the fax number in memory. Example: SHARP = 77777 444 22 7777 SPEAKER 77 SPACE = J= T= A= K= U= B= L= V= M= W= N= X= O= Y= P= Z= C= D= E= F= G= Q= H= R= I= S= ♦ To enter two letters in succession that require the same key, press SPEAKER after entering the first letter.
all.book Page 18 Wednesday, August 28, 2002 9:36 AM Setting the Date and Time Setting the Date and Time The date and time appear in the display and are printed at the top of every page you fax. Set the date and time as shown below. TEL FAX TEL/FAX A.M. ABC 1 A B STOP C D E/ POLL COPY/ HELP START Press 2 Press 3 Press FUNCTION PQRS RESOLUTION/ RECEPTION MODE FUNCTION TUV 7 6 WXYZ 8 0 9 SPEED DIAL REDIAL 3 HOLD/ SEARCH SPEAKER FUNCTION Display: once and 3 times.
9:36 AM Setting the Date and Time 4 Enter a two-digit number for the day (“01” to “31”). Example: the 5th 0 DATE 05-08-2002 5 SPEED DIAL • To correct a mistake, press to move the cursor back to the mistake and then enter the correct number. 5 Enter a two-digit number for the month (“01” for January, “02” for February, “12” for December, etc.). Example: January 6 DATE 05-01-2002 1 The currently set time appears (example): Enter the year (four digits).
all.book Page 20 Wednesday, August 28, 2002 9:36 AM Setting the Reception Mode Setting the Reception Mode Your fax has four modes for receiving incoming faxes: TEL mode: This mode is the most convenient for receiving phone calls. Faxes can also be received; however, all calls must first be answered by picking up the fax's handset or an extension phone connected to the same line. FAX mode: Select this mode when you only want to receive faxes on your line.
9:36 AM Volume Adjustment Volume Adjustment You can adjust the volume of the speaker and ringer using VOLUME . VOLUME TEL FAX TEL/FAX A.M. ABC 1 A B C D E/ POLL GHI FUNCTION PQRS START COPY/ HELP RESOLUTION/ RECEPTION MODE 7 3 MNO 5 4 STOP DEF 2 JKL VOLUME 6 WXYZ TUV 8 0 9 SPEED DIAL REDIAL HOLD/ SEARCH SPEAKER Speaker 1 Press 2 Press SPEAKER VOLUME one or more times to select the desired level.
all.book Page 22 Wednesday, August 28, 2002 9:36 AM Volume Adjustment Ringer 1 Press Display: VOLUME to select the desired volume. (Make sure SPEAKER RINGER: LOW has not been pressed and the handset is not lifted.) RINGER: MIDDLE • The ringer will ring once at the selected level, then the date and time will reappear in the display. RINGER: HIGH RINGER: OFF OK ? 2 If you selected RINGER: OFF OK ?, press 22 START .
all.book Page 23 Wednesday, August 28, 2002 9:36 AM 2. Sending Faxes 2. Sending Faxes Transmittable Documents Size and weight The size and weight of documents that you can load in the document feeder depend on whether you load one page at a time or several pages at once.
all.book Page 24 Wednesday, August 28, 2002 9:36 AM Loading the Document Other restrictions ♦ The scanner cannot recognise yellow, greenish yellow, or light blue ink. ♦ Ink, glue, and correcting fluid on documents must be dry before they pass through the document feeder. ♦ All clips, staples, and pins must be removed from documents before loading in the feeder. If these are not removed, they may damage the machine.
all.book Page 25 Wednesday, August 28, 2002 9:36 AM Loading the Document Adjust the resolution and/or contrast settings as explained in Resolution and Contrast below, then dial the receiving machine as explained on page 28. 2. Sending Faxes 3 Removing a document from the feeder If you need to remove a document from the feeder, open the operation panel. Important! Do not try to remove a document without first releasing it as explained below. This may damage the feeder mechanism.
all.book Page 26 Wednesday, August 28, 2002 9:36 AM Adjusting the Resolution and Contrast Adjusting the Resolution and Contrast If desired, you can adjust the resolution and contrast before sending a document. The default resolution setting is STANDARD and the default contrast setting is AUTO. You must adjust the settings each time you don’t want to use the default settings. Note: The resolution and contrast settings are only effective for sending a document.
all.book Page 27 Wednesday, August 28, 2002 9:36 AM Adjusting the Resolution and Contrast 1 Load the document(s). 2. Sending Faxes • The document must be loaded before the resolution and contrast can be adjusted. 2 Press RESOLUTION/ RECEPTION MODE Display: one or more times until the desired resolution and contrast settings appear in the display. • The first time you move through the list of resolution settings, the contrast setting AUTO will appear next to each resolution setting.
all.book Page 28 Wednesday, August 28, 2002 9:36 AM Sending a Fax by Normal Dialling Sending a Fax by Normal Dialling With Normal Dialling, you pick up the handset (or press SPEAKER ) and dial by pressing the number keys. ♦ If a person answers, you can talk with them through the handset before sending the fax. (If you pressed SPEAKER , you must pick up the handset to talk.) ♦ Normal Dialling allows you to listen to the line and make sure the other fax machine is responding.
all.book Page 29 Wednesday, August 28, 2002 9:36 AM Sending a Fax by Automatic Dialling 5 When you hear the fax tone, press START . Replace the handset if you 2. Sending Faxes used it. • When transmission is completed, the fax will beep once. Sending a Fax by Automatic Dialling You can dial a fax or telephone number by simply pressing a Rapid Key, or by pressing the SPEED DIAL and entering a two-digit number.
all.book Page 30 Wednesday, August 28, 2002 9:36 AM Sending a Fax by Automatic Dialling Storing fax and phone numbers for automatic dialling 1 Press FUNCTION once and 3 once. Display: ENTRY MODE 2 Press 3 Press 4 Enter a two-digit Speed Dial number by pressing the number keys (01 to 05 for Rapid Key Dialling, 06 to 40 for Speed Dialling). once. FAX/TEL # MODE 1 to select SET. 0 5 1 (Example) Enter the fax or voice number by pressing the number keys. Up to 32 digits can be entered.
all.book Page 31 Wednesday, August 28, 2002 9:36 AM Sending a Fax by Automatic Dialling Enter a name by pressing number keys for each letter as shown in the chart below. Up to 10 characters can be entered. (If you do not wish to enter a name, go directly to Step 8.) ♦ Example: SHARP = 77777 444 22 7777 SPACE = J= T= A= K= U= B= C= D= E= F= G= L= V= M= W= N= X= O= Y= P= Z= SPEAKER 2.
all.book Page 32 Wednesday, August 28, 2002 9:36 AM Sending a Fax by Automatic Dialling Clearing auto-dial numbers If you need to clear a number, follow these steps: Display: 1 Press 2 Press 3 Press 4 Enter the Speed Dial number that you want to clear by pressing the number keys. 5 Press 6 Return to Step 4 to clear another number, or press date and time display. FUNCTION once and 3 once. ENTRY MODE once. 2 to select CLEAR.
all.book Page 33 Wednesday, August 28, 2002 9:36 AM Sending a Fax by Automatic Dialling Sending a fax by Rapid Key Dialling 1 2. Sending Faxes If the number you want to dial has been stored for Automatic Dialling as a Speed Dial number from 01 to 05, you can dial it by pressing the corresponding Rapid Key. If you are sending a fax, load the document(s). • If desired, press RESOLUTION/ RECEPTION MODE to set the resolution and/or contrast.
all.book Page 34 Wednesday, August 28, 2002 9:36 AM Sending a Fax by Automatic Dialling Sending a fax by Speed Dialling Speed Dialling can be used to dial any number that has been stored for Automatic Dialling. 1 Load the document(s). • If desired, press RESOLUTION/ RECEPTION MODE to set the resolution and/or contrast. READY TO SEND 2 Press SPEED DIAL and then enter the Speed Dial number by pressing the numeric keys.
all.book Page 35 Wednesday, August 28, 2002 9:36 AM Sending a Fax by Automatic Dialling Sending a fax by Direct Keypad Dialling to begin dialling. You can use this method to dial a full number when you don't need to speak to the other party before faxing. 1 Load the document(s). • If desired, press RESOLUTION/ RECEPTION MODE to set the resolution and/or contrast. READY TO SEND 2 Enter the number of the receiving machine by pressing the number keys.
all.book Page 36 Wednesday, August 28, 2002 9:36 AM Searching for an auto-dial number If you don’t remember the Rapid Key or Speed Dial number in which you have programmed a particular fax number, you can search for the number by following the steps below. Once you have found the number, you can dial and transmit the loaded document by simply pressing START 1 . Load the document(s). • If desired, press RESOLUTION/ RECEPTION MODE to set the resolution and/or contrast.
all.book Page 37 Wednesday, August 28, 2002 9:36 AM Sending a Fax by Automatic Dialling Using the REDIAL key press START REDIAL to redial the last number dialed. To send a document, 2. Sending Faxes You can press when you hear the fax tone after the connection is made. Note that the speaker is automatically activated when you press REDIAL .
all.book Page 38 Wednesday, August 28, 2002 9:36 AM 3. Receiving Faxes Using TEL/FAX Mode To select TEL/FAX mode, press RESOLUTION/ RECEPTION MODE until the arrow in the display points to TEL/FAX. RESOLUTION/ RECEPTION MODE TEL FAX TEL/FAX A.M. When the reception mode is set to TEL/FAX, your fax machine automatically answers all calls on two rings. After answering, your fax monitors the line for about five seconds to see if a fax tone is being sent.
all.book Page 39 Wednesday, August 28, 2002 9:36 AM Using A.M. Mode Using A.M. Mode To select A.M. mode, press RESOLUTION/ RECEPTION MODE until the arrow in the display points to A.M. TEL FAX TEL/FAX A.M. In A.M. mode, your fax will automatically receive voice and fax messages if you have connected an answering machine to the fax machine. See Chapter 6 for more details.
all.book Page 40 Wednesday, August 28, 2002 9:36 AM Using FAX Mode Changing the number of rings If desired, you can change the number of rings on which the fax machine answers incoming calls in FAX and TEL/FAX mode. Any number from 2 to 5 can be selected. ♦ Note for Singapore: "2" or "3" can be selected for the number of rings. Display: 1 Press 2 Press 3 Enter the desired number of rings (any number from 2 to 5). FUNCTION once and 4 once. Example: 3 rings 4 40 once.
all.book Page 41 Wednesday, August 28, 2002 9:36 AM Using TEL Mode Using TEL Mode When the reception mode is set to TEL, you must answer all calls by picking up the fax machine’s handset or an extension phone connected to the same line. To select TEL mode, press RESOLUTION/ RECEPTION MODE until the arrow in the RESOLUTION/ RECEPTION MODE TEL 3. Receiving Faxes display points to TEL. FAX TEL/FAX A.M. Answering with the fax’s handset 1 When the fax machine rings, pick up the handset.
all.book Page 42 Wednesday, August 28, 2002 9:36 AM Using TEL Mode Answering on an extension phone 1 Answer the extension phone when it rings. 2 If you hear a soft fax tone, wait until your fax responds (the extension phone will go dead), then hang up. Beep Phone goes dead 3 If the fax doesn't respond, or if the other party first talks to you and then wants to send a fax, press 5 once and twice on the extension phone (only on a tone dial phone). This signals the fax to begin reception. Hang up.
all.book Page 43 Wednesday, August 28, 2002 9:36 AM Optional Reception Settings Optional Reception Settings Fax Signal Receive 1 Press 2 Press FUNCTION Display: once and 4 Press 2 4 once. 3 times. (South Africa: Press 3 1 3. Receiving Faxes Your fax will automatically begin reception if you hear a soft fax tone after answering a call on your fax or an extension phone.
all.book Page 44 Wednesday, August 28, 2002 9:36 AM Substitute Reception to Memory Changing the number for remote fax activation If desired, you can use a number other than 5 to activate fax reception from an extension telephone. You can select any number from 0 to 9. Display: 1 Press 2 Press 3 Enter the desired number (any number from 0 to 9). FUNCTION once. twice. Example: 3 4 once and 4 OPTION SETTING TEL/FAX REMOTE # 3 STOP Press to return to the date and time display.
all.book Page 45 Wednesday, August 28, 2002 9:36 AM 4. Making Copies Your fax machine can also be used to make copies. 1 Load the document(s) face down. (Maximum of 5 pages.) • If desired, press RESOLUTION/ RECEPTION MODE to set the resolution and/or contrast. (The default resolution setting for copying is FINE.) 2 When you are ready to begin copying, press COPY/ HELP 4. Making Copies READY TO SEND .
all.book Page 46 Wednesday, August 28, 2002 9:36 AM 5. Making Telephone Calls Your fax machine can be used like a regular telephone to make and receive voice calls. ♦ To make or receive a voice call, the power must be on. 1 Pick up the handset or press SPEAKER SPEAKER . Listen for the dial tone. 2 or Dial the number using one of the following methods: • Normal Dialling: Enter the full telephone number with the numeric keys. • Rapid Key Dialling: Press the appropriate Rapid Key.
all.book Page 47 Wednesday, August 28, 2002 9:36 AM Making Telephone Calls Chain Dialling After lifting the handset, you can dial any combination of Normal Dialling, Rapid Key Dialling and Speed Dialling numbers.
all.book Page 48 Wednesday, August 28, 2002 9:36 AM 6. Answering Machine Connection Connecting an Answering Machine If desired, you can connect an answering machine to your fax machine's TEL. SET socket. This will allow you to receive both voice messages and faxes when you are out. ♦ Important: If the answering machine is not connected to the TEL. SET socket on the fax as shown, the setup will not operate properly. 1 Remove the seal covering the TEL. SET socket.
all.book Page 49 Wednesday, August 28, 2002 9:36 AM Using the Answering Machine Connection Changing the outgoing message The outgoing message (OGM) of your answering machine should be changed to inform callers who want to send a fax to press their Start key. For example, your message might go as follows: "Hello. You've reached the ABC company. No one is available to take your call right now. Please leave a message after the beep or press your facsimile Start key to send a fax. Thank you for calling.
all.book Page 50 Wednesday, August 28, 2002 9:36 AM Using the Answering Machine Connection How answering machine mode operates While you are out, all of your incoming calls will be answered by your answering machine and its outgoing message will play. Voice callers can leave a message. During this time, your fax will quietly monitor the line. If your fax detects a fax tone or a duration of silence greater than four seconds, it will take over the line and begin reception.
all.book Page 51 Wednesday, August 28, 2002 9:36 AM Optional A.M. Mode Settings Optional A.M. Mode Settings If necessary, you can use the following settings to improve the response of the answering machine connection to incoming calls. Quiet Detect Time This function causes the fax machine to take over the line and begin reception if a certain duration of silence is detected after the answering machine answers. Time selections for the period of silence are 1 to 10 seconds.
all.book Page 52 Wednesday, August 28, 2002 9:36 AM Optional A.M. Mode Settings 3 Enter a number from 01 to 10, or enter 00 to turn off the function. Example: 3 seconds 4 0 3 STOP Press to return to the date and time display. Quiet Detect Start Time This setting can be used to delay the start of the Quiet Detect Time function.
all.book Page 53 Wednesday, August 28, 2002 9:36 AM Optional A.M. Mode Settings On A.M. Failure When this function is turned on, your fax will answer the call after 5 rings if the answering machine for some reason fails to answer before that time. This ensures that you will receive fax messages even if the answering machine’s tape fills up or the answering machine is not turned on. This function has been turned off at the factory.
all.book Page 54 Wednesday, August 28, 2002 9:36 AM 7. Special Functions Caller ID (Requires Subscription to Service) This function is only available in Singapore and Malaysia. If you subscribe to a caller identification service from your telephone company, you can set your fax machine to display the name and number of the caller while the fax rings. Important: ♦ To use this function, you must subscribe to a caller identification service from your telephone company.
all.book Page 55 Wednesday, August 28, 2002 9:36 AM Caller ID (Requires Subscription to Service) How Caller ID operates When you receive a call, the name and phone number of the caller will alternately appear in the display, beginning just before the second ring. The information will continue to be displayed until the line is disconnected. Note: Some caller ID services may not provide the name of the caller. In this case, only the phone number will appear.
all.book Page 56 Wednesday, August 28, 2002 9:36 AM Caller ID (Requires Subscription to Service) Viewing the Caller ID list If you subscribe to a Caller ID service and have turned on the Caller ID function, your fax machine will keep information on the most recent 20 calls and faxes you have received. You can view this information, which consists of the name and number of each caller, in the Caller ID List. ♦ After you have received 20 calls, each new call will delete the oldest call.
all.book Page 57 Wednesday, August 28, 2002 9:36 AM Caller ID (Requires Subscription to Service) To delete calls from the Caller ID list If you want to delete a single call from the caller list, press 0 while the call appears in the display. If you want to delete all calls from the list, hold 0 down for at least 3 seconds while you are viewing any number in the list.
all.book Page 58 Wednesday, August 28, 2002 9:36 AM Caller ID (Requires Subscription to Service) Blocking voice calls With Caller ID turned on, you can use the Anti Junk Fax function described in Blocking Reception of Unwanted Faxes in this chapter to block voice calls as well as faxes from your specified Anti Junk Number.
all.book Page 59 Wednesday, August 28, 2002 9:36 AM Blocking Reception of Unwanted Faxes The Anti Junk Fax function allows you to block reception of faxes from parties that you specify. This saves paper by not printing out unwanted "junk" faxes. To use this function, enter the fax numbers from which you do not want to receive faxes as shown below. ♦ Up to five numbers can be entered in the Anti Junk Number List.
all.book Page 60 Wednesday, August 28, 2002 9:36 AM Polling (Requesting a Fax Transmission) Polling (Requesting a Fax Transmission) Polling allows you to call another fax machine and have it send a document (previously loaded in its feeder) to your machine without operator assistance. In other words, the receiving fax machine, not the transmitting fax machine, initiates the transmission. To use the polling function, you must first set Rapid Key E/POLL for use as a polling key.
all.book Page 61 Wednesday, August 28, 2002 9:36 AM Polling (Requesting a Fax Transmission) Requesting transmission 1 Dial the fax machine you want to poll using one of the following methods: ABC 1 • Pick up the handset (or press SPEAKER ) and press a Rapid Key. Wait for the fax answerback tone. • Press SPEED DIAL GHI 4 PQRS 7 2 JKL 5 TUV 8 DEF 3 MNO 6 WXYZ 9 and enter a 2-digit Speed Dial number. • Enter the full number using the numeric keys. Press E/POLL .
all.book Page 62 Wednesday, August 28, 2002 9:36 AM 8. Printing Lists You can print lists showing settings and information entered in the fax machine. The lists are described below. To print a list, follow these steps. 1 Press 2 Press FUNCTION Display: once and 2 once. LISTING MODE to select the Anti Junk Number List, or to select the Telephone Number List. 3 Press START to print the list.
all.book Page 63 Wednesday, August 28, 2002 9:36 AM Printing Lists Transaction Report This report is printed out automatically after an operation is completed to allow you to check the result. Your fax machine is set at the factory to print out the report only when an error occurs. ♦ The Transaction report cannot be printed on demand. Headings in Transaction Report SENDER/ RECEIVER The name or fax number of the other machine involved in the transaction.
all.book Page 64 Wednesday, August 28, 2002 9:36 AM Printing Lists Transaction Report print condition You can change the condition under which a Transaction Report is printed out. Follow the steps below. Display: 1 Press 2 Press 3 Press a number from FUNCTION once and 4 once. OPTION SETTING TRANSACTION LIST 3 times. 1 to 4 to select the condition for printing. 1 ALWAYS PRINT A report will be printed after each transmission, reception, or error.
9:36 AM 9. Maintenance all.book Page 65 Wednesday, August 28, 2002 9. Maintenance Cleaning the scanning glass and rollers Clean the scanning glass and rollers frequently to ensure the quality of your transmitted images and copies. 1 Grasp the finger hold and pull up to open the operation panel. 2 Flip up the green levers on each side of the white roller. 3 Wipe the scanning glass and rollers with a cotton pad.
all.book Page 66 Wednesday, August 28, 2002 9:36 AM Maintenance 4 Flip down the green levers on each side of the white roller. 5 Flip up the front paper guide and wipe the roller under it. 6 Flip down the front paper guide. 7 Close the operation pane. • Press down on both front corners of the panel to make sure it clicks into place. Cleaning the housing Wipe the external parts and surface of the machine with a dry cloth. Caution! • Do not use benzene or thinner.
all.book Page 67 Wednesday, August 28, 2002 9:36 AM 10. Troubleshooting 10. Troubleshooting Problems and Solutions Line error Problem LINE ERROR appears in the display. Solution Try the transaction again. If the error persists, check the following: • Check the connection. The cord from the TEL. LINE socket to the wall socket should be no longer than two meters. • Make sure there are no modem devices sharing the same telephone line.
all.book Page 68 Wednesday, August 28, 2002 9:36 AM Problems and Solutions Dialling and transmission problems Problem Solution No dial tone when you pick up the handset or press the SPEAKER key. • Make sure the handset cord is connected to the correct socket. See Connecting the handset on page 9. Dialling is not possible. • Make sure the power cord is properly plugged into a power outlet. • Make sure that the telephone line is properly connected to both the TEL. LINE socket and the wall socket.
all.book Page 69 Wednesday, August 28, 2002 9:36 AM Problems and Solutions Reception and copying problems Solution The power is on, but no reception takes place. • Make sure that the telephone line cord is plugged into the TEL. LINE socket, and not the TEL. SET socket. The printing paper comes out blank when you try to receive a document. • Make sure that the document is loaded properly in the feeder of the transmitting machine.
all.book Page 70 Wednesday, August 28, 2002 9:36 AM Problems and Solutions Answering machine connection Problem The answering machine connection does not operate properly. Solution • Make sure your fax machine's reception mode is set to A.M. • Make sure your fax machine's TEL. LINE socket is connected to the wall socket. Make sure your fax machine's TEL. SET socket is connected to your answering machine's telephone line socket (not the answering machine's extension phone socket).
all.book Page 71 Wednesday, August 28, 2002 9:36 AM Problems and Solutions • Make sure the power cord is properly plugged into a power outlet. 10. Troubleshooting Nothing appears in the display. • Connect another electrical appliance to the outlet to see if it has power. The machine does not respond when you press any of its keys. • If a beep sound is not made when you press the keys, unplug the power cord and then plug it in again several seconds later.
all.book Page 72 Wednesday, August 28, 2002 9:36 AM Messages and Signals Messages and Signals Display messages Note: If you have turnen on the Caller ID funciton, see Caller ID in Chapter 7 for display messeges related to Caller ID. CHECK PAPER The thermal paper is jammed or isn’t loaded properly. Remove and reload the paper. (See the following section, Clearing Paper Jams.) COVER OPEN The operation panel is open. Close it. DOCUMENT JAMMED The original document is jammed.
all.book Page 73 Wednesday, August 28, 2002 9:36 AM OFF HOOK This appears if you forgot to replace the handset after using it to dial and send a fax. Replace the handset or press the STOP key to clear the message. ON HOOK DIAL The SPEAKER key has been pressed and the fax machine is waiting for you to dial. OUT OF PAPER You have run out of thermal paper. Load a new roll of thermal paper as explained in Loading the Thermal Paper in Chapter 1. OVER HEAT The print head has overheated.
all.book Page 74 Wednesday, August 28, 2002 9:36 AM Clearing Paper Jams Clearing Paper Jams Clearing a jammed document If the original document doesn’t feed properly during transmission or copying, START or DOCUMENT JAMMED appears in the display, first try pressing If the document doesn't feed out, remove it as explained below. Important: Do not try to remove a jammed document without releasing it as explained below. This may damage the feeder mechanism.
all.book Page 75 Wednesday, August 28, 2002 9:36 AM Clearing Paper Jams Flip down the green levers on each side of the white roller. 5 Close the operation panel, making sure it clicks into place. 10. Troubleshooting 4 • Press down on both front corners of the panel to make sure it clicks into place. Clearing jammed printing paper 1 Grasp the finger hold and pull up to open the operation panel.
all.book Page 76 Wednesday, August 28, 2002 9:36 AM Clearing Paper Jams 3 Remove the paper roll. • For UX-61/FO-71/GQ-56 only: Remove any cut pieces of paper from the paper compartment. 4 Cut off the wrinkled part of the paper. 5 Reload the paper. • Jammed paper is often caused by improper loading. Be sure to carefully follow the instructions for paper loading given in Loading the Thermal Paper in Chapter 1.
9:36 AM Quick Reference Guide all.book Page 77 Wednesday, August 28, 2002 Quick Reference Guide Sending Faxes Receiving Faxes Place your document (up to 5 pages) face down in the document feeder. Press the RESOLUTION/ RECEPTION MODE until the arrow in the display points to the desired reception mode (make sure the document feeder is empty). TEL FAX Normal Dialling RESOLUTION/ RECEPTION MODE 05 NOV 10:30 TEL/FAX A.M. 1. Lift the handset or press SPEAKER TEL FAX . 05 NOV 10:30 TEL/FAX A.M.
all.book Page 78 Wednesday, August 28, 2002 9:36 AM Index A F A.M. reception mode, 20, 39, 49 Answering machine connection Activating, 49 Connecting, 48 On A.M.
all.book Page 79 Wednesday, August 28, 2002 9:36 AM Index TEL mode, 20, 41 TEL/FAX mode, 20, 38 Redialling, 47 Removing original document, 25 Resolution, 26 Ringer volume, 22 S Scanning glass, cleaning, 65 Search Dial, 36, 47 Sender’s name and number, entering, 16-17 Speaker volume, 21 Speed Dialling, 34, 46 T TEL reception mode, 20, 41 TEL. LINE socket, 11 TEL.
all.
all.