USER GUIDE
Declaration of Conformity Hereby, Sharp Telecommunications of Europe Ltd, declares that this GX1 is in compliance with the essential requirements and other relevant provisions of Directive 1999/5/ EC. A copy of the original declaration of conformity can be found at the following Internet address: http://www.sharp-mobile.com Alternately contact: Sharp Telecommunications of Europe Ltd Azure House, Bagshot Road, Bracknell, Berks, RG12 7QY, U.K.
• Screen layout illustrated in this user guide may differ from the actual one. The information described in this user guide is subject to change without notice. • All the functions described in this user guide may not be supported in all networks. • We assume no responsibility for downloaded contents, information, etc. from network. Copyright According to copyright laws, the reproduction, alteration and use of material which is protected by copyright (music, pictures, etc.
Useful functions and services of the phone Your phone offers you the following features: • The built-in digital camera can take pictures. • Create and read SMS. • Multimedia Messaging Service (MMS) can personalise your phone in various ways: you can send and receive multimedia messages with graphical images, photographs or sound attached. • WAP browser helps you to access a variety of information on the mobile internet. • Colour display makes the screens clearer, more beautiful and easier to view.
Table of Contents Introduction ................................................. 1 Useful functions and services of the phone ..3 Table of Contents ........................................ 4 Your Phone .................................................. 7 Accessories....................................................7 Getting Started ............................................ 8 Inserting the SIM Card and the Battery .....10 Charging the Battery ..................................
Tone Editor .................................................52 Profiles ...................................................... 56 Activating a Profile ....................................56 Customising Profiles ..................................56 Resetting Profile Settings ...........................57 Ringer Volume ...........................................57 Ringer Type ...............................................57 Vibration ....................................................58 Keypad Tones ......
Software Installation and Setup ...............111 Using the Modem Setup ...........................111 Troubleshooting ...................................... 113 Safety Precautions and Conditions of Use ............................................................ 115 CONDITIONS OF USE ...........................115 ENVIRONMENT ....................................117 PRECAUTIONS CONCERNING VEHICLE USE ..........................................................117 Index .......................................
Your Phone Please check the following carefully. Your phone should come complete with: • GSM 900/1800 GPRS phone • Rechargeable Li-ion battery • AC charger • Hands free • CD-ROM • User guide Accessories (option) • Li-ion spare battery (XN-1BT10) • Cigarette lighter charger (XN-1CL10) Some of the above accessories may not be offered by region. For details, please contact your dealer.
Getting Started Getting Started 8
1. Earpiece 2. Hands free Connector 3. Navigation Keys (Arrow Keys): Move the cursor to select menu items, adjust the earpiece volume, etc. Up/Down arrow keys: Searches the Phonebook entries in stand-by mode. Left arrow key: Adjusts the earpiece volume in stand-by mode. Right arrow key: Displays the Phonebook menu in stand-by mode. 4. M Key: Displays the Main Menu and executes the functions. 5. Left Soft Key: Executes the function at the bottom left on the screen. 6.
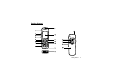
Inserting the SIM Card and the Battery 3. Position the SIM card with the gold contacts facing down, and slide the SIM into the SIM holder. 1. Slide off the battery cover. SIM card 4. Slide the SIM lock lever to the right until the SIM is locked. 2. Slide the SIM lock lever to the left.
5. Hold the battery so that the metal contacts of the battery are facing down and the guides on the top of the battery slide into the battery slots , and then insert it . 6. Replace the battery cover so that the marks are aligned and slide it as shown. Note • Make sure that only 3V SIM cards are used. • Use only the approved battery (XN-1BT10).
Removing the SIM Card and the Battery 1. Make sure to turn off your phone and disconnect charger and other accessories. Slide off the battery cover. 3. Slide the SIM lock lever to the left. SIM lock lever 4. Remove the SIM card from the SIM holder. 2. Pick up the battery using the protruding edge and remove the battery from the phone. Battery Disposal The device is supported by a battery.
Charging the Battery You must charge the battery for at least 2 hours before using your phone for the first time. To Charge Using the Charger 1. Connect the charger to the external socket located on the bottom of the phone with the charger’s “PUSH TOP” mark facing towards you, and to an AC outlet. LED indicator The LED indicator lights in red. Standard charging time: Approx. 2 hours. Note • Charging time may be longer than above depending on the state of a battery and a surrounding situation.
Battery Level Indicator The current battery level is displayed in the upper right hand side of the screen. Low Battery During Use When the battery is running low, an alarm will sound and the “ ” will appear on the screen. If you are using your phone and you hear the “low battery” alarm, attach your charger as soon as possible. The phone may not be able to continue normal operation if you continue to use it. The battery may only last five minutes before the phone itself powers down during a call.
• GX1 has a built-in aerial. As with any other radio transmitting device, do not touch the aerial unnecessarily when your phone is switched on. Contact with the aerial affects call quality and may cause the phone to operate at a higher power level than otherwise needed. Not touching the aerial area during a phone call optimises aerial performance and the talktime of your phone.
1. 2. / : : 3. / / 4. : 5. / / 6. / : 7. : 8. / 9. : Indicates the strength of received signal/the service is out of range. 10. Appears when in call or being in data communication in CSD. 11. / : Indicates the input mode (Upper case only the first letter of the word mode/ Upper case mode/Lower case mode/ Numeric mode). Appears when the T9 text input mode is activated. : : Appears when a new SMS, MMS Alert or WAP Alert has arrived. 12.
20. (No display)/ / / / : Indicates the phone’s mode (Normal mode/Activity mode/Meeting mode/ Car mode/Silent mode). 21. Appears when up, down, right or left navigation is available. 22. : / : Appears when “Infrared” is on/during connection. Softkey Indicators To execute the operation indicated, press each corresponding key. 23. Area at the lower left of a screen: Displays the operation executed by left softkey. 24. : Used to display the menu screen in stand-by mode. 25.
Call Functions Making a Call 1. Enter the area code and the phone number you wish to dial. If you enter the wrong number, press [Clear] to delete the number to the left of the cursor. to dial. 2. Press Emergency Calls 1. Enter 112 (international emergency number) using the keypad. to dial. 2. Press Note • Emergency calls may not be available on all mobile phone networks when certain network services and/ or phone features are in use. Contact your network operator for more information.
Redialling You can redial the numbers in the call register list that you may have missed, received or dialled. Each list can contain up to 10 numbers. during stand-by. 1. Press or to select a category between 2. Press “Dialled Numbers”, “Missed Calls” and “Received Calls”. 3. Select the number you wish to call by pressing or . 4. Press to redial the call. Tip • You can also confirm call records by pressing in stand-by mode.
Set the Any Key Answer function in the profile in each mode. (p. 61) Tip • If you have subscribed to the Calling Line Identification (CLI) service and the caller’s network sends the number, the caller’s number will appear on the screen. If the caller’s name and number are stored in the Phonebook, the caller’s name will appear on the screen. • If the number is a restricted number, the display shows “Withheld”.
3. Enter the phone number you wish to make another call. Tip • You can also make another call by entering the phone number during a call instead of steps 1 and 2. The current call is automatically put on hold. Call Waiting This service notifies you of another incoming call whilst you have a call in progress. [Answer] to answer the 1. During a call, press second call. The first call is put on hold and you can now talk to the second caller. [Options] and select “Swap” to switch 2. Press between the two calls.
3. Enter the number you wish to include in the conference call. 4. Press 5. Press 6. Press to dial. [Options] to display the Options Menu. or to select “Multiparty”, then press . 7. Press or to select “Join All”, then press to join the conference call. If you wish to add other participants, repeat steps 1 to 7. To End the Call with a Conference Call Participant 1. During a conference call, select the person who you wish to disconnect the call by pressing or . [Options] to display the Options Menu. 2.
Phonebook Key Lower Case Characters Upper Case Characters Numeric You can store the phone numbers and E-mail addresses of your friends, family and colleagues in the Phonebook. JKL5 jkl5 5 MNO6ÕÓÔÒÖØÑ mno6õóôòöøñ 6 Group name (p. 25) You can classify the phone numbers and names stored in the Phonebook, such as “Family” and “Business”. PQRS7 pqrs7ß 7 TUV8ÚÜÙÛ tuv8úüùû 8 Entering Characters WXYZ9ÝÞ wxyz9ýþ 9 When entering characters to create Phonebook entries, SMS or MMS, etc.
Changing the Input Mode To change the input mode, press approximately 2 seconds. for T9 Text Input T9 text input method is a shortcut to enter text easily and quickly. until “ ” is displayed. 1. Press and hold 2. Press each key once for any letter you require on that key. To enter the word “How”, press . or until the correct word is shown if 3. Press the character combination, that was initially displayed, is not correct. 4. Press to select the word.
3. Press or to select “Save Nos. to”, then press . 4. Select “SIM Card” to store the entry on the SIM memory or “Phone Memory” by pressing or , then press . When selecting “Choice”, you can choose SIM card or phone memory every time you store a new Phonebook entry. Storing Names and Numbers to display the Phonebook menu. 1. Press or to select “Add New Name”, then 2. Press press . If you select “Choice” in step 4 in “Phonebook Memories” on page 24; 3.
Entering E-mail Address or to highlight the right side of 3. Press “ ”, then press . 9. To determine what part of the picture is chosen to be 4. Enter the E-mail address, then press Note • The stored picture/image are automatically saved under the “in Phonebook” section of the Image Gallery. • The picture/image cannot be deleted in the Image Gallery. Remove the picture/image data from the Phonebook. displayed, select it by pressing then press . . Up to 60 characters can be entered.
Finding a Name and Number Two methods of searching through the Phonebook are available: Search by Name to display the Phonebook menu. 1. Press . 2. Select “View Names”, then press 3. Enter the first character(s) of the name. Matched results will be displayed alphabetically. If there is no entry in the Phonebook that satisfies the exact search criteria, the name that is nearest alphabetically matching will be displayed. The number corresponding to the name highlighted is shown above. or to select 4.
5. Edit entry as required. . 6. Press 3. Press If you wish to edit another item, repeat steps 4 to 6. [Save] to save the change(s). 7. Press Note • “Data” or “Fax” may not be displayed depending on SIM card. Deleting Phonebook Entries 1. Search for the desired Phonebook entries. For details on searching through Phonebook entries, see “Finding a Name and Number” on page 27. . 2. Press or to select “Delete”, then press 3. Press . 4. Select “Yes”, then press . The selected entry will be deleted.
4. Select a desired group name by pressing . “ ” indicates that the group has been selected. To cancel the selected group, press again. The checkbox becomes blank again. Press to return to the stand-by screen. Memory Status This function helps you to check the number of entries stored in the Phonebook. to display the Phonebook menu. 1. Press or to select “Settings”, then press . 2. Press 3. Press press or . to select “Memory Status”, then You can check the following memory status.
Sending Messages 1. Search for the desired Phonebook entries. For details on searching through Phonebook entries, see “Finding a Name and Number” on page 27. or to highlight the right side of 2. Press “ ”, “ ” or “ ”, then press or Press or to highlight the right side of “ ”, then press . 3. Press or to select “Send Message”, then press . If you highlight the right side of “ ”, “ ” or “ ” in step 2: or to select “MMS” or “SMS”, then 4. Press press . 5. Enter your message.
Using the Menu Using the Main Menu during stand-by mode. 1. Press or to navigate to required location. 2. Press 3. Press or to access function. To Select Another Item within the Main Menu To return to the previous screen after selecting a function from the Main Menu or Sub Menu, press . Every time you press , the screen goes back one by one. Operation Guidance Your phone uses softkeys to help you to navigate the phone ( and ). These keys change usage depending on the situation.
Menu No./ Main Menu 5 Organiser 6 Call Manager 7 Settings 8 Browser 9 Info-Service 0 Messages 1 2 3 4 5 1 2 3 1 2 3 4 5 6 7 1 2 * 1 2 3 4 5 Menu No./ Sub Menu1 Calculator Calendar Clock & Alarm Voice Memo Help List Phonebook Call Register Diverts Phone Settings Call Settings Network Settings Internet Settings Infrared Security Master Reset Homepage Bookmarks MMS SMS Cell Broadcast Cell Info Voicemail * Depends on the contents of SIM card.
Camera (M 1) Your phone incorporates an integrated digital camera. This allows you to take and send pictures wherever you are. You can send pictures in several ways: • Immediately after you take a picture by pressing the . • By saving the picture in the Image Gallery (in My Phone) and sending it later from the Image Gallery using the [Options]. • By saving the picture and selecting “ ”, MMS and composing the message and adding the image from using the [Options].
Note • When “Select Size” is set to “Large”, you cannot use the zoom function. To select the picture size [Options] before step 2 in “Taking 1. Press Pictures” to display the Options Menu. or to select “Select Size”, then press 2. Press . 3. Select the picture size by pressing press or , then . To select the mode [Options] before step 2 in “Taking 1. Press Pictures” on page 33 to display the Options Menu. or to select “Select Mode”, then press 2. Press . 3.
Meanings of Indicators in Camera Mode Delay timer indicator : Whilst the timer setting is on. Picture brightness indicators : Bright : : Normal : : Dark Picture size indicators (p. 34) Large: 288 × 352 dots Medium (default): 120 × 160 dots Small: 60 × 80 dots Mode indicator (p. 34) : Mode 1 : Mode 2 Making Adjustments According to Lighting Conditions Adjusting the Brightness of the Picture Adjust the brightness of the picture by pressing or .
2. Press or to select “Delay Timer”, then press . 3. Press or to select “On”, then press . “ ” appears on the screen and the phone returns to camera mode. to take the picture. 4. Press Delay timer begins. 10 seconds after the timer sound occurs, the camera takes a picture, and sounds a tone. Note • Whilst the delay timer is operating, the LED indicator and the icon flash. • If is pressed whilst the delay timer is operating, the picture is taken instantly.
My Phone My Phone contains several types of image and sound data can be controlled collectively. Also included in My Phone are frequently used text message phrases. Image Gallery (M 2-1) Pictures that are taken by a digital camera or images that are downloaded from mobile Internet sites can be managed. : This is the folder where the images registered in the Phonebook are saved.
Changing the File Name 1. Perform steps 1 to 3 in “Viewing Images” on page 37. 2. Select the file name you wish to change by pressing or , then press [Options]. The Options Menu is displayed. . 3. Select “Rename”, then press 2. Select the file name you wish to adjust by pressing 4. Enter a new file name. 5. To determine what part of the image is chosen to be To correct the last character, press [Clear] briefly. Press and hold [Clear] to clear all characters. . 5.
3. Press press or . to select “Send Message”, then 4. Enter your message. For details on creating a message, see “Creating a New MMS” on page 98. Note • Images with a red icon cannot be sent attached to a message. Deleting Images 1. Perform steps 1 to 3 in “Viewing Images” on page 37. 2. Select the file name you wish to delete by pressing or , then press [Options]. The Options Menu is displayed. or to select “Delete”, then press . 3. Press 4. Select “Yes”, then press . The selected image is deleted.
Checking the Sound Data Select the desired sound as in step 4 in “Playing Back Sounds” on page 39, then select “File Information” after pressing [Options]. The file type and size of the selected sound are displayed. Whether the sound can be copied, forwarded or saved is also displayed. To return to the Sound Gallery, press [Back]. Changing the File Name 1. Perform steps 1 to 3 in “Playing Back Sounds” on page 39. 2. Select the file name you wish to change by pressing or , then press [Options].
Sending Messages 1. Perform steps 1 to 3 in “Playing Back Sounds” on page 39. 2. Select the file name you wish to send by pressing or , then press [Options]. The Options Menu is displayed. or to select “Send Message”, then 3. Press press . If you select your original ringing tone in step 2; or to select the file format “SMAF”, 4. Press “MIDI” or “i Melody”, then press . 5. Enter your message. For details on creating a message, see “Creating a New MMS” on page 98.
Text Templates (M 2-3) You can register up to 20 text templates for use in MMS, SMS and entering names in the phone book. You can input messages or others more easily by registering frequently used text. 128 characters may be registered in any text template. Adding Phrases to the Text Templates to display the Main Menu. 1. Press or to select “My Phone”, then press 2. Press . 3. Press or to select “Text Templates”, then press . The list of Text Templates is displayed. 4.
4. Select “Yes”, then press . The selected text template is deleted. To cancel deletion, select “No” at step 4, then press . Memory Status (M 2-4) This function helps you to check the memory status of the Galleries. to display the Main Menu. 1. Press or to select “My Phone”, then press 2. Press . 3. Press press 43 My Phone or .
Fun & Games Games (M 3-1) Your phone comes complete with 3 games (PK Game, Collection Hunter, Air Hockey). Starting Games to display the Main Menu. 1. Press or to select “Fun & Games”, then press 2. Press . 3. Select “Games”, then press . The game list is displayed. or to select the desired game, then 4. Press press . . 5. Select “New Game”, then press 6. When you have finished playing, press . Note • If an incoming call is detected during gameplay, the game will be stopped. Game Guide 1.
Air Hockey (M 3-1-3) The level of the game can be chosen for “Air Hockey”. To Select a Game Level 1. Perform steps 1 to 3 in “Starting Games” on page 44. or to select “Air Hockey”, then press 2. Press . 3. Press 4. Press or to select “Level”, then press or to select the level, then press . . Setting up Game Options (M 3-1-4) 1. Perform steps 1 to 3 in “Starting Games” on page 44. or to select “Game Settings”, then 2. Press press . 3.
7. Press or to select a tempo, then press . The music tempo is described below. • “Allegro (Fast)”: 150 • “Moderato (Normal)”: 125 • “Andante (Slow)”: 107 • “Adagio (Very Slow)”: 94 Tempo is defined by the number of crotchets ( ) played per minute. 8. Select “8 Chords” or “16 Chords” by pressing or , then press . 9. Specify the musical scale and rest using the digit keys. For details on specifying the sound level and rest, see “Specify the Musical Scale and Rest” on page 47. 10.
Specify the Musical Scale and Rest Using the key shown below, specify the musical scale and rest. Do Re Mi Fa Sol La Ti Rest When you press the key shown above once, a crotchet is specified in the middle scale (no mark). When you press the same key repeatedly, the note will shift cycle through the available octave ranges. When you press or whilst a note is selected, the note will raise one semitone higher or lower. When entering rest: Crotchet rest is entered.
Note • You cannot make a dotted semiquaver (semiquaver rest) or a dotted semibreve (semibreve rest). • Three continuous notes are required for triplet. To specify a tie, press after selecting the target notes. An underscore (_) is displayed next to the note, and the note is tied with the next one. To enter the next note, press and move the cursor to the right. Then, repeat the operation on the previous page.
Category Organs Basses Strings 2 49 Tone Category Drawbar Organ Perc. Organ Rock Organ Church Organ Guitars Reed Organ Accordion Harmonica Tango Accordion Acoustic Bass Finger Bass Pick Bass Fretless Bass Strings 1 Slap Bass 1 Slap Bass 2 Synth Bass 1 Synth Bass 2 Str. Ensemble 1 Str. Ensemble 2 Synth Strings 1 Synth Strings 2 Brasses Choir Aahs Voice Oohs Synth Voice Orchestra Hit Fun & Games Tone Nylon Guitar Steel Guitar Jazz Guitar Clean Guitar Muted Guitar Overdriven Gtr. Distortion Gtr. Gtr.
Category Percussions Original Tone Category Tinkle Bell Agogo Steel Drums Woodblock Effects Taiko Drums Melodic Tom Synth Drum Reverse Cymbal Original 1 (Piano)* Original 2 (Glockenspiel)* Original 3 (Reed Organ)* Original 4 (Nylon Guitar)* Original 5 (Violin)* Tone Gtr. Fret Noise Breath Noise Seashore Bird Tweet Telephone Ring Helicopter Applause Gunshot * The default setting tone. To create your original tone, see “Creating Your Original Tone” on page 54.
3. Press or to select an original ringing tone you wish to edit, then press [Options]. The Options Menu is displayed. or to select “Data Edit”, then press 4. Press . . 5. Edit the title and press or to select a tempo, then press . 6. Press or to select the number of chords, then 7. Press press . 8. Select a note you wish to change by pressing or , then edit notes. For details on editing tones, see “Tone Editor” on page 52. When you add notes, enter the note correctly on the cursor.
Copying and Pasting Notes You can copy and move a part of a melody to another position. Only original ringing tones or editable melodies can be copied or moved. 1. Perform steps 1 to 7 in “Editing Original Ringing Tones” on page 50. [Options] to display the Options Menu. 2. Press 3. Press press or . to select “Copy” or “Cut”, then 4. Move the cursor to the first note to be copied or to be cut and press . 5.
Setting an Algorithm Set the combination of the operator. Select from 4 types of combinations in 8 chords, and 2 types in 16 chords. 8 Chords Algorithm3 Algorithm4 Algorithm5 Parameter Multiple (13 levels) Algorithm6 16 Chords Algorithm1 Setting the Operator The meaning and content of the parameter that can be set to the operator is described below.
Parameter Decay Rate (16 levels) Sustain Level (16 levels) Release Rate (16 levels) Wave Shape (8 types) Vibrato (4 levels/ Off) Tremolo (4 levels/ Off) Feedback (8 levels) Meaning This sets the time from the maximum volume to the volume of the sustain level. In sustaining note, this displays the volume of the sound that continues to produce. In fading-out note, this displays the volume when the note starts fading-out.
11. Select a base tone by pressing or , then press . When “Confirm Tones” is selected, the syllable names are played back in the selected tone. . 12. Select “OK”, then press 13. Press or . to select “Details Editor”, then press 14. Press or to select “Algorithm x”, then press . 15. Select an algorithm you wish to set by pressing or , then press . If you do not wish to change the operator, skip to step 20. 16. Select an operator you wish to change by pressing or , then press .
Profiles (M 4) Note • When a profile is set, the icon which corresponds to the profile name appears in the stand-by screen: Normal: Is the default setup. (not displayed in the stand-by screen) Meeting: For use when discretion is needed. Activity: For use in busy environments. Car: For use in the car. (connected to a handsfree kit) Silent: For use when silence is needed. All sounds are muted and you are alerted to calls with the vibrator. You can easily alter the phone tone (e.g.
Ringer Volume 5. Change the setting you want. Resetting Profile Settings You can adjust the ringer volume to one of 5 levels. When it is set to “Silent”, the volume of games is muted. 1. Perform steps 1 and 2 in “Activating a Profile” on 1. Perform steps 1 to 3 in “Customising Profiles” on For details about settings, see pages 57 to 61. page 56. 2. Select the profile you wish to reset by pressing or , then press . 3. Press 4. Press press or to select “Edit”, then press or .
3. Press or to select “Preset Melody” or “Sound Gallery”, followed by . 4. Select the ringing tone you wish to use by pressing or . If you wish to hear the demo, press To stop playing, press [Stop]. 5. When selection is complete, press [Play]. . Vibration When the vibrator option is set to on, the phone will vibrate for incoming calls regardless of the ringer volume and tone settings. 1. Perform steps 1 to 3 in “Customising Profiles” on page 56. or to select “Vibration”, then press 2. Press . 3.
When you select “Preset Melody” or “Sound Gallery” in step 7: 8. Select the keypad tone. For details on selecting a ringing tone, see “Ringer Type” on page 57. or to select “Duration”, then press 9. Press . 10. Set the duration by pressing or , then press . 3. Press or to select “On” or “Off”, then press . If you select “Off”, the screen returns to step 1. . 4. Select “Volume”, then press 59 Profiles to select “Melody”, then press to .
3. Press or to select “On” or “Off”, then press . If you select “Off”, the screen returns to step 1. . 4. Select “Volume”, then press 5. Press to increase the volume or press decrease the volume and then press . 6. Press 7. Press or to to select “Melody”, then press or to select “MMS”, “SMS” or “WAP”, then press . . 4. Select “Volume”, then press to increase the volume or press 5. Press decrease the volume and then press . or to select “Preset Melody” or “Sound Gallery”, then press . 8.
Low Battery Alert Adjust the volume of the alarm when the battery becomes low. 1. Perform steps 1 to 3 in “Customising Profiles” on page 56. or to select “Low Battery Alert”, then 2. Press press . 3. Press to increase the volume or press decrease the volume and then press . to Any Key Answer 1. Perform steps 1 to 3 in “Customising Profiles” on page 56 . 2. Select “Any Key Answer”, then press or , then 3. Select “On” or “Off” by pressing press 61 .
Organiser 6. If you wish to start a new calculation, press Calculator (M 5-1-1) The calculator function performs the 4 arithmetic calculations using up to 12 digits. to display the Main Menu. 1. Press or to select “Organiser”, then press 2. Press . 3. Select “Calculator”, then press 4. Select “Calculator”, then press . . The calculator appears on the display. 5. Key operations for calculation are as follows. [C]. When calculation is complete, press .
3. Press or to select “In Domestic” or “In Foreign”, then press . The result is displayed. If you select “Exchange Rate” in step 3, you can set a currency conversion rate. . 4. When calculation is complete, press 5. Press press or . and select the note number, then 6. Enter the schedule content, press Calendar (M 5-2) . Up to 3 schedule items can be stored. For details on entering characters, see “Entering Characters” on page 23. If you wish to add another item, repeat steps 5 and 6. 7.
Deleting Schedules 5. Select “Yes”, then press To Delete Schedule Items 1. Perform steps 1 to 3 in “Calendar” on page 63. or , then 2. Select the day by pressing , , press . or 3. Select the item you wish to delete by pressing , then press [Options]. The Options Menu is displayed. or to select “Delete”, then press . 4. Press . 5. Select “1 Data”, then press 1. Perform steps 1 to 3 in “Calendar” on page 63. [Options] to display the Options Menu. 2. Press or to select “Delete” to delete all 3. Press 6.
3. Press press 4. Press press or . to select “Clock & Alarm”, then 1. Perform steps 1 to 3 in “Setting the Date and Time” or . to select “Set Date/Time”, then 2. Press 5. Enter the day, month, year and time using the digit keys, then press . When you enter the time in a 12-hour clock format, press and change am/pm. The order in which the date and time appears is based on the format setting. See “To Select the Date Format”. To Select the Time System 1.
To Set Daylight Saving Time You can switch to daylight saving time without having to change the clock time itself. 1. Perform steps 1 to 3 in “Setting the Date and Time” on page 64. 2. Press or . to select “Clock Settings”, then or . to select “Daylight Saving”, then press 4. Press or to select “On”, then press press 3. Press . Setting the Time Zone (M 5-3-3) 1. Perform steps 1 to 3 in “Setting the Date and Time” on page 64. or to select “Set Time Zone”, 2. Press then press . . 3.
8. Enter the alarm time using the digit keys, then press 6. When selection is complete, press . When you enter the alarm time in a 12-hour clock format, press and change am/pm. or to select “Repeat Daily”, then press 9. Press . To Change the Vibration of Alarm 1. Perform steps 1 to 6 in “Setting Alarm” on page 66. or to select “Alarm Tone”, then press 2. Press . 10. Press or to select “On” or “Off”, then press or to select “Alarm Status”, then press or to select “On”, then press . 11. Press .
Note • For the alarm to work, the phone must be switched on. If you wish to use the phone as an alarm clock you may be disturbed by incoming calls or messages notifications. Changing Alarm Settings 1. Perform steps 1 to 5 in “Setting Alarm” on page 66. 2. Select the number you wish to change by pressing or , then press . 3. Change Alarm settings. For details on changing Alarm settings, see “To Change the Type of Alarm Tone” on page 67. Disabling Alarm Function 1.
Help List (M 5-5) 5. Select “Save” to save the voice memo, then press . If you wish to exit the voice memo, press [Exit]. or to select “Yes”, then press . 6. Press To cancel exiting, select “No” in step 6, then press . You can view the help list and use it to guide you in the phone’s functions. to display the Main Menu. 1. Press or to select “Organiser”, then press . 2. Press 3. Press or to select “Help List”, then press . The help list is displayed. and . 4.
Call Manager Call Register The phone will record the last 10 missed calls, received calls and dialled numbers. Viewing Call Register to display the Main Menu. 1. Press or to select “Call Manager”, then press 2. Press . 3. Press or to select “Call Register”, then press . 4. Press or to select “Missed Calls”, “Received Calls” or “Dialled Numbers”, then press . The selected call register list is displayed. 5. Select the number you wish to view by pressing or . 6. Press [View].
4. Press or to select “Yes”, then press . The selected call record will be deleted. To cancel deletion, select “No” in step 4, then press . To Delete All Call Register (M 6-2-4) 1. Perform steps 1 to 3 in “Viewing Call Register” on page 70. 2. Press or to select “Clear Logs”, then press . . 3. Select “All Calls”, then press or to select “Yes”, then press 4. Press . All call register records will be deleted. To cancel deleting, select “No” in step 4, then press .
Call Costs (M 6-2-6) This function lets you check the charges for your calls. Charging Advice is not supported on all networks. Please check with your service provider for availability. Checking the Cost of the Last Call to display the Main Menu. 1. Press or to select “Call Manager”, then press 2. Press . 3. Press or to select “Call Register”, then press . 4. Press or to select “Call Costs”, then press .
Setting the Charge Limit This function is useful if you wish to make sure you do not exceed a certain charge limit. 1. Perform steps 1 to 4 in “Checking the Cost of the Last Call” on page 72. or to select “Max Cost”, then press . 2. Press 3. Press or to select “Set Limit”, then press . 4. Enter your PIN2 code, then press . 5. Enter a value, then press . To enter a decimal point, press . Checking the Charge Limit at step 3 in 1. Select “Read Limit”, then press “Setting the Charge Limit”.
Data Counter (M 6-2-7) Diverts (M 6-3) You can confirm the amount of bytes which you used in the GPRS transmission. to display the Main Menu. 1. Press or to select “Call Manager”, then press 2. Press . This service is used to divert incoming calls to your voice mail system or to another number depending on certain conditions in which you cannot answer a call. 3. Press or to select “Call Register”, then press or to select “Data Counter”, then press . 4. Press . 5.
6. If you wish to divert calls to a number which is located in the Phonebook, search for the desired Phonebook entry. Press or [Search] to search the number by name or press or to search in alphabetical order, then press . For details on searching the Phonebook entries, see “Finding a Name and Number” on page 27. 7. If you wish to divert calls to a number which you can enter manually, enter the phone number. 8. Press . If you select “No Answer” in step 4: 9.
Settings 4. Select “Animation” or “Illustration 1” to “Illustration 3” by pressing . Phone Settings Changing the Language (M 7-1-1) You can change the display language that the phone uses for the display messages and text entry. to display the Main Menu. 1. Press or to select “Settings”, then press . 2. Press . 3. Select “Phone Settings”, then press . 4. Select “Language”, then press or to select the desired language, then 5. Press press .
4. To determine what part of the image is chosen to be displayed, select it by pressing , , or , then press . The selected image is displayed on the stand-by screen. Note • Some images cannot be used because of their image and data types. Backlight (M 7-1-3) You can turn the backlight of the main screen display on or off when you press the keypad or the optional cigarette lighter charger is connected to the phone.
Colour Reduction (M 7-1-5) The colour of the screen of this phone is automatically reduced for preventing battery draining if it is not operated. You can change the time the Colour Reduction will go into effect works between 2 and 20 minutes, or disable this function. Setting the Greeting Message (M 7-1-6) You can set the message which will appear when the phone is turned on. 1. Perform steps 1 to 3 in “Changing the Language” on page 76. or to select “Greeting Message”, then 2. Press press .
To Set Built-in Images 1. Perform steps 1 to 3 in “Changing the Language” on page 76. or to select “Assign Images”, then 2. Press press . 3. Select the screen to set the image by pressing , then press or . 4. Select “Animation 1” or “Animation 2” by pressing or , then press . or Select “Illustration 1” or “Illustration 2” by pressing or , then press when you select “Alarm” in step 3. The selected image is displayed. . 5. Press Tip • To cancel the image setting, select “Off” in step 4.
Call Settings Set various types of functions and services. Call Waiting (M 7-2-1) If you wish to be able to receive another incoming call whilst you have a call in progress, you must activate the Call Waiting service. to display the Main Menu. 1. Press or to select “Settings”, then press . 2. Press 3. Press or to select “Call Settings”, then press . . 4. Select “Call Waiting”, then press 5. Select “On” to activate the Call Waiting service or “Off” to deactivate it by pressing press . 6.
The options available are: • “Show Callers No.”: Select if you wish to see the phone number from any callers before you answer. • “Show your No.”: Select if you wish to show your phone number. • “Show Called No.”: Select if you wish to see the phone number of the phone you are connected to, even if your call is diverted to another phone number. • “Hide if Called”: Select if you wish to hide your phone number from any callers. 4.
6. Select a ringing tone. 5. Press For details on selecting a ringing tone, see “Ringer Type” on page 57. or to select “Vibration”, then press . 7. Press 8. Press or to select “Enable”, “Disable” or “Link to Sound”, then press . For details on setting the vibrator, see “Vibration” on page 58. 9. When setting is complete, select “Setup End”, then press . Group Call (M 7-2-5) Phone numbers can be registered or updated in groups. To Set Group Ringing Tone Different ringing tones can be set for each group.
2. Press or . to select “Minute Minder”, then press 3. Press or to select “On” or “Off”, then press . Call Setting Reset (M 7-2-8) The call settings can be reset to their default settings. 1. Perform steps 1 to 3 in “Call Waiting” on page 80. or to select “Set to Default”, then 2. Press press . . 3. Enter your handset code, then press or to select “Yes”, then press 4. Press . To cancel resetting, select “No” at step 4, then press . All call settings are reset.
Adding a New Network 1. Perform steps 1 to 4 in “Selecting a Network Automatically”. or to select “Add New Network”, then 2. Press press . 3. 4. 5. 6. 7. 8. 9. Press or to select “Add”, then press . Enter the country code. 4. Press or to select “Insert” or “Add to End”, then press . To Delete a Network from the Preferred List 1. Perform steps 1 to 3 in “To Change the Position of a Network in the Preferred List”. or to select “Delete”, then press . 2. Press Enter the network code.
Internet Settings (M 7-4) Item WAP/MMS Settings WAP Settings and MMS Settings can perform following various setups, respectively. Note • The URL set up in “Homepage” of the WAP Settings is set to the connection point URL of Homepage in “Viewing the WAP Browser”. (p. 95) • Your GX1 comes complete with the settings for your network. You should not have to change them. WAP Settings Item Profile Name* Description Operation Select “Profile Name” and WAP Profile press .
Item APN* Description Access Point Name Operation Select “APN” and press . Enter Access Point Name and press Item Description Line Type ISDN or Analogue . User Name press . Select “ISDN” or “Analogue” and press Select “UserName” and UserName Operation Select “Line Type” and press . Enter User Name and press UserName User Name press . Enter User Name and press . . Select “Password” and Password Password press . Enter Password and press Select “Password” and Password Password press .
MMS Settings Item Profile Name* Description Operation Select “Profile Name” and MMS Profile press . Name (Unique Enter the strings you like Name) and press . Item Description Operation GPRS Settings (If “GPRS then CSD” or “GPRS” will be selected as connection type, they should be set) Select “APN” and press APN* Access Point Name and press Select “IP Address” and IP Address* IP address press . Enter IP address for MMS and press MMS Relay Server UserName User Name . and press .
Item Phone No.* Description Access Point Number Operation Select “Phone No.” and press . Enter Access Point Number and press Line Type ISDN or Analogue . Select “Line Type” and 3. Press press . Select “ISDN” or “Analogue” 4. Press and press User Name press . Enter User Name and press . Select “Password” and Password Password press . Enter Password and press . Select “Linger Time” and Linger Time Linger Time press . Enter second time (099999) and press *: Item to be set as mandatory.
Infrared (M 7-5) Security (M 7-6) You can use the built-in infrared modem to establish contact between your phone and a PC equipped with an infrared port. to display the Main Menu. 1. Press or to select “Settings”, then press . 2. Press Key Lock As a safety precaution to prevent accidental use, you can lock your phone’s keys when not in use. 3. Press 4. Press or to select “Infrared”, then press . or to select “On”, then press . “ ” will appear on the screen.
5. Press or to select “On” or “Off”, then press . 6. Enter your PIN code, then press . Note • If you enter the wrong PIN code three times in step 6, the SIM will lock. To remove the lock, contact your service provider/SIM vendor. Changing PIN Code This allows you to change the PIN code stored on the SIM. 1. Perform steps 1 to 3 in “Enabling/Disabling the PIN code”. or to select “PIN Entry”, then press 2. Press . 3. Press or to select “Change PIN”, then press . 4.
5. Enter a new handset code again, then press . If you enter a code different from the code which you entered in step 5, the screen returns to step 4. Enter the correct code again. Changing PIN2 Code (M 7-6-3) PIN2 code is used to protect certain functions in the phone such as Fixed Dialling No. and call cost limits. The following shows you how to change PIN2 code. 1. Perform steps 1 to 3 in “Enabling/Disabling the PIN code” on page 89. or to select “Change PIN2”, then press 2. Press . 3.
The call barring options available are: • “All Services”: Restricts all services. • “Voice Calls”: Restricts all voice calls. • “Data”: Restricts all data calls. • “Fax”: Restricts all fax calls. • “Messages”: Restricts all messages. • “All except Msgs.”: Restricts all services except messages. . 5. Select “On”, then press If you select “Off”, the selected call barring setting is cancelled. . 6.
2. Press press or . to select “Fixed Dialling No.”, then 3. Enter a PIN2 code, then press 4. Select “Settings”, then press . 5. Select “On”, then press For details on searching a name, see “Finding a Name and Number” on page 27. . . If you select “Off”, Fixed Dialling No. is disabled. Adding a New Name 1. Perform steps 1 to 3 in “Enabling/Disabling the PIN code” on page 89. or to select “Edit Dial List”, then press 2. Press . 3. Press 4. Press press . or .
Master Reset (M 7-7) The settings can be reset to their default settings. to display the Main Menu. 1. Press or to select “Settings”, then press 2. Press 3. Press or . to select “Master Reset”, then press . . 4. Enter your handset code, then press or to select “Yes”, then press 5. Press . To cancel resetting, select “No” at step 5, then press . All settings are reset. Note • If you enter a wrong handset code in step 4, operation is cancelled. • The default Handset Lock code is “0000”.
Browser Your phone contains a WAP browser used for surfing on the Mobile Internet, where you can get a lot of useful information. Normally, pages are designed for a mobile phone. To Exit the WAP Browser to exit the browser. 1. Press Navigating a WAP Page • • • • • Setting up for the WAP browser See “WAP/MMS Settings” on page 85 for instructions. • Viewing the WAP Browser (M 8-1) 1. Press 2. Press [ or ] during stand-by. • to select “Homepage”, then press . 3.
Browser Menu When you have started browsing, you can reach browsing options by pressing . Reload: Settings: The Browser Menu contains the following: Bookmarks (M 8-2) Back: Home: The Bookmarks option helps you to store desired (or frequently used) pages (addresses). It can save you time in accessing WAP pages sites. Used to display the previous page. Go to the homepage you set in the WAP Settings.
Accessing Bookmarked Pages 1. Perform steps 1 and 2 in “Adding a Bookmark” on page 96. The list of Bookmarks is displayed. 2. Select a bookmarked page you wish to access by pressing or , then press . Editing Bookmarks 1. Perform steps 1 and 2 in “Adding a Bookmark” on page 96. The list of Bookmarks is displayed. 2. Select the desired bookmark to edit by pressing or , then press [Options]. The Options Menu is displayed. or to select “Edit”, then press . 3. Press 4. Edit the bookmark title.
Messages • • • • Your phone allows you to send and receive short messages, MMS and WAP mails. MMS (Multimedia Messaging Service) About MMS MMS allows you to further personalise your messages with pictures, sounds and animations. Note • Some MMS functions may not always be available depending on your network. Contact your network operator for more information. Setting up MMS (M 0-1-5) 1. 2. 3. 4. Press [ ] during stand-by. Select “MMS”, then press .
6. Select “Send”, then press 5. Enter the phone number or E-mail address of the . The confirmation screen of file size is displayed. . 7. Select “Yes”, then press After the message has been sent, the message is added to the Sent box. other recipients, then press 6. Press To Enter the Subject of the Message 1. Perform steps 1 to 3 in “Creating a New MMS” on page 98. [Options] to display the Options Menu. 2. Press . 3. Select “Subject”, then press 4. Enter the subject of your message, then press 3.
Inserting Attached Data You can send images and sounds saved in the Gallery attached to MMS. You can attach a maximum of 6 images or sounds in all. 1. Perform steps 1 to 3 in “Creating a New MMS” on page 98. [Options] to display the Options Menu. 2. Press 3. Press press or . to select “Image” or “Sound”, then 4. Select the file name you wish to attach by pressing or , then press . When an image is selected, it is displayed. When a sound is selected, it is played. 5.
2. Press or to select “Inbox”, then press . Messages are marked with “ ” denote mails with attachments. or to select the desired message, then 3. Press press . The message is displayed. or to read the 4. Scroll the screen by pressing message. 5. When you finish viewing, press 3. Press or to select “Details”, then press . The sender’s phone number or E-mail address, time and date stamp, subject, attachment and size are displayed. Replying to a Message to the Sender from Inbox 1.
Forwarding a Message 1. Perform steps 1 to 3 in “Replying to a Message to the Sender from Inbox” on page 101. or to select “Forward”, then press . 2. Press 3. Enter the phone number or E-mail address of the recipient, then press . 4. If you wish to select the phone number or E-mail address in the Phonebook, search for the desired Phonebook entry. Press or [Search] to search the number by name or press or to search in alphabetical order, then press .
Storing the Mail Address of a Sender in the Phonebook 1. Perform steps 1 to 3 in “Replying to a Message to the Sender from Inbox” on page 101. or to select “Save to Phonebook”, then 2. Press press . The name entry screen is displayed. 3. Enter the name for the Phonebook entry. For details on entering a name, see “Storing Names and Numbers” on page 25. Retrieving MMS When “ ” is in the Inbox, the following can be done. 1. Perform steps 1 and 2 in “Creating a New MMS” on page 98.
To Lock Messages 1. Perform steps 1 and 2 in “Deleting Messages” on page 103. 2. Select the message you wish to lock by pressing or , then press [Options]. The Options Menu is displayed. or to select “Lock/Unlock”, then press 3. Press . Creating Slide Data 1. 2. 3. 4. 5. Press [ ] during stand-by. Select “MMS”, then press . Select “Compose”, then press Press Press . . [Options] to display the Options Menu. or to select “Slide Show”, then press or to select “On”, then press . 6. Press . 7.
Making a Call to the Sender of a Message You can make a call to the sender of a message in Inbox whose address (From) is the phone number. 1. Perform steps 1 and 2 in “Replying to a Message to the Sender from Inbox” on page 101. [Options] to display the Options Menu. 2. Press 3. Press or to select “Call”, then press . SMS (Short Message Service) About SMS The Short Message Service (SMS) allows you to send text messages of up to 1024 characters to other GSM users.
Validity Period This indicates the number of days and hours for which a message you send may remain undelivered to the message recipient. During this period, the message service centre will continually try to deliver the message to the recipient. 1. Perform steps 1 to 3 in “Setting up SMS” on page 105. or to select “Message Lifetime”, then 2. Press press . 3. Select the validity period by pressing then press or , . Message Format 1. Perform steps 1 to 3 in “Setting up SMS” on page 105.
To Save the Message in the Outbox 1. Perform steps 1 to 5 in “Creating a New SMS”. 2. Enter the SMS phone number of the recipient, then press . 3. Press or to select “Save”, then press . Sending a Message 1. Perform steps 1 to 5 in “Creating a New SMS”. 2. Enter the SMS phone number of the recipient, then press . 3. If you wish to select the SMS phone number in the Phonebook, search for the desired Phonebook entry.
5. Press . Follow the procedure from step 2 in “Sending a Message” on page 107. Modifying a Message 1. Perform steps 1 and 2 in “Creating a New SMS” on page 106. Calling the Message Sender 1. Perform steps 1 to 3 “Reading SMS” on page 107. [Options] to display the Options Menu. 2. Press or to select “Outbox”, then press . 2. Press 3. Select the desired message to modify in the Outbox 3. Press [Options] to display the Options Menu. 4. Press 5. Select “Edit”, then press . 6.
Storing the Phone Number of a Sender in the Phonebook 1. Perform steps 1 and 2 in “Reading SMS” on page 107. [Options] to display the Options Menu. 2. Press 3. Press press or . to select “Save to Phonebook”, then 4. Enter the name for the phonebook entry. For details on entering a name, see “Storing Names and Numbers” on page 25. Check the already entered phone number. Cell Broadcast (M 0-3) You can receive Cell Broadcast messages or general messages like weather reports, traffic reports, etc.
Cell Information (M 0-4) Subscribing to Cell Broadcasts Select the page of the cell broadcast message that you want. 1. Press 2. Press press 3. Press 4. Press press 5. Press press 6. Press [ or . ] during stand-by. to select “Cell Broadcast”, then or to select “Settings”, then press or . to select “Set Info Subjects”, then or . to select “Create Subject”, then The Cell Information is the message information that operators sent to subscribers in certain areas.
Data Transmission Your PC can be set up to use the GX1 as a modem. You can use Infrared (IrDA) to connect to the PC. System Requirements Windows®98*, Windows®Me, Windows®2000, Windows®XP * Windows®98 Second Edition, or Windows®98 + Internet Explorer 5.01 or later OS: Interface: Infrared (IrDA) or Serial port (D-sub 9-pin connector) CD-ROM drive after executing [SHARP GSM GPRS] in the control panel. 2. Install Modem driver. 3. Make the Dial-up connection. 4.
• When using the infrared modem function for executing data transmission, align the infrared port with each other. Note • The distance between the infrared ports which can communicate is a maximum of 20 cm within a 30° angle. • When transmitting data via infrared communication, you need to set the infrared setting to “On”. (p. 89) • It is not recommended that you make or answer a call during data transmission. The operation may be interrupted.
Troubleshooting Problem The phone does not turn on. PIN code or PIN2 code is rejected. SIM card becomes locked. The display is difficult to read. 113 Problem Solution • Make sure the battery is properly inserted and charged. • Make sure you have entered the correct code (4 to 8 digits). • Your SIM card/protected functions will become locked after 3 unsuccessful attempts. • Contact your SIM provider if you do not have the correct PIN code.
Problem Call quality is poor. Cannot access network service. Cannot send or receive SMS messages. Cannot connect to MMS service provider. Solution • Your current location may not provide good call quality (i.e., in a car or train). Move to a location where radio signal strength is greater. • Check where your account has been registered and where the service is available.
Safety Precautions and Conditions of Use Your phone conforms to international regulations insofar as it is used under normal conditions and in accordance with the following instructions. CONDITIONS OF USE Electromagnetic waves • Do not switch on your phone aboard an aircraft (as your phone may interfere with the aircraft’s electronic systems). Current legislation forbids this use and legal action can be taken against the user. • Do not switch on your phone in a hospital, except in designated areas.
Battery • Use your phone only with batteries, chargers and accessories recommended by the manufacturer. The manufacturer disclaims any liability for damage caused by the use of other chargers, batteries or accessories. • When the battery charging alert is displayed on the screen, charge the battery as soon as possible. If you continue using your phone ignoring the alert, the phone may cease to function, and all data and settings you have stored may be lost at any moment.
• Clean the lens cover before taking a picture. Fingerprints, oils, etc. on the lens cover hinder clear focusing. Wipe them off with a soft cloth before taking a picture. Others • As with any electronic storage unit, data may be lost or corrupted under various circumstances. • Before connecting the phone with a PC or a peripheral unit, read the operation manual for the other unit carefully.
SAR Your Sharp mobile phone has been designed, manufactured and tested so as not to exceed the limits for exposure to electromagnetic fields recommended by the Council of the European Union. These limits are part of comprehensive guidelines developed by independent scientific organisations. The guidelines include a substantial safety margin designed to assure the safety of the phone user and others and to take into account variations in age and health, individual sensitivities and environmental conditions.
Index A Accessories 7 B Battery 10 Charging 13 Disposal 12 Inserting 10 Removing 12 Battery Level Indicator 14 Bookmarks 96 Accessing 97 Adding 96 Deleting 97 Editing 97 Browser 95 Browser Menu 96 Navigating WAP Page 95 Viewing WAP Browser 95 C Calculator 62 Rate Conversion 62 Calendar 63 Deleting Schedules 64 Find a Particular Date 63 119 Index Call 18 Answering 19 Ending 19 Holding 20 Making 18 Making Another Call During a Call 20 Rejecting 20 Call Costs 72 Checking Charge Limit 73 Checking Charge Rat
Zoom Function 33 Cell Broadcast 109 Enabling/Disabling 109 Reading 109 Setting Languages 110 Subscribing 110 Cell Information 110 Enabling/Disabling 110 Clock & Alarm 64 Changing Alarm Settings 68 Disabling Alarm Function 68 Resetting Alarm Setting 68 Resetting All Alarm Settings 68 Setting 66 Setting Alarm 66 Setting the Date and Time 64 Clock Setting 64 Setting Date and Time 64 Conference Call 21 Adding New Participants 21 Ending Call with a Participant 22 Making 21 Private Conversation 22 D Data Counter
M M Key 9 Master Reset 94 Melody Editor 45 Copying/Pasting Notes 52 Creating Your Original Ringing Tone 45 Deleting 50 Editing 50 Musical Scale/Rest 47 Strength 50 Tone 48 Types of Notes/Rests 47 Memory Status 43 Menu 31 List of Menu Functions 31 Main Menu 31 Operation Guidance 31 Shortcut Keys 31 Menu Key 31 Messages 98 MMS 98 SMS 105 Microphone 9 Muting 22 Mirror 9 MMS 98 121 Index Adding Recipients 99 Checking Sender/Receiver Address 101 Creating 98 Creating Slide Data 104 Deleting 103 Forwarding 102 I
Sending Messages 30 Storing Inputted Number 26 View Groups 28 Your Own Number 28 PIN Code 89 PIN2 Code 91 Profiles 56 Activating 56 Any Key Answer 61 Customising 56 Keypad Tones 58 Low Battery Alert 61 Message Alert 60 Power On/Off Sound 59 Resetting 57 Ringer Type 57 Ringer Volume 57 Vibration 58 Warning Tone 59 Q Quick Reference 124 R Redialling 19 Auto Redial 19 S SAR 118 Screen Display 9 Security 89 Call Barring 91 Changing Handset Code 90 Changing PIN Code 90 Changing PIN2 Code 91 Enabling/Disablin
FM Sound Source 52 Operator 53 Troubleshooting 113 Turning Your Phone On/Off 14 V Voice Memo 68 Playing Back 69 Recording 68 123 Index
Function Key shortcuts Messages Press Press Press To lock and unlock the keypad. [Mute] Special Features Press and , . To display: Individual Call Timer On/Off Make a call Compose Inbox Outbox Settings Storing name and number 1.Press ,select "Add New Name". 2.Enter name, press . 3.Enter number, press . 4.Select number type, press . Select "Clear Timers" Cumulative Call Timer Select "All Calls" Basic Operation Answer a call End a call Press and hold Enter number. Press . Press . Press . .
Press during stand-by mode. Press or to scroll and press to access function. Camera My Phone 1 2 3 4 1 2 3 4 5 125 Image Gallery Sound Gallery Text Templates Memory Status Fun & Games 1 Games 2 Melody Editor 3 Tone Editor Messages Info-Service Browser MMS SMS Cell Broadcast Cell Info Voicemail (Depends on the contents of SIM card.
Kurzanleitung GX1 Tastenkombinationen Nachrichten Tastatur sperren/ entsperren „Letzter Anruf“ wählen Gesprächsdauer zurücksetzen Ein/Aus Nachrichten lesen Einstellungen Zelleninfo Ein Aus Voicemail Gesamtgesprächsdauer „Alle Anrufe“ wählen Gespräch entgegennehmen Gespräch beenden drücken drücken drücken Name und Nummer speichern 1. drücken, „Neuen Namen hinzufügen“ wählen 2.Name eingeben, drücken 3.Nummer eingeben, drücken 4.
im Standby drücken oder zum Blättern und zum Funktionsaufruf drücken Kamera Mein Telefon 1 2 3 4 Nachrichten 1 2 3 4 5 127 MMS SMS Cell Broadcast Zelleninfo Voicemail Quick Reference Bildgalerie Tongalerie Textvorlagen Speicherstatus Info-Services (Je nach Inhalt der SIM-Karte) Spiel & Spaß 1 Spiele 2 Melodieneditor 3 Toneditor Browser 1 Homepage 2 Lesezeichen Profile 1 2 3 4 5 Normal Besprechung Aktiv Kfz Lautlos Organizer 1 2 3 4 5 Rechner Kalender Uhr & Alarm Voice Memo Hilfe Einstellungen
Beknopt overzicht GX1 Sneltoetsen Berichten Druk tijdens standby op [ ]. Druk op of om de tekst te verschuiven. Druk op . MMS Vergrendelen en ontgrendelen van de toetsen. [Dempen] Opstellen Postvak IN Verstuurd Instellingen Cell Broadcast Selecteer “Laatste gesprek” Resetbare gesprekstellers Selecteer “Timers wissen” Gesprekstellers in totaal Selecteer “Alle gesprekken” Houd ingedrukt. Voer nummer in en druk op Druk op . Druk op . . Naam en nummer opslaan 1.
Druk tijdens de standby-modus op . Druk op of om te verschuiven en druk op om de functie te openen. Camera Mijn Telefoon 1 2 3 4 Berichten 1 2 3 4 5 129 MMS SMS Cell Broadcast Celinfo Voicemail Quick Reference Afbeeldingsgalerie Geluidsgalerie Tekstvoorbeelden Geheugenstatus Infoservices (Hangt af van de inhoud van de SIM-kaart.
SHARP CORPORATION TINSE1660AFZZ 02K 31.