LUCHTREINIGER met bevochtigingsfunctie Device of this mark is a trademark of Sharp Corporation. Plasmacluster is a registered trademark or a trademark of Sharp Corporation. BEDIENINGSHANDLEIDING OCZYSZCZASZ POWIETRZA z funkcją Nawilżania INSTRUKCJA OBSŁUGI Free standing type Freistehendes Modell Modèle sur pied Vrijstaand type Typ wolnostojący Tipo autónomo Напольный очиститель воздуха Жеке дара тұратын түрі SHARP CORPORATION OSAKA, JAPAN OM_KC-A60EU_EN.
Please read before operating your new Air Purifier The air purifier draws in room air from the air intake, passes the air through a PreFilter, a Washable Deodorizing Filter and a HEPA Filter inside of the unit, then discharges the air through the air outlet. The HEPA Filter can remove 99.97% of dust particles as small as 0.3 microns that pass through the filter and also helps absorb odours. The Washable Deodorizing Filter gradually absorbs odours as they pass through the filter.
ENGLISH Unique Combination of Air Treatment Technologies Triple Filtration System + Plasmacluster + Humidification TRAPS DUST* Washable pre-filter traps dust and other large airborne particles. DECREASES ODOURS Washable deodorizing filter absorbs many common household odours. REDUCES POLLEN & MOLD* HEPA filter traps 99.97% of particles as small as 0.3 microns. FRESHENS Plasmacluster treats the air similar to the way nature cleans the environment by emitting a balance of positive and negative ions.
IMPORTANT SAFETY INSTRUCTIONS When using electrical appliances, basic safety precautions should be followed, including the following: WARNING – To reduce the risk of electrical shock, fire or injury to persons: • Read all instructions before using the unit. • Use only a 220~240 volt outlet. • Do not use the unit if the power cord or plug is damaged or the connection to the wall outlet is loosened. • Periodically remove dust from the plug.
• Do not block the intake and/or air outlet. • Do not use the unit near or on hot objects, such as stoves or heaters, or where it may come into contact with steam. • Always operate the unit in an upright position. • Hold the unit by using the handles on both sides when moving. Do not move when the unit is in operation. • Do not move or change the direction of the main unit while dragging the casters.
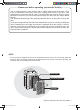
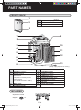
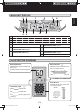
PART NAMES FRONT / BACK 1 2 1 2 3 Main Unit Display (Ref.E-5) Front Monitor Main Unit 3 1 2 9 3 4 10 11 5 12 6 7 13 8 (Shape of plug depends on country.
4 5 1 a b c 2 3 4 1 a 6 b 7 8 ENGLISH MAIN UNIT DISPLAY 2 3 c POWER ON Button CLEAN AIR MODE Button / INDICATOR LIGHT (green) CLEAN AIR & HUMIDIFY MODE Button / INDICATOR LIGHT (green) CLEAN ION SHOWER MODE Button / INDICATOR LIGHT (green) LIGHT CONTROL Button 5 CHILD-LOCK Button / INDICATOR LIGHT (green) Plasmacluster Ion ON / OFF Button / 6 Plasmacluster Sign INDICATOR LIGHT (green) 7 FAN SPEED Button / FILTER RESET Button / INDICATOR LIGHT (green) INDICATOR LIGHT (red) 8 POWER OFF Button ILLUS
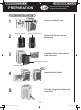
PREPARATION Be sure to remove the power plug from the wall outlet. FILTER INSTALLATION 1 Remove the Back Panel. 1 2 2 HEPA filter (White) Deodorizing filter (Black) Remove the Filters from the plastic bag. 3 Install the Filters in the correct order as shown. Deodorizing filter (Black) HEPA filter (White) Click 4 Install the Back Panel. 5 Fill in the usage start date on the Date Label. E-6 OM_KC-A60EU_EN.
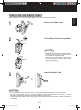
REFILLING THE WATER TANK 1 2 ENGLISH When using the Clean Air & Humidify Mode, or the Clean ION Shower Mode. Remove the Water Tank. 3 1 2 Fill the Water Tank with tap Water. MAX CAUTION • Check to see that there is no water leaking. • Be sure to wipe off any excess water on the outside of the Water Tank. • When carrying the Water Tank, hold it with both hands so that the Water Tank opening is facing up. Tighten 3 Install the Water Tank. 2 Click 1 CAUTION • Do not expose the unit to water.
OPERATION CLEAN AIR & HUMIDIFY Using to quickly clean the air, reduce odours and to humidify. START • Select the desired fan speed. (Ref. E-9) • Unless the power cord has been unplugged, the operations starts in the previous mode it was operated in. NOTE • Fill the Water Tank. (Ref. E-7) • When the Water Tank is empty, the unit will operate in “CLEAN AIR MODE” and (red).
CLEAN ION SHOWER ENGLISH Releases high-density Plasmacluster ions and discharges strong air flow for 60 minutes. START NOTE • If the “Plasmacluster Ion ” is OFF, the plasmacluster ion will be not released. • When the operation finishes, the unit will return to the prior operation mode. It is possible to switch this mode to another while operating. However, the CLEAN ION SHOWER mode will not function after switching mode. FAN SPEED Select the desired fan speed.
USEFUL FUNCTIONS LIGHT CONTROL Use this function to select the desired brightness. brighter darker turn off CHILD LOCK Operation of the unit display will be locked. It is the same method as starting operation. ON CANCELLATION more 3 sec. more 3 sec. SOUND INDICATOR SETTING The unit can be set to give an audible signal when the Water Tank is empty. ON CANCELLATION (with the unit OFF) (with the unit OFF) more 3 sec. more 3 sec.
CARE AND MAINTENANCE Be sure to remove the power plug from the wall outlet. FILTER INDICATOR ENGLISH The Indicator Light will turn on after approximately 720 hours. (30days×24hours=720) Reminder to perform maintenance of parts below. After performing maintenance, reset the Filter Indicator. (Ref. E-12) more 3 sec. CARE INDEX • Notice an unpleasant odour from the air • Filter Indicator Light turn on. outlet. Humidifying Filter (Ref. E-12) • Filter performance appears fall and / or odour persist.
CARE AND MAINTENANCE WATER TANK Rinse the inside with a small amount of water. CAUTION • Do not shake the Water Tank with holding the carrying handle. NOTE for stubborn dart... Clean inside of the water tank with a soft sponge and the tank cap with a cotton swab or a toothbrush. Tank cap Tooth brushs HUMIDIFYING FILTER Rinse with plenty of water. CAUTION • Do not remove the Humidifying Filter from a filter frame. • Avoid spilling water from the Humidifying Tray. NOTE for stubborn dart... 1.
Be sure to remove the power plug from the wall outlet. Humidifying Tray Cover 1. Remove the Humidifying Tray Cover. 2. Rinse the inside of the Humidifying Tray and the Humidifying Tray Cover with a tooth brush. ENGLISH HUMIDIFYING TRAY AND COVER CAUTION • Do not remove the Float and the Roller. • If the Float and / or the Roller comes off. (Ref. E-17) NOTE Float for stubborn dart... TRAY 1. Fill the tray half way with water. 2. Add a small amount of kitchen detergergent. 3. Sork for 30 minutes. 4.
CARE AND MAINTENANCE DEODORIZIING FILTER HAND WASH ONLY! DO NOT DRY IN CLOTHES DRYER! 1 Remove the dust on the DEODORIZING FILTER. 2 Rinse the DEODORIZING FILTER with water. CAUTION • When washing the filter for the first time, the rinse water may be brown. This does not affect deodorization performance. • Avoid bending or folding the filter when washing. 3 Remove as much of the moisture as possible. 4 Dry filter completely in a well ventilated area. When possible, dry outdoors.
Replacement timing Filter life will vary depending on the room environment, usage, and location of the unit. If dust or odour persists, replace the filter. (Refer to “Please read before operating your new Air Purifier”) The following filter life and replacement period is based on the condition of smoking 5 cigarettes per day and the dust collection/deodorization power is reduced by half compared wirh that of new filter.
TROUBLESHOOTING Before calling for service, please review the Troubleshooting chart below, since the problem may not be a unit malfunction. SYMPTOM REMEDY (not a malfunction) Odours and smoke are not removed. • Clean or replace the filters if they appear to be heavily soiled. (Ref. E-11,E-12,E-14) The Front Monitor illuminates green even when the air is impure. • The air could be impure at the time the unit was plugged in. Unplug the unit, wait one minute, and plug the unit in again.
SYMPTOM REMEDY (not a malfunction) When the Roller / Float was removed. FLOAT ENGLISH • Install the Roller / Float in order below. ROLLER Fix the roller in the tray from side way. 1. Insert the float under this tab. Float 2. Inner the tab of float into the hole. NOTE Tab Check the direction of the roller. Float 3. Insert the tab on the other side of the float into the hole. Cross-Section view AUTO RESTART After a power failure, automatically resume the operation when the power recovers.
TROUBLESHOOTING ERROR DISPLAY DIGITAL INDICATION If error occurs again, contact the Sharp Service Centre. LAMP INDICATION ERROR DETAILS REMEDY Flashing of the Clean Air & Humidify Indicator Light. Abnormal humidity filter. Verify if the Humidifying Filter, Humidifying Tray and Water Tank are properly installed and then turn power ON again. Flashing of the Fan Speed Indicator Light ' '. Abnormal fan motor. Turn power OFF to cancel the error display, wait one minute, and then turn power ON.
Model OM_KC-A60EU_EN.indd Sec1:19 47 *4 *3 *2 *1 11.0 9.2 3.0 ~21 400 ~26 35 13 144 40 15 168 MED 200 20 6.8 60 16 4 48 LOW 8.1 382 (W) × 242 (D) × 570 (H) Dust/Temperature & Humidity 450 42 19 180 46 25 216 MAX KC-A40EU Standby Power In order to operate the electrical circuits while the power plug is inserted in the wall outlet, this product consumes about 0.9 W of standby power. For energy conservation, unplug the power cord when the unit is not in use.
A. Information on Disposal for Users (private households) 1. In the European Union Attention: If you want to dispose of this equipment, please do not use the ordinary dust bin! Attention: Your product is marked with this symbol. It means that used electrical and electronic products should not be mixed with general household waste. There is a separate collection system for these products.
OM_KC-A60EU_DE.
Bitte lesen Sie sich diese Bedienungsanleitung vor der ersten Inbetriebnahme Ihres neuen Luftreinigers sorgfältig durch Der Luftreiniger saugt die Raumluft durch seinen Lufteinlass ein, führt diese Luft durch einen Vorfilter, einen auswaschbare Geruchsneutralisationsfilter sowie einen HEPA-Filter im Inneren des Geräts und gibt die gereinigte Luft anschließend über den Luftauslass wieder aus.
DEUTSCH INHALTSVERZEICHNIS Einzigartige Kombination unterschiedlichster Technologien zur Luftbehandlung Dreifaches Filtersystem + Plasmacluster + Luftbefeuchtung WICHTIGE SICHERHEITSHINWEISE ....... D-2 SAMMELT STAUB* Der auswaschbare Vorfilter entfernt Staub und andere größere Partikel aus der Luft. REDUZIERT GERÜCHE Der auswaschbare Geruchsneutralisationsfilter absorbiert die meisten herkömmlichen Haushaltsgerüche. BEZEICHNUNG DER EINZELNEN KOMPONENTEN .......................................
WICHTIGE SICHERHEITSHINWEISE Bei der Verwendung elektrischer Geräte müssen eine Reihe grundlegender Sicherheitshinweise einschließlich der folgenden beachtet werden: WARNUNG – Bitte halten Sie sich an die folgenden Anweisungen, um das Risiko von Stromschlägen, Bränden oder Verletzungen bei Personen zu vermeiden: • Lesen Sie sich die Bedienungsanleitung vor der Inbetriebnahme sorgfältig durch. • Verwenden Sie ausschließlich eine Steckdose mit einer Spannung von 220 ~ 240 Volt.
• Blockieren Sie niemals den Lufteinlass bzw. -auslass. • Verwenden Sie das Gerät niemals in der Nähe oder auf heißen Objekten wie beispielsweise Herde, oder an Orten, an denen es mit heißem Dampf in Kontakt kommen könnte. • Betreiben das Gerät stets in aufrechter Position. • Halten Sie das Gerät beim Transport immer an beiden Griffen fest. Transportieren Sie das Gerät nicht, wenn es in Betrieb ist.
BEZEICHNUNG DER EINZELNEN KOMPONENTEN VORDER-/HINTERSEITE 1 1 2 Anzeigen am Hauptgerät (Siehe dazu Seite D-5) Vorderanzeige Hauptgerät 2 3 3 1 2 9 3 4 10 11 5 12 6 7 13 8 (Der Stecker kann nach Land variieren.
6 7 8 DEUTSCH ANZEIGEN AM HAUPTGERÄT 2 3 1 4 5 1 a b c 2 3 4 a b c Taste EINSCHALTEN Taste LUFTREINIGUNGSMODUS / KONTROLLEUCHTE (grün) Taste LUFTREINIGUNGS- & BEFEUCHTUNGSMODUS / KONTROLLEUCHTE (grün) Taste IONENDUSCHE-MODUS / KONTROLLEUCHTE (grün) Taste LEUCHTANZEIGENSTEUERUNG 5 Taste KINDERSICHERUNG KONTROLLEUCHTE (grün) 6 Plasmacluster-Symbol Taste Plasmacluster-Ionen-EIN-/AUS / KONTROLLEUCHTE (grün) Taste FILTERRÜCKSTELLUNG / 7 Taste GEBLÄSEGESCHWINDIGKEIT / KONTROLLEUCHTE (rot) KONTROLLEUCHTE (
VORBEREITUNG Stellen Sie sicher, dass der Stecker von der Steckdose getrennt wird. FILTERINSTALLATION 1 1 Entfernen Sie die Rückwand. 2 HEPA-Filter (Weiß) 2 Geruchsneutralisationsfilter (Schwarz) 3 Entnehmen Sie die Filter aus dem Plastikbeutel. Installieren Sie die Filter in der richtigen Reihenfolge, wie abgebildet. Geruchsneutralisationsfilter (Schwarz) HEPA-Filter (Weiß) Klicken 4 Bringen Sie die Rückwand an. 5 Tragen Sie das Datum der Inbetriebnahme auf dem Datumsaufkleber ein.
AUFFÜLLUNG DES WASSERBEHÄLTERS 1 2 Entnehmen Sie den Wasserbehälter. 3 1 2 DEUTSCH Wenn Sie das Gerät im Luftreinigungs- und Luftbefeuchtungs- oder Ionendusche-Reinigungsmodus verwenden. Füllen Sie den Wasserbehälter mit Leitungswasser. MAX VORSICHT • Stellen Sie sicher, dass keinerlei Wasser austritt. • Wischen Sie überschüssiges Wasser von der Außenseite des Wasserbehälters ab.
BETRIEB LUFTREINIGUNG & BEFEUCHTUNG Wird verwendet, um die Raumluft schnell und effektiv zu reinigen, unerwünschte Gerüche zu beseitigen und die Luft zu befeuchten. START • Wählen Sie die gewünschte Gebläsegeschwindigkeit aus. (Siehe dazu Seite D-9) • Außer wenn das Netzkabel getrennt wurde, wird der Betrieb im Modus beginnen, in dem das Gerät vorher betrieben wurde. ANMERKUNG • Auffüllung des Wasserbehälters.
IONENDUSCHE In diesem Modus werden hoch verdichtete Plasmacluster-Ionen freigesetzt und das Gerät gibt für 60 Minuten einen starken Luftstrom ab. DEUTSCH START ANMERKUNG • Wenn "Plasmacluster Ionen ” auf AUS steht, werden keine Plasmacluster-Ionen freigesetzt. • Sobald das Verfahren abgeschlossen wird, kehrt das Gerät zum vorherigen Betriebsmodus zurück. Es ist möglich in einen anderen Modus zu wechseln OFF während dieser Modus aktiv ist.
NÜTZLICHE FUNKTIONEN LEUCHTANZEIGENSTEUERUNG Mit dieser Taste kann die Helligkeit der Anzeigen geregelt werden. heller dunkler Schalten Sie aus KINDERSICHERUNG Die Funktion der Geräteanzeigen wird gesperrt. Es handelt sich um das selbe Verfahren, wie beim Betriebsstart. STORNIERUNG EIN länger als 3 Sek. länger als 3 Sek. TONANZEIGER-EINSTELLUNG Das Gerät kann eingestellt werden, um ein akustisches Signal bei leerem Wasserbehälter abzugeben.
PFLEGE UND WARTUNG Stellen Sie sicher, dass der Stecker von der Steckdose getrennt wird. FILTER-KONTROLLEUCHTE Erinnerung zur Wartung der folgenden Teilen. Nach Ablauf der Wartung, die Filteranzeige zurücksetzen. (Siehe dazu Seite D-12) länger als 3 Sek. DEUTSCH Die Kontrolleuchte beginnt nach etwa 720 Betriebsstunden zu leuchten. (30 Tage × 24 Std.=720) PFLEGE-INDEX • Sie bemerken einen unangenehmen Geruch • Filteranzeige leuchtet auf. aus dem Luftauslass.
PFLEGE UND WARTUNG WASSERBEHÄLTER Reinigen Sie die Innenseite mit einer kleinen Menge Wasser. VORSICHT • Schütteln Sie nicht den Wasserbehälter während Sie den Tragegriff halten. ANMERKUNG Bei hartnäckigen Verschmutzungen... Reinigen Sie die Innenseite des Wasserbehälters mit einem weichen Schwamm und den Behälterdeckel mit einem Wattestäbchen oder einer Zahnbürste. Behälterdeckel Zahnbürste LUFTBEFEUCHTUNGSFILTER Mit reichlichem Wasser abspülen.
Stellen Sie sicher, dass der Stecker von der Steckdose getrennt wird. Abdeckung der Luftbefeuchtungswanne 1. Nehmen Sie die Abdeckung der Luftbefeuchtungswanne ab. 2. Reinigen Sie die Innenseite der Luftbefeuchtungswanne und dessen Abdeckung mit einer Zahnbürste. DEUTSCH LUFTBEFEUCHTUNGSWANNE UND ABDECKUNG VORSICHT • Entnehmen Sie nicht den Schwimmer und die Walze. • Wenn der Schwimmer und/oder die Walze abgeht. (Siehe dazu Seite D-17) ANMERKUNG 1. Füllen Sie die Wanne bis zur Mitte mit Wasser. 2.
PFLEGE UND WARTUNG GERUCHSNEUTRALISATIONSFILTER NUR HANDWÄSCHE! NICHT IN DEN WÄSCHETROCKNER GEBEN! 1 Entfernen Sie den Staub vom GERUCHSNEUTRALISATIONSFILTER. 2 Spülen Sie den GERUCHSNEUTRALISATIONSFILTER mit Wasser. VORSICHT • Beim ersten Waschen des Filters könnte das Spülwasser braun werden. Dies beeinträchtigt nicht die Geruchsneutralisationsleistung. • Vermeiden Sie das Biegen oder Knicken des Filters beim Waschen. 34 Entfernen Sie soviel Feuchtigkeit wie möglich.
FILTERERSATZ Die Lebensdauer der Filter variiert je nach Betriebsumgebung des Geräts, Verwendungshäufigkeit sowie Aufstellungsort. Falls das Gerät die Raumluft nicht mehr von Staub oder Gerüchen reinigt, müssen die Filter ausgetauscht werden.
STÖRUNGSBESEITIGUNG Sehen Sie sich bei Problemen mit dem Gerät bitte zuerst die unten aufgeführte Tabelle zur Störungsbeseitigung an, bevor Sie den Kundendienst konsultieren, da es sich bei einigen Problemen u. U. nicht um eine Fehlfunktion des Geräts handelt. PROBLEM ABHILFE (keine Fehlfunktion) Gerüche und Rauch werden nicht beseitigt. • Reinigen Sie die Filter oder tauschen Sie diese aus, falls sie extrem verunreinigt sind.
PROBLEM ABHILFE (keine Fehlfunktion) SCHWIMMER DEUTSCH • Installieren Sie die Walze/der Schwimmer in folgender Reihenfolge. Wenn die Walze/der Schwimmer entfernt wurde. WALZE Fixieren Sie die Walze der Wanne an der Seite. 1. Setzen Sie den Schwimmer unter dieser Lasche. Schwimmer 2. Schieben Sie die Lasche des Schwimmers in das Loch. ANMERKUNG Tab Überprüfen Sie die Richtung der Walze. Schwimmer 3. Schieben Sie die Lasche auf der anderen Seite des Schwimmers in das Loch.
STÖRUNGSBESEITIGUNG FEHLERANZEIGE DIGITALE ANZEIGE Falls die Störung erneut auftreten sollte, kontaktieren Sie die Service Niederlassungen von Sharp. LEUCHTANZEIGE FEHLER-EINZELHEITEN ABHILFE Blinken der Kontrolleuchte für die Luftreinigung & Befeuchtung. Abnormale Feuchtigkeitsfilter-Funktion. Stellen Sie sicher, dass der Luftbefeuchtungsfilter, die Luftbefeuchtungswanne und der Wasserbehälter ordnungsgemäß installiert wurden und schalten Sie wieder EIN.
OM_KC-A60EU_DE.indd Sec1:19 Gebläsegeschwindigkeit (m3/Std.) Geräuschpegel (dBA) Nennleistung (W) Gebläsegeschwindigkeit (m3/Std.
A. Entsorgungsinformationen für Benutzer aus Privathaushalten 1. In der Europäischen Union Achtung: Werfen Sie dieses Gerät zur Entsorgung bitte nicht in den normalen Hausmüll ! Achtung: Ihr Produkt trägt dieses Symbol. Es besagt, dass Elektro- und Elektronikgeräte nicht mit dem Haushaltsmüll entsorgt, sondern einem getrennten Rücknahmesystem zugeführt werden sollten.
OM_KC-A60EU_FR.
Veuillez lire ces instructions avant de faire fonctionner votre nouveau purificateur d’air Le purificateur d'air achemine l'air de la pièce par l'entrée d'air, le fait passer à l'intérieur de l'appareil par un pré-filtre, un filtre désodorisant lavable et un filtre HEPA, puis l'air est évacué par la sortie d'air. Le filtre HEPA peut arrêter 99,97 % des particules de poussière, jusqu'à une taille de 0,3 microns, passant par le filtre tout en aidant à absorber les odeurs.
FRANÇAIS Combinaison unique de techniques de traitement de l’air Action de trois filtres + Plasmacluster + humidification CAPTE LA POUSSIÈRE* Le pré-filtre lavable capte la poussière et les autres grosses particules en suspension dans l’air. RÉDUIT LES ODEURS Le filtre désodorisant lavable absorbe un grand nombre d'odeurs domestiques courantes. RÉDUIT LE POLLEN ET LES MOISISSURES* L e f i l t r e H E PA b l o q u e 9 9 , 9 7 % d e s particules jusqu'à 0,3 microns.
INSTRUCTIONS DE SÉCURITÉ IMPORTANTES Lors de l’utilisation d’appareils électriques, les précautions de sécurité de base doivent être suivies, notamment les suivantes : AVERTISSEMENT - Pour réduire le risque d’électrocution, d’incendie ou de blessures corporelles : • Lisez toutes les instructions avant d’employer l’appareil. • Utilisez uniquement une prise de 220 ~ 240 volts.
• N’obturez ni l’ouïe d’entrée, ni l’ouïe d’évacuation. • N’utilisez pas l’appareil sur des objets chauds ou à proximité, comme sur une cuisinière ou un radiateur ou près d’une source de vapeur d’eau. • Utilisez toujours l’appareil en position verticale. • Tenez l’appareil par les poignées situées de chaque côté lorsque vous le déplacez. Ne déplacez pas l’appareil lorsqu’il est en cours de fonctionnement. • Ne pas déplacer ou changer la direction de l’appareil lorsque vous le traînez par les roulettes.
DÉSIGNATION DES PIÈCES AVANT / DOS DE L’APPAREIL 1 1 2 Affichage de l’unité principale (Voir. F-5) 2 3 Moniteur avant Unité principale 3 1 2 9 3 4 10 11 5 12 6 7 13 8 (Le type de fiche dépend des pays.
4 5 1 a b c 2 3 4 a b 7 8 FRANÇAIS AFFICHAGE DE L’UNITÉ PRINCIPALE 2 3 1 6 c Touche de Mise en marche de l’appareil Touche de Mode d’épuration de l’air / Voyant indicateur (vert) Touche de Mode d’épuration de l’air et d’humidification / Voyant indicateur (vert) Touche de Mode d’épuration par pluie d’ions / Voyant indicateur (vert) Touche de Contrôle des témoins 5 Touche de Verrou-enfant / Voyant indicateur (vert) Touche de Marche/Arrêt du Plasmacluster / 6 Indicateur Plasmacluster (vert) Voyant indi
PRÉPARATION La prise d’alimentation doit être débranchée du secteur. INSTALLATION DE FILTRE 1 1 Retirez le panneau arrière. 2 Filtre HEPA (blanc) Filtre désodorisant (noir) 2 Retirez le filtre du sac en plastique. 3 Installez les filtres dans l’ordre correct comme indiqué. Filtre désodorisant (noir) Filtre HEPA (blanc) Clic 4 Fixez le panneau arrière. 5 Notez la date de départ d’utilisation des filtres sur l’étiquette de date. F-6 OM_KC-A60EU_FR.
REMPLISSAGE DU RÉSERVOIR D’EAU Retirez le réservoir à eau. 3 1 FRANÇAIS 1 2 2 Remplissez le réservoir à eau avec de l’eau du robinet. MAX ATTENTION • Assurez-vous qu’il n’y a pas de fuite d’eau. • Ne manquez pas d’essuyer tout excès d’eau sur l’extérieur du réservoir. • Lorsque vous transportez le réservoir d’eau, tenez-le à deux mains et orientez son ouverture vers le haut. Serrez 3 Installez le réservoir à eau. 2 Clic 1 ATTENTION • N’exposez pas l’appareil à l’eau.
FONCTIONNEMENT EPURATION ET HUMIDIFICATION DE L’AIR À utiliser pour épurer rapidement l’air, réduire les odeurs et humidifier. DÉMARRAGE • Choisissez la vitesse de ventilation souhaitée. (Voir. F-9) • Le fonctionnement démarre dans le mode précédemment utilisé à moins que le cordon d’alimentation ait été débranché. NOTE • Remplissez le réservoir d’eau. (Voir. F-7) • Lorsque le réservoir à eau est vide, l’appareil va fonctionner en “MODE D’ÉPURATION D’AIR” et clignote (en rouge).
EPURATION PAR PLUIE D’IONS Libère des ions Plasmacluster à haute densité et émet un puissant courant d’air pendant 60 minutes. DÉMARRAGE • Si l’option “Ions Plasmacluster ” est DESACTIVÉE, les ions plasmacluster ne seront pas libérés. • Une fois l’opération terminée, l’appareil rétablit l’opération précédente. Il est possible de changer de mode et de positionner sur pendant ce mode. FRANÇAIS NOTE VITESSE DE VENTILATION Choisissez la vitesse de ventilation souhaitée.
FONCTIONS UTILES CONTRÔLE DES TÉMOINS Utilisez cette fonction pour choisir la luminosité souhaitée. plus clair plus sombre désactivé VERROU ENFANT Le fonctionnement de l’affichage de l’appareil sera verrouillé. C’est la même méthode que le démarrage du fonctionnement. ANNULATION MARCHE plus de 3 sec. plus de 3 sec. RÉGLAGE DE L’INDICATEUR SONORE L’appareil peut être réglé pour émettre un bip lorsque le réservoir à eau est vide.
SOIN ET ENTRETIEN La prise d’alimentation doit être débranchée du secteur. VOYANT DU FILTRE Le voyant indicateur s’allume au bout d’environ 720 heures d’utilisation. (30 jours x 24 heures = 720) Rappel pour exécuter la maintenance des éléments ci-dessous. Après avoir effectué l’entretien, réinitialisez le voyant indicateur de filtre. (Voir. F-12) INDEX DE MAINTENANCE • Vous remarquez une odeur désagréable • Le voyant de filtre s’allume. FRANÇAIS plus de 3 sec. provenant de l’échappement d’air.
SOIN ET ENTRETIEN RÉSERVOIR D’EAU Rincez l’intérieur avec une petite quantité d’eau. ATTENTION • Ne pas secouer le réservoir à eau en le tenant par sa poignée de transport. NOTE Pour les taches rebelles... Nettoyez l’intérieur du réservoir à eau avec une éponge douce et le bouchon du réservoir avec un coton-tige ou une brosse à dents. Bouchon du réservoir Brosse à dents FILTRE D’HUMIDIFICATION Rincez abondamment à l’eau. ATTENTION • Ne pas retirer le filtre d’humidification du cadre du filtre.
La prise d’alimentation doit être débranchée du secteur. HUMIDIFICATION BAC ET COUVERTURE Couvercle du bac d’humidification 1. Retirez le couvercle du bac d’humidification. 2. Rincez l’intérieur du bac d’humidification et le couvercle du bac d’humification avec une brosse à dent. • Ne pas enlever le flotteur et le rouleau. • Si le flotteur et/ou le rouleau sortent. (Voir. F-17) NOTE Flotteur Pour les taches rebelles... BAC 1. Remplissez le bac d’eau jusqu’à la moitié. 2.
SOIN ET ENTRETIEN FILTRE DÉSODORISANT LAVAGE À LA MAIN UNIQUEMENT! PAS DE SÉCHAGE EN MACHINE! 1 Retirez la poussière du FILTRE DÉSODORISANT. 2 Rincez le FILTRE DÉSODORISANT à l’eau. ATTENTION • Lorsque vous lavez le filtre pour la première fois, l’eau de rinçage peut être brune. Ceci ne compromet en rien le pouvoir de désodorisation. • Veillez à ne pas plier ou tordre le filtre lors du lavage. 3 Débarrassez-le le plus possible de l’humidité.
REMPLACEMENT DES FILTRES La durée de vie des filtres varie selon les conditions ambiantes, l’emploi et l’emplacement de l’appareil. Si la poussière ou les odeurs persistent, remplacez les filtres. (Reportez-vous à « Veuillez lire ces instructions avant de faire fonctionner votre nouveau purificateur d’air ».
RÉSOLUTION DES PROBLÈMES Avant de faire appel au SAV, veuillez lire le tableau de résolution de problèmes ci-dessous, car le problème n’est peut être pas un dysfonctionnement de l’appareil. SYMPTÔME SOLUTION (pas un dysfonctionnement) Les odeurs et la fumée ne sont pas éliminées. • Nettoyez ou remplacez les filtres s’ils semblent très sales. (Voir. F-11, F-12, F-14.) Le moniteur avant s’allume en vert même lorsque l’air est impur. • L’air était peut-être pollué au moment où l’appareil a été branché.
SYMPTÔME SOLUTION (pas un dysfonctionnement) • Installez le rouleau/flotteur dans l’ordre ci-dessous. Si le rouleau/flotteur a été retiré. FLOTTEUR ROULEAU Fixez le rouleau dans le bac depuis le côté. 1. Insérez le flotteur sous cette languette. FRANÇAIS Flotteur 2. Insérez la languette du flotteur dans la fente. NOTE Languette 3. Insérez la languette de l’autre côté du flotteur dans la fente. Flotteur Vérifiez l’orientation du rouleau.
RÉSOLUTION DES PROBLÈMES AFFICHAGE D’ERREUR AFFICHAGE NUMERIQUE Si l’erreur de reproduit, contactez le centre de service Sharp. AFFICHAGE LUMINEUX ORIGINE DE L’ERREUR SOLUTION Clignotement du voyant indicateur d’épuration de l’air et d’humidification. Anomalie du filtre d’humidification. Vérifiez si le filtre d’humidification, le bac d’humidification et le réservoir d’eau sont bien installés, puis rallumez l’appareil. Clignotement du voyant indicateur de vitesse du ventilateur Faible « ».
(m3/heure) OM_KC-A60EU_FR.
A. Informations sur la mise au rebut à l’intention des utilisateurs privés (ménages) 1. Au sein de l’Union européenne Attention : si vous souhaitez mettre cet appareil au rebut, ne le jetez pas dans une poubelle ordinaire ! Attention : votre produit comporte ce symbole. Il signifie que les produits électriques et électroniques usagés ne doivent pas être mélangés avec les déchets ménagers généraux. Un système de collecte séparé est prévu pour ces produits.
OM_KC-A60EU_NL.
Lees het onderstaande aandachtig door voordat u uw nieuwe luchtreiniger in gebruik neemt De luchtreiniger neemt via de luchtinlaat de kamerlucht op, voert de lucht achtereenvolgens door een voorfilter, een afwasbaar geurfilter en een HEPA-filter en blaast de lucht via de luchtuitlaat weer de kamer in. Het HEPA-filter verwijdert 99,97 % van alle deeltjes groter dan 0,3 micron. Deze worden door het filter opgezogen. Geuren die het afwasbaar geurfilter passeren, worden geleidelijk opgenomen.
NEDERLANDS Unieke combinatie van 3 luchtbehandelingstechnologieën Drievoudig filtratiesysteem + Luchtzuivende Plasmacluster ionen + Luchtbevochtiger PLASMACLUSTER-IONEN Plasmacluster ionen zijn luchtzuiverende negatieve en positieve ionen, die een natuurlijke scheikundige reactie aangaan met deeltjes in de lucht die daarbij worden ontbonden of gedeactiveerd. VANGT STOFDEELTJES EN POLLEN OP* Het afwasbaar voorfilter vangt stofdeeltjes, pollen en andere grote luchtgedragen deeltjes op.
BELANGRIJKE VEILIGHEIDSVOORSCHRIFTEN Bij het gebruik van elektrische apparaten dient u altijd enkele fundamentele veiligheidsvoorschriften in acht te nemen, waaronder: WAARSCHUWING – Om het gevaar voor een elektrische schok, brand of lichamelijk letsel te voorkomen: • Lees alle instructies goed door voordat u de luchtreiniger in gebruik neemt. • Gebruik uitsluitend een stopcontact van 220 ~ 240 volt.
• Blokkeer de luchtinlaat en/of luchtuitlaat niet. • Gebruik de luchtreiniger niet in de buurt van of boven hete voorwerpen, zoals een kachel of oven, noch op plaatsen waar hij aan stoom kan worden blootgesteld. • Gebruik de luchtreiniger altijd rechtopstaand. • Gebruik altijd de handgrepen aan weerszijden van de luchtreiniger om het toestel te verplaatsen. Verplaats de luchtreiniger niet terwijl deze is ingeschakeld.
BENAMING VAN DE ONDERDELEN VOORZIJDE / ACHTERZIJDE 1 1 2 Bedieningspaneel (Zie pagina N-5) 2 3 Display Hoofdtoestel 3 1 2 9 3 4 10 11 5 12 6 7 13 8 (Vorm van stekker is afhankelijk van land.
4 5 1 a b c 2 3 4 1 a 6 b 7 8 c AAN-knop Programmaknop Luchtreinigen met / indicator (groen) Programmaknop Luchtreinigen & Luchtbevochtigen met / indicator (groen) Programmaknop CLEAN ION SHOWER met / indicator (groen) Verlichtingknop 5 Kinderslotknop / met indicator (groen) Plasmaclusterknop AAN / UIT met 6 Plasmacluster teken indicator (groen) 7 Ventilatorsnelheidknop met / indicator Filterresetknop met / indicator (rood) NEDERLANDS BEDIENINGSPANEEL 2 3 (groen) 8 UIT-knop ILLUSTRATIEVE SCHEM
VOORBEREIDING Trek de stekker uit het stopcontact voordat u de luchtreiniger installeert of de filters plaatst. FILTERINSTALLATIE 1 1 Verwijder het achterpaneel. Druk voorzichtig op de lipjes en neem het achterpaneel al kantelend weg. 2 HEPA-filter (wit) Afwasbaar geurfilter (zwart) 2 Neem het afwasbaar geurfilter (zwart) en het HEPA-filter (wit) uit het plastic. 3 Installeer de filters in de juiste volgorde, zoals afgebeeld.
VULLEN VAN HET WATERRESERVOIR Indien u het programma luchtreinigen & bevochtigen gebruikt of het programma ionendouche reinigen. Verwijder het Waterreservoir. 3 1 2 Vul het Waterreservoir met kraanwater. MAX NEDERLANDS 1 2 LET OP • Controleer of er geen water uit het waterreservoir lekt. • Droog de buitenkant van het waterreservoir af, indien u water heeft gemorst. • Houd het waterreservoir met beide handen en met de opening naar boven vast. Vastmaken 3 Installeer het Waterreservoir.
BEDIENING LUCHT REINIGEN & BEVOCHTIGEN Gebruiken om snel de lucht te reinigen, geurtjes te verminderen en om te bevochtigen. START • Kies de gewenste ventilatorsnelheid. (Zie pagina N-9) • Tenzij het stroomsnoer is losgekoppeld, begint de bediening in het vorige programma waarin hij is gebruikt. OPMERKING • Vul het Waterreservoir. (Zie pagina N-7) • Als het Waterreservoir leeg is, werkt de unit in de "PROGRAMMA LUCHT REINIGEN" en knippert (rood).
IONENDOUCHE REINIGEN Laat hoge-dichtheid Plasmacluser ionen vrijkomen en voert gedurende 60 minuten een sterke luchtstroom af. START OPMERKING NEDERLANDS • Als de "Plasmacluster ionen " UIT staat, wordt de plasmacluster ionen niet vrijgegeven. • Als de bediening voltooid is, keer de unit terug naar het vorige bedieningsprogramma. Het is mogelijk naar een andere programma te gaan tijdens dit programma. VENTILATORSNELHEID Kies de gewenste ventilatorsnelheid.
NUTTIGE FUNCTIE BESTURING LAMPJES Gebruik deze functie om de gewenste helderheid te kiezen. helderder donkerder doe uit KINDERSLOT Bediening van de display van de unit is vergrendeld. Dit is dezelfde methode als het beginnen met de bediening. AAN BEËINDIGEN 3 seconden meer 3 seconden meer INSTELLING GELUIDSINDICATOR De unit kan worden ingesteld met een signaal met hoorbare pieptoon als het Waterreservoir leeg is.
Zorg ervoor dat de stekker uit het stopcontact is gehaald. VERZORGING EN ONDERHOUD FILTERINDICATOR Het indicatorlampje gaat na ongeveer 720 uur aan. (30 dagen × 24 uur=720) Herinnering om onderhoud uit te voeren aan onderstaande onderdelen. Na het uitvoeren van onderhoud, zet u de filterindicator terug. (Zie pagina N-12) 3 seconden meer VERZORGINGSINDEX waarnemen. Bevochtigingsfilter (Zie pagina N-12) • Filterprestatie lijkt te verminderen en / of geurtje houdt aan.
VERZORGING EN ONDERHOUD WATERRESERVOIR Spoel de binnenkant met een kleine hoeveelheid water. LET OP • Schud het Waterreservoir niet terwijl u de draaghendel vasthoudt. .OPMERKING voor hardnekkig vuil... Maak de binnenkant van het waterreservoir schoon met een zachte spons, en het tankdopje met een wattenstaafje of een tandenborstel. Tankdopje Tandenborstel BEVOCHTIGINGSFILTER Spoel met ruim water. LET OP • Verwijder het bevochtigingsfilter niet van het filterframe.
Zorg ervoor dat de stekker uit het stopcontact is gehaald. BEVOCHTIGINGSLADE EN -AFDEKKING Afdekking bevochtigingslade 1. Verwijder de afdekking van de bevochtigingslade 2. Spoel de binnenkant van de bevochtigingslade af en maak de afdekking van de bevochtigingslade schoon met een tandenborstel. LET OP • Verwijder de vlotter en de roller niet. • Als de vlotter en/of de roller loslaten. (Zie pagina N-17) Vlotter voor hardnekkig vuil... LADE 1. Vul de lade tot halverwege met water. 2.
VERZORGING EN ONDERHOUD AFWASBAAR GEURFILTER UITSLUITEND MET DE HAND WASSEN! NIET DROGEN IN EEN DROGER! 1 Verwijder het stof op het AFWASBAAR GEURFILTER. 2 Spoel het AFWASBAAR GEURFILTER af met water. LET OP • Als u het filter voor de eerste keer wast, kan het spoelwater mogelijk bruin zijn. Dit heeft geen invloed op de werking van het geurfilter. • Voorkom het buigen of vouwen van het filter tijdens het wassen. 3 Verwijder zo veel mogelijk vocht.
FILTERVERVANGING Vervanging bepalen De levensduur van het filter hangt af van de omgeving, het gebruik en de lokatie van de luchtreiniger. Als stof of geurtjes aanhouden, vervangt u het filter.
PROBLEMEN OPLOSSEN Lees de onderstaande tabel voordat u contact opneemt met een reparateur. Een probleem duidt niet altijd op een defect. PROBLEEM OPLOSSING (geen defect) Geuren en rook worden niet verwijderd. • Reinig of vervang de filters als ze erg vuil lijken. (Zie pagina’s N-11, N-12, N-14) De stof of geur monitor licht groen op hoewel de lucht niet schoon is. • Mogelijk was de lucht niet schoon op het moment waarop de stekker in het stopcontact werd gestoken.
PROBLEEM OPLOSSING (geen defect) Als de roller/vlotter verwijderd zijn geweest. • Installeer de roller/vlotter in onderstaande volgorde. VLOTTER ROLLER Maak de roller vast in de lade vanaf de zijkant. Vlotter 1. Plaats de vlotter onder dit lipje. OPMERKING Klem Controleer de richting van de roller. Vlotter 3. Steek het lipje aan de andere kant van de vlotter in de uitsparing. NEDERLANDS 2. Steek het lipje van de vlotter in de uitsparing.
PROBLEMEN OPLOSSEN FOUTAANDUIDINGEN DIGITALE INDICATIE Neem contact op met het Sharp servicecenter wanneer dezelfde fout nogmaals optreedt. LAMPINDICATIE FOUTDETAILS Het indicatorlampje Lucht reinigen & bevochtigen knippert. Indicatorlampje van de ventilatorsnelheid knippert ' '. - Het indicatorlampje Ionendouche reinigen knippert. OPLOSSING Abnormaal bevochtigingsfilter.
OM_KC-A60EU_NL.indd Sec1:19 40 *4 *3 *2 *1 11,0 9,2 3,0 ~21 400 ~26 35 13 144 40 15 168 MED 200 20 6,8 60 16 4 48 LAAG 8,1 382 (B) × 242 (D) × 570 (H) Stof/temperatuur & luchtvochtigheid 450 42 19 180 46 25 216 MAX KC-A40EU NEDERLANDS Stand-by stroomverbruik Voor het voeden van de elektrische circuits terwijl de stekker in het stopcontact zit, verbruikt deze luchtreiniger in de stand-by ongeveer 0,9 W.
A. Informatie over afvalverwijdering voor gebruikers (particuliere huishoudens) 1. In de Europese Unie Let op: Deze apparatuur niet samen met het normale huisafval weggooien! Let op: Uw product is van dit merkteken voorzien. Dit betekent dat afgedankte elektrische en elektronische apparatuur niet samen met het normale huisafval mogen worden weggegooid. Er bestaat een afzonderlijk inzamelingssysteem voor deze producten.
OM_KC-A60EU_PL.
Przeczytaj przed korzystaniem ze swojego nowozakupionego oczyszczacza powietrza Oczyszczacz powietrza pobiera powietrze z pomieszczenia poprzez wlot powietrza, które następnie przechodzi przez filtr wstępny powietrza, zmywalny filtr dezodoryzujący i filtr HEPA znajdujące się wewnątrz urządzenia, a następnie jest wydmuchiwane przez wylot powietrza. Filtr HEPA może usunąć do 99,97% cząsteczek kurzu, które przechodzą przez filtr, o wielkości od 0,3 mikrona, i pomaga absorbować zapachy.
POLSKI Unikalna kombinacja technologii uzdatniania powietrza Potrójny system filtracji + generator jonów Plasmacluster + nawilżacz WYŁAPUJE KURZ* Zmywalny filtr wstępny wyłapuje kurz i inne duże lotne cząsteczki. OGRANICZA ZAPACHY Zmywalny filtr dezodoryzujący absorbuje wiele zapachów obecnych powszechnie w gospodarstwach domowych OGRANICZA OBECNOŚĆ PYŁKÓW I PLEŚNI* Filtr HEPA zatrzymuje 99,97% cząsteczek o rozmiarze od 0,3 mikrona.
WAŻNE INSTRUKCJE DOTYCZĄCE BEZPIECZEŃSTWA Podczas korzystania z wszelkich urządzeń elektrycznych należy przestrzegać podstawowych środków bezpieczeństwa, w tym następujących: OSTRZEŻENIE – Aby ograniczyć ryzyko wystąpienia porażenia elektrycznego, powstania pożaru lub zranienia osób należy: • Zapoznać się z instrukcją przed korzystaniem z urządzenia. • Korzystać wyłącznie z gniazd elektrycznych o napięciu 220~240 V.
OSTRZEŻENIA DOTYCZĄCE OBSŁUGI • Nie należy używać urządzenia w pobliżu ani na gorących przedmiotach, takich jak piekarniki lub grzejniki, ani w miejscach, w których może mieć ono kontakt z parą. • Należy zawsze używać urządzenia w pozycji pionowej, skierowanej ku górze. • Podczas przenoszenia należy trzymać urządzenie za oba uchwyty znajdujące się po obu jego stronach. Nie należy przenosić urządzenia podczas jego pracy. • Nie należy przenosić ani zmieniać pozycji urządzenia ciągnąc je za nóżki.
NAZWY CZĘŚCI PRZÓD / TYŁ 1 2 1 Wyświetlacz jednostki głównej (Patrz strona P-5) 2 3 Monitor przedni Jednostka główna 3 1 2 9 3 4 10 11 5 12 6 7 13 8 (Kształt wtyczki zależy od kraju.
WYŚWIETLACZ JEDNOSTKI GŁÓWNEJ 2 3 1 6 1 a b c 2 3 4 a b 8 c Przycisk WŁĄCZNIKA Przycisk trybu CLEAN AIR (OCZYSZCZANIA POWIETRZA) / KONTROLKA(zielona) Przycisk trybu CLEAN AIR & HUMIDIFY (OCZYSZCZANIA I NAWILŻANIA POWIETRZA) / KONTROLKA (zielona) Przycisk trybu CLEAN ION SHOWER (STRUMIENIA CZYSTYCH JONÓW) / KONTROLKA (zielona) Przycisk STEROWANIA OŚWIETLENIEM 5 Przycisk CHILD LOCK (BLOKADY RODZICIELSKIEJ)/KONTROLKA (zielona) Przycisk WŁ./WYŁ.
PRZYGOTOWANIA Należy upewnić się, że wyjęto wtyczkę z gniazdka elektrycznego. INSTALACJA FILTRA 1 Należy zdemontować panel tylny. 1 2 2 Filtr HEPA (biały) Filtr dezodoryzujący (czarny) Należy wyjąć filtry z torebki plastikowej. 3 Należy zainstalować filtry w odpowiedniej kolejności, tak jak pokazano. Filtr dezodoryzujący (czarny) Filtr HEPA (biały) Kliknięcie 4 Należy zainstalować panel tylny. 5 Należy wpisać datę rozpoczęcia użytkowania na etykiecie z datą. P-6 OM_KC-A60EU_PL.
UZUPEŁNIANIE ZBIORNIKA WODY Podczas używania trybu oczyszczania i nawilżania powietrza lub trybu strumienia czystych jonów. 1 2 Należy zdemontować zbiornik wody. 3 1 2 Należy napełnić zbiornik wody wodą z kranu. POLSKI MAX OSTRZEŻENIE • Należy upewnić się, że nie nastąpił wyciek wody. • Należy wytrzeć nadmiar wody z zewnętrznej strony zbiornika wody. • Podczas przenoszenia zbiornika wody należy trzymać go oburącz w taki sposób, aby otwarta część zbiornika wody była skierowana ku górze.
OBSŁUGA OCZYSZCZANIE I NAWILŻANIE POWIETRZA Stosowane do szybkiego oczyszczenia powietrza, ograniczenia zapachów i nawilżenia powietrza. URUCHOMIENIE • Należy wybrać żądaną prędkość wentylatora. (Patrz strona. P-9) • Jeśli kabel zasilający urządzenia nie został odłączony od sieci energetycznej, urządzenie rozpoczyna pracę w trybie, w którym znajdowało się poprzednio. UWAGA • Należy uzupełnić zbiornik wody. (Patrz strona.
STRUMIEŃ CZYSTYCH JONÓW Uwalnia jony Plasmacluster o wysokim stężeniu i wyzwala silny przepływ powietrza przez 60 minut. URUCHOMIENIE UWAGA • Jeśli „generator jonów Plasmacluster ” jest WYŁĄCZONA, oznacza to, że nie nastąpi uwolnienie jonów Plasmacluster. • Po zakończeniu pracy urządzenie powróci do poprzedniego trybu pracy. Podczas tego trybu można dokonać zmiany na inny tryb oraz . PRĘDKOŚĆ WENTYLATORA AUTO POLSKI Pozwala wybrać żądaną prędkość wentylatora.
PRZYDATNE FUNKCJE STEROWANIE PODŚWIETLENIEM Funkcja ta pozwala na ustawienie żądanego poziomu jasności. jaśniej ciemniej wyłączona BLOKADA RODZICIELSKA Obsługa wyświetlacza urządzenia zostanie zablokowana. Działa na takiej samej zasadzie jak rozpoczęcie pracy. ANULOWANIE WŁĄCZENIE co najmniej 3 sekundy co najmniej 3 sekundy USTAWIENIE BRZĘCZYKA Urządzenie może sygnalizować dźwiękowo za pomocą brzęczyka opróżnienie zbiornika wody.
CZYSZCZENIE I KONSERWACJA Należy upewnić się, że wyjęto wtyczkę z gniazdka elektrycznego. WSKAŹNIK FILTRA Kontrolka zaświeci się po około 720 godzinach. (30 dni × 24 godziny = 720 godzin) Poniżej znajduje się przypomnienie o konieczności wykonywania czynności konserwacyjnych na wybranych częściach, Po wykonaniu czynności konserwacyjnych należ zresetować wskaźnik filtra. (Patrz strona. P-12) co najmniej 3 sekundy WSKAŹNIK OBSŁUGI • Zauważalny jest nieprzyjemny zapach • Wskaźnik filtra świeci się.
CZYSZCZENIE I KONSERWACJA ZBIORNIK WODY Należy spłukać wnętrze zbiornika niewielką ilością wody. OSTRZEŻENIE • Nie należy potrząsać zbiornikiem trzymając go za uchwyty do przenoszenia. UWAGA W przypadku uciążliwych zabrudzeń... Należy wyczyścić wnętrze zbiornika wody miękką gąbką, a korek zbiornika bawełnianym wacikiem lub szczoteczką do zębów. Korek zbiornika Szczoteczka do zębów FILTR NAWILŻAJĄCY Spłukać dużą ilością wody. OSTRZEŻENIE • Nie należy wyjmować filtra nawilżającego z ramki filtra.
Należy upewnić się, że wyjęto wtyczkę z gniazdka elektrycznego. POJEMNIK NAWILŻACZA I POKRYWA pojemnika nawilżacza 1. Należy zdemontować pokrywę pojemnika nawilżacza. 2. Należy spłukać wnętrze pojemnika nawilżacza i pokrywę pojemnika nawilżacza z użyciem szczoteczki do zębów. OSTRZEŻENIE • Nie należy demontować pływaka ani rolki. • Jeśli pływak i/lub rolka zostaną zdemontowane. (Patrz strona. P-17) W przypadku uciążliwych zabrudzeń... UWAGA 1. Napełnić pojemnik do połowy wodą. 2.
OBSŁUGA I KONSERWACJA CZYSZCZENIE I KONSERWACJA FILTR DEZODORYZUJĄCY MYĆ WYŁĄCZNIE RĘCZNIE! NIE SZUSYĆ W SUSZARKACH DO UBRAŃ! 1 Usunąć kurz znajdujący się na FILTRZE DEZODORYZUJĄCYM. 2 Spłukać FILTR DEZODORYZUJĄCY wodą. OSTRZEŻENIE • Podczas zmywania filtra po raz pierwszy, spłukiwana woda może barwić się na brązowo. Nie ma to wpływu na wydajność filtra dezodoryzującego. • Należy unikać zginania i zgniatania filtra podczas jego mycia. 3 Należy usunąć tyle wilgoci, ile możliwe.
WYMIANA FILTRA Czas wymiany Długość życia filtra różni się w zależności od środowiska pomieszczenia, wykorzystywania i lokalizacji urządzenia. Jeśli zapylenie lub zapachy utrzymują się, należy wymienić filtr.
ROZWIĄZYWANIE PROBLEMÓW Przed skontaktowaniem się z serwisem zapoznaj się z poniższą tabelą poświęconą rozwiązywaniu problemów, ponieważ problem nie musi oznaczać usterki. OBJAW ZALECENIE (brak konieczności naprawy) Zapachy i dym nie są usuwane. • Wyczyść lub wymień filtry, jeśli wydają się mocno zabrudzone. (Patrz strony. P-11, P-12, P-14) Przedni monitor jest podświetlony na zielono nawet gdy powietrze nie jest czyste. • Powietrze mogło nie być czyste w momencie podłączenia urządzenia.
OBJAW ZALECENIE (brak konieczności naprawy) Jeśli pływak/rolka zostały zdemontowane. • Należy zainstalować rolkę/pływak zgodnie z poniższą procedurą. PŁYWAK ROLKA 1. Należy włożyć pływak pod tę wypustkę. Należy zamocować rolkę w pojemniku od strony bocznej. Pływak 2. Należy włożyć wypustkę pływaka do otworu. UWAGA 3. Należy włożyć wypustkę z drugiej strony pływaka do otworu. Pływak Należy sprawdzić kierunek rolki.
ROZWIĄZYWANIE PROBLEMÓW SYGNALIZACJA BŁĘDÓW WSKAZANIE CYFROWE WSKAZANIE KONTROLEK Jeśli błąd wystąpi ponownie należy skontaktować się z Centrum serwisowym firmy Sharp. SZCZEGÓŁY DOTYCZĄCE BŁĘDU ZALECENIE Miganie kontrolki Oczyszczania i nawilżania powietrza. Nieprawidłowe działanie filtra nawilżającego. Sprawdź, czy filtr nawilżający, pojemnik nawilżacza i zbiornik wody są poprawnie zainstalowane, i WŁĄCZ zasilanie ponownie. Miganie kontrolki prędkości wentylatora ' '.
OM_KC-A60EU_PL.indd Sec1:19 49 47 Dezodoryzujący Zatrzymujący kurz *4 *3 *2 *1 600 47 36 288 49 42 306 3,6 ~28 500 ~38 41 20 216 41 18 216 MAKSYMALNA ŚREDNIA 11,0 416 (szer.) × 295 (gł.) × 643 (Wys.) 9,2 399 (szer.) × 273 (gł.) × 603 (Wys.) 2,0 Zmywalny dezodoryzujący HEPA z kontrolą mikrobów *4 250 23 7,4 90 16 4,3 60 NISKA 3,0 ~21 400 ~26 35 13 144 40 15 168 200 20 6,8 60 16 4 48 NISKA 8,1 382 (szer.) × 242 (gł.) × 570 (Wys.
A. Informacje dla użytkownika dotyczące utylizacji (prywatne gospodarstwa domowe) 1. Na terenie Unii Europejskiej Uwaga: Nie wyrzucać sprzętu tego typu do zwykłego kosza na śmieci! Uwaga: Zakupiony produkt oznaczony jest niniejszym symbolem. Oznacza on, że zużyte produkty elektryczne i elektroniczne nie powinny być mieszane z odpadami gospodarczymi. Prowadzony jest specjalny program odbierania takich produktów.
OM_KC-A60EU_RU.
Прочтите, пожалуйста, перед эксплуатацией Вашего нового очистителя воздуха Очиститель воздуха производит забор комнатного воздуха через отверстие забора воздуха, пропускает воздух через фильтр предварительной очистки, моющийся дезодорирующий фильтр и фильтр HEPA, расположенные внутри устройства, а затем выпускает воздух через отверстие для выхода воздуха. Фильтр HEPA способен уловить 99,97 % частиц пыли, размером до 0,3 микрона, которые проходят через фильтр, а также помогает поглощать запахи.
РУССКИЙ Уникальная комбинация технологий очистки воздуха С и с т ема т р о й н о й ф и л ьт р а ц и и + Plasmacluster + Увлажнение УЛАВЛИВАЕТ ПЫЛЬ* Моющийся фильтр предварительной очистки улавливает пыль и другие крупные взвешенные в воздухе частицы. УМЕНЬШАЕТ ЗАПАХИ Моющийся дезодорирующий фильтр поглощает многие обычные домашние запахи. СНИЖАЕТ КОЛИЧЕСТВО ПЫЛЬЦЫ И ПЛЕСЕНИ* Фильтр HEPA улавливает 99,97 % частиц размером до 0,3 микрон.
ВАЖНЫЕ ИНСТРУКЦИИ ПО ТЕХНИКЕ БЕЗОПАСНОСТИ При эксплуатации электроприборов необходимо соблюдать основные меры предосторожности, которые включают следующее: ПРЕДУПРЕЖДЕНИЕ – Для снижения вероятности поражения электрическим током, возгорания и травматизма: • Полностью прочтите инструкции перед эксплуатацией данного устройства. • Следует использовать толко напряжение 220 - 240 В переменного тока.
МЕРЫ ПРЕДОСТОРОЖНОСТИ ПРИ ЭКСПЛУАТАЦИИ • Не блокируйте отверстия забора/выхода воздуха. • Не эксплуатируйте данное устройство вблизи или на источниках тепла, например печах или нагревателях, или в местах, где на устройство может воздействовать пар. • Эксплуатируйте устройство только в вертикальном положении. • При перемещении держите устройство за обе ручки, расположенные по бокам. Не передвигайте работающее устройство. • Не перемещайте основной блок и не меняйте его направление, волоча на колёсиках.
НАЗВАНИЯ УЗЛОВ ВИД СПЕРЕДИ / ВИД СЗАДИ 1 1 2 Дисплей основного блока (Стр. R-5) Передний индикатор Основной блок 2 3 3 1 2 9 3 4 10 11 5 12 6 7 13 8 (Форма вилки зависит от страны.
ДИСПЛЕЙ ОСНОВНОГО БЛОКА 2 3 1 6 4 5 1 a b c 2 3 4 a b 7 8 c Кнопка Включения питания Кнопка Режима очистки воздуха / Индикатор (зеленый) Кнопка Режима очистки воздуха и увлажнения / Индикатор (зелёный) Кнопка Режима ионного дождя / Индикатор (зеленый) Кнопка Управления индикаторами 5 Кнопка Защиты от доступа детей / Индикатор (зеленый) Кнопка Plasmacluster ВКЛ/ВЫКЛ / 6 Знак Plasmacluster Индикатор (зеленый) Кнопка Сброса фильтра / 7 Кнопка Скорости вентилятора / (зеленый) Индикатор (красный) Индикато
ПОДГОТОВКА Убедитесь, что вилка вынута из розетки. УСТАНОВКА ФИЛЬТРОВ 1 Снимите заднюю панель. 1 2 2 Фильтр HEPA (Белый) Дезодорирующий фильтр (Чёрный) Выньте фильтр из полиэтиленового мешка. 3 Установите фильтры в правильном порядке как показано на рисунке. Дезодорирующий фильтр (Чёрный) Фильтр HEPA (Белый) До щелчка 4 Установите заднюю панель. 5 Запишите дату начала эксплуатации на наклейке с датами. R-6 OM_KC-A60EU_RU.
ЗАПОЛНЕНИЕ ЁМКОСТИ ВОДОЙ При использовании режима очистки воздуха и увлажнения или режима ионного дождя. 1 2 Выньте ёмкость для воды. 3 1 2 Заполните ёмкость водопроводной водой. MAX ОСТОРОЖНО • Проверьте, чтобы вода не подтекала. • Лишнюю воду на внешней стенке ёмкости удаляй- те тряпкой. • При переноске ёмкости держите её в обеих руках отверстием вверх. РУССКИЙ Затяните 3 Установите ёмкость для воды. 2 До щелчка 1 ОСТОРОЖНО • Не подвергайте устройство воздействию воды.
ЭКСПЛУАТАЦИЯ ОЧИСТКА ВОЗДУХА И УВЛАЖНЕНИЕ Используйте для быстрой очистки воздуха, уменьшения запахов и увлажнения. ЗАПУСК • Выберите необходим ую ск орость вентилятора. (Стр. R-9) • Если вилка шнура питания не была вынута из розетки между включениями, то устройство автоматически возобновит работу согласно последним установкам. ПРИМЕЧАНИЕ • Заполните ёмкость водой. (Стр. R-7) • Если емкость для воды пуста, то устройство будет работать в режиме ”РЕЖИМ ОЧИСТКИ ВОЗДУХА”, а индикатор будет мигать (красным).
ИОННОГО ДОЖДЯ Выпускаются ионы Plasmacluster в высокой концентрации и в течение 60 минут подается мощный поток воздуха. ЗАПУСК ПРИМЕЧАНИЕ • Если функция “Ион Plasmacluster ” установлена на ВЫКЛ, то ионы plasmacluster выпускаться не будут. • Когда работа в этом режиме завершается, устройство вер-нётся к работе в режиме, в котором оно работало до этого. Во время выполнения данного режима можно . выбрать другой режим или значение СКОРОСТЬ РАБОТЫ ВЕНТИЛЯТОРА Выберите необходимую скорость вентилятора.
ПОЛЕЗНЫЕ ФУНКЦИИ УПРАВЛЕНИЯ ИНДИКАТОРАМИ Используйте данную функцию для выбора необходимой яркости. ярче темнее выключить ЗАЩИТА ОТ ДОСТУПА ДЕТЕЙ Работа с дисплеем устройства будет заблокирована. Разблокирование производится тем же способом. ОТМЕНА ВКЛ более 3 сек. более 3 сек. УСТАНОВКА ЗВУКОВОЙ ИНДИКАЦИИ Можно установить звуковой сигнал оповещения, когда ёмкость для воды окажется пустой. ВКЛ ОТМЕНА (с выключенным устройством) (с выключенным устройством) более 3 сек. более 3 сек.
УХОД И ОБСЛУЖИВАНИЕ Убедитесь, что вилка вынута из розетки. ИНДИКАТОР ФИЛЬТРА Этот индикатор загорается примерно после 720 часов работы. (30 дней x 24 часа=720) более 3 сек. Напоминание о выполнении технического обслуживания нижеприведенных деталей. После выполнения обслуживания произведите переустановку индикатора фильтра. (Стр. R-12) ПОКАЗАТЕЛИ О НЕОБХОДИМОСТИ ОБСЛУЖИВАНИЯ • Заметен неприятный запах, исходящий из • Индикатор фильтра включен. отверстия для выхода воздуха. Увлажняющий фильтр (Стр.
УХОД И ОБСЛУЖИВАНИЕ ЁМКОСТЬ Промойте емкость внутри небольшим количеством воды. ОСТОРОЖНО • Не трясите ёмкость, держась за ручку для переноски. ПРИМЕЧАНИЕ Для удаления трудноудаляемых пятен... Почистите ёмкость внутри мягкой губкой, а крышку ёмкости ватной палочкой или зубной щеткой. Крышка ёмкости Зубная щетка УВЛАЖНЯЮЩИЙ ФИЛЬТР Промойте большим количеством воды. ОСТОРОЖНО • Не вынимайте увлажняющий фильтр из рамки фильтра. • Следите, чтобы из лотка не пролилась вода.
Убедитесь, что вилка вынута из розетки. ЛОТОК ДЛЯ ВОДЫ И КРЫШКА Крышку лотка для воды 1. Снимите крышку лотка для воды. 2. Почистите внутри лотка для воды и крышку зубной щеткой. ОСТОРОЖНО • Не вынимайте поплавок и ролик. • Если поплавок и / или ролик выпали. (Стр. R-17) Поплавок ЛОТОК 1. Наполовину наполните лоток водой. 2. Добавьте небольшое количество средства для мытья посуды. 3. Замочите на 30 минут. 4. Смойте средство для мытья посуды чистой водой. КРЫШКА 1.
УХОД И ОБСЛУЖИВАНИЕ ДЕЗОДОРИРУЮЩИЙ ФИЛЬТР ТОЛЬКО РУЧНАЯ МОЙКА! НЕ СУШИТЕ В СУШИЛЬНОЙ МАШИНЕ ДЛЯ ОДЕЖДЫ! 1 Удалите грязь с ДЕЗОДОРИРУЮЩЕГО ФИЛЬТРА. 2 Промойте ДЕЗОДОРИРУЮЩИЙ ФИЛЬТР водой. ОСТОРОЖНО • При промывке фильтра в первый раз, вода может стать коричневого цвета. Это не влияет на дезодорирующие характеристики фильтра. • Не гните и не складывайте фильтр во время мытья. 3 Удалите как можно больше влаги. 4 Полностью высушите фильтр в хорошо проветриваемом помещении.
ЗАМЕНА ФИЛЬТРА Замена сроки Сроки службы фильтров зависят от условий в помещении, времени работы и места расположения устройства. Если в воздухе остается пыль и запахи, замените фильтры. (Смотрите «Прочтите, пожалуйста, перед эксплуатацией Вашего нового очистителя воздуха».) Срок службы и период замены фильтров рассчитан исходя из условий, что в день выкуривается 5 сигарет, и способность улавливания пыли/дезодорирования сокращается в 2 раза по сравнению с новым фильтром.
УСТРАНЕНИЕ НЕИСПРАВНОСТЕЙ Преж де чем обратиться в с ервисный центр, пожа луйста, прочтите информацию по устранению неисправностей, так как проблема может быть не связана с поломкой устройства. ПРОБЛЕМА УСТРАНЕНИЕ (проблема не является поломкой устройства) Запахи и дым не удаляются. • Прочистите или замените фильтры, если они сильно загрязнены. (Стр. R-11, R-12 и R-14). Индикатор чистоты воздуха горит зелёным цветом при загрязнённом воздухе.
УСТРАНЕНИЕ (проблема не является поломкой устройства) ПРОБЛЕМА Если ролик / поплавок выпал. • Установите ролик / поплавок в порядке, показанном ниже. ПОПЛАВОК РОЛИК Зафиксируйте ролик в лотке сбоку. 1. Вставьте поплавок под этим выступом. Поплавок 2. Вставьте выступ поплавка в отверстие. ПРИМЕЧАНИЕ Выступ 3. Вставьте выступ на другой стороне поплавка в отверстие. Поплавок Проверьте направление вращения ролика.
УСТРАНЕНИЕ НЕИСПРАВНОСТЕЙ Сообщения об ошибках Если ошибка возникает снова, свяжитесь с сервисным центром Sharp. ЦИФРОВАЯ ИНДИКАЦИЯ СОСТОЯНИЕ ИНДИКАТОРА СОДЕРЖАНИЕ ОШИБОК УСТРАНЕНИЕ Мигание индикатора режима очистки воздуха и увлажнения. Неисправность увлажняющего фильтра Проверьте правильность установки увлажняющего фильтра, лотка для воды и ёмкости и снова включите питание.
OM_KC-A60EU_RU.indd Sec1:19 49 600 ~48 730 Увлажнение (мл/час)*1 40 44 47 Номинальная мощность (Вт) 24 270 40 22 270 СРЕД KC-A60EU Уровень шума (дБA) 366 Уровень шума (дБA) Объем очищаемого воздуха (м3/час) 60 396 МАКС Номинальная мощность (Вт) Дезодорирующий 11.0 Вес нетто (кг) *4 *3 *2 600 47 36 288 49 42 306 МАКС 3,6 ~28 500 ~38 41 20 216 41 18 216 СРЕД 9.2 399 (Ш) × 273 (Г) × 603 (В) 2.
R-20 OM_KC-A60EU_RU.
OM_KC-A60EU_PT.
Por favor leia antes de começar a operar o seu novo Purificador de Ar O purificador de ar aspira o ar da sala a partir da entrada de ar, passa o ar através de um Pré-Filtro, um Filtro Desodorizante Lavável e um Filtro HEPA dentro da unidade, e descarrega depois o ar através da saída de ar. O Filtro HEPA consegue remover 99,97% de partículas de pó tão pequenas como 0,3 mícrones que passam pelo do filtro e consegue também absorver odores.
PORTUGUÊS Combinação Única de Tecnologias de Tratamento do Ar Sistema de Filtração Tripla + Plasmacluster + Humidificação CAPTURA PÓ* O pré-filtro lavável captura o pó e outras partículas aéreas grandes. REDUZ ODORESS O filtro desodorizante lavável absorve muitos odores domésticos comuns. REDUZ PÓLEN E BOLOR* O filtro HEPA captura 99,97% das partículas tão pequenas como 0,3 mícrones.
IMPORTANTES INSTRUÇÕES DE SEGURANÇA Quando utilizar aparelhos eléctricos, deve seguir precauções básicas de segurança, incluindo as seguintes: AVISO – Para reduzir o risco de choque eléctrico, incêndios ou lesões: • Leia todas as instruções antes de utilizar a unidade. • Utilize apenas uma tomada de 220~240 volts. • Não utilize a unidade se o cabo de alimentação ou a ficha estiverem danifi cados ou ainda se a ligação à tomada de parede estiver solta. • Remova o pó da ficha de forma periódica.
• Não bloqueie a admissão e/ou exaustão de ar. • Não utilize a unidade perto ou em cima de objectos quentes, como estufas ou aquecedores, ou em sítios em que pode contactar com vapor. • Trabalhe sempre com a unidade principal numa posição vertical. • Segure a unidade usando as pegas em ambos os lados quando a movimentar. Não mova a unidade enquanto esta estiver a funcionar. • Não mova ou mude a direcção da unidade principal enquanto arrastar os rodízios.
NOME DAS PEÇAS FRENTE / ATRÁS 1 1 2 2 3 Mostrador da Unidade Principal (Veja Pt-5) Monitor Frontal Unidade Principal 3 1 2 9 3 4 10 11 5 12 6 7 13 8 (A forma da ficha depende do país.
MOSTRADOR DA UNIDADE PRINCIPAL 2 3 1 6 4 5 3 4 b 8 c Botão LIGAR Botão MODO LIMPEZA DE AR / LUZ INDICADORA (verde) Botão MODO LIMPEZA DE AR E HUMIDIFICAÇÃO / LUZ INDICADORA (verde) Botão MODO LIMPEZA COM CHUVEIRO IÓNICO / LUZ INDICADORA (verde) Botão CONTROLO DE LUZ 5 Botão BLOQUEIO PARA CRIANÇAS / LUZ INDICADORA (verde) Botão LIGAR / DESLIGAR Ião Plasmacluster 6 Sinal Plasmacluster / LUZ INDICADORA (verde) Botão REINÍCIO DO FILTRO / 7 Botão VELOCIDADE VENTOINHA / LUZ INDICADORA (vermelho) LUZ INDICAD
PREPARAÇÃO Certifique-se de que remove a ficha de alimentação da tomada de parede. INSTALAÇÃO DOS FILTROS 1 1 Remova o Painel Traseiro. 2 Filtro HEPA (branco) Filtro Desodorizante (preto) 2 Remova os Filtros do saco de plástico. 3 Instale os Filtros na ordem correcta como mostrado. Filtro Desodorizante (preto) Filtro HEPA (branco) Clique 4 Instale o Painel Traseiro. 5 Preencha a data de início de utilização no Rótulo da Data. Pt-6 OM_KC-A60EU_PT.
ENCHER O TANQUE DE ÁGUA Quando usar o Modo Limpeza de Ar e Humidificação ou o Modo Limpeza com Chuveiro IÓNICO. 1 2 Remova o Tanque de Água. 3 1 2 Encha o Tanque de Água com água da torneira. MÁX MAX • Verifique se não existem fugas de água. • Certifique-se de que limpa qualquer excesso de água na parte de fora do Tanque de Água. • Quando transportar o Tanque de Água, segure-o com ambas as mãos de forma a que a abertura do Tanque de Água esteja virada para cima.
FUNCIONAMENTO LIMPEZA DE AR E HUMIDIFICAÇÃO Utilizar para limpar rapidamente o ar, reduzir odores e para humidificar. INICIAR • Seleccione a velocidade desejada da ventoinha. (Veja Pt-9) • A menos que o cabo de alimentação tenha sido desligado, o funcionamento inicia no modo em que funcionou anteriormente. NOTA • Encha o Tanque de Água. (Veja Pt-7) • Quando o Tanque de Água estiver vazio, a unidade irá funcionar em “MODO LIMPEZA DE AR” e pisca (vermelho).
LIMPEZA COM CHUVEIRO IÓNICO Liberta iões Plasmacluster de alta densidade e descarrega um fluxo de ar intenso durante 60 minutos. INICIAR NOTA • Se o “Ião Plasmacluster ” está DESLIGADO, o ião plasmacluster não será libertado. • Quando a operação terminar, a unidade irá voltar ao modo de funcionamento anterior. Esta é capaz de mudar o outro modo e durante este modo.
FUNÇÃO ÚTIL CONTROLO DE LUZES Utilize esta função para seleccionar o brilho. mais brilhante mais escuro desligado BLOQUEIO PARA CRIANÇAS O funcionamento do mostrador da unidade será bloqueado. A operação de início será bloqueada. CANCELAMENTO LIGADO mais de 3 seg. mais de 3 seg. DEFINIÇÃO DO INDICADOR SONORO A unidade pode ser definida para sinalizar com um bip audível quando o Tanque de Água está vazio. LIGADO CANCELAMENTO (com a unidade DESLIGADA) (com a unidade DESLIGADA) mais de 3 seg.
CUIDADOS E MANUTENÇÃO Certifique-se de que remove a ficha de alimentação da tomada de parede. INDICADOR DO FILTRO A Luz Indicadora ligar-se-á depois de aproximadamente 720 horas. (30dias×24horas=720) Lembrete para executar a manutenção de peças abaixo. Depois de executar a manutenção, reinicie o Indicador do Filtro. (Veja Pt-12) mais de 3 seg. ÍNDICE DA CUIDADOS • Nota um odor desagradável que vem da • Luz do Indicador do Filtro ligada. saída de ar.
CUIDADOS E MANUTENÇÃO TANQUE DE ÁGUA Enxagúe o interior com pouca quantidade de água. CUIDADO • Não abane o Tanque de Água quando o segurar apenas pela pega de transporte. NOTA para sujidade difícil de remover... Limpe dentro do tanque de água com uma esponja suave e a tampa do tanque com um cotonete ou uma escova de dentes. Tampa do tanque Escova de Dentes FILTRO DE HUMIDIFICAÇÃO Enxagúe com muita água. CUIDADO • Não remova o Filtro Humidificador da moldura do filtro.
Certifique-se de que remove a ficha de alimentação da tomada de parede. TABULEIRO DE HUMIDIFICAÇÃO E TAMPA Tampa do Tabuleiro de Humidificação 1. Remova a Tampa do Tabuleiro de Humidificação. 2. Enxagúe o interior do Tabuleiro de Humidificação e a Tampa do Tabuleiro de Humidificação com uma escova de dentes. CUIDADO • Não remova a Bóia e o Rolo. • Se a Bóia e / ou o Rolo saírem. (Veja Pt-17) Bóia para sujidade difícil de remover... TABULEIRO 1. Encha o tabuleiro até meio com água. 2.
CARE AND MAINTENANCE CUIDADOS E MANUTENÇÃO FILTRO DESODORIZANTE LAVE APENAS À MÃO! NÃO SEQUE NUM SECADOR DE ROUPA! 1 Remova o pó no FILTRO DESODORIZANTE. 2 Enxagúe o FILTRO DESODORIZANTE com água. CUIDADO • Quando lavar o filtro pela primeira vez, a água com que o enxaguar pode ficar castanha. Isto não afecta o desempenho da desodorização. • Evite dobrar ou vincar o filtro quando o lavar. 3 Remova o máximo de humidade que conseguir. 4 Seque completamente o filtro numa área bem ventilada.
SUBSTITUIÇÃO DO FILTRO Tempo de substituição A vida do filtro irá variar dependendo do ambiente da sala, utilização e localização da unidade. Se o pó ou odor persistir, substitua o filtro. (Refira-se a “Por favor leia antes de utilizar o seu novo Purificador de Ar”) O seguinte período de vida e substituição do filtro é baseado na condição de fumar 5 cigarros por dia e a colecção de pó/poder de desodorização é reduzido a metade comparado com o do novo filtro.
RESOLUÇÃO DE PROBLEMAS Antes de solicitar assistência, por favor reveja a tabela de Resolução de Problemas abaixo, uma vez que o problema pode não ser um mau funcionamento da unidade. SINTOMA RESOLUÇÃO (não é mau funcionamento) Odores e fumo não são removidos. • Limpe ou substitua os filtros se parecerem demasiado sujos. (Veja Pt-11,Pt-12,Pt-14) O Monitor Frontal ilumina a verde mesmo quando o ar está impuro. • O ar pode estar impuro no momento em que a unidade foi ligada à corrente.
SINTOMA RESOLUÇÃO (não é mau funcionamento) • Instale o Rolo / Bóia na ordem abaixo. Quando o Rolo / Bóia foi removido. BÓIA ROLO Fixe o rolo no tabuleiro pelos lados. 1. Insira o bóia debaixo desta etiqueta. Bóia 2. Insira a etiqueta da bóia no buraco. NOTA Etiqueta Verifique a direcção do rolo. Bóia 3. Insira a etiqueta no outro lado da bóia no buraco. REINICIAR AUTOMÁTICO O Reiniciar Automático pode ser definido.
RESOLUÇÃO DE PROBLEMAS APRESENTAÇÃO DE ERRO Se o erro ocorrer de novo, contacte o Centro de Assistência Sharp. INDICAÇÃO DIGITAL INDICAÇÃO DA LÂMPADA DETALHES DO ERRO SOLUÇÃO Piscar da Luz Indicadora de Limpeza de Ar e Humidificação Filtro de humidade anormal. Verifique se o Filtro de Humidificação, Tabuleiro de Humidificação e Tanque de Água estão apropriadamente instalados e torne a LIGAR a alimentação. Piscar da Luz Indicadora da Velocidade da Ventoinha ' '. Motor da ventoinha anormal.
OM_KC-A60EU_PT.indd Sec1:19 Velocidade da Ventoinha Nível de Ruído (dBA) Potência Nominal (W) Velocidade da Ventoinha (m3/hora) (m3/hora) *4 *3 *2 *1 3.6 ~28 ~38 500 60 9.2 3.0 ~21 ~26 400 35 13 144 40 15 168 MÉD 200 20 6.8 60 16 4 48 BAIXO 8.
A. Informações sobre a Eliminação de Produtos para os Utilizadores (particulares) 1. Na União Europeia Atenção: Se quiser eliminar este equipamento, não o deve fazer juntamente com o lixo doméstico comum! Atenção: O seu produto está identificado com este símbolo. Significa que os produtos eléctricos e electrónicos não devem ser misturados com o lixo doméstico comum. Existe um sistema de recolhas específico para estes produtos.
OM_KC-A60EU_Kaz.
Жаңа ауа тазартқышты пайдаланудан бұрын оқып шығыңыз Ауа тазартқыш бөлмедегі ауаны ауа сорғыштан сорып, ауаны қондырғы ішіндегі алдын ала тазартатын сүзгіден, жуылмалы хошиістендіргіш сүзгіден жəне HEPA сүзгісінен өткізеді, содан кейін ауаны ауа шығару тесігінен шығарады. HEPA сүзгісі сүзгіден өтетін ұсақтығы 0,3 микрон болатын шаң бөлшектерінің 99,97% ұстай алады жəне иістерді сіңіруге де көмектеседі. Жуылмалы хошиістендіргіш сүзгі ауадағы иістерді сүзгіден өтуі барысында біртіндеп сіңіреді.
ҚАЗАҚША Ауа тазарт у технологияларының ерекше жиынтығы Үш реттік сүзгілеу жүйесі + Плазмалық кластер + Ылғалдандыру ШАҢДЫ ТҰТЫП ҚАЛАДЫ* Жуылмалы алдын ала тазартатын сүзгі шаңды жəне басқа да ірі ауа бөлшектерін тұтып қалады. ИІСТЕРДІ АЗАЙТАДЫ Жуылмалы хошиістендіргіш сүзгі көптеген əдеттегі тұрмыстық иістерді сіңіреді. ГҮЛ ТОЗАҢЫН ЖƏНЕ ЗЕҢДІ АЗАЙТАДЫ* HEPA сүзгісі ұсақтығы 0,3 микронға тең бөлшектердің 99,97% ұстап қалады.
МАҢЫЗДЫ ҚАУІПСІЗДІК НҰСҚАУЛАРЫ Электр құрылғыларын пайдаланған кезде, қауіпсіздікке қатысты негізгі сақтық шаралары орындалуы тиіс, оның ішінде келесі де бар: АБАЙ БОЛЫҢЫЗ – Электр тогының соғу, өрт немесе адамдардың жарақат алу қаупін азайту: • Қондырғыны пайдаланудан бұрын барлық нұсқауларды оқыңыз. • Тек 220~240 вольттық кернеуі бар ток көзін пайдаланыңыз. • Қондырғыны қуат сымы немесе ашасы зақымдалған болса немесе жардағы розетка жалғанар тұс босаған болса пайдаланбаңыз.
ПАЙДАЛАНУҒА ҚАТЫСТЫ САҚТЫҚ ЕСКЕРТУЛЕРІ • Сору тесігін жəне/немесе ауа шығару тесігін бітемеңіз. • Қондырғыны пештер немесе жылытқыштар сияқты ыстық нəрселердің маңында немесе үстінде немесе будың əсеріне ұшырауы мүмкін жерлерде пайдаланбаңыз. • Қондырғыны əрдайым тік күйде пайдаланыңыз. • Қондырғыны қозғаған кезде екі жағындағы тұтқаларынан ұстаңыз. Қондырғыны жұмыс істеп тұрғанда қозғамаңыз. • Дөңгелектері арқылы сүйреген кезде негізгі қондырғыны қозғамаңыз немесе бағытын өзгертпеңіз.
БӨЛШЕК АТАУЛАРЫ АЛДЫҢҒЫ ЖАҚ / АРТҚЫ ЖАҚ 1 2 1 Негізгі қондырғы дисплейі (K-5 бетті қараңыз) Алдыңғы монитор Негізгі қондырғы 2 3 3 1 2 9 3 4 10 11 5 12 6 7 13 8 (Аша пішіні елге байланысты өзгеше келеді.
НЕГІЗГІ ҚОНДЫРҒЫ ДИСПЛЕЙІ 2 3 1 6 4 5 1 a b c 2 3 4 a b 7 8 c ІСКЕ ҚОСУ түймешігі ТАЗА АУА РЕЖИМІ түймешігі / ИНДИКАТОР ШАМЫ (жасыл) ТАЗА АУА ЖƏНЕ ЫЛҒАЛДАНДЫРУ РЕЖИМІ түймешігі / ИНДИКАТОР ШАМЫ (жасыл) ТАЗА ИОНДЫ ДУШ РЕЖИМІ түймешігі / ИНДИКАТОР ШАМЫ (жасыл) ШАМДЫ БАҚЫЛАУ түймешігі 5 БАЛА ҚҰЛПЫ түймешігі / ИНДИКАТОР ШАМЫ (жасыл) 6 Плазмалық кластер белгісі Плазмалық кластер ионын ҚОСУ・ АЖЫРАТУ түймешігі / 7 ЖЕЛДЕТКІШ ЖЫЛДАМДЫҒЫ ИНДИКАТОР ШАМЫ (жасыл) түймешігі / СҮЗГІНІ БАСТАПҚЫ ҚАЛПЫНА ИНДИКАТОР ША
ДАЙЫНДАУ Қуат ашасын жардағы розеткадан суыруды ұмытпаңыз. СҮЗГІНІ ОРНАТУ 1 Артқы панельді алып тастаңыз. 1 2 2 HAPA сүзгісі (ақ) Хошиістендіргіш сүзгі (қара) Пластмассалық сөмкеден сүзгілерді шығарыңыз. 3 Сүзгілерді көрсетілгендей дұрыс ретте орнатыңыз. Хошиістендіргіш сүзгі (қара) HAPA сүзгісі (ақ) Тырс 4 Артқы панельді орнатыңыз. 5 Пайдалануды бастаған күнді күн жапсырмасына жазып қойыңыз. K-6 OM_KC-A60EU_Kaz.
СУ БАГЫН ТОЛТЫРУ Таза ауа жəне ылғалдандыру режимін немесе таза ионды душ режимін пайдаланған кезде. 1 2 Су багын алып тастаңыз. 3 1 2 Су багын шүмектен ағатын сумен толтырыңыз. MAX МАКС САҚ БОЛЫҢЫЗ Қатайтыңыз 3 ҚАЗАҚША • Судың ешбір жерден ағып тұрмағанын тексеріңіз. • Су багының сыртындағы артық суды сүртіп тастауды ұмытпаңыз. • Су багын тасыған кезде, су багының тесігі жоғары қарап тұратындай етіп екі қолмен ұстаңыз. Су багын орнатыңыз. 2 Тырс 1 САҚ БОЛЫҢЫЗ • Қондырғыға су төгіп алмаңыз.
ПАЙДАЛАНУ ТАЗА АУА ЖƏНЕ ЫЛҒАЛДАНДЫРУ Ауаны жылдам тазалау, иісті азайту жəне ылғалдандыру үшін пайдаланылады. СТАРТ • Қажетті желдеткіш жылдамдығын таңдаңыз. (K-9 бетті қараңыз) • Қуат сымы суырылмайынша, қондырғы соңғы пайдаланылған режимде жұмыс істей бастайды. ЕСКЕРТУ • Су багын толтырыңыз. (K-7 бетті қараңыз) • Су багының іші түгесілген кезде, қондырғы “ТАЗА АУА РЕЖИМІН” қосады жəне түспен) жыпылықтайды.
ТАЗА ИОН ДУШЫ Тығыздығы жоғары плазмалық кластер иондарын бөледі жəне 60 минут бойы қатты ауа ағымын шығарады. СТАРТ ЕСКЕРТУ • Егер “Плазмалық кластер ионы ” ӨШІРУЛІ болса, плазмалық кластер ионы бөлінбейді. • Жұмысы аяқталған кезде, қондырғы осыған дейінгі жұмыс жасау режиміне оралады. Ол осы режим барысында өзге режимге жəне ауыса алады. ЖЕЛДЕТКІШ ЖЫЛДАМДЫҒЫ Қажетті желдеткіш жылдамдығын таңдаңыз.
ПАЙДАЛЫ ФУНКЦИЯ ШАМДЫ БАҚЫЛАУ Осы функцияны қажетті жарық деңгейін таңдау үшін пайдаланыңыз. жарығырақ күңгірттеу ажыратып тастау БАЛА ҚҰЛПЫ Қондырғы дисплейінің жұмысы бұғатталады. Бұл бастапқы əрекетке ұқсас əдіс. БОЛДЫРМАУ ҚОСУЛЫ 3 секундтан артық. 3 секундтан артық. ДЫБЫС ИНДИКАТОРЫНЫҢ ОРНАТЫМЫ Қондырғыны су багы түгесілген кезде дыбыс сигналын шығаратындай етіп баптауға болады. ҚОСУЛЫ БОЛДЫРМАУ (қондырғы ӨШІРУЛІ тұрғанда) (қондырғы ӨШІРУЛІ тұрғанда) 3 секундтан артық. 3 секундтан артық.
КҮТІМ ЖАСАУ ЖƏНЕ ТЕХНИКАЛЫҚ ҚЫЗМЕТ КӨРСЕТУ Қуат ашасын жардағы розеткадан суыруды ұмытпаңыз. СҮЗГІ ИНДИКАТОРЫ Индикатор шамы шамамен 720 сағаттан соң жанады. (30күн × 24сағат=720) Төмендегі бөлшектерде жөндеу жұмыстарын жүргізу қажеттігі туралы ескерту. Техникалық қызмет жұмыстарынан кейін, сүзгі индикаторын бастапқы қалпына келтіріңіз. (K-12 бетті қараңыз) 3 секундтан артық. КҮТІМ ЖАСАУ ИНДЕКСІ • Ауаны шығару тесігінен жағымсыз иісті • Сүзгі индикаторының шамы жанады. сезуге болады.
КҮТІМ ЖАСАУ ЖƏНЕ ТЕХНИКАЛЫҚ ҚЫЗМЕТ КӨРСЕТУ СУ БАГЫ Ішкі жағын азғантай сумен шайыңыз. САҚ БОЛЫҢЫЗ • Су багын тасымалдау тұтқасынан ұстап шайқамаңыз. ЕСКЕРТУ Қиқар жебе үшін…. С у ба г ы н ы ң і ш і н ж ұ м с а қ ысқышпен жəне бак қақпағын киіз шөткемен немесе тіс шөткесімен тазалаңыз. Бак қақпағын Тіс шөткелері ЫЛҒАЛДАНДЫРҒЫШ СҮЗГІ Мол сумен шайыңыз. САҚ БОЛЫҢЫЗ • Ылғалдандырғыш сүзгіні сүзгі негізінен алып тастамаңыз. • Ылғалдандырғыш науадағы суды төгіп алмауға тырысыңыз. ЕСКЕРТУ Қиқар жебе үшін… 1.
Қуат ашасын жардағы розеткадан суыруды ұмытпаңыз. ЫЛҒАЛДАНДЫРҒЫШ НАУА ЖƏНЕ ҚАҚПАҒЫН Ылғалдандырғыш науа қақпағын 1. Ылғалдандырғыш науа қақпағын алыңыз. 2. Ылғалдандырғыш науаның ішін жəне ылғалдандырғыш науа қақпағын тіс шөткесімен шайыңыз. САҚ БОЛЫҢЫЗ • Қалтқыны жəне білікшені алып тастамаңыз. • Егер қалтқыны жəне / немесе білікше ағытылып кетсе. (K-17 бетті қараңыз) ЕСКЕРТУ Қалтқы Қиқар жебе үшін… НАУА 1. Науаны сумен жартылай толтырыңыз. 2.
КҮТІМ ЖАСАУ ЖƏНЕ ТЕХНИКАЛЫҚ ҚЫЗМЕТ CARE AND MAINTENANCE КӨРСЕТУ ХОШИІСТЕНДІРГІШ СҮЗГІ ТЕК ҚОЛМЕН ЖУУ! КИІМДЕРДІ КЕПТІРГІШ МАШИНА ІШІНДЕ КЕПТІРМЕҢІЗ! 1 ХОШИІСТЕНДІРГІШ СҮЗГІДЕГІ шаңды кетіріңіз. 2 ХОШИІСТЕНДІРГІШ СҮЗГІНІ сумен шайыңыз. САҚ БОЛЫҢЫЗ • Сүзгіні алғаш жуған кезде, шаю үшін пайдаланылған су қоңыр түсті болуы мүмкін. Бұл хошиістендіру жұмысына əсер етпейді. • Жуу кезінде сүзгіні бүгуге немесе бүктеуге тырыспаңыз. 3 Ылғалдықты барынша мол ғып кетіріңіз.
СҮЗГІНІ АУЫСТЫРУ Ауыстыру жиілігі Сүзгінің жарамды мерзімі бөлмедегі ортаға, қолданысына жəне қондырғының орнына байланысты əртүрлі келеді. Егер шаң немесе иіс кетпесе, сүзгіні ауыстырыңыз. (“Жаңа ауа тазартқышты пайдаланудан бұрын оқыңыз” тарауын қараңыз) Келесі сүзгінің жарамды мерзімі жəне ауыстыру уақыты күніне 5 шылым шегілетін жəне шаңды жинау/хошиістендіру мүмкіндігі жаңа сүзгімен салыстырғанда екі есеге төмендеген жағдай негізінде жасалған.
АҚАУЛАРДЫ ЖОЮ Техникалық қызмет көрсететін мамандарды шақырудан бұрын, төмендегі ақауларды жою кестесімен танысыңыз, себебі ақаудың себебі қондырғының істен шығуы болмауы мүмкін. СЕБЕБІ ШЕШІМІ (ақау емес) Иістері жəне түтіні кетпейді. • Сүзгілер қатты ластанған болса, оларды тазалаңыз немесе ауыстырыңыз. (K-11,K-12 жəне K-14 тұстарын қараңыз) Ауа таза болмаса да, алдыңғы монитор жасыл түспен жанып тұрады. • Ауа қондырғы іске қосылған кезде таза болмаған болуы мүмкін.
СЕБЕБІ ШЕШІМІ (ақау емес) Білікше / қалтқы алынып тасталған кезде. • Білікшені / қалтқыны төмендегі ретте орнатыңыз. ҚАЛТҚЫ БІЛІКШЕ Науа ішіндегі білікшені жанына бекітіңіз. 1. Қалтқыны мына тілшенің астына салыңыз. Қалтқы 2. Қалтқы тілшесін тесікке итеріңіз. ЕСКЕРТУ Тілшенің 3. Қалтқының екінші жағындағы тілшені де тесік ішіне салыңыз. Қалтқы Білікшенің бағытын тексеріңіз. Көлденеңінен жасалған көрініс АВТО ҚАЙТА ҚАЛПЫНА КЕЛТІРУ Авто қайта қалпына келтіру мүмкіндігін орнатуға болады.
АҚАУЛАРДЫ ЖОЮ ҚАТЕНІ КӨРСЕТУ САНДЫҚ КӨРСЕТКІШ Егер қате қайта орын алса, Sharp компаниясының қызмет көрсету орталығына хабарласыңыз. ШАМ КӨРСЕТКІШІ ҚАТЕ ТУРАЛЫ МƏЛІМЕТ ШЕШІМІ Таза ауа жəне ылғалдандыру индикатор шамының жыпылықтауы.. Ылғалдық сүзгісінің əдеттен тыс жұмысы. Ылғалдандырғыш сүзгінің, ылғалдандырғыш науаның жəне су багының дұрыс орнатылғанына көз жеткізіңіз, содан кейін қайта іске ҚОСЫҢЫЗ. Желдеткіш жылдамдығы индикатор шамының жыпылықтауы ' '. Желдеткіш моторының əдеттен тыс жұмысы.
OM_KC-A60EU_PE.
OM_KC-A60EU_AR.
ﻏﺑﺎﺭ ﮔﻳﺭی ﺑﻭﺯﺩﺍﻳﯽ ﻣﺩﻝ ﻣﻧﺑﻊ ﺗﻐﺫﻳﻪ ﺗﻧﻅﻳﻡ ﺳﺭﻋﺕ ﺩﻣﻧﺩﻩ ﺳﺭﻋﺕ ﺩﻣﻧﺩﻩ )ﻣﺗﺭ ﻣﮑﻌﺏ/ﺳﺎﻋﺕ( ﺗﻭﺍﻥ ﺍﺳﻣﯽ )ﻭﺍﺕ( ﻫﻭﺍی ﺗﻣﻳﺯ ﻣﻳﺯﺍﻥ ﺳﺭﻭﺻﺩﺍ )(dBA ﺳﺭﻋﺕ ﺩﻣﻧﺩﻩ )ﻣﺗﺭ ﻣﮑﻌﺏ/ﺳﺎﻋﺕ( ﺗﻭﺍﻥ ﺍﺳﻣﯽ )ﻭﺍﺕ( ﻫﻭﺍی ﺗﻣﻳﺯ ﻭ ﺭﻁﻭﺑﺕ ﺩﻫﯽ ﻣﻳﺯﺍﻥ ﺳﺭﻭﺻﺩﺍ )(dBA ﺭﻁﻭﺑﺕ ﺩﻫﯽ )ﻣﻳﻠﯽ ﻟﻳﺗﺭ/ﺳﺎﻋﺕ(*۱ ﺍﻧﺩﺍﺯﻩ ﺍﺗﺎﻕ ﺗﻭﺻﻳﻪ ﺷﺩﻩ )ﻣﺗﺭ ﻣﺭﺑﻊ(*۲ ﺍﻧﺩﺍﺯﻩ ﺍﺗﺎﻕ ﺗﻭﺻﻳﻪ ﺷﺩﻩ ﻳﻭﻥ Plasmaclusterﭼﮕﺎﻟﯽ ﺑﺎﻻ )ﻣﺗﺭ ﻣﺭﺑﻊ(*۳ ﻅﺭﻓﻳﺕ ﻣﺧﺯﻥ ﺁﺏ )ﻟﻳﺗﺭ( ﺣﺳﮕﺭﻫﺎ ﻧﻭﻉ ﻓﻳﻠﺗﺭ ﻁﻭﻝ ﺳﻳﻡ )ﻣﺗﺭ( ﺍﺑﻌﺎﺩ )ﻣﻳﻠﻳﻣﺗﺭ( ﻭﺯﻥ )ﮐﻳﻠﻭﮔﺭﻡ( *۱ *۲ *۳ *۴
ﺭﻓﻊ ﺍﺷﮑﺎﻻﺕ ﻧﻣﺎﻳﺵ ﺧﻁﺎ ﻧﺷﺎﻧﮕﺭ ﺩﻳﺟﻳﺗﺎﻝ ﺩﺭ ﺻﻭﺭﺕ ﺑﺭﻭﺯ ﻣﺟﺩﺩ ﺧﻁﺎ ،ﺑﺎ ﻣﺭﮐﺯ ﺧﺩﻣﺎﺕ Sharpﺗﻣﺎﺱ ﺑﮕﻳﺭﻳﺩ. ﻧﺷﺎﻧﮕﺭ ﭼﺭﺍﻍ ﺟﺯﺋﻳﺎﺕ ﺧﻁﺎ ﺭﺍﻩ ﺣﻝ ﭼﺷﻣﮏ ﺯﺩﻥ ﭼﺭﺍﻍ ﻧﺷﺎﻧﮕﺭ ﻫﻭﺍی ﺗﻣﻳﺯ ﻭ ﺭﻁﻭﺑﺕ ﺩﻫﯽ. ﻣﺷﮑﻝ ﺩﺭ ﻓﻳﻠﺗﺭ ﺭﻁﻭﺑﺕ. ﺑﺭﺭﺳﯽ ﮐﻧﻳﺩ ﮐﻪ ﻓﻳﻠﺗﺭ ﺭﻁﻭﺑﺕ ﺩﻫﯽ ،ﺳﻳﻧﯽ ﺭﻁﻭﺑﺕ ﺩﻫﯽ ﻭ ﻣﺧﺯﻥ ﺁﺏ ﺑﻪ ﺩﺭﺳﺗﯽ ﻧﺻﺏ ﺷﺩﻩ ﺑﺎﺷﻧﺩ ﻭ ﺳﭘﺱ ﺩﺳﺗﮕﺎﻩ ﺭﺍ ﺩﻭﺑﺎﺭﻩ ﺭﻭﺷﻥ ﮐﻧﻳﺩ. ﭼﺷﻣﮏ ﺯﺩﻥ ﭼﺭﺍﻍ ﻧﺷﺎﻧﮕﺭ ﺳﺭﻋﺕ ﺩﻣﻧﺩﻩ ' '. ﻣﺷﮑﻝ ﺩﺭ ﻣﻭﺗﻭﺭ ﺩﻣﻧﺩﻩ.
ﺭﺍﻩ ﺣﻝ )ﻧﻘﺹ ﺩﺭ ﻋﻣﻠﮑﺭﺩ ﻧﻳﺳﺕ( ﻧﺷﺎﻧﻪ • ﻏﻠﻁﮏ /ﺷﻧﺎﻭﺭ ﺭﺍ ﺑﻪ ﺗﺭﺗﻳﺏ ﺯﻳﺭ ﻧﺻﺏ ﮐﻧﻳﺩ. ﻫﻧﮕﺎﻣﯽ ﮐﻪ ﻏﻠﻁﮏ /ﺷﻧﺎﻭﺭ ﺟﺩﺍ ﺷﺩﻩ ﺍﺳﺕ. ﺷﻧﺎﻭﺭ ﻏﻠﻁﮏ ﻏﻠﻁﮏ ﺩﺍﺧﻝ ﺳﻳﻧﯽ ﺭﺍ ﺍﺯ ﺳﻣﺕ ﺟﺎﻧﺑﯽ ﺛﺎﺑﺕ ﮐﻧﻳﺩ. .۱ﺷﻧﺎﻭﺭ ﺭﺍ ﺯﻳﺭ ﺍﻳﻥ ﺯﺑﺎﻧﻪ ﺩﺍﺧﻝ ﻧﻣﺎﻳﻳﺩ. ﺷﻧﺎﻭﺭ .۲ﺯﺑﺎﻧﻪ ﺷﻧﺎﻭﺭ ﺭﺍ ﺩﺍﺧﻝ ﺳﻭﺭﺍﺥ ﻗﺭﺍﺭ ﺩﻫﻳﺩ. ﺗﺫﮐﺭ ﺷﻧﺎﻭﺭ ﻧﻣﺎی ﻣﻘﻁﻊ ﻋﺭﺿﯽ .۳ﺯﺑﺎﻧﻪ ﺳﻣﺕ ﺩﻳﮕﺭ ﺷﻧﺎﻭﺭ ﺭﺍ ﺩﺍﺧﻝ ﺳﻭﺭﺍﺥ ﻧﻣﺎﻳﻳﺩ. ﻓﺎﺭﺳﯽ ﺟﻬﺕ ﻏﻠﻁﮏ ﺭﺍ ﺑﺭﺭﺳﯽ ﮐﻧﻳﺩ.
ﺭﻓﻊ ﺍﺷﮑﺎﻻﺕ ﭘﻳﺵ ﺍﺯ ﺩﺭﺧﻭﺍﺳﺕ ﺗﻌﻣﻳﺭ ،ﻟﻁﻔﺎً ﺟﺩﻭﻝ ﺭﻓﻊ ﺍﺷﮑﺎﻻﺕ ﺯﻳﺭ ﺭﺍ ﻣﺭﻭﺭ ﮐﻧﻳﺩ ،ﺯﻳﺭﺍ ﻣﻣﮑﻥ ﺍﺳﺕ ﻣﺷﮑﻝ ﺑﻪ ﻧﻘﺹ ﻋﻣﻠﮑﺭﺩ ﺩﺳﺗﮕﺎﻩ ﻣﺭﺑﻭﻁ ﻧﺑﺎﺷﺩ. ﺭﺍﻩ ﺣﻝ )ﻧﻘﺹ ﺩﺭ ﻋﻣﻠﮑﺭﺩ ﻧﻳﺳﺕ( ﻧﺷﺎﻧﻪ ﺑﻭﻫﺎ ﻭ ﺩﻭﺩ ﺣﺫﻑ ﻧﻣﯽ ﺷﻭﻧﺩ. • ﺍﮔﺭ ﺑﻧﻅﺭ ﻣﻳﺭﺳﺩ ﻓﻳﻠﺗﺭﻫﺎ ﺧﻳﻠﯽ ﮐﺛﻳﻑ ﺷﺩﻩ ﺍﻧﺩ ﺁﻧﻬﺎ ﺭﺍ ﺗﻣﻳﺯ ﻳﺎ ﺗﻌﻭﻳﺽ ﮐﻧﻳﺩ. )ﺭﺟﻭﻉ ﺑﻪ (Pe-14 ،Pe-12 ،Pe-11 ﻧﻣﺎﻳﺷﮕﺭ ﺟﻠﻭﻳﯽ ﺣﺗﯽ ﻫﻧﮕﺎﻣﯽ ﮐﻪ ﻫﻭﺍ ﺗﻣﻳﺯ ﺑﻧﻅﺭ ﻧﻣﯽ ﺭﺳﺩ ﺑﻪ ﺭﻧﮓ ﺳﺑﺯ ﺭﻭﺷﻥ ﻣﯽ ﺷﻭﺩ. • ﻣﻣﮑﻥ ﺍﺳﺕ ﻫﻭﺍ ﺩﺭ ﺯﻣﺎﻥ ﻭﺻﻝ ﮐﺭﺩﻥ ﺩﺳﺗﮕﺎﻩ ﺑﻪ ﭘﺭﻳﺯ ﺑﺭﻕ ﮐﺛﻳﻑ ﺑﻭﺩﻩ ﺍﺳﺕ.
ﺗﻌﻭﻳﺽ ﻓﻳﻠﺗﺭ ﺯﻣﺎﻥ ﺗﻌﻭﻳﺽ ﻋﻣﺭ ﻓﻳﻠﺗﺭ ﺑﺳﺗﻪ ﺑﻪ ﻣﺣﻳﻁ ﺍﺗﺎﻕ ،ﻧﻭﻉ ﮐﺎﺭﺑﺭی ﻭ ﻣﺣﻝ ﻧﺻﺏ ﺩﺳﺗﮕﺎﻩ ﻣﺗﻐﻳﺭ ﺍﺳﺕ .ﺩﺭ ﺻﻭﺭﺕ ﻭﺟﻭﺩ ﺑﻭ ﻳﺎ ﮔﺭﺩﻭﻏﺑﺎﺭ ،ﻓﻳﻠﺗﺭ ﺭﺍ ﺗﻌﻭﻳﺽ ﮐﻧﻳﺩ. )ﺑﻪ ﺑﺧﺵ ”ﻗﺑﻝ ﺍﺯ ﺍﺳﺗﻔﺎﺩﻩ ﺍﺯ ﺩﺳﺗﮕﺎﻩ ﺗﺻﻔﻳﻪ ﻫﻭﺍی ﺟﺩﻳﺩ ﺧﻭﺩ ،ﻟﻁﻔﺎً ﺍﻳﻥ ﺑﺧﺵ ﺭﺍ ﻣﻁﺎﻟﻌﻪ ﻓﺭﻣﺎﻳﻳﺩ“ ﻣﺭﺍﺟﻌﻪ ﮐﻧﻳﺩ( ﻋﻣﺭ ﻓﻳﻠﺗﺭ ﻭ ﻣﺩﺕ ﺯﻣﺎﻥ ﺗﻌﻭﻳﺽ ﮐﻪ ﺩﺭ ﺯﻳﺭ ﺁﻭﺭﺩﻩ ﺷﺩﻩ ﺍﺳﺕ ،ﺑﺭ ﺍﺳﺎﺱ ﺷﺭﺍﻳﻁ ﺍﺳﺗﻔﺎﺩﻩ ﺍﺯ ۵ﺳﻳﮕﺎﺭ ﺩﺭ ﺭﻭﺯ ﺍﺳﺕ ﻭ ﻗﺩﺭﺕ ﻏﺑﺎﺭﮔﻳﺭی/ﺑﻭﺯﺩﺍﻳﯽ ،ﺩﺭ ﻣﻘﺎﻳﺳﻪ ﺑﺎ ﻓﻳﻠﺗﺭ ﻧﻭ ،ﺑﻪ ﻧﺻﻑ ﮐﺎﻫﺵ ﻣﯽ ﻳﺎﺑﺩ.
ﻣﺭﺍﻗﺑﺕ ﻭ ﻧﮕﻬﺩﺍﺭی ﻓﻳﻠﺗﺭ ﺑﻭﺯﺩﺍ ﻓﻘﻁ ﺑﺎ ﺩﺳﺕ ﺷﺳﺗﻪ ﺷﻭﺩ! ﺩﺭ ﺧﺷﮏ ﮐﻥ ﻟﺑﺎﺱ ﺧﺷﮏ ﻧﮑﻧﻳﺩ! ۱ ﮔﺭﺩ ﻭ ﺧﺎک ﺭﻭی ﻓﻳﻠﺗﺭ ﺑﻭﺯﺩﺍ ﺭﺍ ﭘﺎک ﮐﻧﻳﺩ. ۲ ﻓﻳﻠﺗﺭ ﺑﻭﺯﺩﺍ ﺭﺍ ﺑﺎ ﺁﺏ ﺷﺳﺗﺷﻭ ﺩﻫﻳﺩ. ﺍﺣﺗﻳﺎﻁ • ﻫﻧﮕﺎﻡ ﺷﺳﺗﻥ ﻓﻳﻠﺗﺭ ﺑﺭﺍی ﻧﺧﺳﺗﻳﻥ ﺑﺎﺭ ،ﻣﻣﮑﻥ ﺍﺳﺕ ﺁﺏ ﺷﺳﺗﺷﻭ ﺑﻪ ﺭﻧﮓ ﻗﻬﻭﻩ ﺍی ﺩﺭﺁﻳﺩ. ﺍﻳﻥ ﻣﺳﺋﻠﻪ ﺭﻭی ﻋﻣﻠﮑﺭﺩ ﺑﻭﺯﺩﺍﻳﯽ ﺗﺎﺛﻳﺭی ﻧﺩﺍﺭﺩ. • ﺍﺯ ﺧﻡ ﮐﺭﺩﻥ ﻳﺎ ﺗﺎ ﮐﺭﺩﻥ ﻓﻳﻠﺗﺭ ﺩﺭ ﻫﻧﮕﺎﻡ ﺷﺳﺗﺷﻭ ﺧﻭﺩﺩﺍﺭی ﮐﻧﻳﺩ. ۳ ﺭﻁﻭﺑﺕ ﺭﺍ ﺗﺎ ﺣﺩ ﺍﻣﮑﺎﻥ ﺑﺯﺩﺍﻳﻳﺩ. ۴ ﻓﻳﻠﺗﺭ ﺭﺍ ﺩﺭ ﻣﺣﻠﯽ ﮐﻪ ﺩﺍﺭﺍی ﺗﻬﻭﻳﻪ ﻣﻧﺎﺳﺏ ﺍﺳﺕ ﺑﻁﻭﺭ ﮐﺎﻣﻝ ﺧﺷﮏ ﮐﻧﻳﺩ.
ﺣﺗﻣﺎً ﺩﻭﺷﺎﺧﻪ ﺭﺍ ﺍﺯ ﭘﺭﻳﺯ ﺑﺭﻕ ﺧﺎﺭﺝ ﻧﻣﺎﻳﻳﺩ. ﺩﺭﭘﻭﺵ ﻭ ﺳﻳﻧﯽ ﺭﻁﻭﺑﺕ ﺩﻫﯽ .۱ﺩﺭﭘﻭﺵ ﺳﻳﻧﯽ ﺭﻁﻭﺑﺕ ﺩﻫﯽ ﺭﺍ ﺑﺭﺩﺍﺭﻳﺩ. .۲ﺩﺍﺧﻝ ﺳﻳﻧﯽ ﺭﻁﻭﺑﺕ ﺩﻫﯽ ﻭ ﺩﺭﭘﻭﺵ ﺳﻳﻧﯽ ﺭﻁﻭﺑﺕ ﺩﻫﯽ ﺭﺍ ﺑﺎ ﻳﮏ ﻣﺳﻭﺍک ﺗﻣﻳﺯ ﮐﻧﻳﺩ. ﺩﺭﭘﻭﺵ ﺳﻳﻧﯽ ﺭﻁﻭﺑﺕ ﺩﻫﯽ ﺍﺣﺗﻳﺎﻁ • ﺷﻧﺎﻭﺭ ﻭ ﻏﻠﻁﮏ ﺭﺍ ﺟﺩﺍ ﻧﮑﻧﻳﺩ. • ﺩﺭ ﺻﻭﺭﺕ ﺟﺩﺍﺷﺩﻥ ﺷﻧﺎﻭﺭ ﻭ/ﻳﺎ ﻏﻠﻁﮏ) .ﺭﺟﻭﻉ ﺑﻪ (Pe-17 ﺗﺫﮐﺭ ﺳﻳﻧﯽ .۱ﺳﻳﻧﯽ ﺭﺍ ﺗﺎ ﻧﻳﻣﻪ ﺑﺎ ﺁﺏ ﭘﺭ ﮐﻧﻳﺩ. .۲ﻣﻘﺩﺍﺭ ﺍﻧﺩﮐﯽ ﻣﺎﻳﻊ ﻅﺭﻓﺷﻭﻳﯽ ﺍﺿﺎﻓﻪ ﻧﻣﺎﻳﻳﺩ. .۳ﺑﻪ ﻣﺩﺕ ۳۰ﺩﻗﻳﻘﻪ ﻏﻭﻁﻪ ﻭﺭ ﮐﻧﻳﺩ. .۴ﻣﺎﻳﻊ ﻅﺭﻓﺷﻭﻳﯽ ﺭﺍ ﺑﺎ ﺁﺏ ﺗﻣﻳﺯ ﺑﺯﺩﺍﻳﻳﺩ.
ﻣﺭﺍﻗﺑﺕ ﻭ ﻧﮕﻬﺩﺍﺭی ﻣﺧﺯﻥ ﺁﺏ ﺩﺍﺧﻝ ﻣﺧﺯﻥ ﺭﺍ ﺑﺎ ﻣﻘﺩﺍﺭ ﺍﻧﺩﮐﯽ ﺁﺏ ﺷﺳﺗﺷﻭ ﺩﻫﻳﺩ. ﺍﺣﺗﻳﺎﻁ • ﺍﺯ ﺗﮑﺎﻥ ﺩﺍﺩﻥ ﻣﺧﺯﻥ ﺁﺏ ﻫﻧﮕﺎﻡ ﻧﮕﻬﺩﺍﺷﺗﻥ ﺁﻥ ﺑﺎ ﺩﺳﺗﻪ ﺣﻣﻝ ﺧﻭﺩﺩﺍﺭی ﮐﻧﻳﺩ. ﺗﺫﮐﺭ ﺑﺭﺍی ﻟﮑﻪ ﻫﺎی ﺳﺧﺕ... ﺩﺍﺧﻝ ﻣﺧﺯﻥ ﺁﺏ ﺭﺍ ﺑﺎ ﻳﮏ ﺍﺳﻔﻧﺞ ﻧﺭﻡ ﻭ ﺩﺭﭘﻭﺵ ﻣﺧﺯﻥ ﺭﺍ ﺑﺎ ﻳﮏ ﮔﻭﺵ ﭘﺎک ﮐﻥ ﻳﺎ ﻳﮏ ﻣﺳﻭﺍک ﺗﻣﻳﺯ ﮐﻧﻳﺩ. ﻣﺳﻭﺍک ﺩﺭﭘﻭﺵ ﻣﺧﺯﻥ ﻓﻳﻠﺗﺭ ﺭﻁﻭﺑﺕ ﺩﻫﯽ ﺑﺎ ﺁﺏ ﻓﺭﺍﻭﺍﻥ ﺷﺳﺗﺷﻭ ﺩﻫﻳﺩ. ﺍﺣﺗﻳﺎﻁ • ﻓﻳﻠﺗﺭ ﺭﻁﻭﺑﺕ ﺩﻫﯽ ﺭﺍ ﺍﺯ ﻗﺎﺏ ﻓﻳﻠﺗﺭ ﺑﻳﺭﻭﻥ ﻧﻳﺎﻭﺭﻳﺩ. • ﺍﺟﺎﺯﻩ ﻧﺩﻫﻳﺩ ﺁﺏ ﺍﺯ ﺳﻳﻧﯽ ﺭﻁﻭﺑﺕ ﺩﻫﯽ ﺑﺭﻳﺯﺩ. ﺗﺫﮐﺭ ﺑﺭﺍی ﻟﮑﻪ ﻫﺎی ﺳﺧﺕ... .
ﻣﺭﺍﻗﺑﺕ ﻭ ﻧﮕﻬﺩﺍﺭی ﺣﺗﻣﺎً ﺩﻭﺷﺎﺧﻪ ﺭﺍ ﺍﺯ ﭘﺭﻳﺯ ﺑﺭﻕ ﺧﺎﺭﺝ ﻧﻣﺎﻳﻳﺩ. ﻧﺷﺎﻧﮕﺭ ﻓﻳﻠﺗﺭ ﭼﺭﺍﻍ ﻧﺷﺎﻧﮕﺭ ﭘﺱ ﺍﺯ ﺣﺩﻭﺩ ۷۲۰ﺳﺎﻋﺕ ﺭﻭﺷﻥ ﻣﻳﺷﻭﺩ ۳۰) .ﺭﻭﺯ × ۲۴ﺳﺎﻋﺕ = (۷۲۰ ﻧﮕﻬﺩﺍﺭی ﻗﻁﻌﺎﺕ ﺯﻳﺭ ﺭﺍ ﺑﻪ ﻳﺎﺩ ﺩﺍﺷﺗﻪ ﺑﺎﺷﻳﺩ. ﭘﺱ ﺍﺯ ﺍﻧﺟﺎﻡ ﻧﮕﻬﺩﺍﺭی ،ﻧﺷﺎﻧﮕﺭ ﻓﻳﻠﺗﺭ ﺭﺍ ﺗﻧﻅﻳﻡ ﻣﺟﺩﺩ ﻧﻣﺎﻳﻳﺩ) .ﺭﺟﻭﻉ ﺑﻪ (Pe-12 ﺑﻳﺵ ﺍﺯ ۳ﺛﺎﻧﻳﻪ ﺭﺍﻫﻧﻣﺎی ﻣﺭﺍﻗﺑﺕ • ﺑﻭی ﻧﺎﺧﻭﺷﺎﻳﻧﺩ ﺍﺯ ﺧﺭﻭﺟﯽ ﻫﻭﺍ ﺍﺣﺳﺎﺱ ﻣﻳﺷﻭﺩ. • ﺑﻧﻅﺭ ﻣﯽ ﺭﺳﺩ ﻋﻣﻠﮑﺭﺩ ﻓﻳﻠﺗﺭ ﺍﻓﺕ ﮐﺭﺩﻩ ﺍﺳﺕ ﻭ/ﻳﺎ ﺑﻭ ﻭﺟﻭﺩ ﺩﺍﺭﺩ. • ﭼﺭﺍﻍ ﻧﺷﺎﻧﮕﺭ ﻓﻳﻠﺗﺭ ﺭﻭﺷﻥ ﻣﻳﺷﻭﺩ.
ﻗﺎﺑﻠﻳﺕ ﻫﺎی ﻣﻔﻳﺩ ﮐﻧﺗﺭﻝ ﭼﺭﺍﻍ ﺍﺯ ﺍﻳﻥ ﻗﺎﺑﻠﻳﺕ ﺑﺭﺍی ﺍﻧﺗﺧﺎﺏ ﺭﻭﺷﻧﺎﻳﯽ ﺩﻟﺧﻭﺍﻩ ﺍﺳﺗﻔﺎﺩﻩ ﮐﻧﻳﺩ. }> IíÚ >}> ĉxÚn ÝYnB ﻗﻔﻝ ﮐﻭﺩک ﮐﺎﺭﮐﺭﺩ ﻧﻣﺎﻳﺷﮕﺭ ﺩﺳﺗﮕﺎﻩ ﻗﻔﻝ ﻣﯽ ﺷﻭﺩ .ﺍﻳﻥ ﺭﻭﺵ ﻣﺷﺎﺑﻪ ﻋﻣﻠﻳﺎﺕ ﺁﻏﺎﺯﻳﻥ ﺍﺳﺕ. ﻟﻐﻭ ﺭﻭﺷﻥ ﺑﻳﺵ ﺍﺯ ۳ﺛﺎﻧﻳﻪ ﺑﻳﺵ ﺍﺯ ۳ﺛﺎﻧﻳﻪ ﺗﻧﻅﻳﻡ ﻧﺷﺎﻧﮕﺭ ﺻﻭﺗﯽ ﻣﯽ ﺗﻭﺍﻥ ﺩﺳﺗﮕﺎﻩ ﺭﺍ ﻁﻭﺭی ﺗﻧﻅﻳﻡ ﻧﻣﻭﺩ ﮐﻪ ﻫﻧﮕﺎﻡ ﺧﺎﻟﯽ ﺑﻭﺩﻥ ﻣﺧﺯﻥ ﺁﺏ ،ﺑﺎ ﻳﮏ ﺑﻭﻕ ﺷﻧﻳﺩﺍﺭی ﻋﻼﻣﺕ ﺩﻫﺩ.
ﺩﻭﺵ ﻳﻭﻥ ﺗﻣﻳﺯ ﻳﻭﻥ ﻫﺎی Plasmaclusterﭼﮕﺎﻟﯽ ﺑﺎﻻ ﺭﺍ ﻣﻧﺗﺷﺭ ﻧﻣﻭﺩﻩ ﻭ ﺟﺭﻳﺎﻥ ﻫﻭﺍی ﻗﻭی ﺭﺍ ﺑﻪ ﻣﺩﺕ ۶۰ﺩﻗﻳﻘﻪ ﺗﺧﻠﻳﻪ ﻣﯽ ﻧﻣﺎﻳﺩ. ﺷﺭﻭﻉ ﺗﺫﮐﺭ • ﺍﮔﺭ ”ﻳﻭﻥ “ Plasmaclusterﺧﺎﻣﻭﺵ ﺑﺎﺷﺩ، ﻳﻭﻥ Plasmaclusterﻣﻧﺗﺷﺭ ﻧﻣﯽ ﺷﻭﺩ. • ﺯﻣﺎﻧﯽ ﮐﻪ ﻋﻣﻠﻳﺎﺕ ﺑﻪ ﭘﺎﻳﺎﻥ ﻣﻳﺭﺳﺩ ،ﺩﺳﺗﮕﺎﻩ ﺑﻪ ﺣﺎﻟﺕ ﮐﺎﺭﮐﺭﺩ ﻗﺑﻠﯽ ﺑﺭﻣﻳﮕﺭﺩﺩ. ﺩﺭ ﺍﻳﻥ ﺣﺎﻟﺕ ﻣﯽ ﺗﻭﺍﻧﺩ ﺑﻪ ﺣﺎﻟﺕ ﺩﻳﮕﺭ ﻭ ﺗﻐﻳﻳﺭ ﮐﻧﺩ. ﻓﺎﺭﺳﯽ ﺳﺭﻋﺕ ﺩﻣﻧﺩﻩ ﺳﺭﻋﺕ ﺩﻣﻧﺩﻩ ﺩﻟﺧﻭﺍﻩ ﺭﺍ ﺍﻧﺗﺧﺎﺏ ﮐﻧﻳﺩ.
ﺑﮑﺎﺭﮔﻳﺭی ﺩﺳﺗﮕﺎﻩ ﻫﻭﺍی ﺗﻣﻳﺯ ﻭ ﺭﻁﻭﺑﺕ ﺩﻫﯽ ﺍﺳﺗﻔﺎﺩﻩ ﺑﺭﺍی ﺗﻣﻳﺯﮐﺭﺩﻥ ﺳﺭﻳﻊ ﻫﻭﺍ ،ﮐﺎﻫﺵ ﺑﻭﻫﺎی ﻧﺎﺧﻭﺷﺎﻳﻧﺩ ﻭ ﺭﻁﻭﺑﺕ ﺩﻫﯽ. ﺷﺭﻭﻉ • ﺳﺭﻋﺕ ﺩﻣﻧﺩﻩ ﺩﻟﺧﻭﺍﻩ ﺭﺍ ﺍﻧﺗﺧﺎﺏ ﮐﻧﻳﺩ) .ﺭﺟﻭﻉ ﺑﻪ (Pe-9 ً ﻗﺑﻼ ﻣﻭﺭﺩ ﺍﺳﺗﻔﺎﺩﻩ ﻗﺭﺍﺭ • ﻋﻣﻠﻳﺎﺕ ﺩﺭ ﻫﻣﺎﻥ ﺣﺎﻟﺗﯽ ﮐﻪ ﮔﺭﻓﺗﻪ ﺑﻭﺩﻩ ﺍﺳﺕ ﺁﻏﺎﺯ ﻣﻳﺷﻭﺩ ،ﻣﮕﺭ ﺍﻳﻧﮑﻪ ﺳﻳﻡ ﺑﺭﻕ ﺍﺯ ﭘﺭﻳﺯ ﺟﺩﺍ ﺷﺩﻩ ﺑﺎﺷﺩ. ﺗﺫﮐﺭ • ﻣﺧﺯﻥ ﺁﺏ ﺭﺍ ﭘﺭ ﮐﻧﻳﺩ) .ﺭﺟﻭﻉ ﺑﻪ (Pe-7 • ﻫﻧﮕﺎﻣﯽ ﮐﻪ ﻣﺧﺯﻥ ﺁﺏ ﺧﺎﻟﯽ ﺍﺳﺕ ،ﺩﺳﺗﮕﺎﻩ ﺩﺭ ”ﺣﺎﻟﺕ ﻫﻭﺍی ﺗﻣﻳﺯ“ ﮐﺎﺭ ﻣﯽ ﮐﻧﺩ ﻭ ﻋﻼﻣﺕ ﭼﺷﻣﮏ ﻣﻳﺯﻧﺩ )ﻗﺭﻣﺯ(.
ﭘﺭﮐﺭﺩﻥ ﻣﺧﺯﻥ ﺁﺏ ﻫﻧﮕﺎﻡ ﺍﺳﺗﻔﺎﺩﻩ ﺍﺯ ﺣﺎﻟﺕ ﻫﻭﺍی ﺗﻣﻳﺯ ﻭ ﺭﻁﻭﺑﺕ ﺩﻫﯽ ،ﻳﺎ ﺣﺎﻟﺕ ﺩﻭﺵ ﻳﻭﻥ ﺗﻣﻳﺯ. ۱ ﻣﺧﺯﻥ ﺁﺏ ﺭﺍ ﺟﺩﺍ ﮐﻧﻳﺩ. ۲ ﻣﺧﺯﻥ ﺁﺏ ﺭﺍ ﺑﺎ ﺁﺏ ﺷﻳﺭ ﭘﺭ ﮐﻧﻳﺩ. ﻓﺎﺭﺳﯽ MAX ﺍﺣﺗﻳﺎﻁ ﻣﺣﮑﻡ ﮐﻧﻳﺩ • ﺑﺭﺭﺳﯽ ﮐﻧﻳﺩ ﮐﻪ ﻧﺷﺗﯽ ﺁﺏ ﻭﺟﻭﺩ ﻧﺩﺍﺷﺗﻪ ﺑﺎﺷﺩ. • ﺣﺗﻣﺎً ﺁﺏ ﺍﺿﺎﻓﯽ ﺭﻭی ﺳﻁﺢ ﺧﺎﺭﺟﯽ ﻣﺧﺯﻥ ﺁﺏ ﺭﺍ ﭘﺎک ﮐﻧﻳﺩ. • ﻫﻧﮕﺎﻡ ﺣﻣﻝ ﻣﺧﺯﻥ ﺁﺏ ،ﺁﻥ ﺭﺍ ﺑﺎ ﻫﺭﺩﻭ ﺩﺳﺕ ﺑﮕﻳﺭﻳﺩ ﺑﻪ ﮔﻭﻧﻪ ﺍی ﮐﻪ ﺩﻫﺎﻧﻪ ﻣﺧﺯﻥ ﺁﺏ ﺭﻭ ﺑﻪ ﺑﺎﻻ ﻗﺭﺍﺭ ﮔﻳﺭﺩ. ۳ ﻣﺧﺯﻥ ﺁﺏ ﺭﺍ ﻧﺻﺏ ﮐﻧﻳﺩ. ﮐﻠﻳﮏ ﺍﺣﺗﻳﺎﻁ • ﺩﺳﺗﮕﺎﻩ ﺭﺍ ﺩﺭ ﺗﻣﺎﺱ ﺑﺎ ﺁﺏ ﻗﺭﺍﺭ ﻧﺩﻫﻳﺩ .
ﺁﻣﺎﺩﻩ ﺳﺎﺯی ﺣﺗﻣﺎً ﺩﻭﺷﺎﺧﻪ ﺭﺍ ﺍﺯ ﭘﺭﻳﺯ ﺑﺭﻕ ﺧﺎﺭﺝ ﻧﻣﺎﻳﻳﺩ. ﻧﺻﺏ ﻓﻳﻠﺗﺭ ۱ ۲ ﺻﻔﺣﻪ ﭘﺷﺗﯽ ﺭﺍ ﺑﺭﺩﺍﺭﻳﺩ. ﻓﻳﻠﺗﺭ ﺑﻭﺯﺩﺍ )ﻣﺷﮑﯽ( ﻓﻳﻠﺗﺭ ) HEPAﺳﻔﻳﺩ( ۳ ۴ ﻓﻳﻠﺗﺭﻫﺎ ﺭﺍ ﺍﺯ ﮐﻳﺳﻪ ﭘﻼﺳﺗﻳﮑﯽ ﺧﺎﺭﺝ ﻧﻣﺎﻳﻳﺩ. ﻓﻳﻠﺗﺭﻫﺎ ﺭﺍ ﺑﻪ ﺗﺭﺗﻳﺏ ﺻﺣﻳﺢ ﻣﻁﺎﺑﻕ ﺷﮑﻝ ﻧﺻﺏ ﮐﻧﻳﺩ. ﻓﻳﻠﺗﺭ ﺑﻭﺯﺩﺍ )ﻣﺷﮑﯽ( ﮐﻠﻳﮏ ﻓﻳﻠﺗﺭ ) HEPAﺳﻔﻳﺩ( ﺻﻔﺣﻪ ﭘﺷﺗﯽ ﺭﺍ ﻧﺻﺏ ﮐﻧﻳﺩ. ۵ ﺗﺎﺭﻳﺦ ﺷﺭﻭﻉ ﺍﺳﺗﻔﺎﺩﻩ ﺭﺍ ﺭﻭی ﺑﺭﭼﺳﺏ ﺗﺎﺭﻳﺦ ﺑﻧﻭﻳﺳﻳﺩ. Pe-6 10/1/12 9:52 AM OM_KC-A60EU_PE.
ﻧﻣﺎﻳﺷﮕﺭ ﺍﺻﻠﯽ ﺩﺳﺗﮕﺎﻩ ۸ ۶ ۷ ۱ ﺝ ۱ ﺏ ۲ ۳ ﺍﻟﻑ ۴ ۵ ﺩﮐﻣﻪ ﺭﻭﺷﻥ ﮐﺭﺩﻥ ﺩﺳﺗﮕﺎﻩ ﺩﮐﻣﻪ ﺣﺎﻟﺕ ﻫﻭﺍی ﺗﻣﻳﺯ /ﭼﺭﺍﻍ ﻧﺷﺎﻧﮕﺭ )ﺳﺑﺯ( ﺍﻟﻑ ﺏ ﺝ ۲ ﺩﮐﻣﻪ ﮐﻧﺗﺭﻝ ﭼﺭﺍﻍ ۵ ۳ ﺩﮐﻣﻪ ﺭﻭﺷﻥ /ﺧﺎﻣﻭﺵ ﻳﻭﻥ / Plasmacluster ۶ ﺩﮐﻣﻪ ﺗﻧﻅﻳﻡ ﻣﺟﺩﺩ ﻓﻳﻠﺗﺭ / ۷ ﭼﺭﺍﻍ ﻧﺷﺎﻧﮕﺭ )ﺳﺑﺯ( ۴ ﭼﺭﺍﻍ ﻧﺷﺎﻧﮕﺭ )ﻗﺭﻣﺯ( ۸ ﻓﺎﺭﺳﯽ ﺩﮐﻣﻪ ﺣﺎﻟﺕ ﻫﻭﺍی ﺗﻣﻳﺯ ﻭ ﺭﻁﻭﺑﺕ ﺩﻫﯽ /ﭼﺭﺍﻍ ﻧﺷﺎﻧﮕﺭ )ﺳﺑﺯ( ﺩﮐﻣﻪ ﺣﺎﻟﺕ ﺩﻭﺵ ﻳﻭﻥ ﺗﻣﻳﺯ /ﭼﺭﺍﻍ ﻧﺷﺎﻧﮕﺭ )ﺳﺑﺯ( ﺩﮐﻣﻪ ﻗﻔﻝ ﮐﻭﺩک / ﭼﺭﺍﻍ ﻧﺷﺎﻧﮕﺭ )ﺳﺑﺯ
ﻧﺎﻡ ﺍﺟﺯﺍی ﺩﺳﺗﮕﺎﻩ ﺟﻠﻭ /ﻋﻘﺏ ۱ ۲ ۱ ۲ ۳ ﻧﻣﺎﻳﺷﮕﺭ ﺍﺻﻠﯽ ﺩﺳﺗﮕﺎﻩ )ﺭﺟﻭﻉ ﺑﻪ (Pe-5 ﻧﻣﺎﻳﺷﮕﺭ ﺟﻠﻭﻳﯽ ﺩﺳﺗﮕﺎﻩ ﺍﺻﻠﯽ ۳ ۹ ۱ ۲ ۱۰ ۳ ۴ ۱۱ ۵ ۱۲ ۶ ۷ ۸ ۱۳ )ﺷﮑﻝ ﺩﻭﺷﺎﺧﻪ ﺑﻪ ﮐﺷﻭﺭ ﺑﺳﺗﮕﯽ ﺩﺍﺭﺩ(.
ﻣﻭﺍﺭﺩ ﺍﺣﺗﻳﺎﻁﯽ ﻣﺭﺑﻭﻁ ﺑﻪ ﺑﮑﺎﺭﮔﻳﺭی ﺩﺳﺗﮕﺎﻩ • ﻣﺣﻝ ﻣﮑﺵ ﻭ/ﻳﺎ ﺧﺭﻭﺟﯽ ﻫﻭﺍ ﺭﺍ ﻣﺳﺩﻭﺩ ﻧﮑﻧﻳﺩ. • ﺍﺯ ﺩﺳﺗﮕﺎﻩ ﺩﺭ ﻧﺯﺩﻳﮑﯽ ﺍﺷﻳﺎی ﺩﺍﻍ ﻣﺎﻧﻧﺩ ﺍﺟﺎﻕ ﻫﺎ ﻳﺎ ﺑﺧﺎﺭی ﻫﺎ ﻳﺎ ﺩﺭ ﻣﺣﻠﯽ ﮐﻪ ﻣﻣﮑﻥ ﺍﺳﺕ ﺩﺭ ﺗﻣﺎﺱ ﺑﺎ ﺑﺧﺎﺭ ﻗﺭﺍﺭ ﮔﻳﺭﺩ ،ﺍﺳﺗﻔﺎﺩﻩ ﻧﮑﻧﻳﺩ. • ﻫﻣﻭﺍﺭﻩ ﺩﺳﺗﮕﺎﻩ ﺭﺍ ﺩﺭ ﻭﺿﻌﻳﺕ ﺍﻳﺳﺗﺎﺩﻩ ﺑﮑﺎﺭ ﺑﮕﻳﺭﻳﺩ. • ﻫﻧﮕﺎﻡ ﺟﺎﺑﺟﺎ ﮐﺭﺩﻥ ﺩﺳﺗﮕﺎﻩ ،ﺁﻥ ﺭﺍ ﺑﺎ ﺩﺳﺗﮕﻳﺭﻩ ﻫﺎی ﻫﺭﺩﻭ ﻁﺭﻑ ﺁﻥ ﺑﮕﻳﺭﻳﺩ. ﻫﻧﮕﺎﻣﯽ ﮐﻪ ﺩﺳﺗﮕﺎﻩ ﺩﺭﺣﺎﻝ ﮐﺎﺭ ﺍﺳﺕ ﺍﺯ ﺟﺎﺑﺟﺎ ﮐﺭﺩﻥ ﺁﻥ ﺧﻭﺩﺩﺍﺭی ﮐﻧﻳﺩ. • • ﺍﺯ ﺟﺎﺑﺟﺎ ﮐﺭﺩﻥ ﻳﺎ ﺗﻐﻳﻳﺭ ﺟﻬﺕ ﺩﺳﺗﮕﺎﻩ ﺍﺻﻠﯽ ﻫﻧﮕﺎﻡ ﮐﺷﻳﺩﻥ ﭼﺭﺥ ﻫﺎ ﺧﻭﺩﺩﺍﺭی ﻧﻣﺎﻳﻳﺩ.
ﺩﺳﺗﻭﺭﺍﻟﻌﻣﻠﻬﺎی ﺍﻳﻣﻧﯽ ﻣﻬﻡ ﻫﻧﮕﺎﻡ ﺍﺳﺗﻔﺎﺩﻩ ﺍﺯ ﻭﺳﺎﻳﻝ ﺑﺭﻗﯽ ،ﺑﺎﻳﺳﺗﯽ ﺍﺯ ﺍﻗﺩﺍﻣﺎﺕ ﺍﺣﺗﻳﺎﻁﯽ ﺍﻳﻣﻧﯽ ﺍﻭﻟﻳﻪ ،ﻣﻧﺟﻣﻠﻪ ﻣﻭﺍﺭﺩ ﺯﻳﺭ ﭘﻳﺭﻭی ﻧﻣﻭﺩ: ﻫﺷﺩﺍﺭ -ﺑﺭﺍی ﮐﺎﻫﺵ ﺧﻁﺭ ﺑﺭﻕ ﮔﺭﻓﺗﮕﯽ ،ﺁﺗﺵ ﺳﻭﺯی ﻳﺎ ﻭﺍﺭﺩﺁﻣﺩﻥ ﺟﺭﺍﺣﺕ ﺑﻪ ﺍﻓﺭﺍﺩ: • ﻗﺑﻝ ﺍﺯ ﺍﺳﺗﻔﺎﺩﻩ ﺍﺯ ﺍﻳﻥ ﺩﺳﺗﮕﺎﻩ ،ﮐﻠﻳﻪ ﺩﺳﺗﻭﺭﺍﻟﻌﻣﻠﻬﺎ ﺭﺍ ﻣﻁﺎﻟﻌﻪ ﻓﺭﻣﺎﻳﻳﺩ. • ﻓﻘﻁ ﺍﺯ ﭘﺭﻳﺯ ﺑﺭﻕ ۲۴۰~۲۲۰ﻭﻟﺕ ﺍﺳﺗﻔﺎﺩﻩ ﮐﻧﻳﺩ. • ﺩﺭ ﺻﻭﺭﺗﻳﮑﻪ ﺳﻳﻡ ﻳﺎ ﺩﻭﺷﺎﺧﻪ ﺑﺭﻕ ﺻﺩﻣﻪ ﺩﻳﺩﻩ ﺍﺳﺕ ،ﻭ ﻳﺎ ﺍﺗﺻﺎﻝ ﺑﻪ ﭘﺭﻳﺯ ﺑﺭﻕ ﺩﻳﻭﺍﺭی ﺷﻝ ﺍﺳﺕ ،ﺍﺯ ﺩﺳﺗﮕﺎﻩ ﺍﺳﺗﻔﺎﺩﻩ ﻧﮑﻧﻳﺩ. • ﮔﺭﺩﻭﻏﺑﺎﺭ ﺭﺍ ﻫﺭ ﭼﻧﺩﻭﻗﺕ ﻳﮑﺑﺎﺭ ﺍﺯ ﺩﻭﺷﺎﺧﻪ ﺑﺭﻕ ﺑﺯﺩﺍﻳﻳﺩ.
ﻓﺎﺭﺳﯽ ﻗﺎﺑﻠﻳﺕ ﻫﺎ ﻓﻬﺭﺳﺕ ﻣﻁﺎﻟﺏ ﺗﺭﮐﻳﺑﯽ ﻣﻧﺣﺻﺭﺑﻔﺭﺩ ﺍﺯ ﻓﻧﺎﻭﺭی ﻫﺎی ﺗﺻﻔﻳﻪ ﻫﻭﺍ ﺳﻳﺳﺗﻡ ﻓﻳﻠﺗﺭﮐﺭﺩﻥ ﺳﻪ ﮔﺎﻧﻪ + Plasmacluster + ﺭﻁﻭﺑﺕ ﺩﻫﯽ ﺗﻠﻪ ﮔﺭﺩﻭﻏﺑﺎﺭ* ﻓﻳﻠﺗﺭ ﺍﻭﻟﻳﻪ ﻗﺎﺑﻝ ﺷﺳﺗﺷﻭ ،ﮔﺭﺩﻭﻏﺑﺎﺭ ﻭ ﺳﺎﻳﺭ ﺫﺭﺍﺕ ﺑﺯﺭگ ﻣﻌﻠﻕ ﺩﺭ ﻫﻭﺍ ﺭﺍ ﺑﻪ ﺩﺍﻡ ﻣﯽ ﺍﻧﺩﺍﺯﺩ. ﮐﺎﻫﺵ ﺑﻭﻫﺎی ﻧﺎﺧﻭﺷﺎﻳﻧﺩ ﻓﻳﻠﺗﺭ ﺑﻭﺯﺩﺍی ﻗﺎﺑﻝ ﺷﺳﺗﺷﻭ ،ﺑﺳﻳﺎﺭی ﺍﺯ ﺑﻭﻫﺎی ﻧﺎﺧﻭﺷﺎﻳﻧﺩ ﺧﺎﻧﮕﯽ ﻣﻌﻣﻭﻝ ﺭﺍ ﺟﺫﺏ ﻣﯽ ﮐﻧﺩ.
ﻗﺑﻝ ﺍﺯ ﺍﺳﺗﻔﺎﺩﻩ ﺍﺯ ﺩﺳﺗﮕﺎﻩ ﺗﺻﻔﻳﻪ ﻫﻭﺍی ﺟﺩﻳﺩ ﺧﻭﺩ ،ﻟﻁﻔﺎً ﺍﻳﻥ ﺑﺧﺵ ﺭﺍ ﻣﻁﺎﻟﻌﻪ ﻓﺭﻣﺎﻳﻳﺩ ﺩﺳﺗﮕﺎﻩ ﺗﺻﻔﻳﻪ ﻫﻭﺍ ،ﺍﺑﺗﺩﺍ ﻫﻭﺍی ﺍﺗﺎﻕ ﺭﺍ ﺍﺯ ﻗﺳﻣﺕ ﻣﮑﺵ ﻫﻭﺍ ﺑﻪ ﺩﺍﺧﻝ ﺩﺳﺗﮕﺎﻩ ﻣﯽ ﮐﺷﺩ ،ﺁﻥ ﺭﺍ ﺍﺯ ﻳﮏ ﻓﻳﻠﺗﺭ ﺍﻭﻟﻳﻪ ،ﻳﮏ ﻓﻳﻠﺗﺭ ﺑﻭﺯﺩﺍی ﻗﺎﺑﻝ ﺷﺳﺗﺷﻭ ﻭ ﻳﮏ ﻓﻳﻠﺗﺭ HEPAﮐﻪ ﺩﺭ ﺩﺍﺧﻝ ﺩﺳﺗﮕﺎﻩ ﻗﺭﺍﺭ ﺩﺍﺭﺩ ﻋﺑﻭﺭ ﻣﯽ ﺩﻫﺩ، ﻭ ﺳﭘﺱ ﻫﻭﺍ ﺭﺍ ﺍﺯ ﻁﺭﻳﻕ ﺧﺭﻭﺟﯽ ﻫﻭﺍ ﺑﻪ ﺑﻳﺭﻭﻥ ﻫﺩﺍﻳﺕ ﻣﯽ ﮐﻧﺩ .ﻓﻳﻠﺗﺭ HEPAﻗﺎﺩﺭ ﺍﺳﺕ ٪۹۹/۹۷ﺍﺯ ﺫﺭﺍﺕ ﮔﺭﺩﻭﻏﺑﺎﺭ ﺑﺎ ﺍﻧﺩﺍﺯﻩ ﺣﺩﺍﻗﻝ ۰/۳ﻣﻳﮑﺭﻭﻥ ﮐﻪ ﺍﺯ ﺍﻳﻥ ﻓﻳﻠﺗﺭ ﻋﺑﻭﺭ ﻣﯽ ﮐﻧﻧﺩ ﺭﺍ ﺣﺫﻑ ﻧﻣﺎﻳﺩ ﻭ ﺑﻪ ﺟﺫﺏ ﺑﻭﻫﺎی ﻧﺎﺧﻭﺷﺎﻳﻧﺩ ﻧﻳﺯ ﮐﻣﮏ ﻣﯽ ﮐﻧﺩ.
OM_KC-A60EU_PE.
ﺍﻟﻣﻭﺩﻳﻝ ﻣﺻﺩﺭ ﺍﻟﺗﻳﺎﺭ ﺍﻟﻛﻬﺭﺑﺎﺋﻲ ﺿﺑﻁ ﺳﺭﻋﺔ ﺍﻟﻣﺭﻭﺣﺔ ﺳﺭﻋﺔ ﺍﻟﻣﺭﻭﺣﺔ )ﻡ/۳ﺳﺎﻋﺔ( ﺗﻧﻅﻳﻑ ﺍﻟﻬﻭﺍء ﻣﻌﺩﻝ ﺍﻟﻁﺎﻗﺔ )ﻭﺍﺕ( ﻣﺳﺗﻭﻯ ﺍﻟﺻﻭﺕ )ﺩﻳﺳﻳﺑﻝ( ﺳﺭﻋﺔ ﺍﻟﻣﺭﻭﺣﺔ )ﻡ/۳ﺳﺎﻋﺔ( ﺗﻧﻅﻳﻑ ﻭﺗﺭﻁﻳﺏ ﻣﻌﺩﻝ ﺍﻟﻁﺎﻗﺔ )ﻭﺍﺕ( ﺍﻟﻬﻭﺍء ﻣﺳﺗﻭﻯ ﺍﻟﺻﻭﺕ )ﺩﻳﺳﻳﺑﻝ( ﺍﻟﺗﺭﻁﻳﺏ )ﻣﻝ/ﺳﺎﻋﺔ(*۱ ﺍﻟﻣﺳﺎﺣﺔ ﺍﻟﻣﻘﺗﺭﺣﺔ ﻟﻠﻐﺭﻓﺔ )ﻡ۲*(۲ ﻛﺛﺎﻓﺔ ﺃﻳﻭﻧﺎﺕ ﺑﻼﺯﻣﺎﻛﻠﺳﺗﺭ ﺍﻟﻌﺎﻟﻳﺔ ﻟﻠﻣﺳﺎﺣﺔ ﺍﻟﻣﻘﺗﺭﺣﺔ ﻟﻠﻐﺭﻓﺔ )ﻡ۳*(۲ ﺳﻌﺔ ﺧﺯﺍﻥ ﺍﻟﻣﺎء )ﻟﺗﺭ( ﺍﻟﻣﺳﺗﺷﻌﺭﺍﺕ ﺟﻣﻊ ﺍﻟﻐﺑﺎﺭ ّ ﺍﻟﻣﺭﺷﺢ ﻧﻭﻉ ﺇﺯﺍﻟﺔ ﺍﻟﺭﻭﺍﺋﺢ ﺍﻟﻛﺭﻳﻬﺔ ﻁﻭﻝ ﺍﻟﺳﻠﻙ ﺍﻟﻛﻬﺭﺑﺎﺋﻲ )ﻡ( ﺍﻷﺑﻌﺎﺩ )ﻣﻡ( ﺍﻟﻭﺯﻥ )ﻛﻎ( *۱
ﺗﺣﺭﻱ ﺍﻟﺧﻠﻝ ﻭﺇﺻﻼﺣﻪ ﺷﺎﺷﺔ ﻋﺭﺽ ﺍﻟﺧﻁﺄ ﺍﻟﻣﺅﺷﺭ ﺍﻟﺭﻗﻣﻲ ﺇﺫﺍ ﻅﻬﺭ ﺍﻟﺧﻁﺄ ﻣﺭﺓ ﺃﺧﺭﻯ ،ﺍﺗﺻﻝ ﺑﻣﺭﻛﺯ ﺧﺩﻣﺔ ﺷﺎﺭﺏ. ﺗﻔﺎﺻﻳﻝ ﺍﻟﺧﻁﺄ ﺍﻟﺗﺻﺣﻳﺢ ﻣﺅﺷﺭ ﺍﻹﺿﺎءﺓ ﻭﻣﻳﺽ ﺿﻭء ﻣﺅﺷﺭ ﺗﻧﻅﻳﻑ ﻭﺗﺭﻁﻳﺏ. ّ ﻣﺭﺷﺢ ﺍﻟﺗﺭﻁﻳﺏ ﻻ ﻳﻌﻣﻝ ﺑﺷﻛﻝ ﻁﺑﻳﻌﻲ. ّ ﻣﺭﺷﺢ ﺍﻟﺗﺭﻁﻳﺏ ﺗﺄﻛﺩ ﻣﻥ ﺃﻥ ﻭﺻﻳﻧﻳﺔ ﺍﻟﺗﺭﻁﻳﺏ ﻭﺧﺯﺍﻥ ﺍﻟﻣﺎء ﺟﻣﻳﻌﻬﺎ ﻣﺛﺑﺗﺔ ﺑﺎﻟﺷﻛﻝ ﺍﻟﺻﺣﻳﺢ ﺛﻡ ﺷﻐﻝ ﺍﻟﺟﻬﺎﺯ ﻣﺭﺓ ﺃﺧﺭﻯ. '. ﺍﻟﻣﺭﻭﺣﺔ ﻻ ﺗﻌﻣﻝ ﺑﺷﻛﻝ ﻁﺑﻳﻌﻲ. ﺃﻁﻔﺊ ﺍﻟﺟﻬﺎﺯ ﻹﻟﻐﺎء ﻋﺭﺽ ﺍﻟﺧﻁﺄ، ﺍﻧﺗﻅﺭ ﻟﻣﺩﺓ ﺩﻗﻳﻘﺔ ﻭﺍﺣﺩﺓ ﺛﻡ ﻗﻡ ﺑﺗﺷﻐﻳﻝ ﺍﻟﺟﻬﺎﺯ.
ً ﻋﻁﻼ( ﺍﻟﺗﺻﺣﻳﺢ )ﻟﻳﺱ ﺍﻷﻋﺭﺍﺽ ﻋﻧﺩﻣﺎ ﻳﺗﻡ ﻧﺯﻉ ﺍﻟﺑﻛﺭﺓ/ﺍﻟﻌﻭﺍﻣﺔ. • ﻗﻡ ﺑﺗﺭﻛﻳﺏ ﺍﻟﺑﻛﺭﺓ/ﺍﻟﻌﻭﺍﻣﺔ ﺑﺎﻟﺗﺭﺗﻳﺏ ﺍﻟﻣﺑﻳﻥ ﺃﺩﻧﺎﻩ. ﺍﻟﻌﻭﺍﻣﺔ ﺍﻟﺑﻛﺭﺓ ﻗﻡ ﺑﺗﺛﺑﻳﺕ ﺍﻟﺑﻛﺭﺓ ﻓﻲ ﺍﻟﺻﻳﻧﻳﺔ ﻣﻥ ﺍﻟﺟﺎﻧﺏ. .۱ﺃﺩﺧﻝ ﺍﻟﻌﻭﺍﻣﺔ ﺗﺣﺕ ﻫﺫﺍ ﺍﻟﻠﺳﺎﻥ. ﻋﻭﺍﻣﺔ ﻣﻼﺣﻅﺔ ﺗﺣﻘﻕ ﻣﻥ ﺍﺗﺟﺎﻩ ﺍﻟﺑﻛﺭﺓ. ﻋﺭﺑـﻲ .۲ﻗﻡ ﺑﺈﺩﺧﺎﻝ ﻟﺳﺎﻥ ﺍﻟﻌﻭﺍﻣﺔ ﻓﻲ ﺍﻟﻔﺗﺣﺔ. ﻟﺳﺎﻥ ﻋﻭﺍﻣﺔ ﻣﺷﻬﺩ ﻟﻠﻣﻘﻁﻊ ﺍﻟﻌﺭﺿﻲ .۳ﺃﺩﺧﻝ ﺍﻟﻠﺳﺎﻥ ﺍﻟﻣﻭﺟﻭﺩ ﻋﻠﻰ ﺍﻟﺟﺎﻧﺏ ﺍﻵﺧﺭ ﻣﻥ ﺍﻟﻌﻭﺍﻣﺔ ﻓﻲ ﺍﻟﻔﺗﺣﺔ.
ﺗﺣﺭﻱ ﺍﻟﺧﻠﻝ ﻭﺇﺻﻼﺣﻪ ً ﻋﻁﻼ ﻓﻲ ﺍﻟﺟﻬﺎﺯ ﻧﻔﺳﻪ. ﻗﺑﻝ ﺍﻻﺗﺻﺎﻝ ﺑﺧﺩﻣﺔ ﺍﻟﺻﻳﺎﻧﺔ ،ﻳﺭﺟﻰ ﻣﺭﺍﺟﻌﺔ ﺍﻟﻼﺋﺣﺔ ﺃﺩﻧﺎﻩ ،ﺣﻳﺙ ﺃﻥ ﺍﻟﻣﺷﻛﻠﺔ ﺍﻟﺣﺎﺩﺛﺔ ﻗﺩ ﻻ ﺗﻛﻭﻥ ً ﻋﻁﻼ( ﺍﻟﺗﺻﺣﻳﺢ )ﻟﻳﺱ ﺍﻷﻋﺭﺍﺽ ﺍﻟﺭﻭﺍﺋﺢ ﺍﻟﻛﺭﻳﻬﺔ ﻭﺍﻟﺩﺧﺎﻥ ﻻ ﻳﺯﻭﻻﻥ. • ّ ﺍﻟﻣﺭﺷﺣﺎﺕ ﺇﺫﺍ ﻻﺣﻅﺕ ﺃﻧﻬﺎ ﻣﺗﺳﺧﺔ ﻟﻠﻐﺎﻳﺔ. ﻗﻡ ﺑﺗﻧﻅﻳﻑ ﺃﻭ ﺍﺳﺗﺑﺩﺍﻝ )ﺍﺭﺟﻊ ﺇﻟﻰ (Ar-14 ،Ar-12 ،Ar-11 • ﻗﺩ ﻳﻛﻭﻥ ﺍﻟﻬﻭﺍء ﻏﻳﺭ ﻧﻘﻲ ﻓﻲ ﺍﻟﻠﺣﻅﺔ ﺍﻟﺗﻲ ﺗﻡ ﻓﻳﻬﺎ ﻓﺻﻝ ﺍﻟﺟﻬﺎﺯ ﻣﻥ ﺍﻟﺗﻳﺎﺭ ﺍﻟﻛﻬﺭﺑﺎﺋﻲ. ﺃﺧﺭﺝ ﻣﻘﺑﺱ ﺍﻟﻛﻬﺭﺑﺎء ﻣﻥ ﺍﻟﻣﺻﺩﺭ ﻭﺍﻧﺗﻅﺭ ﻟﺩﻗﻳﻘﺔ ﻭﺍﺣﺩﺓ ﺛﻡ ﻗﻡ ﺑﺗﻭﺻﻳﻠﻪ ﺑﻣﺻﺩﺭ ﺍﻟﺗﻳﺎﺭ ﻣﺭﺓ ﺃﺧﺭﻯ.
ّ ﺍﻟﻣﺭﺷﺢ ﺍﺳﺗﺑﺩﺍﻝ ﻓﺗﺭﺓ ﺍﻻﺳﺗﺑﺩﺍﻝ ّ ﻣﺭﺷﺢ ﺇﺯﺍﻟﺔ ﺍﻟﺭﻭﺍﺋﺢ ﺍﻟﻛﺭﻳﻬﺔ ﺑﺷﻛﻝ ﻣﺗﻛﺭﺭ ﺑﻌﺩ ﻏﺳﻠﻪ، * ﻣﻥ ﺍﻟﻣﻣﻛﻥ ﺃﻥ ﻳﺗﻡ ﺍﺳﺗﺧﺩﺍﻡ ﺃﻭ ﻣﻥ ﺍﻟﻣﻣﻛﻥ ﺍﺳﺗﺑﺩﺍﻟﻪ. ّ ﺍﻟﻣﺭﺷﺢ ﺍﺳﺗﺑﺩﺍﻝ ﻣﻭﺩﻳﻝ ّ ﻣﺭﺷﺢ ﺍﻟﺗﺭﻁﻳﺏ ّ ﺍﻟﻣﺭﺷﺢ.
ﺍﻟﻌﻧﺎﻳﺔ ﻭﺍﻟﺻﻳﺎﻧﺔ ّ ﻣﺭﺷﺢ ﺇﺯﺍﻟﺔ ﺍﻟﺭﻭﺍﺋﺢ ﺍﻟﻛﺭﻳﻬﺔ ﺍﻟﻐﺳﻝ ﻳﺩﻭﻳًﺎ ﻓﻘﻁ! ﻻ ﺗﻘﻡ ﺑﺗﻧﺷﻳﻔﻪ ﻓﻲ ﻏﺳﺎﻟﺔ ﺍﻟﻣﻼﺑﺱ! ۱ ّ ﻣﺭﺷﺢ ﺇﺯﺍﻟﺔ ﺍﻟﺭﻭﺍﺋﺢ ﺍﻟﻛﺭﻳﻬﺔ. ﻗﻡ ﺑﺈﺯﺍﻟﺔ ﺍﻟﻐﺑﺎﺭ ﻋﻥ ۲ ّ ﻣﺭﺷﺢ ﺇﺯﺍﻟﺔ ﺍﻟﺭﻭﺍﺋﺢ ﺍﻟﻛﺭﻳﻬﺔ ﺑﺎﻟﻣﺎء. ﻗﻡ ﺑﻐﺳﻝ ﺗﻧﺑﻳﻪ ّ ﺍﻟﻣﺭﺷﺢ ﻟﻠﻣﺭﺓ ﺍﻷﻭﻟﻰ ،ﻓﻘﺩ ﻳﻛﻭﻥ ﻟﻭﻥ ﻣﺎء ﺍﻟﺷﻁﻑ ﺑﻧﻳًﺎ. • ﻋﻧﺩ ﻏﺳﻝ ﻻ ﻳﺅﺛﺭ ﺫﻟﻙ ﻋﻠﻰ ﻓﻌﺎﻟﻳﺔ ﺇﺯﺍﻟﺔ ﺍﻟﺭﻭﺍﺋﺢ ﺍﻟﻛﺭﻳﻬﺔ. ّ ﺍﻟﻣﺭﺷﺢ ﻋﻧﺩ ﺍﻟﻐﺳﻝ. • ﺗﺟﻧﺏ ﻁﻲ ﺃﻭ ﺇﺣﻧﺎء ۳ ٤ ﻗﻡ ﺑﺈﺯﺍﻟﺔ ﺃﻛﺑﺭ ﻗﺩﺭ ﻣﻥ ﺍﻟﺭﻁﻭﺑﺔ. ّ ﺍﻟﻣﺭﺷﺢ ﺑﺷﻛﻝ ﺗﺎﻡ ﻓﻲ ﻣﻛﺎﻥ ﺟﻳﺩ ﺍﻟﺗﻬﻭﻳﺔ.
ﺍﺣﺭﺹ ﻋﻠﻰ ﻧﺯﻉ ﻗﺎﺑﺱ ﺍﻟﺗﻳﺎﺭ ﻣﻥ ﺍﻟﻣﺧﺭﺝ ﺍﻟﺟﺩﺍﺭﻱ. ﺻﻳﻧﻳﺔ ﻭﻏﻁﺎء ﺟﻬﺎﺯ ﺍﻟﺗﺭﻁﻳﺏ .۱ﻗﻡ ﺑﻧﺯﻉ ﻏﻁﺎء ﺻﻳﻧﻳﺔ ﺍﻟﺗﺭﻁﻳﺏ. .۲ﻗﻡ ﺑﻐﺳﻝ ﺍﻟﺟﺯء ﺍﻟﺩﺍﺧﻠﻲ ﻣﻥ ﺻﻳﻧﻳﺔ ﺍﻟﺗﺭﻁﻳﺏ ﻭﻏﻁﺎء ﺻﻳﻧﻳﺔ ﺍﻟﺗﺭﻁﻳﺏ ﺑﻔﺭﺷﺎﺓ ﺃﺳﻧﺎﻥ. ﻏﻁﺎء ﺻﻳﻧﻳﺔ ﺍﻟﺗﺭﻁﻳﺏ ﺗﻧﺑﻳﻪ • ﻻ ﺗﻌﻣﺩ ﺇﻟﻰ ﻧﺯﻉ ﺍﻟﻌﻭﺍﻣﺔ ﻭﺍﻟﺑﻛﺭﺓ. • ﺇﺫﺍ ﺗﻡ ﻧﺯﻉ ﺍﻟﻌﻭﺍﻣﺔ ﻭ/ﺃﻭ ﺍﻟﺑﻛﺭﺓ) .ﺍﺭﺟﻊ ﺇﻟﻰ (Ar-17 ﺑﻛﺭﺓ .۱ﻗﻡ ﺑﺗﻌﺑﺋﺔ ﻧﺻﻑ ﺍﻟﺻﻳﻧﻳﺔ ﺑﺎﻟﻣﺎء. .۲ﻗﻡ ﺑﺈﺿﺎﻓﺔ ﻛﻣﻳﺔ ﻗﻠﻳﻠﺔ ﻣﻥ ﻣﺣﻠﻭﻝ ﺗﻧﻅﻳﻑ ﺍﻟﻣﻁﺎﺑﺦ. .۳ﺍﻧﻘﻌﻪ ﻟﻣﺩﺓ ۳۰ﺩﻗﻳﻘﺔ. .٤ﻗﻡ ﺑﺈﺯﺍﻟﺔ ﻣﺣﻠﻭﻝ ﺗﻧﻅﻳﻑ ﺍﻟﻣﻁﺎﺑﺦ ﺑﻣﺎء ﻧﻅﻳﻑ.
ﺍﻟﻌﻧﺎﻳﺔ ﻭﺍﻟﺻﻳﺎﻧﺔ ﺧﺯﺍﻥ ﺍﻟﻣﺎء ﻗﻡ ﺑﻐﺳﻝ ﺍﻟﺟﺯء ﺍﻟﺩﺍﺧﻠﻲ ﺑﻛﻣﻳﺔ ﻗﻠﻳﻠﺔ ﻣﻥ ﺍﻟﻣﺎء. ﺗﻧﺑﻳﻪ • ﻻ ﺗﻌﻣﺩ ﺇﻟﻰ ﻫﺯ ﺧﺯﺍﻥ ﺍﻟﻣﺎء ﻋﻥ ﻁﺭﻳﻕ ﺍﻹﻣﺳﺎﻙ ﺑﺎﻟﻣﻘﺎﺑﺽ ﺍﻟﻣﺧﺻﺻﺔ ﻟﻠﺣﻣﻝ. ﻣﻼﺣﻅﺔ ﻟﻸﻭﺳﺎﺥ ﺍﻟﻌﻧﻳﺩﺓ... ﻗﻡ ﺑﺗﻧﻅﻳﻑ ﺍﻟﺟﺯء ﺍﻟﺩﺍﺧﻠﻲ ﻟﺧﺯﺍﻥ ﺍﻟﻣﺎء ﺑﺈﺳﻔﻧﺟﺔ ﻧﺎﻋﻣﺔ ﻭﻏﻁﺎء ﺍﻟﺧﺯﺍﻥ ﺑﻣﻣﺳﺣﺔ ﻗﻁﻧﻳﺔ ﺃﻭ ﻓﺭﺷﺎﺓ ﺃﺳﻧﺎﻥ. ﻓﺭﺍﺷﻲ ﺃﺳﻧﺎﻥ ﻏﻁﺎء ﺍﻟﺧﺯﺍﻥ ﻣﺭﺷﺢ ﺍﻟﺗﺭﻁﻳﺏ ﻗﻡ ﺑﻐﺳﻠﻪ ﺑﺎﻟﻛﺛﻳﺭ ﻣﻥ ﺍﻟﻣﺎء. ﺗﻧﺑﻳﻪ ّ ّ ﺍﻟﻣﺭﺷﺢ. ﻣﺭﺷﺢ ﺍﻟﺗﺭﻁﻳﺏ ﻣﻥ ﺇﻁﺎﺭ • ﻻ ﺗﻌﻣﺩ ﺇﻟﻰ ﻧﺯﻉ • ﺗﺟﻧﺏ ﺳﻛﺏ ﺍﻟﻣﺎء ﻣﻥ ﺻﻳﻧﻳﺔ ﺍﻟﺗﺭﻁﻳﺏ. ﻟﻸﻭﺳﺎﺥ ﺍﻟﻌﻧﻳﺩﺓ... ﻣﻼﺣﻅﺔ .
ﺍﻟﻌﻧﺎﻳﺔ ﻭﺍﻟﺻﻳﺎﻧﺔ ﺍﺣﺭﺹ ﻋﻠﻰ ﻧﺯﻉ ﻗﺎﺑﺱ ﺍﻟﺗﻳﺎﺭ ﻣﻥ ﺍﻟﻣﺧﺭﺝ ﺍﻟﺟﺩﺍﺭﻱ. ﻣﺅﺷﺭ ﺍﻟﻣﺭﺷﺢ ﺳﻳﺷﺗﻐﻝ ﺿﻭء ﺍﻟﻣﺅﺷﺭ ﺑﻌﺩ ﺣﻭﺍﻟﻲ ۷۲۰ﺳﺎﻋﺔ ۳۰) .ﻳﻭﻡ × ۲٤ﺳﺎﻋﺔ =(۷۲۰ ﺗﺫﻛﻳﺭ ﻹﺟﺭﺍء ﺍﻟﺻﻳﺎﻧﺔ ﻟﻸﺟﺯﺍء ﺍﻟﻣﺫﻛﻭﺭﺓ ﺃﺩﻧﺎﻩ. ّ ﺑﻌﺩ ﺇﺟﺭﺍء ﺍﻟﺻﻳﺎﻧﺔ ،ﻗﻡ ﺑﺈﻋﺎﺩﺓ ﺿﺑﻁ ﻣﺅﺷﺭ ﺍﻟﻣﺭﺷﺢ) .ﺍﺭﺟﻊ ﺇﻟﻰ (Ar-12 ﺛﻭﺍﻥ ﺃﻛﺛﺭ ﻣﻥ ۳ ٍ ﻓﻬﺭﺱ ﺍﻟﻌﻧﺎﻳﺔ ّ ﻣﺭﺷﺢ ﺍﻟﺗﺭﻁﻳﺏ )ﺍﺭﺟﻊ ﺇﻟﻰ (Ar-12 ﻋﺭﺑـﻲ ّ ﺍﻟﻣﺭﺷﺢ. • ﻳﺿﻲء ﺿﻭء ﻣﺅﺷﺭ • ﻻﺣﻅ ﻭﺟﻭﺩ ﺭﺍﺋﺣﺔ ﻛﺭﻳﻬﺔ ﻣﻧﺑﻌﺛﺔ ﻣﻥ ﻣﺧﺭﺝ ﺍﻟﻬﻭﺍء.
ﺍﻟﻭﻅﺎﺋﻑ ﺍﻟﻣﻔﻳﺩﺓ ﺍﻟﺗﺣﻛﻡ ﺑﺎﻟﺿﻭء ﻗﻡ ﺑﺎﺳﺗﺧﺩﺍﻡ ﻫﺫﻩ ﺍﻟﻭﻅﻳﻔﺔ ﻻﺧﺗﻳﺎﺭ ﺍﻟﺳﻁﻭﻉ ﺍﻟﻣﺭﻏﻭﺏ. JnH _Y h`Z> ænbxÎ ﻗﻔﻝ ﻣﻧﻊ ﻋﺑﺙ ﺍﻷﻁﻔﺎﻝ ﺳﻳﺗﻡ ﻗﻔﻝ ﺗﺷﻐﻳﻝ ﺷﺎﺷﺔ ﺍﻟﺟﻬﺎﺯ .ﺇﺫﺍ ﻛﺎﻧﺕ ﺑﻧﻔﺱ ﻁﺭﻳﻘﺔ ﺑﺩء ﺍﻟﺗﺷﻐﻳﻝ. ﺇﻟﻐﺎء ﺗﺷﻐﻳﻝ ﺛﻭﺍﻥ ﺃﻛﺛﺭ ﻣﻥ ۳ ٍ ﺛﻭﺍﻥ ﺃﻛﺛﺭ ﻣﻥ ۳ ٍ ﺗﻬﻳﺋﺔ ﻣﺅﺷﺭ ﺍﻟﺻﻭﺕ ً ﻓﺎﺭﻏﺎ.
ﺗﻧﻅﻳﻑ ﻣﻭﺿﻊ ﺩﻓﻕ ﺍﻷﻳﻭﻧﺎﺕ ﻳﻌﻣﻝ ﻋﻠﻰ ﺇﻁﻼﻕ ﺃﻳﻭﻧﺎﺕ ﺑﻼﺯﻣﺎﻛﻠﺳﺗﺭ ﺑﻛﺛﺎﻓﺔ ﻋﺎﻟﻳﺔ ﻛﻣﺎ ﻳﻌﻣﻝ ﻋﻠﻰ ﺗﺻﺭﻳﻑ ﺗﺩﻓﻕ ﺍﻟﻬﻭﺍء ﺍﻟﻘﻭﻱ ﻟﻣﺩﺓ ٦۰ﺩﻗﻳﻘﺔ. ﺗﺷﻐﻳﻝ ﻣﻼﺣﻅﺔ “، ﻋﺭﺑـﻲ • ﺇﺫﺍ ﺗﻡ ﺇﻳﻘﺎﻑ ﺗﺷﻐﻳﻝ”ﺃﻳﻭﻧﺎﺕ ﺑﻼﺯﻣﺎﻛﻠﺳﺗﺭ ﻓﻠﻥ ﻳﺗﻡ ﺇﻁﻼﻕ ﺃﻳﻭﻧﺎﺕ ﺑﻼﺯﻣﺎﻛﻠﺳﺗﺭ. • ﻋﻧﺩﻣﺎ ﻳﻧﺗﻬﻲ ﺍﻟﺗﺷﻐﻳﻝ ،ﺳﻳﻌﻭﺩ ﺍﻟﺟﻬﺎﺯ ﺇﻟﻰ ﻭﺿﻊ ﺍﻟﺗﺷﻐﻳﻝ ﺍﻟﺳﺎﺑﻕ. ﻣﻥ ﺍﻟﻣﻣﻛﻥ ﺍﻟﺗﻐﻳﻳﺭ ﺇﻟﻰ ﻭﺿﻊ ﺁﺧﺭ ﻭ ﺃﺛﻧﺎء ﺗﺷﻐﻳﻝ ﻫﺫﺍ ﺍﻟﻭﺿﻊ. ﺳﺭﻋﺔ ﺍﻟﻣﺭﻭﺣﺔ ﻗﻡ ﺑﺎﺧﺗﻳﺎﺭ ﺳﺭﻋﺔ ﺍﻟﻣﺭﻭﺣﺔ ﺍﻟﻣﺭﻏﻭﺑﺔ.
ﺍﻟﺗﺷﻐﻳﻝ ﺗﻧﻅﻳﻑ ﻭﺗﺭﻁﻳﺏ ﺍﻟﻬﻭﺍء ﻳﺗﻡ ﺍﺳﺗﺧﺩﺍﻣﻪ ﻟﺗﻧﻅﻳﻑ ﺍﻟﻬﻭﺍء ﻭﺗﻘﻠﻳﻝ ﺍﻟﺭﻭﺍﺋﺢ ﺍﻟﻛﺭﻳﻬﺔ ﻭﻟﻠﺗﺭﻁﻳﺏ ﺑﺳﺭﻋﺔ. ﺗﺷﻐﻳﻝ • ﻗﻡ ﺑﺎﺧﺗﻳﺎﺭ ﺳﺭﻋﺔ ﺍﻟﻣﺭﻭﺣﺔ ﺍﻟﻣﺭﻏﻭﺑﺔ) .ﺍﺭﺟﻊ ﺇﻟﻰ (Ar-9 • ﺇﺫﺍ ﻟﻡ ﻳﺗﻡ ﻓﺻﻝ ﺳﻠﻙ ﺍﻟﺗﻳﺎﺭ ﻣﻥ ﺍﻟﻘﺎﺑﺱ ،ﺗﺑﺩﺃ ﻋﻣﻠﻳﺎﺕ ﺍﻟﺗﺷﻐﻳﻝ ﻓﻲ ﺍﻟﻭﺿﻊ ﺍﻟﺳﺎﺑﻕ ﺍﻟﺫﻱ ﻛﺎﻥ ﺍﻟﺟﻬﺎﺯ ﻳﻌﻣﻝ ﻓﻳﻪ. ﻣﻼﺣﻅﺔ • ﻗﻡ ﺑﺗﻌﺑﺋﺔ ﺧﺯﺍﻥ ﺍﻟﻣﺎء) .ﺍﺭﺟﻊ ﺇﻟﻰ (Ar-7 ً ﻓﺎﺭﻏﺎ ،ﺳﻳﺷﻐﻝ ﺍﻟﺟﻬﺎﺯ ”ﻭﺿﻊ ﺗﻧﻅﻳﻑ ﺍﻟﻬﻭﺍء“ ﻭﺳﺗﻭﻣﺽ • ﻋﻧﺩﻣﺎ ﻳﻛﻭﻥ ﺧﺯﺍﻥ ﺍﻟﻣﺎء )ﺑﺎﻟﻠﻭﻥ ﺍﻷﺣﻣﺭ(.
ﺇﻋﺎﺩﺓ ﺗﻌﺑﺋﺔ ﺧﺯﺍﻥ ﺍﻟﻣﺎء ﻋﻧﺩ ﺍﺳﺗﺧﺩﺍﻡ ﻭﺿﻊ ﺗﻧﻅﻳﻑ ﻭﺗﺭﻁﻳﺏ ﺍﻟﻬﻭﺍء ،ﺃﻭ ﻭﺿﻊ ﺗﻧﻅﻳﻑ ﻣﻭﺿﻊ ﺩﻓﻕ ﺍﻷﻳﻭﻧﺎﺕ. ۱ ﺍﻧﺯﻉ ﺧﺯﺍﻥ ﺍﻟﻣﺎء. ﻋﺭﺑـﻲ ۲ ﻗﻡ ﺑﺗﻌﺑﺋﺔ ﺧﺯﺍﻥ ﺍﻟﻣﺎء ﻣﻥ ﻣﺎء ﺍﻟﺣﻧﻔﻳﺔ. ﺍﻟﺣﺩ ﺍﻷﻗﺻﻰ MAX ﺗﻧﺑﻳﻪ ﺷﺩ • ﺗﺣﻘﻕ ﻣﻥ ﻋﺩﻡ ﻭﺟﻭﺩ ﺗﺳﺭﺏ ﻣﺎء. • ﺍﺣﺭﺹ ﻋﻠﻰ ﻣﺳﺢ ﺃﻱ ﻣﺎء ﺯﺍﺋﺩ ﺧﺎﺭﺝ ﺧﺯﺍﻥ ﺍﻟﻣﺎء. • ﻋﻧﺩ ﺣﻣﻝ ﺧﺯﺍﻥ ﺍﻟﻣﺎء ،ﺍﻣﺳﻛﻪ ﻣﻥ ﺍﻟﻣﻘﺑﺿﻳﻥ ﺑﺣﻳﺙ ﺗﻛﻭﻥ ﻓﺗﺣﺔ ﺍﻟﺧﺯﺍﻥ ﻣﻭﺟﻬﺔ ﺇﻟﻰ ﺍﻷﻋﻠﻰ. ۳ ﻗﻡ ﺑﺗﺭﻛﻳﺏ ﺧﺯﺍﻥ ﺍﻟﻣﺎء. ﺍﻧﻘﺭ ﺗﻧﺑﻳﻪ • ﻻ ﺗﻌﺭﺽ ﺍﻟﻭﺣﺩﺓ ﻟﻠﻣﺎء .
ﺍﻟﺗﺣﺿﻳﺭ ﺍﺣﺭﺹ ﻋﻠﻰ ﻧﺯﻉ ﻗﺎﺑﺱ ﺍﻟﺗﻳﺎﺭ ﻣﻥ ﺍﻟﻣﺧﺭﺝ ﺍﻟﺟﺩﺍﺭﻱ. ﺗﺭﻛﻳﺏ ﺍﻟﻣﺭﺷﺢ ۱ ۲ ﺍﻧﺯﻉ ﺍﻟﻠﻭﺣﺔ ﺍﻟﺧﻠﻔﻳﺔ. ّ ّ ﻣﺭﺷﺢ ﻫﻳﺑﺎ )ﺃﺑﻳﺽ( ﻣﺭﺷﺢ ﺇﺯﺍﻟﺔ ﺍﻟﺭﻭﺍﺋﺢ ﺍﻟﻛﺭﻳﻬﺔ )ﺃﺳﻭﺩ( ّ ﺍﻟﻣﺭﺷﺣﺎﺕ ﻣﻥ ﺍﻟﺣﺎﻓﻅﺔ ﺍﻟﺑﻼﺳﺗﻳﻛﻳﺔ. ﺍﻧﺯﻉ ۳ ّ ﺍﻟﻣﺭﺷﺣﺎﺕ ﺑﺎﻟﺗﺭﺗﻳﺏ ﺍﻟﺻﺣﻳﺢ ﻛﻣﺎ ﻗﻡ ﺑﺗﺭﻛﻳﺏ ﻫﻭ ﻣﺑﻳﻥ. ّ ﻣﺭﺷﺢ ﺇﺯﺍﻟﺔ ﺍﻟﺭﻭﺍﺋﺢ ﺍﻟﻛﺭﻳﻬﺔ )ﺃﺳﻭﺩ( ٤ ّ ﻣﺭﺷﺢ ﻫﻳﺑﺎ )ﺃﺑﻳﺽ( ﺍﻧﻘﺭ ﻗﻡ ﺑﺗﺭﻛﻳﺏ ﺍﻟﻠﻭﺣﺔ ﺍﻟﺧﻠﻔﻳﺔ. ٥ ﻗﻡ ﺑﺗﻌﺑﺋﺔ ﺗﺎﺭﻳﺦ ﺑﺩء ﺍﻻﺳﺗﺧﺩﺍﻡ ﻋﻠﻰ ﻣﻠﺻﻕ ﺍﻟﺗﺎﺭﻳﺦ.
ﺷﺎﺷﺔ ﺍﻟﺟﻬﺎﺯ ﺍﻟﺭﺋﻳﺳﻲ ۸ ٦ ۷ ۱ ﺍ ٤ ٥ ﻋﺭﺑـﻲ ﺝ ۱ ﺏ ۲ ۳ ﺯﺭ ﺍﻟﺗﺷﻐﻳﻝ ﺍ ﺯﺭ ﻭﺿﻊ ﺗﻧﻅﻳﻑ ﺍﻟﻬﻭﺍء /ﺿﻭء ﺍﻟﻣﺅﺷﺭ )ﺃﺧﺿﺭ( ﺏ ﺯﺭ ﻭﺿﻊ ﺗﻧﻅﻳﻑ ﻭﺗﺭﻁﻳﺏ ﺍﻟﻬﻭﺍء /ﺿﻭء ﺍﻟﻣﺅﺷﺭ )ﺃﺧﺿﺭ( ﺝ ﺯﺭ ﻭﺿﻊ ﺗﻧﻅﻳﻑ ﻣﻭﺿﻊ ﺩﻓﻕ ﺍﻷﻳﻭﻧﺎﺕ /ﺿﻭء ﺍﻟﻣﺅﺷﺭ )ﺃﺧﺿﺭ( ۲ ﺯﺭ ﺍﻟﺗﺣﻛﻡ ﺑﺎﻷﺿﻭﺍء ٥ ۳ ﺯﺭ ﺗﺷﻐﻳﻝ /ﺇﻳﻘﺎﻑ ﺃﻳﻭﻧﺎﺕ ﺑﻼﺯﻣﺎﻛﻠﺳﺗﺭ /ﺿﻭء ﺍﻟﻣﺅﺷﺭ ٦ ﺯﺭ ﻗﻔﻝ ﻣﻧﻊ ﻋﺑﺙ ﺍﻷﻁﻔﺎﻝ / ﺿﻭء ﺍﻟﻣﺅﺷﺭ )ﺃﺧﺿﺭ( ﺇﺷﺎﺭﺓ ﺍﻟﺑﻼﺯﻣﺎﻛﻠﺳﺗﺭ ٤ ﺯﺭ ﺇﻋﺎﺩﺓ ﺿﺑﻁ ﺍﻟﻣﺭ ّ ﺷﺢ / ﺿﻭء ﺍﻟﻣﺅﺷﺭ )ﺃﺣﻣﺭ( ۷ ﺯ
ﺃﺳﻣﺎء ﺍﻟﻘﻁﻊ ﺍﻟﺟﻬﺔ ﺍﻷﻣﺎﻣﻳﺔ /ﺍﻟﺟﻬﺔ ﺍﻟﺧﻠﻔﻳﺔ ۱ ۲ ۱ ۲ ۳ ﺷﺎﺷﺔ ﺍﻟﺟﻬﺎﺯ ﺍﻟﺭﺋﻳﺳﻲ )ﺭﺍﺟﻊ (Ar-5 ﺍﻟﺷﺎﺷﺔ ﺍﻷﻣﺎﻣﻳﺔ ﺍﻟﺟﻬﺎﺯ ﺍﻟﺭﺋﻳﺳﻲ ۳ ۹ ۱ ۲ ۱۰ ۳ ٤ ۱۱ ٥ ۱۲ ٦ ۷ ۸ ۱۳ )ﻳﻌﺗﻣﺩ ﺷﻛﻝ ﺍﻟﻣﻘﺑﺱ ﻋﻠﻰ ﺍﻟﺑﻠﺩ(.
ﺍﺣﺗﻳﺎﻁﺎﺕ ﺧﺎﺻﺔ ﺑﺎﻟﺗﺷﻐﻳﻝ • ﻻ ﺗﻘﻡ ﺑﺳﺩ ﻣﺩﺧﻝ ﻭ/ﺃﻭ ﻣﺧﺭﺝ ﺍﻟﻬﻭﺍء. • ﻻ ﺗﺳﺗﺧﺩﻡ ﺍﻟﺟﻬﺎﺯ ﺑﺎﻟﻘﺭﺏ ﻣﻥ ﺃﻭ ﻓﻭﻕ ﻣﺻﺎﺩﺭ ﺍﻟﺣﺭﺍﺭﺓ ،ﻣﺛﻝ ﺍﻷﻓﺭﺍﻥ ﺃﻭ ﺍﻟﺳﺧﺎﻧﺎﺕ ،ﺃﻭ ﺣﻳﺙ ﻳﻣﻛﻥ ﺃﻥ ﺗﺗﻌﺭﺽ ﻟﻠﺑﺧﺎﺭ. • ﻗﻡ ﺑﺗﺷﻐﻳﻝ ﺍﻟﺟﻬﺎﺯ ﺩﻭﻣًﺎ ﻭﻫﻭ ﻓﻲ ﻭﺿﻊ ﻗﺎﺋﻡ. • ﻋﻧﺩ ﺗﺣﺭﻳﻙ ﺍﻟﺟﻬﺎﺯ ،ﺍﺳﺗﺧﺩﻡ ﺍﻟﻣﻘﺎﺑﺽ ﺍﻟﺟﺎﻧﺑﻳﺔ. ﻻ ﺗﻘﻡ ﺑﺗﺣﺭﻳﻙ ﺍﻟﺟﻬﺎﺯ ﻭﻫﻭ ﻳﻌﻣﻝ. • • • ّ ﺍﻟﻣﺭﺷﺣﺎﺕ ،ﺃﻭ ﺧﺯﺍﻥ ﺍﻟﻣﺎء ،ﺃﻭ ﺻﻳﻧﻳﺔ ﺍﻟﺗﺭﻁﻳﺏ ﺑﺷﻛﻝ ﺻﺣﻳﺢ. • ﻻ ﺗﻘﻡ ﺑﺗﺷﻐﻳﻝ ﺍﻟﺟﻬﺎﺯ ﺩﻭﻥ ﺗﺛﺑﻳﺕ ّ ﻣﺭﺷﺢ ﻫﻳﺑﺎ.
ﺗﻌﻠﻳﻣﺎﺕ ﻫﺎﻣﺔ ﺣﻭﻝ ﺍﻟﺳﻼﻣﺔ ﻋﻧﺩ ﺍﺳﺗﺧﺩﺍﻡ ﺍﻷﺟﻬﺯﺓ ﺍﻟﻛﻬﺭﺑﺎﺋﻳﺔ ،ﻳﺗﻭﺟﺏ ﺍﺗﺑﺎﻉ ﺍﺣﺗﻳﺎﻁﺎﺕ ﺍﻟﺳﻼﻣﺔ ﺍﻷﺳﺎﺳﻳﺔ ،ﻭﺍﻟﺗﻲ ﺗﺗﺿﻣﻥ ﺍﻟﺗﺎﻟﻲ: ﺗﺣﺫﻳﺭ -ﻟﺗﻔﺎﺩﻱ ﺧﻁﺭ ﺍﻹﺻﺎﺑﺔ ﺑﺻﺩﻣﺔ ﻛﻬﺭﺑﺎﺋﻳﺔ ﺃﻭ ﻧﺷﻭﺏ ﺣﺭﻳﻕ ﺃﻭ ﻭﻗﻭﻉ ﺇﺻﺎﺑﺎﺕ: • ﺇﻗﺭﺃ ﺟﻣﻳﻊ ﺍﻟﺗﻌﻠﻳﻣﺎﺕ ﻗﺑﻝ ﺍﺳﺗﺧﺩﺍﻡ ﺍﻟﺟﻬﺎﺯ. • ﺍﺳﺗﺧﺩﻡ ً ﻣﻧﻔﺫﺍ ﻛﻬﺭﺑﺎﺋﻳًﺎ ﺑﺟﻬﺩ ﻛﻬﺭﺑﺎﺋﻲ ﻣﻘﺩﺍﺭﻩ ۲٤۰~۲۲۰ﻓﻭﻟﺕ. • ﻻ ﺗﺳﺗﺧﺩﻡ ﻫﺫﺍ ﺍﻟﺟﻬﺎﺯ ﺇﺫﺍ ﻣﺎ ﻛﺎﻥ ﺃﻱ ﻣﻥ ﺍﻟﺳﻠﻙ ﺃﻭ ﺍﻟﻘﺎﺑﺱ ً ﺗﺎﻟﻔﺎ ﺃﻭ ﺇﺫﺍ ﻛﺎﻧﺕ ﺍﻟﺗﻭﺻﻳﻠﺔ ﺑﻣﻧﻔﺫ ﺍﻟﻛﻬﺭﺑﺎء ﻓﻲ ﺍﻟﺣﺎﺋﻁ ﻣﺭﺗﺧﻳﺔ. • ﻗﻡ ﺑﺗﻧﻅﻳﻑ ﺍﻟﻘﺎﺑﺱ ﻣﻥ ﺍﻟﻐﺑﺎﺭ ﺑﺷﻛﻝ ﺩﻭﺭﻱ.
ﻋﺭﺑﻲ ﺍﻟﻣﻣﻳﺯﺍﺕ ﺍﺗﺣﺎﺩ ﻓﺭﻳﺩ ﻟﺗﻛﻧﻭﻟﻭﺟﻳﺎﺕ ﻣﻌﺎﻟﺟﺔ ﺍﻟﻬﻭﺍء ﻧﻅﺎﻡ ﺗﺭﺷﻳﺢ ﺛﻼﺛﻲ +ﺑﻼﺯﻣﺎﻛﻠﺳﺗﺭ +ﺗﺭﻁﻳﺏ ﺍﻟﻐﺑﺎﺭ* ﻣﺣﺎﺻﺭﺓ ّ ﻳﻌﻣﻝ ﺍﻟﻣﺭﺷﺢ ﺍﻟﻣﺳﺑﻕ ﺍﻟﻘﺎﺑﻝ ﻟﻠﻐﺳﻝ ﻋﻠﻰ ﻣﺣﺎﺻﺭﺓ ﺍﻟﻐﺑﺎﺭ ﻭﺍﻟﺟﺯﻳﺋﺎﺕ ﺍﻷﺧﺭﻯ ﺍﻟﻁﻳﺎﺭﺓ ﻓﻲ ﺍﻟﻬﻭﺍء. ﺗﻘﻠﻳﻝ ﺍﻟﻔﻁﺭﻳﺎﺕ ﻭﻏﺑﺎﺭ ﺍﻟﻁﻠﻊ* ّ ﻣﺭﺷﺢ ﻫﻳﺑﺎ ٪۹۹٫۹۷ﻣﻥ ﺍﻟﺟﺯﻳﺋﺎﺕ ﺑﺣﺟﻡ ﻳﺣﺎﺻﺭ ۰٫۳ﻣﻳﻛﺭﻭﻥ. ﻳﻧﻌﺵ ﺗﻌﻣﻝ ﺑﻼﺯﻣﺎﻛﻠﺳﺗﺭ ﻋﻠﻰ ﻣﻌﺎﻟﺟﺔ ﺍﻟﻬﻭﺍء ﺑﻧﻔﺱ ﺍﻟﻁﺭﻳﻘﺔ ﺍﻟﺗﻲ ﺗﺗﻡ ﻓﻲ ﺍﻟﻁﺑﻳﻌﺔ ﻋﻥ ﻁﺭﻳﻕ ﺇﻁﻼﻕ ﻣﺟﻣﻭﻋﺔ ﻣﺗﻭﺍﺯﻧﺔ ﻣﻥ ﺍﻷﻳﻭﻧﺎﺕ ﺍﻟﺳﺎﻟﺑﺔ ﻭﺍﻟﻣﻭﺟﺑﺔ. ﻳﺭﻁﺏ ﻳﻌﻣﻝ ﺣﺗﻰ ۱۰ﺳﺎﻋﺎﺕ ﻟﻛﻝ ﺗﻌﺑﺋﺔ**.
ﻳﺭﺟﻰ ﻗﺭﺍءﺓ ﺍﻟﺗﺎﻟﻲ ﻗﺑﻝ ﺍﻟﺑﺩء ﺑﺎﺳﺗﺧﺩﺍﻡ ﺟﻬﺎﺯ ﺗﻧﻘﻳﺔ ﺍﻟﻬﻭﺍء ﺍﻟﺟﺩﻳﺩ ﺍﻟﺧﺎﺹ ﺑﻙ ﺍﻟﻣﺭﺷﺢ ﺍﻟﻣﺳﺑﻕ ﻭﻣﻥ ﺛﻡ ّ ّ ﻣﺭﺷﺢ ﻳﻌﻣﻝ ﺟﻬﺎﺯ ﺗﻧﻘﻳﺔ ﺍﻟﻬﻭﺍء ﻋﻠﻰ ﺳﺣﺏ ﻫﻭﺍء ﺍﻟﻐﺭﻓﺔ ﻣﻥ ﻣﺩﺧﻝ ﺍﻟﻬﻭﺍء ،ﻭﻳﻣﺭﺭﻩ ﻋﺑﺭ ّ ﻣﺭﺷﺢ ﻫﻳﺑﺎ ﺩﺍﺧﻝ ﺍﻟﺟﻬﺎﺯ ،ﻭﺑﻌﺩ ﺫﻟﻙ ﻳﺧﺭﺝ ﺍﻟﻬﻭﺍء ﻣﻥ ﺧﻼﻝ ﻣﺧﺭﺝ ﺇﺯﺍﻟﺔ ﺍﻟﺭﻭﺍﺋﺢ ﺍﻟﻛﺭﻳﻬﺔ ﺍﻟﻘﺎﺑﻝ ﻟﻠﻐﺳﻝ ﻳﻠﻳﻪ ّ ﺍﻟﻬﻭﺍء ﻣﻌﻳ ًﺩﺍ ﺇﻳﺎﻩ ﺇﻟﻰ ﺍﻟﻐﺭﻓﺔ .ﻳﺳﺗﻁﻳﻊ ﻣﺭﺷﺢ ﻫﻳﺑﺎ ﺇﺯﺍﻟﺔ ٪۹۹٫۹۷ﻣﻥ ﺟﺯﻳﺋﺎﺕ ﺍﻟﻐﺑﺎﺭ ﺑﺣﺟﻡ ۰٫۳ﻣﻳﻛﺭﻭﻥ ﺍﻟﺗﻲ ّ ﺍﻟﻣﺭﺷﺢ ﺇﻟﻰ ﺟﺎﻧﺏ ﻗﺩﺭﺗﻪ ﻋﻠﻰ ﺍﻣﺗﺻﺎﺹ ﺍﻟﺭﻭﺍﺋﺢ ﺍﻟﻛﺭﻳﻬﺔ.
R KC-A60EU KC-A50EU KC-A40EU ﻋﺭﺑـﻲ ﺩﺳﺗﮕﺎﻩ ﺗﺻﻔﻳﻪ ﻫﻭﺍ ﺑﺎ ﻗﺎﺑﻠﻳﺕ ﺭﻁﻭﺑﺕ ﺩﻫﯽ ﺩﻓﺗﺭﭼﻪ ﺭﺍﻫﻧﻣﺎ ﻓﺎﺭﺳﯽ ﺩﺳﺗﮕﺎﻩ ﺗﺻﻔﻳﻪ ﻫﻭﺍ ﺑﺎ ﻗﺎﺑﻠﻳﺕ ﺭﻁﻭﺑﺕ ﺩﻫﯽ ﺩﻓﺗﺭﭼﻪ ﺭﺍﻫﻧﻣﺎ ﻓﺎﺭﺳﯽ ﺩﺳﺗﮕﺎﻩ ﺗﺻﻔﻳﻪ ﻫﻭﺍ ﺑﺎ ﻗﺎﺑﻠﻳﺕ ﺭﻁﻭﺑﺕ ﺩﻫﯽ ﺩﻓﺗﺭﭼﻪ ﺭﺍﻫﻧﻣﺎ ﻓﺎﺭﺳﯽ ﺩﺳﺗﮕﺎﻩ ﺗﺻﻔﻳﻪ ﻫﻭﺍ ﺑﺎ ﻗﺎﺑﻠﻳﺕ ﺭﻁﻭﺑﺕ ﺩﻫﯽ ﺩﻓﺗﺭﭼﻪ ﺭﺍﻫﻧﻣﺎ ﻓﺎﺭﺳﯽ Device of this mark is a trademark of Sharp Corporation. Plasmacluster is a registered trademark or a trademark of Sharp Corporation.