. Web Page Connection Open an Internet browser of your computer or smart phone, then enter the designated address. Then the system information input page pops up. Input URL: https://myess.samsungsdi.com/engineer/main.do or https://112.106.12.149/engineer/main.do 1. By typing ““https://myess.samsungsdi.com,” access the corresponding website. Then click the “Go to Installer” icon at the top. [Figure 오류! 지정한 스타일은 사용되지 않습니다.-1: Main page] NOTICE Note that the URL starts with "http://.
. Enter your ID and password in the login window. If you have no account, please join as a member. NOTICE To install the product, you must obtain an installer membership instead of a general membership. To join as an installer member, a special number is required. First check the special number from the local dealer or service center. 3. Click the “Join Membership” link. 4. In order to join as a member, you must consent to the terms for personal privacy protection.
8. The installation wizard runs automatically. Explain the terms for personal privacy protection to your customer and obtain the consent to the terms with a signature. NOTICE The data collected during the installation process is used only for installation purposes. The consent and signature acquisition process proceeds according to the local laws. We at Samsung SDI are making the utmost effort to protect personal information in accordance with the laws. 9.
10. Enter the information of the installation site in Step 2. In the address input field, enter the address or select the installation site on the map. After the installation site entry is finished, click the "Next" button. [Figure 오류! 지정한 스타일은 사용되지 않습니다.-4: Address Entry in Step 2] NOTICE In the address input box, enter the country and city. It is recommended to move the focus on the map and select the installation site.
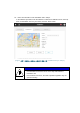
11. Enter the product Setup Information details in Step 3. Enter values for installed capacities for each PV string, feed-in limit (e.g. 60% in Germany), maximum inverter power, whether or not to use the basic mode, energy meter type, and its model. [Figure 오류! 지정한 스타일은 사용되지 않습니다.-5: Product Setup Information Details Entry in Step 3] CAUTION If configuration in this page has errors, it may cause product failure. Accordingly, first check specific installation conditions of the house for accuracy.
12. Enter the energy rate Information of the house in Step 4. If a house uses a variable tariff, the charge and discharge operations may differ depending on the input price. Enter the time-based electricity tariff correctly. If a house uses a fixed payment tariff, the charge and discharge operations are not affected depending on the input price. The entry of energy price is used only for reference to calculate energy costs and it may not be the same as the actual electricity rate.
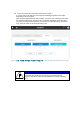
13. End the installation. If you click the "Done" button, the product monitoring details page appears. Check whether the login is finished within 2 to 3 minutes. Some products immediately run “Automatic Update.” [Figure 오류! 지정한 스타일은 사용되지 않습니다.-7: Installation Completion Screen] NOTICE If a firmware update is required, automatic update may run immediately after installation. When "AP.
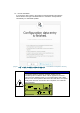
1.1.1 Remote Monitoring 1. In order to check operation status, perform the product test. For this purpose, select Remote > Remote Monitoring. [Figure 오류! 지정한 스타일은 사용되지 않습니다.-8: Remote Monitoring Screen] 2. When the installed product is in “Run,” click the product serial number. [Figure 오류! 지정한 스타일은 사용되지 않습니다.-9: Selection of Product Serial No. to Test] NOTICE After installation, log in to the remote monitoring takes 2 to 3 minutes.
3. On the product information page, you can check the product information and the basic operation status. Click the "Detailed Product Information" button. [Figure 오류! 지정한 스타일은 사용되지 않습니다.-10: Selection of Detailed Product Information] 4. Check the energy meter operation status. Check whether the values for grid power, load power and inverter power match the values calculated by the energy meter.
[Figure 오류! 지정한 스타일은 사용되지 않습니다.-11: Operation checkup for energy meter page] NOTICE If the values on the page show a large difference compared to the actual values, you can suspect wiring or configuration issue in the energy meter. If this happens, check the energy meter configuration method and the energy meter installation errors at the upper right corner. 5. Now, perform the ESS operation test. Perform tests for each item and check whether the tests for each item operate normally.
a. Stop The test stops all ESS operations. This test stops operations, such as PV generation, battery charge/discharge and energy sales/purchase to/from Grid. Check whether all operations for display and measurement stop during the test. b. PV Only This test also stops the battery process. The remaining energy is sold to Grid. If the energy for the load is greater than the PV generated energy, the balance is purchased from Grid. For this test, check whether the measurements by PV and Grid are correct.