LC-42LB261U 42" LED TV USER GUIDE Before using your new product, please read these instructions to prevent any damage.
Contents CHILD SAFETY . . . . . . . . . . . . . . . . . . . . . . . . . . . . . . . . . . . . . . . . . . . . . . . . . . . . . . . . . . . . . . . 1 Important Safety Instructions . . . . . . . . . . . . . . . . . . . . . . . . . . . . . . . . . . . . . . . . . . . . . . . . 2 WARNING . . . . . . . . . . . . . . . . . . . . . . . . . . . . . . . . . . . . . . . . . . . . . . . . . . . . . . . . . . . . . . . . . . . . . . . . . . 2 CAUTION . . . . . . . . . . . . . . . . . . . . . . . . . . . . . . . . . .
Contents Connecting a game console . . . . . . . . . . . . . . . . . . . . . . . . . . . . . . . . . . . . . . . . . . . . . . . . 24 HDMI (best) . . . . . . . . . . . . . . . . . . . . . . . . . . . . . . . . . . . . . . . . . . . . . . . . . . . . . . . . . . . . . . . . . . . . . . 24 Component video (better) . . . . . . . . . . . . . . . . . . . . . . . . . . . . . . . . . . . . . . . . . . . . . . . . . . . . . . . . 25 AV (composite video) (good). . . . . . . . . . . . . . . . . . . . . . . . . . . .
Contents Switching to USB mode . . . . . . . . . . . . . . . . . . . . . . . . . . . . . . . . . . . . . . . . . . . . . . . . . . . . . . . . . . . 47 Browsing photos . . . . . . . . . . . . . . . . . . . . . . . . . . . . . . . . . . . . . . . . . . . . . . . . . . . . . . . . . . . . . . . . . . 47 Viewing favorite photos . . . . . . . . . . . . . . . . . . . . . . . . . . . . . . . . . . . . . . . . . . . . . . . . . . . . . . . . . . . 48 Viewing photos in a slideshow . . . . . . . . . . . . . . . . .
Contents Viewing system information . . . . . . . . . . . . . . . . . . . . . . . . . . . . . . . . . . . . . . . . . . . . . . . . . . . . . . . 68 Video and audio . . . . . . . . . . . . . . . . . . . . . . . . . . . . . . . . . . . . . . . . . . . . . . . . . . . . . . . . . . . . . . . . . . 69 Remote control . . . . . . . . . . . . . . . . . . . . . . . . . . . . . . . . . . . . . . . . . . . . . . . . . . . . . . . . . . . . . . . . . . . 71 General . . . . . . . . . . . . . . . . . . . . . . . . . .
CHILD SAFETY PROPER TELEVISION PLACEMENT MATTERS THE CONSUMER ELECTRONICS INDUSTRY CARES • Manufacturers, retailers and the rest of the consumer electronics industry are committed to making home entertainment safe and enjoyable. • As you enjoy your television, please note that all televisions - new and old- must be supported on proper stands or installed according to the manufacturer's recommendations.
LC-42LB261U Important Safety Instructions CAUTION RISK OF ELECTRIC SHOCK DO NOT OPEN This symbol indicates that dangerous voltage constituting a risk of electric shock is present within your TV. This label is located on the back of your TV. 8 9 10 11 12 13 2 WARNING Electric shock hazard To reduce the risk of fire or electric shock, do not remove any cover or expose the device to rain or moisture. No user-serviceable parts are inside. Refer servicing to qualified service technicians.
LC-42LB261U Power source Operate your TV only from the type of power source indicated on the marking label. If you are not sure of the type of power supplied to your home, consult an electrician or your local power company.
LC-42LB261U Sharp 42" LED TV Sharp 42" LED TV Introduction MHL™ Congratulations on your purchase of a high-quality Sharp product. Your LC-42LB261U represents the state of the art in LED TV design and is designed for reliable and trouble-free performance.
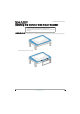
LC-42LB261U Sharp 42" LED TV Installing the stand or wall-mount bracket Notes • If you plan to wall-mount your TV, do not install the stand. • Store the stand and stand screws in case you decide to use the stand in the future. Installing the stand 1 Carefully place your TV face-down on a cushioned, clean surface to protect the screen from damages and scratches. 2 Insert the stand column into the TV. www.sharpusa.
LC-42LB261U Sharp 42" LED TV 3 Secure the TV stand to your TV with the four provided screws. Screw type M4 Screw length 18 mm # of screws 4 Installing a wall-mount bracket Warning • This TV is intended to be supported by a UL Listed wall mount bracket with suitable weight/load. (See “Miscellaneous” on page 76.) • To prevent injury, this apparatus must be securely attached to the floor/wall in accordance with the installation instructions.
LC-42LB261U Sharp 42" LED TV 2 If the TV stand is attached, remove the four screws that secure the stand to your TV. Notes • The length of the wall-mount screws vary depending on the wall-mount bracket you purchased. See the instructions that came with the wall-mount bracket for screw lengths. • The mounting holes on the back of your TV take type M6 screws. 7.87 in. (200 mm) 7.87 in. (200 mm) www.sharpusa.
LC-42LB261U Sharp 42" LED TV TV components Front buttons Package contents • • • • • • 42" LED TV Remote control and batteries (2 AAA) TV stand and screws (4) Power cord Quick Setup Guide Important Information Front # Item Description 1 MENU # Item 1 Remote control sensor 2 Power indicator Description Receives signals from the remote control. Do not block. Lights blue when your TV is on. Lights red when your TV is off (standby mode). 2 INPUT 3 VOL+/VOL– 4 CH 5 8 www.sharpusa.
LC-42LB261U Sharp 42" LED TV Side # Item 1 /AUDIO OUT 2 HDMI 3/DVI 3 HDMI 2/MHL 4 HDMI 1/ARC 5 USB www.sharpusa.com Description Connect headphones, an analog audio amplifier, a home theater system, or a sound bar to this jack. For more information, see “Connecting headphones” on page 31 or “Analog audio” on page 33. Connect an HDMI device to this jack. For more information, see “HDMI (best)” on pages 13, 19, 24, or 27. OR Connect the video for a DVI device to this jack.
LC-42LB261U Sharp 42" LED TV Back # Item 4 ANT/CABLE 5 PC IN 6 PC/DVI AUDIO IN # Item 1 DIGITAL AUDIO OUTPUT (optical) Y/VIDEO, PB, PR 2 OR Y/VIDEO 3 L and R (audio) 10 Description Connect a digital audio amplifier, home theater system, or sound bar to this jack to listen to TV audio through the external speakers. For more information, see “Digital audio” on page 32. The Y/VIDEO jack works as one of the three component video jacks or as a composite video jack.
LC-42LB261U Sharp 42" LED TV Remote control # Button Description 1 Press to turn your TV on or off (standby mode). Warning: When your TV is off, power still flows through it. To disconnect power, unplug the power cord. POWER # Button Description 5 AV MODE Press to select the AV (picture) mode. You can select Dynamic, Natural, Standard, Movie, or User. See the AV Mode option in “Adjusting the TV picture” on page 49. 6 VOL+/– Press to increase or decrease the volume.
LC-42LB261U Sharp 42" LED TV What connection should I use? Connection type and jack Your TV has several connection types for connecting devices to your TV. For the best video quality, you should connect a device to the best available connection.
LC-42LB261U Sharp 42" LED TV Connecting a cable or satellite box Many cable or satellite TV boxes have more than one connection type. To get the best video, you should use the best connection type available. For more information, see “What connection should I use?” on page 12. HDMI (best) Side of TV Cable or satellite box On your TV HDMI cable connector HDMI cable HDMI jack 1 Make sure that your TV’s power cord is unplugged and all connected equipment is turned off.
LC-42LB261U Sharp 42" LED TV DVI (same as HDMI but requires an audio connection) Note You must use the HDMI 3/DVI jack to connect a cable or satellite box using DVI. If you use another HDMI jack, you will not hear sound from the TV speakers.
LC-42LB261U Sharp 42" LED TV Component video (better) Note Cables are often color-coded to match color-coded jacks. Cable or satellite box On your TV Component Audio cable video cable connectors connectors Component video cable Audio cable Component Analog video jacks audio jacks Back of TV 1 Make sure that your TV’s power cord is unplugged and all connected equipment is turned off. 2 Connect the incoming cable from the cable wall jack to the cable-in jack on the cable or satellite box.
LC-42LB261U Sharp 42" LED TV AV (composite video) (good) Notes • Cables are often color-coded to match color-coded jacks. • The yellow video connector on the AV cable connects to the green Y/VIDEO jack. On your TV Composite video cable connector Composite video jack Cable or satellite box Audio cable connectors AV cable Analog audio jacks Back of TV 1 Make sure that your TV’s power cord is unplugged and all connected equipment is turned off.
LC-42LB261U Sharp 42" LED TV Coaxial (good) On your TV Cable or satellite box Coaxial cable connector ANT/CABLE jack Back of TV Coaxial cable 1 Make sure that your TV’s power cord is unplugged and all connected equipment is turned off. 2 Connect the incoming cable from the cable wall jack to the cable-in jack on the cable or satellite box. 3 Connect a coaxial cable (not provided) to the ANT/CABLE jack on the back of your TV and to the coaxial out jack on the cable or satellite box.
LC-42LB261U Sharp 42" LED TV Connecting an antenna or cable TV (no box) On your TV Antenna or cable TV (no box) Coaxial cable connector ANT/CABLE jack Back of TV Coaxial cable 1 Make sure that your TV’s power cord is unplugged and all connected equipment is turned off. 2 Connect a coaxial cable (not provided) to the ANT/CABLE jack on the back of your TV and to the antenna or cable TV wall jack. 3 Plug your TV’s power cord into a power outlet, then turn on your TV.
LC-42LB261U Sharp 42" LED TV Connecting a DVD or Blu-ray player Many DVD or Blu-ray players have more than one connection type. To get the best video, you should use the best connection type available. For more information, see “What connection should I use?” on page 12. HDMI (best) Side of TV DVD or Blu-ray player On your TV HDMI cable connector HDMI cable HDMI jack 1 Make sure that your TV’s power cord is unplugged and the DVD or Blu-ray player is turned off.
LC-42LB261U Sharp 42" LED TV Component video (better) Note Cables are often color-coded to match color-coded jacks. On your TV DVD or Blu-ray player Component video cable connectors Audio cable connectors Component video cable Audio cable Component Analog video jacks audio jacks Back of TV 1 Make sure that your TV’s power cord is unplugged and the DVD or Blu-ray player is turned off.
LC-42LB261U Sharp 42" LED TV AV (composite video) (good) Notes • Cables are often color-coded to match color-coded jacks. • The yellow video connector on the AV cable connects to the green Y/VIDEO jack. On your TV Composite video cable connector DVD or Blu-ray player Audio cable connectors AV cable Composite video jack Analog audio jacks Back of TV 1 Make sure that your TV’s power cord is unplugged and the DVD or Blu-ray player is turned off.
LC-42LB261U Sharp 42" LED TV Connecting a Roku Streaming Stick You can connect a Roku Streaming Stick® to your TV to enjoy streaming video and audio. Note You must use the purple HDMI 2/MHL jack to connect a Roku Streaming Stick. Side of TV Roku Streaming Stick 1 Plug the Roku Streaming Stick (not provided) into the purple HDMI 2/MHL jack on the side of your TV. 2 If your TV is turned on, press ENTER when a message appears. Your Roku Streaming Stick’s menu opens.
LC-42LB261U Sharp 42" LED TV Connecting an MHL-enabled device You can connect an MHL-enabled device, such as a cell phone, and view your device’s screen on your TV. Note You must use the purple HDMI 2/MHL jack to connect an MHL-enabled device. Side of TV On your TV MHL-enabled device HDMI cable connector MHL cable HDMI 2/MHL jack 1 2 3 4 Connect the small connector on an MHL cable (not provided) to the micro USB port on the MHL-enabled device.
LC-42LB261U Sharp 42" LED TV Connecting a game console HDMI (best) Side of TV On your TV Game console HDMI cable connector HDMI cable HDMI jack 1 Make sure that your TV’s power cord is unplugged and the game console is turned off. 2 Connect an HDMI cable (not provided) to one of the HDMI jacks on the side of your TV and to the HDMI OUT jack on the game console. 3 Plug your TV’s power cord into a power outlet, then turn on your TV. 4 Turn on the game console, then set it to the correct output mode.
LC-42LB261U Sharp 42" LED TV Component video (better) Note Cables are often color-coded to match color-coded jacks. On your TV Component video cable connectors Component video jacks Analog audio cable connectors Game console Console-specific component video and audio cable Analog audio jacks Back of TV 1 Make sure that your TV’s power cord is unplugged and the game console is turned off.
LC-42LB261U Sharp 42" LED TV AV (composite video) (good) Notes • Cables are often color-coded to match color-coded jacks. • The yellow video connector on the AV cable connects to the green Y/VIDEO jack. Game console On your TV AV cable connector Composite video jack Analog audio cable connectors Console-specific AV cable Analog audio jacks Back of TV 1 Make sure that your TV’s power cord is unplugged and the game console is turned off.
LC-42LB261U Sharp 42" LED TV Connecting a computer HDMI (best) Side of TV On your TV HDMI cable connector HDMI cable HDMI jack 1 Make sure that your TV’s power cord is unplugged and the computer is turned off. 2 Connect an HDMI cable (not provided) to one of the HDMI jacks on the side of your TV and to the HDMI OUT jack on the computer. 3 Plug your TV’s power cord into a power outlet, then turn on your TV and the computer. 4 Press INPUT to open the INPUT SOURCE list.
LC-42LB261U Sharp 42" LED TV DVI (same as HDMI but requires an audio connection) Note You must use the HDMI 3/DVI jack to connect a computer using DVI. If you use another HDMI jack, you will not hear sound from the TV speakers. Side of TV HDMI cable with HDMI-DVI adapter On your TV HDMI cable connector HDMI 3/DVI jack Audio cable connector Audio cable PC/DVI AUDIO IN jack Back of TV 1 Make sure that your TV’s power cord is unplugged and the computer is turned off.
LC-42LB261U Sharp 42" LED TV VGA (most common) On your TV VGA cable connector Audio cable connector PC IN jack PC/DVI AUDIO IN jack VGA cable Audio cable Back of TV 1 Make sure that your TV’s power cord is unplugged and the computer is turned off. 2 Connect a VGA cable (not provided) to the PC IN jack on the back of your TV and to the VGA jack on the computer.
LC-42LB261U Sharp 42" LED TV Connecting a USB flash drive Side of TV USB flash drive 1 Plug a USB flash drive into the USB port on the side of your TV. Caution Do not remove the USB flash drive or turn off the TV while using the USB flash drive. You may lose data or damage the USB flash drive. 2 If your TV is turned on when you connect the USB flash drive, press S or T to select Yes in the message that appears, then press ENTER. The PHOTOS menu opens.
LC-42LB261U Sharp 42" LED TV Connecting headphones When you connect headphones, the TV speakers are muted. Warning Loud noise can damage your hearing. When using headphones, use the lowest volume setting on your headphones that still lets you hear the sound. Side of TV 1 Connect the headphones to the /AUDIO OUT jack on the side of your TV. 2 In the screen that opens, press W or X to highlight Headphone, then press ENTER. For more information, see “Selecting the audio out mode” on page 53.
LC-42LB261U Sharp 42" LED TV Connecting external speakers or a sound bar You can connect external speakers or a sound bar to the digital audio jack. Digital audio External speaker system On your TV Digital optical audio cable Sound bar Digital optical audio cable connector Digital optical audio jack Back of TV 1 Make sure that your TV’s power cord is unplugged and the external speaker system or sound bar is turned off.
LC-42LB261U Sharp 42" LED TV Analog audio When you connect external speakers or a sound bar to the /AUDIO OUT jack, the TV speakers are muted. Side of TV Audio cable On your TV External speaker system Audio cable connector Sound bar /AUDIO OUT jack 1 Make sure that your TV’s power cord is unplugged and the external speaker system or sound bar is turned off.
LC-42LB261U Sharp 42" LED TV Connecting a home theater system with multiple devices DVD or Blu-ray player Cable or satellite box AV receiver Game console USB flash drive Antenna or cable TV connected directly to the wall jack Computer The connections you make depend on the video and audio jacks available on your devices. Refer to the documentation that came with your devices for connection information. Just remember to use the best connection types available for the best picture and sound.
LC-42LB261U Sharp 42" LED TV Connecting power 1 Connect the AC power cord to the AC IN connector on the back of your TV. 2 Connect the other end of the cord to a power outlet. Caution • Your TV should only be operated from the power source indicated on the label. • Always unplug the AC power cord from the power outlet when you will not be using your TV for an extended period of time. www.sharpusa.
LC-42LB261U Sharp 42" LED TV Using the remote control Cautions • Batteries should not be exposed to excessive heat, such as sunshine, heat registers, or fire. • Battery chemicals can cause a rash. If the batteries leak, clean the battery compartment with a cloth. If chemicals touch your skin, wash immediately. • Make sure that batteries are disposed of correctly. Do not burn or incinerate.
LC-42LB261U Sharp 42" LED TV Turning on your TV for the first time The first time you turn on your TV, the EZ SETUP wizard opens. The wizard guides you through setting up basic settings including the menu language, time setting, picture mode, TV signal source, and channel list. 1 Make sure that you have: • Installed the remote control batteries. (See page 36 for details.) • Connected an antenna, cable TV, or satellite TV. (See page 13 through 18 for details.) • Connected the power cord.
LC-42LB261U Sharp 42" LED TV 13 Press S or T to highlight Antenna, Cable, or Satellite Box, then press ENTER. A If you select Antenna, your TV scans for available channels. The scan may take several minutes. Note You can press EXIT to stop the auto channel search, but you will need to run the auto channel search again to create a channel list. B If you select Cable, a message asks if you have a cable box: • Select No, then press ENTER if no cable box is connected. Your TV scans for available channels.
LC-42LB261U Sharp 42" LED TV C If you select Satellite Box, a message asks how you connected the satellite box to your TV: Understanding the basics Turning your TV on or off 1 Make sure that the power cord is connected to a power outlet. See “Connecting power” on page 35. 2 Press POWER to turn on your TV. The power indicator turns blue. 3 Press POWER again to turn off your TV. Your TV enters standby mode, and the power indicator turns red.
LC-42LB261U Sharp 42" LED TV On-screen menu overview SETUP menu (TV mode) Notes • Depending on the signal source selected, you may see different options on your screen. • Menu items that are not selectable are grayed out. • Menus in this manual are described in TV mode, unless otherwise indicated. • The screens shown in this manual are for explanation purposes and may vary from the actual screens on your TV.
LC-42LB261U Sharp 42" LED TV Selecting a channel • Press CH or CH to go to the next or previous channel on the memorized channel list. • Press the number buttons to enter the channel number you want, then wait for the channel to change or press ENTER to immediately change the channel. • To select a digital sub-channel, press the number buttons to enter the main digital channel, press (sub-channel), then press the number button for the sub-channel.
LC-42LB261U Sharp 42" LED TV Switching back to the Roku Streaming Stick 1 Press INPUT, then press S or T to select HDMI 2 (Roku). Using an MHL-enabled device You can connect your MHL-enabled device, such as a cell phone, and view your device’s screen on your TV. Note You must use the purple HDMI 2/MHL jack to connect an MHL-enabled device. Connecting and using OR Press MENU, then press W or X to highlight Streaming. 1 Connect an MHL-enabled device to your TV.
LC-42LB261U Sharp 42" LED TV Switching back to the connected device 1 Press INPUT, then press S or T to select HDMI 2 (MHL/ACC). Using CEC Control CEC Control lets you control HDMI CEC-compatible devices connected to the HDMI jacks on your TV using the remote control that came with your TV. To use CEC Control, you must set the CEC Control setting on the SETUP · CEC menu to On. Notes • HDMI cables must be used to connect HDMI CEC-compatible devices to your TV.
LC-42LB261U Sharp 42" LED TV Turning Device Auto Power Off on or off 44 Turning TV Auto Power On on or off When CEC Control is set to On, Device Auto Power Off automatically turns off HDMI CEC devices when you turn off your TV. 1 Press MENU. The on-screen menu opens. 2 Press W or X to highlight SETUP, then press T or ENTER. The SETUP menu opens. TV Auto Power On automatically turns on your TV when an HDMI CEC device is turned on, if the device has this feature. 1 Press MENU. The on-screen menu opens.
LC-42LB261U Sharp 42" LED TV Turning Audio Return Channel on or off Displaying a list of CEC-compatible devices When CEC Control is turned on and you have connected an audio receiver to your TV, turning on Audio Return Channel lets you use your TV’s remote control to control the volume on the audio receiver. 1 Press MENU. The on-screen menu opens. 2 Press W or X to highlight SETUP, then press T or ENTER. The SETUP menu opens. You can display a list of HDMI CEC devices that are connected to your TV.
LC-42LB261U Sharp 42" LED TV Selecting a CEC-compatible device When you have more than one INlink-compatible device connected, you can select the device you want to use. 1 Press INPUT, press S or T to highlight an HDMI input, then press ENTER. 2 Press MENU. The on-screen menu opens. 3 Press W or X to highlight SETUP, then press T or ENTER. The SETUP menu opens.
LC-42LB261U Sharp 42" LED TV Using a USB flash drive You can connect a USB flash drive to your TV to view compatible JPEG pictures. Notes • Never remove the USB flash drive or turn off your TV while viewing JPEG pictures. • The JPEG picture viewer only supports JPEG format images (with “.jpg” file extensions) and not all JPEG files are compatible with your TV. 2 Press S or T to highlight Browse Photos, then press ENTER.
LC-42LB261U Sharp 42" LED TV Viewing favorite photos Viewing photos in a slideshow After you create your favorite photo list, you can browse among your favorite photos quickly. 1 Switch to USB mode. See “Switching to USB mode” on page 47. The PHOTOS menu opens. You can view your photos in a slideshow. 1 Switch to USB mode. See “Switching to USB mode” on page 47. The PHOTOS menu opens. 2 If the photos you want to view are in a folder on the USB flash drive, select the folder.
LC-42LB261U Sharp 42" LED TV Customizing slideshow settings You can customize the slideshow settings, including Slideshow Repeat, Slideshow Shuffle, Slideshow Interval, and Slideshow Effect. 1 Switch to USB mode. See “Switching to USB mode” on page 47. The PHOTOS menu opens. Adjusting the picture Adjusting the TV picture You can adjust various settings to improve the quality of the TV picture. Also, you can reset all picture settings to the factory default. 1 Press MENU.
LC-42LB261U Sharp 42" LED TV • Contrast—Adjusts the brightness of the light areas of the picture. • Color—Adjusts the color intensity of the picture. A low setting may make the color look faded. A high setting may make the color look artificial. • Tint—Adjusts the color balance of the picture. Use this control to make skin tones look more natural. • Sharpness—Adjusts the color detail of images. If you set this control too high, dark images may appear with light or white edges.
LC-42LB261U Sharp 42" LED TV Automatically adjusting the aspect ratio Auto View Mode automatically changes how the picture looks on the screen (aspect ratio) based on the TV program you are viewing. 1 Press MENU. The on-screen menu opens. 2 Press W or X to highlight CHANNELS, then press T or ENTER. The CHANNELS menu opens. Setting the power on picture mode You can set the picture mode your TV uses when you turn it on. 1 Press MENU. The on-screen menu opens.
LC-42LB261U Sharp 42" LED TV Adjusting the computer image When you connect a computer to your TV using the PC IN jack, you may need to adjust the computer image to improve the quality. Note The PC option is only available when a computer is connected to the PC IN jack on the back of your TV. 1 Press INPUT, press S or T to highlight PC, then press ENTER. 2 Press MENU. The on-screen menu opens. 3 Press W or X to highlight SETUP, then press ENTER. The SETUP menu opens.
LC-42LB261U Sharp 42" LED TV • Digital Audio Output—Sends digital audio to an external audio system. You can select: • Audio Format— Selects how the digital audio is sent to the external audio system.You can select: • Dolby Digital—Outputs the original digital audio sound. • PCM—Outputs audio in 2-channel stereo. • Audio Delay—Fine tunes the audio when it is not in sync with the video. • Analog TV Sound—(Analog channels only) Selects the audio mode.
LC-42LB261U Sharp 42" LED TV Playing TV audio only You can turn off the picture on your TV and listen to the program audio only. 1 Press MENU. The on-screen menu opens. 2 Press W or X to highlight CHANNELS, then press T or ENTER. The CHANNELS menu opens. 1 Press MENU. The on-screen menu opens. 2 Press W or X to highlight CHANNELS, then press T or ENTER. The CHANNELS menu opens. 3 Press S or T to highlight Auto Channel Search, then press ENTER. The CHANNELS · AUTO CHANNEL SEARCH screen opens.
LC-42LB261U Sharp 42" LED TV B If you select Cable, a message asks if you have a cable box: C If you select Satellite Box, a message asks how you connected the satellite box to your TV: • Select No, then press ENTER if no cable box is connected. Your TV scans for available channels. The scan may take several minutes. • Select Yes, then press ENTER if a cable box is connected. A message asks how you connected the cable box to your TV.
LC-42LB261U Sharp 42" LED TV Hiding channels Setting up a favorite channel list You can hide channels in the channel list. When you press CH or CH , your TV skips the hidden channels. You can still tune to a hidden channel by pressing the number buttons for the channel. 1 Press MENU. The on-screen menu opens. 2 Press W or X to highlight CHANNELS, then press T or ENTER. The CHANNELS menu opens.
LC-42LB261U Sharp 42" LED TV Adding or changing a channel label Checking the digital signal strength If a channel is not already labeled, you can label the channel to make it easier to identify. You can also relabel a channel that is already labeled. 1 Press MENU. The on-screen menu opens. 2 Press W or X to highlight CHANNELS, then press T or ENTER. The CHANNELS menu opens. You can check the digital signal strength to determine if you need to adjust your antenna or digital cable input.
LC-42LB261U Sharp 42" LED TV Setting parental controls 5 Press S or T to highlight Change Password, then press ENTER. The SETUP · PARENTAL CONTROLS · CHANGE PASSWORD screen opens. Parental controls let you prevent your children from watching inappropriate material on TV. When set, parental controls read the rating of the program (with some exceptions, such as news and sports) and deny access to programs that exceed the ratings level you select.
LC-42LB261U Sharp 42" LED TV Locking control buttons Blocking unrated TV When the button block is turned On, the buttons on the side of your TV are locked, and you can only operate your TV using the remote control. 1 Press MENU. The on-screen menu opens. 2 Press W or X to highlight SETUP, then press T or ENTER. The SETUP menu opens. Some TV programs, such as news and sports shows are not rated. When you set UnRated/Exempt Ratings to Block, TV programs that do not have ratings are blocked.
LC-42LB261U Sharp 42" LED TV Setting parental control levels You can set parental controls for the U.S. and Canada. U.S. rating levels U.S.
LC-42LB261U Sharp 42" LED TV 5 Press S or T to highlight U.S. V-CHIP, then press ENTER. (To set Canadian ratings, select Canada V-CHIP.) U.S. V-CHIP Downloading rating information If the program you are viewing has downloadable rating information, you can download the information to use when setting parental controls. Note If the program you are viewing does not have V-Chip rating information, Open V-CHIP is grayed on the SETUP · PARENTAL CONTROLS menu and cannot be selected. 1 Press MENU.
LC-42LB261U Sharp 42" LED TV 5 Press S or T to highlight Open V-CHIP, then press ENTER. The SETUP · PARENTAL CONTROLS · OPEN V-CHIP screen opens. The screen that you see may vary depending on the broadcaster. Using closed captioning Closed captioning displays a text version of the TV program audio or displays information provided by the broadcaster. Turning closed captioning on or off 1 Press MENU. The on-screen menu opens. 2 Press W or X to highlight SETUP, then press T or ENTER. The SETUP menu opens.
LC-42LB261U Sharp 42" LED TV Selecting the analog closed captioning mode Selecting the digital closed captioning mode Analog channels usually have one or more closed captioning modes. The CC1 mode usually displays a text version of the TV program audio in a small banner. The other CC modes display information provided by the broadcaster. The Text modes display information in a box that covers half of the screen. 1 Press MENU. The on-screen menu opens.
LC-42LB261U Sharp 42" LED TV Customizing digital closed captioning settings 1 Press MENU. The on-screen menu opens. 2 Press W or X to highlight SETUP, then press T or ENTER. The SETUP menu opens. 3 Press S or T to highlight Closed Caption, then press ENTER. The SETUP · CLOSED CAPTION menu opens. 4 Press S or T to highlight Digital CC Style, then press ENTER. The SETUP · CLOSED CAPTION · DIGITAL CC STYLE menu opens with Caption Style highlighted. 64 www.sharpusa.
LC-42LB261U Sharp 42" LED TV Adjusting time settings When you set up your TV for the first time, you set up the clock. If the power is disconnected or you move your TV to a different time zone, you need to reset the clock to the correct time. Setting the clock 1 Press MENU. The on-screen menu opens. 2 Press W or X to highlight SETUP, then press T or ENTER. The SETUP menu opens. 7 Press S or T to highlight Time Zone, then press ENTER. 8 Press S or T to select your time zone, then press ENTER.
LC-42LB261U Sharp 42" LED TV Setting the sleep timer You can specify the amount of time before your TV automatically turns off. 1 Press MENU. The on-screen menu opens. 2 Press W or X to highlight SETUP, then press T or ENTER. The SETUP menu opens. Adjusting menu settings Selecting the menu language Your TV can display the on-screen menu in English, French, or Spanish. When you set your TV up for the first time, you select the language. You can change the menu language to a different language.
LC-42LB261U Sharp 42" LED TV Turning Input Sensor on or off Labeling an input source When the Input Sensor feature is turned on, your TV automatically detects which video jacks have devices connected to them. Your TV uses this information to determine what options you can select on the INPUT SOURCE list when you press INPUT. 1 Press MENU. The on-screen menu opens. 2 Press W or X to highlight SETUP, then press T or ENTER. The SETUP menu opens.
LC-42LB261U Sharp 42" LED TV Maintenance 4 Press S or T to highlight Reset All, then press ENTER. A message asks if you want to reset all TV settings to the default settings. 5 Press S or T to select OK (to reset) or Cancel (to not reset), then press ENTER. If you select OK, your TV restarts and the EZ SETUP wizard opens. 6 Go through the EZ SETUP wizard. For more information, see “Turning on your TV for the first time” on page 37.
LC-42LB261U Sharp 42" LED TV Video and audio Problem Problem Solution Picture does not fill the screen. There are black bars around the picture. • Change the aspect ratio. An increasing amount of digital TV and movies are presented in wide screen (16:9). See the View Mode option in “Adjusting the TV picture” on page 49. No picture (screen is not lit) and no sound. • Press on the TV or the remote control. • Make sure that the Audio Only option is set to Off. See “Playing TV audio only” on page 54.
LC-42LB261U Sharp 42" LED TV Problem Solution Problem Only snow (noise) appears on the screen. • Try another channel. The station may be experiencing problems. • Make sure that the antenna or cable TV is connected correctly and securely. See “Connecting a cable or satellite box” on page 13 or “Connecting an antenna or cable TV (no box)” on page 18. • If you are using an antenna, the digital channel signal may be low.
LC-42LB261U Sharp 42" LED TV Problem Good picture, but no sound. Poor picture. A retail banner is displayed. Good sound, but poor color. Solution Problem • Increase the volume. • Make sure that the sound is not muted. • Make sure that you do not have headphones connected. When headphones are connected, no sound comes from the TV speakers. • Make sure that the correct audio mode is selected. • Make sure that the audio cables are connected correctly and securely to your TV.
LC-42LB261U Sharp 42" LED TV General Problem Problem Solution No power. • Make sure that the power cord is correctly connected to your TV and a power outlet. • Unplug the power cord, wait 60 seconds, then plug the cord back in and turn on your TV. • Other devices (for example, a surround sound receiver, external speakers, fans, or hair dryers) may be interfering with your TV. Try turning off one device at a time to determine which device is causing interference.
LC-42LB261U Sharp 42" LED TV Roku Streaming Stick Problem Problem Solution I cannot see a picture on my TV. • Make sure that your TV is turned on. • Make sure that the mobile device is securely connected to the purple HDMI 2/MHL jack. See “Connecting a Roku Streaming Stick” on page 22. • Make sure that the you have selected HDMI 2 (Roku) as the video input source. See “Selecting the video input source” on page 39. • Try adjusting the picture settings on your TV.
LC-42LB261U Sharp 42" LED TV Problem CEC-compatible device Solution My TV is not displaying the video or playing the audio from the connected mobile device. • Make sure that the MHL cable is connected securely to your TV and the device. • Make sure that you are using an MHL cable. An MHL cable may be difficult to identify. It may look like a micro USB-to-HDMI cable because the cable connectors are the same, but the cable itself is thinner. The cable also may not be labeled MHL.
LC-42LB261U Sharp 42" LED TV Problem My TV’s remote control does not control the device. The device does not show up in the CEC Device list. My device does not turn off when I turn off my TV. Solution Problem • Make sure that there are no obstructions between the remote control and the remote control sensors on your TV and the device. • If the device is not a Sharp device, all the buttons may not work. • Make sure that the CEC Control feature is turned on.
LC-42LB261U Sharp 42" LED TV Specifications Outputs Specifications are subject to change without notice. Dimensions and weight Without stand With stand 37.7 × 22.2 × 2.5 in. (96 × 56.5 × 6.3 cm) 18.7 lb. (8.5 kg) 37.7 × 23.3 × 9.2 in. (96 × 59.2 × 23.3 cm) 19.8 lb. (9 kg) Screen Screen size measured diagonally Display type Panel 60 Hz vs.
LC-42LB261U Sharp 42" LED TV Programming universal remote controls You can operate your Sharp TV with a new or existing universal remote control. 1 See the table in “Common universal remote control codes” for common codes. If you have problems programming your remote or need a different remote control code, see the instructions that came with the remote control or check the remote control manufacturer’s website for the latest remote control code information.
LC-42LB261U Sharp 42" LED TV Legal notices Dolby License Notice and Trademark Acknowledgement Manufactured under license from Dolby Laboratories. Dolby and the double-D symbol are trademarks of Dolby Laboratories. FCC Statement This device complies with Part 15 of the FCC Rules. Operation is subject to the following two conditions: (1) this device may not cause harmful interference, and (2) this device must accept any interference received, including interference that may cause undesired operation.
LC-42LB261U Sharp 42" LED TV One-year limited warranty - Sharp Televisions • Definitions: Best Buy (“Warrantor”) warrants to you, the original purchaser of this new Sharp-branded television (“Product”), that the Product shall be free of defects in the original manufacturer of the material or workmanship for a period of one (1) year from the date of your purchase of the Product (“Warranty Period”).
Product information: For the U.S., go to: www.sharpusa.com/manuals/hd.aspx For Canada (English), go to: www.sharp.ca/en-CA/CustomerSupport/Support/ProductDownloads.aspx For Canada (French), go to: www.sharp.ca/fr-CA/CustomerSupport/Support/ProductDownloads.aspx Product support (855) 544-2030 This product is manufactured for Best Buy China Ltd, as trustee for Best Buy China, and distributed and warranted by Best Buy Purchasing, LLC (7601 Penn Avenue South, Richfield, Minnesota, U.S.A.