OPERATION MANUAL Dear SHARP customer Thank you for your purchase of the SHARP LCD colour TV product. To ensure safety and many years of trouble-free operation of your product, please read the Important Safety Precautions carefully before using this product. Contents Introduction Dear SHARP customer.................................................................................................................. 1 Contents.......................................................................................
Contents Watching TV (Continued) Useful viewing functions............................................................................................................. 32 Freezing the image......................................................................................................... 32 Returning to the previously selected channel................................................................. 32 Muting the audio temporarily..........................................................................
Contents Enjoying 3D image (Continued) Viewing 3D images....................................................................................................................... 58 Receiving a 3D image signal that can be detected automatically.................................. 58 Switching 3D to 2D mode............................................................................................... 58 Receiving a 3D image signal that cannot be detected automatically.............................
Contents Network function Connecting to the Network......................................................................................................... 76 Wired installation.............................................................................................................76 Wireless installation.........................................................................................................76 LAN Setting..................................................................................
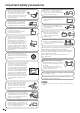
Precautions for daily use Observe the following items Maintenance of the cabinet • When cleaning the cabinet, use a soft cloth (made of cotton, floss, etc.) to clean gently. Do not use a dry or damp rag mixed with chemicals, as this could cause the ingredients of the cabinet body to deteriorate or crack. • Be careful not to use an abrasive cloth for cleaning or clean with excessive force, as this could scratch the surface of the cabinet.
Important safety precautions • Cleaning — Unplug the AC cord from the AC outlet before cleaning the product. Use a damp cloth to clean the product. Do not use alcohol cleaners, spray cleaners or chemical cloth when cleaning because these types of materials may damage the product. • Water and moisture — Do not use the product near water, such as bathtub, washbasin, kitchen sink, laundry tub, swimming pool and in a wet basement. • Do not place vases or any other water-filled containers on this product.
Important Safety Precautions 3D glasses Prevention of accidental ingestion • Keep the accessory out of the reach of small children. Small children can accidentally swallow these parts. • If a child accidentally swallows any of these parts, seek immediate medical attention. Do not disassemble • Do not disassemble the 3D glasses. Do not modify the 3D glasses. Caution for button battery • Do not expose the battery to excessive heat, sunlight or the fire, etc. • Replace only with the same type of battery.
Trademarks • Manufactured under license from Dolby Laboratories. Dolby and the double-D symbol are trademarks of Dolby Laboratories. • The terms HDMI and HDMI High-Definition Multimedia Interface, and the HDMI Logo are trademarks or registered trademarks of HDMI Licensing LLC in the United States and other countries. • DivX®, DivX Certified®, DivX Plus® HD and associated logos are trademarks of Rovi Corporation or its subsidiaries and are used under license.
Trademarks DISCLAIMERS This Sharp device facilitates the access to content and services provided by third parties. The content and services accessible via this device belong to and may be proprietary to third parties. Therefore, any use of such third party content and services must be in accordance with any authorization or terms of use provided by such content or service provider. Sharp shall not be liable to you or any third party for your failure to abide by such authorization or terms of use.
Accessories Supplied accessories Make sure the following accessories are provided with the product. Remote control unit “AAA” size alkaline battery (g2) 3D glasses accessories (g2) Button Battery * CR2025 (×2) 3D Glasses (×2) * Already installed in 3D glasses. Used with batteries inserted.
Accessories Optional accessories The listed optional accessories are available for this LCD colour TV. Please purchase them at your nearest shop. • Additional optional accessories may be available in the near future. When purchasing, please read the newest catalogue for compatibility and check the availability. Part name Part number Note 3D glasses AN-3DG30 Rechargeable NOTE • The optional glasses are different from the supplied ones.
Preparation Attaching the stand unit • Before attaching (or detaching) the stand, unplug the AC power cord from the AC power outlet. • Before performing work, spread cushioning over the surface on which you will be laying the TV. This will prevent it from being damaged. CAUTION • Attach the stand in the correct direction. • Be sure to follow the instructions. Incorrect installation of the stand may result in the TV falling over.
Preparation H LC-60LX650H 1 1 Insert the supporting post into the foam blocks TOP-MIDDLE, as shown in the figure below. 2 As illustrated in the following figure, attach the supporting post onto the stand. 3 Insert the eight screws into the eight holes on the bottom of the stand, and tighten them. 3 Insert the four screws into the four holes on the back of the TV, and tighten them. • To install the stand correctly, hold the stand with one hand securely, and tighten the screws with the other hand.
Preparation Protection against overturning H Applicable to LC-60LX650H only There is a danger of the product overturning in the case of a disaster or sudden collision. Carry out the following tip-resistant measurement for your safety. Anchoring the TV to the wall or a pillar the 2 screws (supplied) to attach the 2 1 Use clamps (supplied) to the rear of the TV. 2 Attach the TV to the wall using extra strong ties (commercially available).
Preparation Handling and precautions with the wall-mounted TV • You can mount the TV on the wall using the optional bracket. • For details, refer to the instructions supplied with the optional bracket. CAUTION • This TV should be mounted on a wall only with a wall mount bracket recommended by SHARP. The use of other wall mount brackets may result in an unstable installation and may cause serious injuries.
Preparation Part names TV (Front / Side) 1 2 3 4 5 6 1 2 3 4 5 POWER (On/Off) button MENU button TV/VIDEO button CH r/s (Channel up/down) buttons VOL k/l (Volume up/down) buttons 7 8 9 6 Remote control sensor 7 OPC sensor* 8 POWER indicator 9 REC indicator 0 Infrared emitter 0 * OPC: Optical Picture Control (See page 41 for details.) • The illustrations and on-screen displays in this operation manual are for explanation purposes and may vary slightly from the actual operations.
Preparation TV (Rear) *1 Audio Return Channel ( ARC ) (See page 66.) *2 Mobile High-Definition Link (MHL) can also be used. (See page 69.) *3 The HDMI 2/ PC AUDIO INPUT( L/R ) terminal share the same audio input terminal (HDMI 2/PC). However, the proper item must be selected in the “Audio select” menu. (See pages 62 and 71.) *4 Use this terminal if the recharging of the USB HDD is by USB.
Preparation Remote control unit 6 7 1 2 8 9 MPX 3 15 16 4 HOME 6 MENU 17 18 19 7 RETURN 8 9 10 1 2 3 4 5 18 11 12 5 11 12 13 14 10 EPG INFO TEXT 13 14 15 16 20 21 22 23 24 25 26 27 POWER (Standby/On) To switch the power on and off. (See page 23.) EXT MEDIA buttons EXT MEDIA buttons are used for AQUOS LINK function and USB recording functions,etc. • AQUOS LINK (See page 67.) • USB recording (See page 82.) A-TV (Analogue TV) Press to access analogue TV mode. (See page 48.
Preparation Before turning on the power Notes on installing the TV • Avoid direct sunlight and place the TV in a well-ventilated location. • Place the TV in a level location. • Do not turn on the power of the TV before connecting the AC cord. 1 Connecting the antenna cable To enjoy a clearer picture, use an outdoor antenna. The following is a brief explanation of the types of connections that are used for coaxial cable.
Preparation Connecting external devices You can connect many types of external equipment to your TV, like a VCR, game console, camcorder, DVD player, Digital TV Set Top Box (STB) and PC. To view external source images, select the input source from TV/VIDEO on the remote control unit or TV/VIDEO on the TV. CAUTION • To protect all equipment, always turn off the TV before connecting to a VCR, game console, camcorder, DVD player, Digital TV Set Top Box (STB), PC or other external equipment.
Preparation When using HDMI cable (commercially available) Connecting a USB hard disk drive (HDD) You can use USB3 (HDD) terminal when connecting a USB hard disk drive. Digital TV STB/VCR/ Game console/ Camcorder/DVD Player USB hard disk drive Using digital audio output NOTE • When using a DVI-HDMI adaptor, input the audio signal from the HDMI2/PC AUDIO INPUT terminal. (See page 71.) • Some commercially available devices may have not been properly certified.
Preparation Inserting the batteries Before using the TV for the first time, insert two “AAA” size alkaline batteries (supplied). When the batteries become depleted and the remote control fails to operate, replace the batteries with new “AAA” size alkaline batteries. 1 Open the battery cover. 2 Insert the two supplied “AAA” size alkaline batteries. • Place batteries with their terminals corresponding to the (e) and (f) indications in the battery compartment. 3 Close the battery cover.
Preparation Turning the TV on/off Initial auto installation When the TV powers on for the first time after purchase, the initial auto installation wizard appears. Follow the menus and make the necessary settings one after another. POWER button Confirm the following before turning on the power • Is the antenna cable connected? • Is the AC cord plugged in? Press POWER on the TV. 1 2 • The initial auto installation wizard appears. Press a/b to select the desired language, and then press ENTER.
Preparation MPX Supplying electric power to the antenna When you set-up the D-TV antenna for the first time, or connect the antenna to a community antenna, you need to proceed to set the antenna by following this manual. HOME MPX MENU RETURN 1 Press D-TV to access D-TV mode.
Preparation MPX About Menu operations w Using the control panel of the TV What is Menu? • You need to bring up the On-Screen Display to perform settings for the TV. The On-Screen Display for the settings is called “Menu”. • The Menu can be operated with the remote control unit. You can also operate the Menu using the control panel of the TV. Button operations on the control panel correspond to the ones on the remote control as shown below.
Watching TV Setting channels automatically You can run auto installation again, even after setting MPX up the preset channels. 3 Press a/b to select “Auto installation”, and then press ENTER. Menu CH list :Enter Setup :Back View setting Auto installation Channel Execute autosettings installation [Off] Network setup HOME MENU 4 If you have already set the password, enter it here. • See page 35 for setting a password. RETURN EPG INFO TEXT 1 Press MENU and the MENU screen displays.
Watching TV Selecting programmes HOME MENU MPX Adjusting the volume You can change channels in several ways. Using CH r/s on the remote control unit • Press CH r to increase the channel number. RETURN • Press CH s to decrease the channel number. HOME NOTE EPG INFO TEXT • CH r/s on the TV operates the same as CH r/s on the remote control unit. MENU RETURN Changing the volume EPG INFO TEXT You can change the volume on the TV or on the remote control unit. • To increase the volume, press VOL e.
MPX Watching TV Setting channels to your preference You can run the auto search procedure again at any time by accessing the “Setup” menu and “Programme setup”. Channels can be tuned automatically or manually. HOME 1 Press a/b to select the desired service. 2 Press the colour button on the remote control corresponding with the item you want to reconfigure. • The 4 mark indicates the operation is set to on. Each time the colour button is pressed, you can switch the corresponding operation on/off.
Watching TV Manual setting for each channel (Analogue) 2 You can set some channel items manually. They are Search, Fine (TV frequency), Colour sys., Sound sys., Label, Skip and Lock (Child Lock). 1 Search Fine Colour sys. Sound sys. Press MENU and the MENU screen displays. 2 Press b/c/d to select “View setting”. 3 Press a/b to select “Channel settings” and then press ENTER. 4 The “Programme setup” screen displays, and then press ENTER. If you have already set the password, enter it here.
Watching TV Manual setting for each channel (Analogue) (continued) Sound system (Broadcasting system) Press a/b/c/d to select the channel you want to edit, and then press ENTER. 1 Skipping channels Channels with “Skip” set to “On” are passed over when using CH r/s even if selected while watching the image from the TV. 1 • The selected channel information will be displayed. • The selected channel information displays. Press a/b to select “Sound sys.”, and then press ENTER.
Watching TV Sorting programmes (Analogue) Erasing programmes (Analogue) Channel positions can be sorted freely. The individual programme can be erased. 1 Press MENU and the MENU screen displays. 1 Press MENU and the MENU screen displays. 2 Press b/c/d to select “View setting”. 2 Press b/c/d to select “View setting”. 3 Press a/b to select “Channel settings” and then press ENTER. 3 Press a/b to select “Channel settings” and then press ENTER.
HOME Watching TV MENU RETURN Useful viewing functions When listening to music from a music programme, you can set the display off and enjoy audio only. Freezing the image Allows you to capture and freeze one frame from a moving image that you are watching. EPG INFO Outputting only audio TEXT 1 Press FREEZE. 2 Press FREEZE again to cancel the function. • Captures one frame from a moving image. NOTE • The still image automatically goes MPX out after 30 minutes.
Watching TV Menu language settings You can also select a language from setup menu. Select from among 3 languages: English, Simplified Chinese and Traditional Chinese. Press MENU and the MENU screen displays. 1 2 Press b/c/d to select “View setting”. 3 Press a/b to select “Language”, and then press ENTER. 4 Press a/b to select the desired language listed on the screen, and then press ENTER.
Watching TV When receiving a bilingual signal Each time you press MPX, the mode switches among CH A, CH B and CH AB. Switching the analogue audio format You can switch between multiple audio modes when watching a multiple audio or stereo broadcast programme.
Watching TV MPX Password setting for the child lock Allows you to use a password to protect certain MPX settings from being accidentally changed. HOME MENU 8 Enter the 4-digit number as in step 7 to confirm. 9 Press ENTER to complete. Password RETURN Press to complete HOME MENU Setting a password Register a 4-digit password number to use the Child Lock function. OK RETURN 1 Press MENU and the MENU screen displays. EPG INFO TEXT 2 Press b/c/d to select “View setting”.
Watching TV Parental rate Selected item This function allows TV channels to be restricted. It prevents children from watching violent or sexual scenes that may be considered inappropriate. Repeat steps 1 to 3 in Setting a password. 1 2 Press a/b to select “Parental rating”, and then press ENTER. 3 Press a/b to select your desired rating, and then press ENTER. Selected item Description None Cancel the blocking. Age 4-18 years Select desired age to block.
Watching TV w Function buttons used to edit “My favourite” Buttons Description R button Add to “My favourite” list or remove from “My favourite” list. ” mark will be added to or The “ removed from the selected channel. B button Move channel position in “My favourite” list. (“My favourite” channel numbers will be sequentially allocated.
Watching TV 2 Press b/c/d to select “ECO”. 3 Press a/b to select “Energy save”, and then press ENTER. 4 Press a/b to select “Standard” or “Advanced”, and then press ENTER. • ECO menu displays. Selected item Off Description Picture size settings Auto wide The "Auto wide" allows a television to switch automatically among the different screen formats. Press MENU and the MENU screen displays. 1 2 Press b/c/d to select “Option”. Reduces the backlight brightness more than “Standard”.
HOME Watching TV MENU MPX Selecting the picture size manually RETURN Manual Selection You can select different picture sizes that account for the kind of each picture. HOME EPG INFO 2 • As you toggle down the options, each mode is immediately reflected on the TV. Auto Selection MENU If you set “Auto wide” and “4:3 Mode” in the Setup menu on page 38, the optimum WIDE mode is automatically chosen for every broadcast containing the aspect ratio information.
Watching TV HOME MENU Selecting a preset AV mode RETURN The “AV mode” function enables you to select appropriate settings for audio and video to account for the system environment which can vary due to factors like room brightness, type of programme watched or the type of image input from external equipment. Using AV MODE on the remote control unit EPG INFO TEXT Press AV mode. 2 Press AV mode again before the mode displayed on the screen disappears. • Present “AV mode” displays.
Watching TV w Clear Picture Processing Manual picture settings Reduce signal noise to improve picture quality. Picture adjustment You can adjust the picture to your preference. Follow the steps to adjust the picture. 1 Press MENU and the MENU screen displays. 2 Press b/c/d to select “Picture”. Selected item Description Improves picture quality through Clear Picture Processing at a level above “Middle”.
Watching TV w C.M.S.-hue w Game type This function adjusts the hue of a selected colour using a six-colour adjustment system. Adjusts the images of fast moving video games to be clearer. w C.M.S.-saturation This function increases or decreases the saturation of a selected colour using a six-colour adjustment system. w C.M.S.-value This function makes the image brighter or darker depending on the value of the setting. Selected item Standard Optimises picture quality for standard video games.
Watching TV Advanced picture settings (Continued) w Range of OPC The brightness level range of the OPC sensor’s automatic adjustments can be set according to your preferences. The adjustment range of the OPC sensor can be set to a maximum of +16 and a minimum of -16. Selected item Description Max. -15 through +16 Min. -16 through +15 NOTE • This function is available only when the OPC setting is set to On or On: Display. • The maximum setting cannot be set to a smaller number than the minimum setting.
Watching TV w Timer setting Wallpaper setting This function is available only when “Quick start” is set to “On (Wallpaper)”. Press “POWER” of the R/C to start or end the wallpaper, if you want to quit the wallpaper, please set the “Quict start” to “Off” or “On”. Activating the function will display still images when the TV is in standby mode. 1 Press MENU and the MENU screen displays. 2 Press b/c/d to select “Option”. 3 Press a/b to select “Wallpaper setting” , and then press ENTER.
Watching TV w Time display Indicating time on the screen 1 Press MENU and the MENU screen displays. This function allows you to display the clock time in the lower-right corner of the screen. 2 Press b/c/d to select “View setting”. Press a/b to select the desired item and then press ENTER. 3 Press a/b to select “Individual setting” and then press ENTER. 5JNF BEKVTUNFOU Press a/b to select “Clock setup” and then press ENTER.
Watching TV w Bass enhancer Audio adjustment You can adjust the audio of the selected AV mode. Press MENU and the MENU screen displays. 1 2 Press b/c/d to select “Audio”. 3 Press a/b to select the desired menu item. Press ENTER to proceed if necessary. 4 Press a/b or c/d to select the desired item or adjust the item to the desired level. Press ENTER if necessary.
Watching TV Wall mount audio setup When you mount the TV on a wall, you can adjust the sound to a more suitable one by setting this function to “Yes”. 1 Press MENU and the MENU screen displays. Headphone/Audio out select You can select which device is used for outputting audio. 1 Press MENU and the MENU screen displays. 2 Press a/b to select “Terminal setting”, and then press ENTER. 3 Press a/b to select “Headphone/Audio out select”, and then press ENTER.
Watching TV A-TV (Analogue TV)/D-TV (Digital TV) buttons Use the following buttons on the remote control to operate the menu. When you watch the TV for the first time When the TV powers on for the first time after purchase, perform the auto installation. A-TV (Analogue TV) You can run the auto installation to set channels automatically. 1 To watch the analogue TV, select “Auto installation” from “Setup” menu. (See page 26.
HOME MENU MPX Watching TV RETURN Info While watching D-TV you can check the extended programme information on the screen using INFO on the remote control. HOME EPG INFO TEXT MENU RETURN 001 D-TV TV1 SD Moving 20:00 - 21:00 HProgramme info. HInput Info. Video : 576i Audio : STEREO Age : No limit Optic. REC : OK EPG INFO TEXT • If there is more information, pressing c/d allows you to go to the next page or return to the previous page. • You can cancel this info by pressing INFO again.
Watching TV EPG EPG display settings What is an EPG? An “EPG” (Electronic Programme Guide) is a programme schedule, which is displayed on the TV screen. The EPG is broadcasted together with D-TV. The TV screen shows the EPG when the viewer presses EPG on the remote control, provided that the TV is receiving the digital broadcasting signal. The EPG enables you to search for a programme, view the programme schedule in detail.
MPX Watching TV Selecting a programme using EPG Basic operation w Display the EPG screen Press EPG.HOME 1 MENU 2 RETURN EPG INFO TEXT 3 1 Press c/d to select the time span you want to search. • Continue to press d to display programmes in the next time span. 4 5 NOTE • You can also display the EPG screen from “Menu” s “EPG” s “EPG”. • The time displayed on the EPG is information sent by the TV station. 2 Press a/b to select the desired programme.
Watching TV 4 Search a programme in a category 1 Press G. 2 Press a/b to select the desired genre, and then press ENTER. 3 Press a/b to select a programme you want to watch, and then press ENTER. NOTE • The genre information depends on the broadcasts. • You can also display the EPG screen from “Menu” s “EPG” s “Search by genre”. 5 Search for a programme by date/time 1 Press Y. 2 Press a/b/c/d to select the desired time span and then press ENTER.
Watching TV Timer setting using EPG Cancelling the timer setting You can select TV programmes using data from the EPG. 1 Press EPG. • You can also enable this function from “Menu” s “EPG ” s “EPG”. 1 Press EPG. 2 Press a/b/c/d to select the programme on timer setup, and then press ENTER. • You can also enable this function from “Menu” s “EPG” s “EPG” . 2 Press a/b/c/d to select the programme you want to set, and then press ENTER. 3 Press c/d to select “Cancel”, and then press ENTER.
Enjoying 3D image You can use special 3D glasses to watch 3D-supported images on this TV. • You can enjoy 3D images on this TV through the supplied or optional 3D glasses that sold separately. • To produce 3D images, liquid crystal shutters in the 3D glasses alternately open and close imperceptibly fast to exactly match alternating left and right video images displayed by the TV. • Not all consumers can experience and enjoy 3D TV.
Enjoying 3D image You can enjoy 3D-supported images on the TV when you wear the supplied 3D glasses or optional 3D glasses. NOTE • Some menu items are greyed out in 3D mode. This is not a malfunction. Preparing for the 3D glasses Confirm how to use the 3D glasses before watching 3D-supported images. These 3D glasses are only for use with SHARP LCD TVs supporting 3D. Accessories for supplied 3D Glasses Please make sure that the following accessories are along with 3D glasses.
Enjoying 3D image Battery assembly The battery has an expected service life of approximately 120 hours. • When replacing the button battery, use only the designated battery (CR2025 lithium button battery). 1 Use the tip of a ballpoint pen or similar object to press in on the lock. 2 While pressing in on the lock, place your fingertip in the groove and pull out the battery holder. • Pull the battery holder all the way out. 3 Replace the battery. Remove the battery according to the arrow direction.
Enjoying 3D image Using the 3D glasses Turn on/off the power Turn on the Power • Press power button for at least 3 seconds. • LED indicator lights up in green for 2 seconds and then starts slow blinking (once every 3 seconds). • If the LED indicator lights up in red and blinks every 3 seconds, the glasses is in 2D mode. Please refer to the instruction below. Turn off the power • Press power button for at least 3 seconds. • LED indicator lights up in red for 2 seconds then the power is turned off.
MPX Enjoying 3D image Viewing 3D images HOME 3 MENU RETURN NOTE • The TV screen may temporarily become black when the TV is trying to detect a 3D image signal and when switching from 3D to 2D mode.EPG INFO TEXT Receiving a 3D image signal that can be detected automatically The image signal may contain a 3D identification signal. You can enable the TV to automatically detect the 3D image type (See page 54). 1 Take off the 3D glasses and turn off the power of the 3D glasses.
Enjoying 3D image HOME Watching 2D images in 3D You can convert normal 2D images into 3D images. 1 Press 3D. 2 Press c/d to select “2D s 3D”, and then press ENTER. 3 Turn on the power of the 3D glasses, and then wear the 3D glasses. Switching to the previous mode You can switch back to the previous mode by pressing 3D. Press 3D. • A confirmation message is displayed. HOME MPX 2 Select “Yes”, and then press ENTER. MENU • The TV returns to the previous mode.
Enjoying 3D image w Viewing time info 3D setup E Basic operation Go to “Menu” s “Setup” s “Option” s “3D setup” s select the menu you want to set. This function allows you to display the elapsed time of 3D image viewing on the screen. Selected item w 3D auto change This function allows the TV to switch to 3D mode automatically when a 3D identification signal is detected. Description Selected item Mode1 Switches 3D image detecting 3D identification signal.
Settings when using external devices Settings when using HDMI output devices HDMI terminals can carry audio and visual signals to the TV with an HDMI certified cable. When you want to output the audio and picture from an HDMI output device on the TV, select “HDMI 1(ARC)”, “HDMI 2”, “HDMI 3” or “HDMI 4” by switching the input source.
Settings when using external devices Controlling HDMI devices This system is using the HDMI CEC (Consumer Electronics Control) technology. What you can do with CEC capable using HDMI devices Selecting the input source Can use for selecting the input source. Using TV/VIDEO on the remote control unit or on the TV. TV/VIDEO allows you to choose from the available input sources.
Settings when using external devices MPX Labelling input sources 6 You can assign each input source a label as you prefer. Press c/d to select “Yes”. NOTE • When you select “A-TV”, “D-TV”, the skip function works only when using the INPUT button on the TV. Colour system settings HOME 1 MENU Press TV/VIDEO to select the desired input source. 2 Press MENU and the MENU screen displays. RETURN You can change the colour system to one that is compatible with the image on the screen.
AQUOS LINK Controlling HDMI devices using AQUOS LINK What is AQUOS LINK? Using the HDMI CEC (Consumer Electronics Control) protocol, with AQUOS LINK you can interactively operate compatible system devices (AV amplifier, DVD, Blu-ray Disc device) . NOTE • Please check the availability of AQUOS LINK-compatible AQUOS BD players and AQUOS LINK-compatible audio systems in your country. • AQUOS LINK does not work while using USB recording functions.
AQUOS LINK AQUOS LINK connection First connect the AQUOS LINK-compatible audio system or an AQUOS BD player that supports the HDMI CEC protocol. NOTE • Refer to the operation manual of the device to be connected for further details. • After unplugging connection cables or changing the connection pattern, first turn on the power of the TV with all relevant device’s power turned on. Change the external input source by pressing TV/VIDEO, select the appropriate input source and verify the audio visual output.
AQUOS LINK Selecting recorder You can select a recorder for the recording from several connected recorders. 1 Press MENU and the MENU screen displays. 2 Press c/d to select “Link operation”. 3 Press a/b to select “AQUOS LINK setup”, and then press ENTER. 4 Press a/b to select “Selecting recorder”, and then press ENTER. Link operation 5 Press a/b to select the input source of the connected HDMI device you want to control using the TV’s remote control. 6 Press c/d to select “On”.
AQUOS LINK Operating an AQUOS LINK device AQUOS LINK allows you to operate the HDMIconnected device with one remote control. Use the following procedures to start playback. Playback of titles using AQUOS LINK This section explains how to play back a title in the AQUOS BD player. 1 Power on the AQUOS BD player and select the appropriate external input. 1 Press I to start playback of a title.
AQUOS LINK Selecting media type for CEC-compatible recorder If your recorder has multiple storage media, select the media type here. 1 Press MENU and the MENU screen displays. 2 Press c/d to select “Link operation”. 3 Press a/b to select “Media change”, and then press ENTER. 4 Select the desired medium, such as DVD or HDD. The media type changes every time you press ENTER.
AQUOS LINK Using a Smartphone with the TV This function enables you to connect the TV to a smartphone that supports Mobile High-Definition Link (MHL) using an MHL-compatible cable. To connect the TV to your MHL-compatible smartphone, be sure to use an MHL-compatible cable (Commercially available). • You can view pictures and video on a large screen. • You can play back music files.
Connecting a PC Use the PC terminals to connect a PC. Analogue connection RGB cable (Commercially available) PC 8 Ø 3.5 mm stereo mini jack cable (Commercially available) Signal names for 15-pin mini D-sub connector Pin No. 5 4 10 15 13 1 6 7 8 9 14 2 3 12 11 Signal name R G B Not connected CSYNC Pin No. Signal name GND (Ground) GND (Ground) GND (Ground) +5V GND (Ground) Pin No.
Connecting a PC Audio select for connecting a PC HDMI connection PC HDMI-certified cable TV (commercially available) HDMI 1, 2, 3, 4 When using the PC terminal, you must select which terminal uses the AUDIO (R/L) jack for analogue audio input. Go to “MENU” s “Setup” s “Option” s “Terminal setting” s “Audio select”. Selected item ø 3.5 mm stereo minijack cable* PC MPX DVI/HDMI cable TV Description Video When connecting devices with AV cable to the PC terminal, display images without audio.
Connecting a PC a Picture size images. Input Signal 1024g768 Input Signal 1360g768 Normal Keeps the original aspect ratio in a full screen display. Cinema An image fully fills the For viewing wide screen programs. The screen. top and bottom of the image is slightly cropped. Normal Keeps the original aspect ratio in a full screen display. NOTE • Connect the PC before making adjustments. • Selectable picture size may vary with input signal type.
Connecting a PC Adjusting the PC image automatically This function enables the screen to be automatically adjusted to its best possible condition when the analogue terminals of the TV and PC are connected with a commercially available RGB cable, etc. Adjusting the PC image manually Ordinarily you can easily adjust the picture as necessary to change image position using Auto Sync. In some cases, however, manual adjustment is needed to optimise the image. Press MENU and the MENU screen displays.
Connecting a PC PC control of the TV • When a programme is set, the TV can be controlled from the PC using the RS-232C or IP. The input signal (PC/video) can be selected, the volume can be adjusted and various other adjustments and settings can be made, enabling automatic programmed playing. • Use an RS-232C cable cross-type (commercially available), LAN cable (commercially available) or wireless LAN USB adapter for the connections.
Connecting a PC Response code format Normal response O Problem response (communication error or incorrect command) K E R R Return code (0DH) Return code (0DH) RS-232C Commands List RS-232C Commands • Commands not indicated here are not guaranteed to operate.
Network function Connecting to the Network H How to connect To enjoy internet services, you need to connect the TV to a router with a high speed connection to the internet. You can also connect the TV to your Home network server through a router or access point. The TV connection to the router can either be wired or wireless. NOTE • If you choose a wired connection to the router, you need a LAN cable (commercially available).
Network function w Easy setup Only the WPS mode is available for wireless connection setup. “Manual setup” is possible for other wireless connections. 1 Go to "Menu"s"Setup"s"View setting" s "Network setup"s"LAN setting". 2 Press a/b to select “Easy setup”, and then select "Yes", press ENTER. 3 Select "Wired" or "Wireless", and then press ENTER. • Follow the on-screen instructions to complete the network setup. • A connection test is performed after the setup is complete.
Network function Specifications (Wireless LAN USB adapter) Standard IEEE 802.11a/b/g/n Frequency band 2400-2483.5 MHz 5725-5850 MHz Security Static WEP (64/128 bit, key index 1 only) WPA-PSK (TKIP) WPA2-PSK (AES) Modulation DBPSK@1Mbps DQPSK@2Mbps CCK@5.5/11Mbps BPSK@6/9 Mbps QPSK@12/18Mbps 16-QAM@24Mbps 64-QAM@48/54 Mbps and above, Rx up to 300 Mbps HOME UI 12 3 1 2 5 6 AQUOS.
Network function Selecting in the HOME 1 Youtube You can enjoy Youtube on your AQUOS TV. 2 EPG Quick shortcut for EPG. For EPG, please see page 50. 3 AQUOS.NET By connecting the TV to the Internet, you can enjoy a variety of broadband content. Example : The image shown below, which is only for explanation, it is subjected to change. w Twin Picture • Each time you press WIDE when a browser screen is shown , the display pattern toggles between a website-only screen and a TV+Web screen.
Network function Press a/b/c/d to select the “address bar”, and then press ENTER. The software keyboard will pop up when you press ENTER again. Use the software keyboard to input the “URL”, and then press ENTER. Hello 43556 Hello Aiello Helen Cello Gallo Gekk 1 .,?! 2 abc 3 def 4 ghi 5 jkl 6 mno 7 pqrs 8 tuv 9 wxyz [ Shift ] 0 x 11 CH List You can check the CH list and view detailed information. 12 Status guide Clear browser setting RETURN 10 IP Control (See page 74.
Other useful features You can connect the TV to a USB memory device, USB hard disk drive (HDD) or home network server to enjoy viewing pictures, listening to music, and watching videos.The USB memory device can also be used for recording. NOTE • Depending on the USB memory device/USB hard disk drive (HDD)/home network server, the TV may not be able to recognise the recorded data.
Other useful features Buttons How to operate USB recording You can enjoy D-TV recording or playback by connecting a commercially available USB HDD to the TV. CAUTION • Do not unplug the AC cord or turn off the MAIN POWER switch during USB recording timer setting or USB recording. • When the AC cord is unplugged and the MAIN POWER switch is turned off: − The USB recording timer setting is cancelled. • USB recording may stop automatically when signal reception is poor.
Other useful features USB recording w EPG timer setup You can record the programme you are watching to the registered USB HDD. You can select the programme you want to record and set the timer setting with EPG (Pages 53). w Starting USB recording w Manual timer setting Press REC E. • The TV starts USB recording. NOTE • You can also operate from the control panel by pressing CONTROL. • You cannot switch the channel or the input source during USB recording.
Other useful features USB recording playback (continued) Playback recorded scenes of the programme being recorded. Press d during recording. • Press REC STOP H to return the scene that is broadcasting. NOTE • You can also operate from the control panel by pressing CONTROL. • USB recording playback may take a while to start. • USB recording playback will stop and the TV will return to normal broadcasting when a programme is fast-forwarded to a scene that is near to the scene currently being broadcast.
MPX Other useful features Select the files to play back HOME MPX 3 MENU Press c/d to select “Photo mode”, “Music mode” or “Video mode”, and then press ENTER. Example Music mode RETURN Photo mode Video mode HOME MENU EPG INFO TEXT • To play back data on a USB memory device, insert the USB memory device on the TV. Select “USB media” from RETURN “INPUT”. • Use the following procedure to switch back to USB mode after switching from USB mode to another mode.
Other useful features Playing back files on a USB memory device Photo mode w Viewing thumbnails Example NOTE • Only compatible file formats are displayed. • The 3D icon appears on the thumbnails of 3D images. If you do not switch to 3D mode for the 3D images, they will be displayed in 2D. • You can see the file name, shooting date, file size and pixel size of the selected photo in the lower-left corner of the screen (shooting date is only available in the EXIF file format).
Other useful features w USB media menu E 3D display You can view photos in 3D. 1 Press B to display the “USB media menu” screen. 2 Press a/b to select “3D display”, and then press ENTER. 3 Press c/d to select “On”, and then press ENTER. NOTE • In 3D mode, you cannot rotate the photos. • You can select “3D display” from “USB media menu” only when the thumbnails screen for the photo mode in USB mode is displayed on the screen.
Other useful features Music mode Video mode Example Buttons for music mode Buttons Buttons for file selecting operations Description ENTER When selecting a music file: Play music. a/b/c/d (Cursor) Select a desired item. RETURN When music is stopped: Return to the previous operation. When music is being played: Stop music. R button Select/deselect items (4 mark appears on the selected items). G button All*: Stop music. Folder*: Move to the parent folder. Y button Play/pause music.
Other useful features w Using the operation panel w USB media menu You can use the operation panel for video playback operations. You can call up this operation panel by pressing CONTROL on the remote control unit or selecting “Control (USB media)” from “Menu” s “Setup” s“Optioin” s “Option for view”. E Set/Reset all auto play Option Set or reset the video to be played back. 1 Press B to display the “USB media menu” screen.
Other useful features DivX® setup This is the function to confirm your registration code. You need to register the code at http://www.divx.com. Press MENU to display the menu screen. w DivX® VOD registration 1 2 Press b/c/d to select “View setting”. You can find your registration code on this menu. You need to register the TV at http://www.divx.com before playing the DivX content. 3 Press a/b to select “DivX ® setup”, and then press ENTER.
Other useful features Video file format File extension *.avi *.mkv Container AVI MKV *.mp4** *.mov MP4 *.mpg *.mpeg PS *.rm/*.rmvb RM *.wmv/*.asf ASF Video decoder Supported resolutions DivX 3.11/4.x/5.1/6.0 1920×1080 XviD 1920×1080 H.264 1920×1080 MPEG4 1920×1080 Motion Jpeg 1280×720 DivX 3.11/4.x/5.x/6.0 1920×1080 XviD 1920×1080 H.264 1920×1080 MPEG4 1920×1080 H.
MPX Other useful features Playing back files on a home network server HOME MENU w Viewing individual photos The photo selected on the thumbnail selection screen is displayed. Buttons for individual display operation Buttons Go to the previous/next photo in the same directory. RETURN Return to the thumbnail selection screen. 3D Switches between 2D and 3D modes. R Rotate the photo by 90 degrees to the left. G Rotate the photo by 90 degrees to the right.
Other useful features HOME MENU Buttons for playing mode Buttons RETURN Music mode EPG INFO TEXT Example /Root/Music/Folders/Music Folder1 Folder2 Folder3 Description Go to the beginning of a file by pressing a once and the previous file by pressing a twice. a b Go to the next file. c/d Reverse/fast forward a video.*1 RETURN Go back to the file selection screen. ENTER Play/Pause the video. 3D Switches between 2D and 3D modes. G Stop a video. Y Display the home network control panel.
Other useful features Playing back files from a portable device or PC With the remote playback function, you can use your portable device to playback pictures, video and music on the home network server. • Please ensure that the TV and portable device or PC are in the same network environment, and set portable device as the server of TV. For the network setting of TV, please refer to pages 76 – 77. Easy share setting 1 Press MENU, and then press b/c/d to select “View setting”.
Appendix Troubleshooting The problems described below are not always caused by malfunctions. Check the TV again before having the TV serviced. Problem Possible solution • No power. • Is the AC cord disconnected? (See page 19.) • Has the power been turned on? (See page 23.) • When the power switch does not work, remove the power plug and insert it again, and press POWER on the TV after waiting more than five seconds. • Unit cannot be operated.
Appendix Troubleshooting - 3D images Problem Possible solution • 3D images are not displayed. • Is “3D auto change” set to “Off”? Press 3D to switch to 3D mode. • If “3D auto change” is set to “Mode1” or “Mode2” but no 3D images are displayed, check the display format of the content being viewed. Some 3D image signals may not be recognised as 3D images automatically. Press 3D to select the appropriate display format for the 3D image.
Appendix Reset Selected item If complex adjustments are made and the settings cannot be restored to normal, you can reset the settings to the factory preset values. Press MENU and the MENU screen displays. 1 2 Press b/c/d to select “View setting”. 3 Press a/b to select “Reset”, and then press ENTER. 4 If you have already set the password, enter it here. • “Return to factory pre-settings” displays on the screen. 5 Press c/d to select “Yes”, and then press ENTER.
Appendix Message list 3 When a new broadcast station is detected, the message is updated in the “Message list” of the “Information” menu. NOTE • If there are unread messages in the “Message list”, “New information” is displayed on “Channel display”. (See page 27.) Receiver report Display reports regarding failures and changes for timer settings. Identification You can check the current version of the software on the screen.
Appendix Specifications Model Item Resolution LC-52LX650H LC-60LX650H 2,073,600 pixels (1920 (H) g 1080 (V)) Video colour system TV function PAL/SECAM/NTSC 3.58/PAL 60 TV-Standard Receiving channel TV tuning system PAL:B/G, D/K, I SECAM:B/G, D/K,K/K1 NTSC:M Digital DMB-T/H VHF/UHF 44.25-863.
Appendix Dimensional drawings LC-46LX650H Unit: mm LC-52LX650H *1 Active area *2 Thinnest part 100
Appendix LC-60LX650H (Excluding tip prevention brackets ) (Including tip prevention brackets when stored ) (Including tip prevention brackets when attached ) *1 Active area *2 Thinnest part 101
MPX Appendix Clearing the password MPX If you forget your password, clear the password using the following procedure. HOME MENU RETURN HOME 1 MENU Press MENU and the MENU screen displays. 2 Press c/d to select “Setup”. RETURN EPG INFO TEXT 3 Press b/c/d to select “View setting”. 4 Press a/b to select “Individual setting” and then press ENTER. 5 Press a/b to select “Password”, and then press ENTER. 6 The password input screen displays.