
Operation Manual, User's Manual
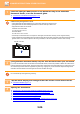
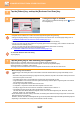
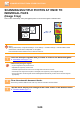

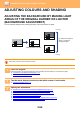
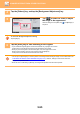
Table Of Contents

5-92
SCANNER/INTERNET FAX►OTHER FUNCTIONS
3
Specify the destination.
► RETRIEVING A DESTINATION FROM AN ADDRESS BOOK (page 5-16)
► VIEWING A LIST OF THE SELECTED DESTINATIONS (page 5-19)
► USING A SEARCH NUMBER TO RETRIEVE A DESTINATION (page 5-20)
► ENTERING AN ADDRESS MANUALLY (page 5-21)
► SPECIFYING A NETWORK FOLDER (page 5-22)
► RETRIEVING A DESTINATION FROM A GLOBAL ADDRESS BOOK (page 5-24)
► USING A TRANSMISSION LOG TO RESEND (page 5-26)
When in fax mode, enter the destination number.
► ENTERING A
DESTINATION NUMBER USING THE NUMERIC KEYS (page 4-12)
► RETRIEVING A DESTINATION FROM AN ADDRESS BOOK (page 4-14)
► USING A SEARCH NUMBER TO RETRIEVE A DESTINATION (page 4-17)
► RETRIEVING A DESTINATION FROM A GLOBAL ADDRESS BOOK (page 4-18)
► USING A TRANSMISSION LOG TO RESEND (page 4-20)
4
Tap the [Job Build] key.
A checkmark appears on the icon.
If you are performing Scan to E-mail, tap the [Others] key and then tap the [Job Build] key.
To cancel the job build setting:
Tap the [Job Build] key to uncheck it.
5
Change settings as needed.
6
Tap the [Start] key to scan the first original page.
7
Place the next set of originals and tap the [Start] key.
Repeat until all originals have been scanned.
• If needed, tap [Change Setting] before tapping the [Start] key, and change the original scan settings and send settings
for the next original. The setting changes will be applied to the next job.
• If you tap the [Preview] key, you cannot scan additional pages.
To cancel scanning:
Tap the [CA] key. All the settings including scanned data will be cleared.