English 26" LCD COLOR TV TÉLÉVISEUR ACL COULEUR 26" TV DE LCD A COLOR DE 26" LD-26SH3U Español Français OPERATION MANUAL MODE D'EMPLOI MANUAL DE FUNCIONAMIENTO Products that have earned the ENERGY STAR® are designed to protect the environment through superior energy efficiency. English ...... E1 Français .... F1 Español ..... S1 00_LD-26SH3U_cover1-2.
IMPORTANT: To aid in reporting in case of loss or theft, please record the TV's model and serial numbers in the space provided. The numbers are located on the rear of the TV. English ENGLISH CAUTION RISK OF ELECTRIC SHOCK DO NOT OPEN. CAUTION: TO REDUCE THE RISK OF ELECTRIC SHOCK, DO NOT REMOVE COVER (OR BACK). NO USER-SERVICEABLE PARTS INSIDE. REFER SERVICING TO QUALIFIED SERVICE PERSONNEL.
IMPORTANT INFORMATION FCC Statement WARNING – FCC Regulations state that any unauthorized changes or modifications to this equipment not expressly approved by the manufacturer could void the user's authority to operate this equipment. Note: This equipment has been tested and found to comply with the limits for a Class B digital device, pursuant to Part 15 of the FCC Rules. These limits are designed to provide reasonable protection against harmful interference in a residential installation.
E27 E28 E28 E29 E30 E30 E31 E31 TV/AV mode Setting TV channels . . . . . . . . . . . . . . . . . . . . . . . . . . . . . . . . . . . . . . . . . . . . . . . . . . . . . . . . . . . . . . . . . Selecting broadcast (Air) or cable TV (Cable) for channel setting . . . . . . . . . . . . . . . . . . . . . . . . . . Saving broadcast TV channels in the memory (CH Search) . . . . . . . . . . . . . . . . . . . . . . . . . . . . . . Setting channels manually (CH Memory) . . . . . . . . . . . . . . . . . . . . . . . .
Table of Contents PC mode Adjusting the computer display automatically (for analog signals) . . . . . . . . . . . . . . . . . . . . . . . . . . . . Using the menus in PC mode . . . . . . . . . . . . . . . . . . . . . . . . . . . . . . . . . . . . . . . . . . . . . . . . . . . . . . . . . How to adjust using the menus . . . . . . . . . . . . . . . . . . . . . . . . . . . . . . . . . . . . . . . . . . . . . . . . . . . . . Menu setting items . . . . . . . . . . . . . . . . . . . . . . . . . . . . . . . . . .
9) 10) 11) 12) 13) 14) 15) 16) 17) 18) 19) 20) 21) Read these instructions. Keep these instructions. Heed all warnings. Follow all instructions. Do not use this apparatus near water. Clean only with dry cloth. Do not block any ventilation openings. Install in accordance with the manufacturer's instructions. Do not install near any heat sources such as radiators, heat registers, stoves, or other apparatus (including amplifiers) that produce heat.
Tips and safety instructions - Water and Moisture – Do not use this product near water – for example, near a bath tub, wash bowl, kitchen sink, or laundry tub; in a wet basement; or near a swimming pool; and the like. - Stand – Do not place the product on an unstable cart, stand, tripod or table. Placing the product on an unstable base can cause the product to fall, resulting in serious personal injuries as well as damage to the product.
GROUND CLAMP ANTENNA DISCHARGE UNIT (NEC SECTION 810-20) ELECTRIC SERVICE EQUIPMENT GROUNDING CONDUCTORS (NEC SECTION 810-21) GROUND CLAMPS POWER SERVICE GROUNDING ELECTRODE SYSTEM (NEC ART 250, PART H) NEC-NATIONAL ELECTRICAL CODE Español - For added protection for this equipment during a lightning storm, or when it is left unattended and unused for long periods of time, unplug it from the wall outlet and disconnect the antenna.
Tips and safety instructions Power cord - Do not damage the power cord, place heavy objects on it, stretch it, or over bend it. Also, do not add extension cords. Damage to the cord may result in fire or electric shock. - Use only the power cord supplied with the TV. - Insert the power plug directly into the AC outlet. Adding an extension cord may lead to fire as a result of overheating. - Do not remove or insert the power plug with wet hands. Doing so could result in electric shock.
Product and accessory checklist Français English Please check that the following items are included in the package.
Product description Main unit Front view 1 INPUT MENU ENTER 2 CH VOL POWER 3 4 5 6 OPC POWER 7 8 1. Control buttons (See page E29 for the INPUT button and E27 for the others. Also see page E30 for the CH and VOL buttons.) 2. POWER button (See page E28.) 3. Speakers 4. Headphone terminal (See page E13.) 5. Remote control sensor (See page E14.) 6. OPC (Optical Picture Control) sensor (See OPC on page E43 or E49.) 7. OPC LED Green: OPC is on. Off: OPC is off. 8.
Product description English Main unit Rear view 1 2 4 5 6 12 13 14 B 26 7 8 9 10 Italiano 15 16 17 18 19 20 21 1. Antenna input terminal 2. Antenna output terminal 3. S-video input terminal 4. Video input terminal 5. Audio input terminal - Left 6. Audio input terminal - Right 7. Component input terminals 8. Video input terminal 9. Audio input terminal - Left 10. Audio input terminal - Right 11. S-video input terminal 12. Video input terminal 13. Audio input terminal - Left 14.
Product description Remote control POWER DISPLAY INPUT 13 14 1 2 3 FLASH BACK TV AV MENU PC 15 4 5 ENTER 6 16 CH RETURN 7 8 9 10 VOL EXIT VIEW MODE PICT MODE MTS MUTE CC FREEZE 1. POWER button 2. Channel buttons 3. FLASHBACK button 4. MENU button 5. buttons and ENTER button 6. CH (channel) buttons 7. RETURN button 8. EXIT button 9. VIEW MODE button 10. PICT MODE button 11. SLEEP button 12. PIP/SPLIT buttons (ON/OFF, SIZE/MOVE, SWAP, and SELECT) 13. INPUT button 14.
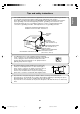
Adjust to an easy to view angle. CAUTION! CAUTION! - Be sure to hold both sides of the TV when adjusting the viewing angle. The LCD panel used in this TV is made of glass. Pressure from hands on the LCD panel could cause damage. - Be careful not to allow your fingers to be pinched. - Do not put your hand or objects near the stand. When changing the viewing angle horizontally, the stand moves and may hit the objects or cause injury to your hand or fingertips.
Remote control Using the remote control Use the remote control by pointing it towards the remote control sensor on the TV. Objects between the remote control and remote control sensor may prevent proper operation. 2. Insert two ("AAA" size, UM/SUM-4) batteries. Position the positive and negative ends of the batteries as indicated in the compartment. Remote control sensor 3. Close the battery cover. Engage the claw on the cover into the battery housing and slide shut.
Preparation steps English Use the following steps to connect and set up your TV. TV ...Required when using the TV as a television AV ...Required when using the TV as an AV monitor TV AV Español TV Connecting the TV to a home antenna terminal (See pages E16 through E18.) - The commercially available antenna cable is required. Français PC ...Required when using the TV as a computer monitor PC Italiano Connecting the TV to a power source (See page E19.
Connecting the TV to a home antenna terminal CAUTION! - When connecting, ensure that the TV is switched off. The antenna requirements for good color television reception are more important than those for black & white television reception. For this reason, a good quality outdoor antenna is strongly recommended. The following is a brief explanation of the type of connections that are provided with the various antenna systems. (See page E10 for information on removing/replacing the terminal cover.
Connecting the TV to a home antenna terminal "A" position on the RF switch (commercially available): You can view all unscrambled channels by using the TV's channel buttons. "B" position on the RF switch (commercially available): You can view the scrambled channels via the converter/descrambler by using the converter's channel keys. Français Español - A 75-ohm coaxial cable connector is built into the set for easy hookup.
Connecting the TV to a home antenna terminal Connection to an antenna input terminal of AV equipment A different type of antenna cable is required depending on the shape of the antenna input terminal of the AV equipment to be connected. Antenna input terminal of AV equipment Antenna cable (commercially available) Antenna output terminal (ANT-OUT) Note: - The signal from the antenna output terminal is less powerful than when it first enters the TV.
Connecting the TV to a power source - When connecting, ensure that the TV is switched off. - Use only the power cord supplied with the TV. - Be careful not to over bend the cable or add extension cords as this could lead to a malfunction. English CAUTION! Français See page E10 for information on removing/replacing the terminal cover. Italiano Español 1. Connect the power cord (supplied) to the power input terminal. 2. Place the power plug into an AC outlet.
Setting TV channels (EZ Setup) When you turn on the TV for the first time (see page E28), it will automatically memorize the broadcasting channels where you live. Make sure you have performed the following steps before you turn on the TV. - Insert the batteries into the remote control. (See page E14.) - Connect the antenna cable to the TV. (See pages E16 and E17.) Make sure what kind of connection (receiving mode) is made with your TV. - Plug in the power cord to the TV and AC outlet. (See page E19.
Connecting the TV to AV equipment - Ensure that the TV and all the equipment you are connecting to it are switched off before you begin. See page E10 for information on removing/replacing the terminal cover.
Connecting the TV to AV equipment AV equipment with video output terminals Right side of the TV Output terminals of AV equipment VIDEO (Yellow) VIDEO (Yellow) AV-IN 1 or AV-IN 3 AUDIO-L AUDIO-R (White) (Red) (White) AUDIO-L (Red) AUDIO-R AV-IN 2 RCA pin cable (commercially available) Notes: - When using the video input terminal of AV-IN 1 or AV-IN 3, do not connect the cable to the S-video input terminal of the same group.
Connecting the TV to AV equipment (Green) (Green) Y Pb (Blue) (Blue) Pb Pr (Red) (Red) Pr Component video cable (commercially available) AUDIO-L (White) AUDIO-R (Red) AV-IN 2 VIDEO (White) AUDIO-L (Red) AUDIO-R Español Y Français Right side of the TV RCA pin cable (commercially available) Note: - When using the component input terminals, do not connect the cable to the video input terminal of AV-IN 2.
Connecting the TV to AV equipment AV equipment with DVI output terminals Rear of the TV AUDIO-L AUDIO-R Output terminals of AV equipment AUDIO-L (White) AUDIO-R (Red) (White) DIGITAL (Red) RCA pin cable (commercially available) DVI OUT Digital signal cable (separately-sold, NL-C04J) Notes: - The DVI input terminal is used for either AV equipment or a computer. Before using this terminal, you need to set "DVI Select" to "AV" or "PC" in the Option menu. (See page E45 or E52.
Analog RGB output terminal (Mini D-sub 15 pin, 3 rows) Installing the set-up information Depending on the computer or OS, you may have to install the set-up information for the TV. Refer to "readmee.pdf" (in English) on the supplied CD-ROM. You need Adobe Reader installed on your computer to view this PDF file.
Connecting the TV to a computer Digital connection Connect the separately-sold digital signal cable (model name: NL-C04J) to the digital RGB output terminal of the computer. See page E10 for information on removing/ replacing the terminal cover. - The TV has an input terminal for connecting to a computer with a DVI-compatible output terminal (DVI-D 24 pin or DVI-I 29 pin). (Depending on the type of computer to be connected, the display may not work correctly.
The explanations in this manual use primarily the remote control. (Operations requiring the use of control buttons on the TV are specifically identified using the words "on the TV".) The following table shows the remote control buttons, their functions, and their corresponding control buttons on the TV. Main unit TV Français Remote control AV MENU PC CH VOL POWER Español INPUT MENU ENTER ENTER VOL MTS MUTE Remote control buttons MENU ENTER RETURN EXIT Function Displays the MENU screen.
Basic operations Turning power on/off INPUT MENU ENTER CH VOL POWER POWER DISPLAY INPUT FLASH BACK Turning power on When the POWER LED is off: 1. Press the POWER button on the TV. 2. Turn on power to the connected equipment. After a while the POWER LED will light green, and then the display mode will be displayed for several seconds. When the POWER LED is lit red (standby): 1. Press the POWER button on the remote control. 2. Turn on power to the connected equipment.
Basic operations INPUT AV1 AV2 AV3 AV4 AV5 FLASH BACK TV PC AV MENU PC ENTER CH VOL Using the TV, AV, or PC button 1. Press the TV, AV, or PC button. The TV will switch to the display mode for the button you pressed. Notes: - Each time you press the AV button, the input changes in the order of AV1 → AV2 → AV3 → AV4 → AV5 → AV1.... - Each time you press the PC button, the input toggles between analog and digital. Displays the TV's image. The number is the channel being received.
Basic operations Selecting channels Adjusting the volume The volume can be set individually for PC mode and TV/AV mode. Start by switching to the display mode for which you want to set the volume. TV AV MENU PC FLASH BACK TV AV MENU PC ENTER ENTER CH VOL 1. Press the VOL +/– buttons to adjust. CH 30 VOL 1. Select a channel using the CH buttons or channel buttons (0-9 and 100). Pressing one of these buttons automatically switches to TV mode if the TV is in AV or PC mode.
This feature is helpful when you want to mute the sound such as when the phone rings or someone comes to the door. ENTER Manufactured under license from Dolby Laboratories. "Dolby", "Pro Logic" and the double-D symbol are trademarks of Dolby Laboratories. TV AV MENU PC ENTER CH RETURN VOL EXIT MTS MUTE 1. Press the MENU button to display the MENU screen. 2. Press the buttons to select "Audio". 3. Press the buttons to select "Dolby Virtual", and press the ENTER button. buttons to select "On". 4.
Setting TV channels The following table shows the channels this TV can receive. VHF Channels 2 through 13 UHF Channels 14 through 69 Channel 1 (HRC and IRC mode only) Cable Channels 2 through 125 (STD, HRC, and IRC) Selecting broadcast (Air) or cable TV (Cable) for channel setting It is necessary to set the receiving mode to "Air" or "Cable" channels to receive locally broadcast TV programs. (You must subscribe to a cable TV service to receive cable channels.
Setting channels manually (CH Memory) "CH Search" allows you to search through available channels ("Air" or "Cable") in your area. The tuner saves them to TV memory automatically. After performing the steps of Selecting broadcast (Air) or cable TV (Cable) for channel setting on page E32, continue with the following steps. "CH Memory" allows you to set the channels you want one by one.
Watching TV Selecting MTS (Multi ch TV Sound) You can select MTS (Multi ch TV Sound) using the MTS button. STEREO SAP MONO Returning to previous channel (FLASHBACK) You can return to the previous channel you were watching. stereo audio second audio program monophonic audio TV AV MENU PC FLASH BACK ENTER CH RETURN VOL EXIT MTS 1. Press the FLASHBACK button. The TV will return to the channel you were previously watching.
Note: - This manual refers to AV1 mode through AV5 mode as "AV mode". DISPLAY INPUT Notes: - Sometimes no image will be displayed during fast searching of video. - The display may flicker during slow playback of video depending on the VCR or videotape you are using. - You cannot play shooting games that use gun controllers with this TV.
Helpful features (in TV/AV mode) Adjusting the V-Chip settings Important: - Please refer to the end of this manual for "Clearing the secret number". This function allows TV programs to be restricted and TV usage to be controlled based on FCC data. It prevents children from watching violent or sexual scenes that may be harmful. - Restriction of TV programs includes two ratings that contain information about the program: the MPAA rating and the TV Parental Guidelines. The MPAA rating is restricted by age.
Helpful features (in TV/AV mode) FV (Fantasy violence) Rating Content base S (Sexual situation) L (Adult language) D (Sexually suggestive dialog) Deutsch TV-Y (All children) TV-Y7 (Direct to older children) TV-G (General audience) TV-PG (Parental guidance suggested) TV-14 (Parents strongly cautioned) TV-MA (Mature audience only) Français Age base V (Violence) English TV Parental Guidelines Example 1: When "TV-Y7" in the age-based rating is blocked, this will automatically block the higher ratin
Helpful features (in TV/AV mode) 8. Press the MENU or EXIT button to exit the screen. Setting V-Chip for MPAA rating Notes: - Set ratings are blocked only when you activate V-Chip Block (see page E39). - If you select "G" to block, all ratings are automatically blocked. - If you select "X" to block, "G", "PG", "PG-13", "R", and "NC-17" are not blocked. FLASH BACK TV AV MENU PC Setting V-Chip for TV Parental Guidelines (TV Guidelines) 1.
Helpful features (in TV/AV mode) English Activating or deactivating V-Chip Block (Status) You can activate V-Chip Block after "Setting V-Chip for MPAA rating" and/or "Setting V-Chip for TV Parental Guidelines (TV Guidelines)". Français Deutsch 1. Repeat steps 1 to 5 of "Setting V-Chip for MPAA rating" on page E38. ("V-Chip" screen will be displayed.) 2. Press the buttons to select "Status", and press the ENTER button. buttons to set "Status" to "On" 3. Press the (activated) or "Off" (deactivated).
Helpful features (in TV/AV mode) Setting the Closed Caption (CC) This TV is equipped with an internal Closed Caption decoder. "Closed Caption" is a system which allows conversations, narration, and sound effects in TV programs and home videos to be viewed as captions on the TV screen. - Not all programs and videos will offer Closed Captioning. - The Closed Caption broadcasts can be viewed in 2 modes: Caption (CC) and Text (Text). For each mode, two channels are available: CH1 and CH2.
Helpful features (in TV/AV mode) English Pausing the screen (FREEZE) RETURN EXIT VIEW MODE PICT MODE MTS MUTE CC FREEZE SWAP SELECT Deutsch This feature pauses the image from the TV or other connected AV equipment. This is helpful when you want to write down a recipe or phone number for purchasing tickets for an event. ON/OFF SIZE/MOVE Français SLEEP PIP/SPLIT 1. Press the FREEZE button. The images will pause. Italiano Canceling pausing 1. Press the FREEZE button again.
Using the menus in TV/AV mode You can adjust TV and video images and perform various settings using the menus in TV/AV mode. Menu setting items Picture menu How to adjust using the menus OPC ..................................................... Page Brightness ........................................... Page Black Level .......................................... Page Contrast ............................................... Page Color .................................................... Page Tint ........
Using the menus in TV/AV mode Color Temp. Reset Audio menu (See page E42 for information on using the menus.) When headphones are connected or when "Output Select" is set to "Variable2" in the Option menu, the Audio menu cannot be adjusted. Description Adjusts high-pitch sounds. Adjusts low-pitch sounds. Adjusts the balance between the right and left speakers. Turns the Virtual Dolby Surround function "On" or "Off". (See page E31.
Using the menus in TV/AV mode Setup menu (See page E42 for information on using the menus.) Item CH Setup (TV mode only) Description Sets TV channels. - Air/Cable ........ Sets the receiving mode broadcast (Air) or cable TV (Cable). (See page E32.) - CH Search ..... Sets available channels automatically. (See page E33.) - CH Memory .... Sets channels manually. (See page E33.) Allows TV programs to be restricted and TV usage to be controlled based on FCC data. - MPAA ..............
Using the menus in TV/AV mode DVI Select HDMI Setup (AV4 mode only) E45 02_LD-26SH3U_gb_02.P65 45 5/23/2005, 1:44 PM Deutsch Français Italiano Español Description Reduces the visual lag inherent in fast-motion scenes. Selects how to adjust the sound via the audio output terminals. - Fixed ..................... Set "Fixed" when connecting to a VCR for recording, etc. The volume via the audio output terminals is fixed. (TV speaker volume can be adjusted.
Adjusting the computer display automatically (for analog signals) When using the TV as a computer display for the first time or after having changed the system settings during use, perform an automatic screen adjustment. "Clock", "Phase", "H-Pos.", and "V-Pos." in "Fine Sync." of the Setup menu (PC mode) will be set to their optimum states. Note: - When using the TV with a digital connection, automatic screen adjustment is unnecessary. TV AV MENU PC ENTER CH RETURN VOL EXIT MTS MUTE 1.
Auto* .................................................... Page OPC ..................................................... Page Brightness ........................................... Page Black Level* ........................................ Page Contrast* ............................................. Page Color Control ....................................... Page How to adjust using the menus 1. Press the PC button to select PC mode. 2.
Using the menus in PC mode Adjustment pattern If you are using Windows, use the adjustment pattern on the supplied CD-ROM. 1. Load the supplied CD-ROM into the CD-ROM drive of the computer. 2. Open [My Computer] and select CD-ROM. 3. Double click on [Adj_uty.exe] to run the adjustment program. The adjustment pattern will appear. Adjustment pattern 4. After completing the adjustments, press the computer's [Esc] key to exit the adjustment program.
Using the menus in PC mode Black Level* Color pattern Contrast* Color Control Adjust contrast watching the color pattern so that all gradations appear. - Color Mode ........ Selects the color tone. - Standard ..... Displays images using the original color tone of the LCD monitor. - sRGB ........... sRGB is an international standard for color representation defined by the IEC (International Electrotechnical Commission).
Using the menus in PC mode Audio menu (See page E47 for information on using the menus.) When headphones are connected or when "Output Select" is set to "Variable2" in the Option menu, the Audio menu cannot be adjusted. Item Treble Bass Balance Dolby Virtual Reset Description Adjusts high-pitch sounds. Adjusts low-pitch sounds. Adjusts the balance between the right and left speakers. Turns the Virtual Dolby Surround function "On" or "Off". (See page E31.
Using the menus in PC mode Vertical flicker noise Italiano - Phase ............. Makes an adjustment after "Clock" is properly adjusted so that no horizontal flicker noise is emitted. Horizontal flicker noise - H-Pos., V-Pos. ... Adjusts the position of the adjustment pattern so that it appears centered on screen. Screen frame Adjustment pattern - Reset .............. Resets adjustment values for this item to their original factory settings. - 480 Lines .......
Using the menus in PC mode Option menu (See page E47 for information on using the menus.) Item Quick Shoot Output Select Description Reduces the visual lag inherent in fast-motion scenes. Selects how to adjust the sound via the audio output terminals. - Fixed ............... Set "Fixed" when connecting to a VCR for recording, etc. The volume via the audio output terminals is fixed. (TV speaker volume can be adjusted.) Image and sound are simultaneously output via the output terminals.
Watching two images simultaneously (PIP/SPLIT) RETURN EXIT VIEW MODE PICT MODE Displaying the images in PIP/Split mode (ON/OFF) MTS MUTE CC FREEZE SWAP SELECT SIZE/MOVE PIP/SPLIT 1. Press the SELECT button. will move to the other window. ENTER RETURN VOL EXIT VIEW MODE PICT MODE MTS MUTE CC FREEZE SWAP SELECT SLEEP ON/OFF SIZE/MOVE Changing between TV and AV modes While displaying the images in PIP/Split mode, you can change the display mode between TV and AV modes.
Watching two images simultaneously (PIP/SPLIT) Swapping images (SWAP) In PIP/Split mode, you can switch the images displayed on two windows with each other. Adjusting the size or position of the small window (SIZE/MOVE) TV RETURN EXIT MTS AV MUTE MENU VIEW MODE PICT MODE CC FREEZE SLEEP ON/OFF PC ENTER SIZE/MOVE SWAP SELECT CH PIP/SPLIT 1. Press the SWAP button. RETURN [PIP mode] Switches the images displayed in the whole screen and in the small window with each other.
TV AV MENU PC ENTER RETURN VOL EXIT VIEW MODE PICT MODE MTS MUTE CC FREEZE Italiano CH Español 1. Press the VIEW MODE button. "View Mode" menu will be displayed. 2. Press the VIEW MODE button to select the desired mode. You can also use the buttons to select. English [TV/AV mode] Side Bar Displays 4:3 aspect ratio TV images normally. S. Stretch Expands 4:3 images to fill the entire screen (16:9).
Other features Customizing the picture mode Adjusting the picture mode (PICT MODE) For each display mode, you can register the adjustments set in the Picture menu as "USER" of the picture mode. You can change the picture mode depending on the type of the image you are now watching. Each picture mode consists of the adjustments set in the Picture menu. (See pages E43 and E49.) RETURN EXIT VIEW MODE PICT MODE MTS MUTE CC FREEZE SWAP SELECT SLEEP ON/OFF SIZE/MOVE PIP/SPLIT 1.
Switching power off after a specified length of time (SLEEP) The information displayed will vary depending on the current display mode and other settings. The TV can automatically switch off (standby) after a specified length of time. This is helpful if you want to use the TV at bedtime. POWER DISPLAY INPUT RETURN EXIT VIEW MODE PICT MODE MTS MUTE CC FREEZE SWAP SELECT Deutsch Checking your TV's current settings (DISPLAY) English Other features 1. Press the DISPLAY button.
Other features Preventing changes to adjusted values (Adjustment Lock) Resetting all adjustment values (ALL RESET) Disabling the control buttons other than the following buttons (TV and remote control) prevents adjusted values from being changed. The changing of adjusted values for both TV/AV mode and PC mode will be prevented. All adjustment values will be reset for both PC mode and TV/AV mode (including channel settings and the secret number for V-Chip Block).
Outputting images and sound to AV equipment CAUTION! - Ensure that the TV and all the equipment you are connecting to it are switched off before you begin. English Other features (Yellow) (Yellow) VIDEO AUDIO-L (White) (White) AUDIO-L AV-OUT AUDIO-R (Red) AUDIO-R (Red) RCA pin cable (commercially available) The image displayed on the TV screen and the sound can be output via the AV-OUT terminals to AV equipment.
Instructions for attaching a VESA-compliant mount An arm or stand based on the VESA standard (commercially available) can be attached to the TV. Procurement of the arm or stand is at the customer's discretion. 5. Remove the four screws and then remove the stand from the TV. Arms or stands able to be used Attachments must satisfy the following. - Compatible with the VESA standard. - The six screw holes on the section to be attached have a gap of 100 mm between them.
Instructions for attaching a VESA-compliant mount English 7. Reconnect the cables and replace the terminal covers. See page E10 for information on replacing the terminal cover. English Español Italiano Français Deutsch Note: - You can attach a stand or an arm that has four screw holes located at an interval of 100 mm. Please fully confirm that the stand or arm will not drop and the TV will not fall before use. E61 02_LD-26SH3U_gb_02.
Troubleshooting If you think the TV may be faulty, please check the following points before taking it to be repaired. If the TV continues not to work after you have checked all the points mentioned below, please contact the shop where you purchased the TV or your nearest Sharp authorized Service Center. The TV's fluorescent tubes have a limited life span. - If the screen darkens, persistently flickers or does not light up, the fluorescent tube has reached the end of its operational life span.
E63 02_LD-26SH3U_gb_02.P65 63 5/23/2005, 1:45 PM Deutsch Français Italiano Español English What to Check - Adjust the volume. (Page E30) - Are the audio cables properly connected? (Pages E21 to E24 and E26) - Did you press the MUTE button? (Page E31) - No sound can be heard from the TV speakers while headphones are connected. - When "Output Select" is set to "Variable2" in the Option menu, no sound can be heard from the TV speakers.
Troubleshooting Problem "Temperature" is displayed on the screen. POWER LED blinks red. What to Check If the temperature inside the TV rises, this message is displayed on the screen and then the TV switches to standby mode. Check the following points before turning the power on.
TV care English TV care Always make sure to turn your TV off and then unplug the TV from the AC outlet before cleaning the TV. Deutsch Cabinet and control panel section Français Use a soft dry cloth to lightly wipe away any grime from the cabinet and control panel. If the cabinet or control panel is still dirty, apply a neutral cleaner (that is not acid or alkaline based) to a dampened soft cloth, wring it out well and wipe away grime.
Specifications Product specifications Model name LD-26SH3U LCD display 26" Advanced Super-V and Anti-Glare Low-Reflection TFT LCD module Actual display size 2533/64" (64.8 cm) measured diagonally Resolution (max.) 1366 x 768 Displayable colors (max.) Approx. 16.77 million colors (8 bit) Dot pitch (H x V) 0.4135 mm x 0.4135 mm Brightness (max.) 450 cd/m2 (The screen brightness deteriorates over time. Constant brightness cannot be maintained.
Specifications - 280 (111/32) Note: - As a part of our policy of continuous improvement, SHARP reserves the right to make design and specification changes for product improvement without prior notice. The performance specification figures indicated are nominal values of production units. There may be some deviations from these values in individual units. Français 398 (1543/64) Power cord: approx. 1.8 m (5' 10") PC analog signal cable: approx. 1.8 m (5' 10") PC audio cable: approx. 1.
Specifications The analog RGB input connector pin The monitor is based on the VESA DPMS and the DVI DMPM standards. To activate the power management function, the video card and the computer used with it must also conform to these standard. (Mini D-sub connector with 15 pins) DPMS: Display Power Management Signaling Function No. Power management Power H-sync V-sync consumption 1 Red video signal input 2 Green video signal input 3 Blue video signal input 4 N.C.