PORTABLE MINIDISC PLAYER MODEL MD-S301 OPERATION MANUAL MD-MS200-HYOSHI
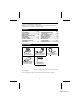
INTRODUCTION Thank you for purchasing this SHARP product. To obtain the best performance from this product please read this manual carefully. It will guide you in operating your SHARP product. CONTENTS Page ACCESSORIES ...................................... 1 SPECIAL NOTES ................................... 2 PRECAUTIONS ................................... 3-4 NAMES OF CONTROLS AND INDICATORS ....................................... 5 POWER SOURCE ............................... 6-7 PLAYING A MINIDISC ....
SPECIAL NOTES ● Contains Lithium-Ion Battery. Must be Disposed of properly. Contact Local Environmental Officials for disposal instructions. Caution - use of controls or adjustments or performance of procedures other than those specified herein may result in hazardous radiation exposure. FOR YOUR RECORDS For your assistance in reporting this unit in case of loss or theft, please record below the model number and serial number which are located on the bottom of the unit. Please retain this information.
PRECAUTIONS ■ Important ■ Storing the unit ● Do not wear your headphones when you are crossing streets or near traffic. ● Do not use your headphones while driving a motor vehicle, it may create a dangerous traffic hazard and may be illegal. Remember to obey all of the safety rules in your area. ● Do not play the unit at a high volume. Hearing experts advise against extended play at high volume levels. ● If you experience ringing in your ears, reduce the volume or discontinue use.
■ Notes about the rechargeable battery ● A rechargeable lithium-ion battery is the only kind that can be used. Even if the battery supplied with the unit is not used, you should charge it at least once every three months because of the special quality of this battery. ● The rechargeable battery can be charged approximately 300 times. ● Do not use any battery other than that specified. Use of other batteries may cause malfunctions.
NAMES OF CONTROLS AND INDICATORS ■ Main unit 1 4 2 5 3 6 7 1. Volume Buttons: +, – 2. Stop/Power Off/Charge Button: ■:OFF 3. Power Indicator 4. Fast Reverse Button: 5. Play/Fast Forward Button: / 6. 5V DC Input Jack 7. Eject Lever 5 8. Hold Switch 9. Battery Case Connection Terminals 10. Headphones Jack 11. Rechargeable Lithium-Ion Battery Compartment 8 10 11 9 04 ■ Remote control unit 1. Character/Time Information Display 2. Disc Mode Indicator 3. Total Track Number Display 4.
POWER SOURCE This unit can be used with 4 different power sources: a rechargeable battery, an AC adaptor, an optionally available battery case (AD-S30BC), and an optionally available car adaptor (AD-CA20X). ■ Rechargeable battery power 1 OPEN When the rechargeable battery is used for the first time or when you want to use it after a long period of disuse, be sure to charge it fully. EN OP 1 Open the rechargeable battery compartment cover. 2 Insert the rechargeable battery.
■ Alkaline battery power 1 Use of the optionally available alkaline battery case combined with the rechargeable battery will result in extended playback times. ● Use one, commercially available alkaline battery (LR6, “AA” size). 1 Insert the battery into the battery case. 2 (1) Open the case cover. (2) Insert the battery according to the polarity marked on the inside of the battery case. Then, close the case cover. Back of the MD player 2 Attach the battery case to the main unit.
PLAYING A MINIDISC Headphones To the jack BASS For the left (L) For the right (R) Remote control unit 1 Insert the headphones plug firmly into 4 Press the VOLUME + button to increase the volume and the VOLUME – button to decrease the volume. the headphones jack on the remote control unit. 2 Plug the remote control unit into the (0 - 30) jack on the main unit. Push the plug all the way in. ● Since the remote control unit plug has only one correct orientation, plug it in as shown in the drawing.
To interrupt playback: 06 To turn off the power: Press the ■:OFF (■) button while in the stop mode. ● If the unit is not operated for at least 2 minutes while in the stop mode, the power will be turned off automatically. Press the button on the remote control unit during playback. ● To resume playback, press the button again. To stop playback: 06 0 4 06 To remove the MiniDisc: Press the ■:OFF (■) button.
CONVENIENT PLAYBACK FUNCTIONS ■ Cue and review 1 Load a MiniDisc and begin playback. 2 Press and hold down the 0/4 (4) button for audible fast forward, or press and hold down the 5 button for audible fast reverse. 3 Normal playback will resume when the 5 or 0/4 (4) button is released. ■ APSS (Auto Program Search System) APSS automatically locates the beginning of any track. To move to the beginning of the next track: Press the / ( ) button during playback.
■ Random play or repeat play (Remote control) During playback or while in the stop mode, press the PLAY MODE button repeatedly to select the playback mode. PLAY MODE RANDOM .... Random play R 1R ....... Repeat play of all of the tracks ....... Repeat play of a single track No display ... Normal playback ● If the playback mode is selected while stopped, press the button to start playback. 06 RANDOM Notes: ● In random play the unit will select and play tracks automatically.
■ To check the elapsed time and remaining time of the track DISPLAY (Remote control) During playback, press the DISPLAY button. ● Each time the button is pressed, the display will change as follows: Track name ■ To check the total playing time (Remote control) While in the stop mode, press the DISPLAY button.
CONVENIENT OPERATION OF THE UNIT ■ Checking the remaining amount of battery charge ■ To prevent the unit from being operated by mistake The remaining amount of battery charge is shown by the battery indicator ( ) on the remote control display during operation. To avoid operations being started by accidentally pressing the buttons, use the hold function. Move the HOLD switch to the safety position (direction indicated by the arrow).
■ To turn off the display backlight PLAY MODE (Remote control) Whenever you press a button, the display will light for about 4 seconds, so that you can read it in the dark. You can turn off the backlight. 1 While in the stop mode ... ■ To eliminate the confirmation sound Hold down the PLAY MODE button until “SET UP” appears. ● When you release the button, “BEEP 1” or “BEEP 0” will appear. (Remote control) 2 Press the Every time a button is pressed, a “beep” will be heard in the headphones.
■ To cancel the auto power save function PLAY MODE (Remote control) Power consumption can be reduced by controlling the memory storage time. You can cancel the auto power save function. 1 While in the stop mode ... Hold down the PLAY MODE button until “SET UP” appears. ● When you release the button, “BEEP 1” or “BEEP 0” will appear. ■ To cancel the auto-play function 2 Press the ● “PS off” will appear, and the auto power save function will be canceled.
USING EXTERNAL UNITS ● Before connecting any other equipment, turn off the power to all units. ● Connect the plugs securely. Improper connections may cause noise or malfunctions. ● Adjust the volume on both this unit and any other equipment connected to it.
WHAT IS A MINIDISC? ■ Where not to store discs A MiniDisc is a disc inside a protective cartridge. You can handle it freely without worrying about dust, fingerprints, etc. However, if dust enters the opening of the cartridge, or there is excessive dirt on the cartridge, or the cartridge becomes warped, you may experience malfunctions. Please note the following. Do not store discs in places with high temperatures or humidity.
Many potential “problems” can be resolved by the owner without calling a service technician. If something seems to be wrong with this product, check the following before calling your authorized SHARP dealer or service center. PROBLEM CAUSE The unit does not turn on.
ERROR MESSAGES When an error message is displayed on the display, proceed as follows: Display Meaning Remedy ● Nothing is recorded. ● Replace the disc with a recorded disc. ● The disc is damaged or the music information is not written properly on the disc. ● Replace the disc. ● The unit is malfunctioning and will require service. ● For service, contact your local Sharp authorized servicer. ● The temperature is too high. ● Turn off the power, and wait for a while. ● The disc is damaged.
MAINTENANCE ■ Cleaning ● Clean the battery case connection terminals. Wipe them with a dry cotton swab. (Never use water or alcohol.) ● When the unit becomes dirty Clean it with a soft cloth. When the unit is excessively dirty, use a soft cloth dampened in water. (External surfaces only) Notes: ● Do not use chemicals for cleaning (gasoline, paint thinner, etc.) It may affect the quality or color. ● Do not apply oil to the inside of the unit. It may cause malfunctions. ● Clean the headphone plug.
● Volume level: “VOL 15” ● The above values are the standard values when the unit is charged and used at an ambient temperature of 68˚F (20˚C). ● The playing time when using an alkaline battery may be different, depending on the type and manufacturer of the battery and on the operating temperature.
MEMO
LIMITED WARRANTY SHARP ELECTRONICS CORPORATION warrants to the first consumer purchaser that this Sharp brand product (the “Product”), when shipped in its original container, will be free from defective workmanship and materials, and agrees that it will at its option, either repair the defect or replace the defective Product or part thereof with a new or remanufactured equivalent at no charge to the purchaser for parts or labor for the period(s) set forth below.