
MiniDisc Player User Manual


Continued on the following page.
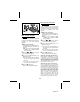
■ To change track names or
disc names
Some MiniDiscs created on other equip-
ment may have more than 100 characters
in a track name or disc name. The charac-
ters from the 101st character and on can-
not be corrected or changed.
To change characters:
1 Put the unit in the character input
mode.
● To change characters in a disc name,
perform steps 1 - 2 on page 28.
● To change characters in a track name,
perform steps 1 - 3 on page 29.
2 Press the or button to move
the cursor to the character you want to
change.
3 Enter the new character you want, and
press the ENTER/F.PLAY/SYNCHRO
button.
To delete characters:
1 Put the unit in the character input
mode.
● To delete characters in a disc name,
perform steps 1 - 2 on page 28.
● To delete characters in a track name,
perform steps 1 - 3 on page 29.
2 Press the or button to move
the cursor to the character you want to
delete.
3 Press the BASS/DEL button.
● The character will be erased.
4 Press the ENTER/F.PLAY/SYNCHRO
button.
To add characters:
1 Put the unit in the character input
mode.
● To add characters to a disc name, per-
form steps 1 - 2 on page 28.
● To add characters to a track name, per-
form steps 1 - 3 on page 29.
2 Press the or button to move
the cursor to the right of the character,
where you want to add a new charac-
ter.
3 Press the MODE/INS button.
● A space will be inserted.
4 Enter the new character you want, and
press the ENTER/F.PLAY/SYNCHRO
button.
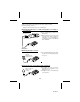
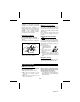
■ Name/stamp
1 Record the sound from the master
MiniDisc onto a recordable MiniDisc.
● Refer to the standard recording
method. (Pages 8 to 12)
● At this point, only the sound is
recorded. No character information is
transferred.
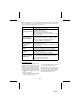
1. The sound is recorded.
2. The character informa-
tion, such as the disc
name and track
names is transferred.
Recordable
MiniDisc
Master MiniDisc
(Prerecorded
MiniDisc)
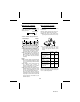
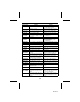
Recording unit
Recordable MiniDisc
Master MiniDisc
The sound
is recorded.
Playback unit
30
MD-MS702