S M S M S M MD STUDIO MD STUDIO MD STUDIO MD STUDIO MODEL MODELL MODÈLE MODELO MD-ZV30H MODE D’EMPLOI MANUAL DE MANEJO DEUTSCH ENGLISH OPERATION MANUAL BEDIENUNGSANLEITUNG FRANÇAIS ESPAÑOL S M MD-ZV30H TINSZ0217AWZZ
SM SPECIAL NOTES FOR UK CUSTOMERS ONLY NOTE FOR USERS IN THE U.K. Ensure that neither the brown nor the blue wire is connected to the earth terminal in your three pin plug. The mains lead of this product is fitted with a non-rewireable (moulded) plug incorporating a 3A fuse. Should the fuse need to be replaced, a BSI or ASTA approved BS 1362 fuse marked or and of the same rating as above, which is also indicated on the pin face of the plug must be used.
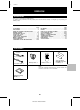
SM ENGLISH INTRODUCTION Thank you for purchasing this SHARP product. To obtain the best performance from this product please read this manual carefully. SHARP product. It will guide you in operating your CONTENTS Page ACCESSORIES . . . . . . . . . . . . . . . . . . . . . . . . . . . . . . . . . .1 PRECAUTIONS . . . . . . . . . . . . . . . . . . . . . . . . . . . . . . . . . .2 NAMES OF CONTROLS AND INDICATORS . . . . . . . . . .3 REMOTE CONTROL . . . . . . . . . . . . . . . . . . . . . . . . . .
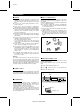
PRECAUTIONS ■ General ■ Care of compact discs ● Please ensure that the equipment is positioned in a well ventilated area and ensure that there is at least 5 cm of free space along the sides, top and back of the equipment. ● Do not use oil, solvents, petrol, paint thinners or insecticides on the unit. ● Do not expose the unit to moisture, to temperatures higher than 60˚C (140˚F) or to extreme low temperatures.
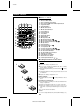
NAMES OF CONTROLS AND INDICATORS ● Display window 1 2 345 6 7 8 9 DISC 1 MONO LP 2 TRACK DATE 12 ST STEREO 4 0dB PRGM RANDOM CLOCK REC 3D SURROUND TOTAL REMAIN kHz MHz 3 TOC 1 2 3 4 5 15 16 17 6 7 8 9 10 11 12 13 14 15 16 17 18 19 20 21 20 19 18 23 24 22 DISC-1 25 26 1 DISC-2 2 DISC-3 3 TUNING CURSOR CD PLAY ON/STAND-BY CD 10 11 12 13 14 OVER MD VOLUME 3D SURROUND TUNER MODE ON/OFF (BAND) TRACK NAME / TIMER / TOC EDIT DELETE DISPLAY START REC ENTER 1 2 3
REMOTE CONTROL ■ Names of controls 1 2 3 MD/CD/TUNER DIRECT KEY 1 4 5 6 7 8 9 10 11 12 6 2 3 4 7 8 9 ST-MODE TUNER 10 5 PROGRAM CLEAR P-MODE REC MODE AUTO MARK 1 2 3 1 2 3 CD SLEEP DISPLAY TIME ON/ STAND-BY AUX 3D SURROUND MODE ON/OFF BASS/ TREBLE VOLUME 13 26 27 28 Clear Button FM Stereo Mode Button Tuner Call (Band Select) Button Tuner Preset/CD/MD Track Number Input Buttons Programme Button Play Mode Button MD Record Button: ● 18. 19. 10. 11. 12. 13. 14. 15. 16.
(Continued) ■ Proper use of the remote control Notes concerning use: ● Replace the batteries if control distance decreases or operation becomes erratic. ● Periodically clean the transmitter window on the remote control and the sensor on the main unit with a soft cloth. ● Exposing the sensor on the main unit to strong light may interfere with operation. Change the lighting or the direction of the unit. ● Keep the remote control away from moisture, excessive heat, shock, and vibrations.
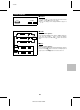
SM SETTING THE CLOCK DISC-1 When recording, the date and time are recorded on the MiniDisc (page 18), but only when the date and time have been previously entered, as described in the instructions below.
SOUND CONTROL (Main unit) VOLUME (Remote control) VOLUME ■ Volume Press the VOLUME button to increase the volume and the VOLUME button to decrease the volume. ● The volume display can be changed within the range of "0" to "10". ■ Treble Remote control operation BASS/ TREBLE W Press the BASS/TREBLE button until the TREBLE display appears. Press the VOLUME button to increase the high-frequency level, and press the VOLUME button to decrease the level.
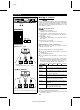
(Continued) ■ SRS (●) 3D SURROUND DISC-1 1 DISC-2 2 DISC-3 3 TUNING CURSOR CD PLAY ON/STAND-BY CD MD VOLUME 3D SURROUND TUNER MODE ON/OFF (BAND) TRACK START NAME / TIMER / TOC EDIT DELETE DISPLAY REC CD SRS is a breakthrough technology that creates 3-dimensional sound by processing sound signals based on the human auditory system. It produces real depth and localization of the sound image which cannot be accomplished by ordinary stereo. SRS only requires two speakers.
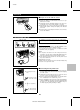
COMPACT DISC OPERATION ■ Loading and playing CDs 4 8 cm (3") 12 cm (5") 1 2 3 1 2 DISC-2 TUNING CURSOR MD REC 3 CD PLAY DISC-3 ENTER POWER CD / NAME / TIMER DISPLAY TOC EDIT DELETE VOLUME TUNER 3D SURROUND (BAND) MODE ON/OFF TRACK CD START MD DIGITAL EDIT 3,5 CD PLAY DISC-1 2 DISC-3 3 TUNING CURSOR CD PLAY 1 CD MD VOLUME 3D SURROUND TUNER MODE ON/OFF (BAND) TRACK NAME / TIMER / TOC EDIT DELETE DISPLAY START REC ENTER 1 2 3 CD Press the CD ■ button.
(Continued) ■ When choosing a CD for playback DISC-1 1 DISC-2 2 DISC-3 3 TUNING CURSOR CD PLAY ON/STAND-BY CD MD VOLUME 3D SURROUND TUNER MODE ON/OFF (BAND) TRACK START NAME / TIMER / TOC EDIT DELETE DISPLAY REC ENTER 1 2 3 CD CD MD DIGITAL EDIT 1 Press one of the buttons CD PLAY 1 - CD PLAY 3 to select the CD you want to listen to. ● Only the selected CD will be played back.
SM MINIDISC OPERATION ■ Loading and playing MiniDiscs 1 2 3 3 1 DISC-1 2 DISC-2 TUNING CURSOR REC MD 3 Set the ON/STAND-BY switch to ON. Press the MD ■ button. Load a MiniDisc in the direction indicated by the arrow on the MiniDisc, with the labeled side facing up.
RADIO OPERATION ■ Tuning 1 2 3 4 DISC-1 1 DISC-2 2 DISC-3 3 TUNING CURSOR CD PLAY ON/STAND-BY CD MD VOLUME 3D SURROUND TUNER MODE ON/OFF (BAND) TRACK NAME / TIMER / TOC EDIT DELETE DISPLAY START 1 4 6 Press the TUNING ( station.
(Continued) ■ Preset tuning DISC-1 You can store up to 40 stations in memory (40 stations consisting of any combination of FM and AM stations you like) and recall them at the push of a button. 1 DISC-2 2 DISC-3 3 TUNING CURSOR CD PLAY ON/STAND-BY CD MD VOLUME 3D SURROUND TUNER TRACK MODE ON/OFF (BAND) NAME / TIMER / TOC EDIT DELETE DISPLAY START REC ENTER To enter stations into memory: 1 2 3 CD MD DIGITAL EDIT 3 1 2 3 2,4 Perform steps 1 - 6 in the "Tuning" section.
CONVENIENT CD AND MD OPERATIONS ■ Direct-selection play MD/CD/TUNER DIRECT KEY MD/CD/TUNER DIRECT KEY 1 2 3 4 1 2 3 4 5 6 7 8 9 10/0 5 By using the track number input buttons on the remote control, any track you wish can be played directly.
(Continued) ■ Cue and review DISC-1 1 DISC-2 2 DISC-3 3 TUNING CURSOR CD PLAY ON/STAND-BY CD MD VOLUME 3D SURROUND TUNER MODE ON/OFF (BAND) TRACK START NAME / TIMER / TOC EDIT DELETE DISPLAY REC ENTER 1 2 3 CD MD DIGITAL EDIT 1 2 TUNING CURSOR 3 2 3 4 5 6 7 8 9 10/0 ST-MODE TUNER 10 MD BAND PROGRAM CLEAR P-MODE REC REC MODE AUTO MARK 1 2 3 1 2 3 Hold the 2 button down for audible fast forward, and hold the 3 button down for audible fast reverse.
SM (Continued) ■ APMS (Automatic Programmable Music Selector) MD/CD/TUNER DIRECT KEY 4 1 2 3 4 7 8 9 ST-MODE TUNER 6 10 5 1,6 10/0 MD BAND 7 1,6 PROGRAM CLEAR P-MODE 2 CLEAR REC REC MODE AUTO MARK 1 2 3 1 2 3 CD 3 7 SLEEP DISPLAY TIME ON/ STAND-BY AUX BASS/ TREBLE 3D SURROUND MODE ON/OFF Remote control operation 1 2 3 5 PRGM 3 12 4 0dB 4 0dB OVER PRGM 2 3 3 12 6 OVER PRGM 1 TOTAL 2 3 7 12 PRGM 1 4 0dB Use the track number input buttons
(Continued) ■ Switching the time display MD/CD/TUNER DIRECT KEY 1 2 3 4 5 6 7 8 9 10/0 ST-MODE TUNER 10 Each time the TIME button is pressed during playback or pause, the display will change as described below.
RECORDING ■ Differences from tape recordings You cannot record music on the reverse side of a MiniDisc. You can check the total or remaining recordable time (possible recording) before recording. MiniDiscs are single sided and should only be inserted with the correct side up. (Page 39) This lets you plan a recording session so that the last song will not come to an abrupt end before it has finished. (Page 17) You don’t need to search for the starting point at which to record.
(Continued) Recordings cannot be made in the following situations.
(Continued) ■ Recording from a CD onto a MiniDisc (OneTouch Editing) 2 2 DISC-1 DISC-2 2 DISC-3 3 TUNING CURSOR CD PLAY ON/STAND-BY 1 2 1 CD MD VOLUME 3D SURROUND TUNER MODE ON/OFF (BAND) TRACK NAME / TIMER / TOC EDIT DELETE DISPLAY START MD DIGITAL EDIT 1 3 DISPLAY 6 2 3 4 7 8 9 ST-MODE TUNER 10 ● The total number of tracks and the total playing time on the CD will be displayed.
SM (Continued) ■ Recording desired tracks from a compact disc 2 2 DISC-1 1 DISC-2 2 DISC-3 3 TUNING CURSOR CD PLAY ON/STAND-BY onto a MiniDisc (Track Editing) CD MD VOLUME 3D SURROUND TUNER MODE ON/OFF (BAND) TRACK NAME / TIMER / TOC EDIT DELETE DISPLAY START REC ENTER 1 2 3 CD 1 MD DIGITAL EDIT 4,5 6 1 2 3 Press the CD ■ button. Load a compact disc and a recordable MiniDisc.
(Continued) ■ Recording from the built-in radio onto a MiniDisc 2 DISC-1 1 DISC-2 2 DISC-3 3 TUNING CURSOR CD PLAY ON/STAND-BY CD MD VOLUME 3D SURROUND TUNER MODE ON/OFF (BAND) TRACK NAME / TIMER / TOC EDIT DELETE DISPLAY START REC ENTER 1 2 3 CD MD DIGITAL EDIT 1 4 3 1 3 1 2 3 4 5 6 7 8 9 10/0 ST-MODE TUNER 10 MD BAND 4 PROGRAM CLEAR P-MODE REC REC MODE AUTO MARK 1 2 3 1 2 3 ON/ STAND-BY AUX Press the REC ● button. Press the MD 0 6 button.
EDITING We will explain the 5 editing functions with which you can create your own original discs from recorded MiniDiscs. Playback-only MiniDiscs cannot be edited. DIVIDE MOVE A track can be divided into two tracks. If two selections were recorded as a single track because there was not enough silent space between the pieces, you can use the DIVIDE function to separate the selections.
(Continued) ■ Divide DISC-1 1 DISC-2 2 DISC-3 3 TUNING CURSOR CD PLAY ON/STAND-BY CD MD VOLUME 3D SURROUND TUNER MODE ON/OFF (BAND) TRACK START NAME / TIMER / TOC EDIT DELETE DISPLAY REC 1 ENTER 1 2 3 CD MD DIGITAL EDIT Play the track which you want to divide into two, and press the MD 0 6 button at the point where you want to divide the track. ● The unit will enter the pause mode. 2 3,4 1 2 3 Press the NAME/TOC EDIT button, and then select "DIVIDE" using the jog dial.
(Continued) ■ Combine DISC-1 2 DISC-3 3 TUNING CURSOR CD PLAY CD 1 1 DISC-2 ON/STAND-BY MD VOLUME 3D SURROUND TUNER MODE ON/OFF (BAND) TRACK NAME / TIMER / TOC EDIT DELETE DISPLAY START REC ENTER 1 2 3 CD MD DIGITAL EDIT 2 1 3,4 1 Whilst in the stop mode, select the second of the two adjacent tracks you want to combine using the jog dial. Or start playing the second of the two tracks you want to combine, and then press the MD 0 6 button. ● The unit will enter the pause mode.
SM (Continued) ■ Move DISC-1 2 DISC-3 3 TUNING CURSOR CD PLAY CD 1 1 DISC-2 ON/STAND-BY MD VOLUME 3D SURROUND TUNER MODE ON/OFF (BAND) TRACK NAME / TIMER / TOC EDIT DELETE DISPLAY START REC ENTER 1 2 3 CD MD DIGITAL EDIT 2 1,4 3,5 1 TRACK 1 REMAIN 1 2 3 4 5 6 7 8 9 10 11 12 ● The unit will enter the pause mode. 2 3 4 5 REMAIN 1 2 3 4 5 6 7 8 9 10 Press the NAME/TOC EDIT button, and then select "MOVE" using the jog dial. Within 10 seconds, press the ENTER button.
(Continued) ■ Erase DISC-1 To erase tracks one at a time: 1 DISC-2 2 DISC-3 3 TUNING CURSOR CD PLAY ON/STAND-BY CD MD VOLUME 3D SURROUND TUNER MODE ON/OFF (BAND) TRACK NAME / TIMER / TOC EDIT DELETE DISPLAY START REC 1 ENTER 1 2 3 CD MD DIGITAL EDIT 2 1 3,4 1 ● The unit will enter the pause mode. 2 3 TRACK 1 REMAIN 1 2 3 4 5 6 7 8 9 10 Whilst in the stop mode, select the track you want to erase using the jog dial.
(Continued) ■ Entering characters (Track/disc name) DISC-1 1 DISC-2 2 DISC-3 3 TUNING CURSOR CD PLAY ON/STAND-BY CD MD VOLUME 3D SURROUND TUNER MODE ON/OFF (BAND) TRACK START NAME / TIMER / TOC EDIT DELETE DISPLAY REC ENTER 1 2 3 CD MD DIGITAL EDIT DISPLAY ● Use this section in conjunction with the sections: To create a disc name (Page 29). To create a track name (Page 30). ● Up to 255 tracks can be named on each disc, and each disc can be given a disc name.
(Continued) ■ To create a disc name DISC-1 1 DISC-2 2 DISC-3 3 TUNING CURSOR CD PLAY ON/STAND-BY CD MD VOLUME 3D SURROUND TUNER MODE ON/OFF (BAND) TRACK START NAME / TIMER / TOC EDIT DELETE DISPLAY REC ENTER 1 1 2 3 CD A name for the whole disc. Disc names are displayed when an MD is inserted. MD DIGITAL EDIT 2,7 4 5 3,6 1 Press the MD ■ button. ● The total number of tracks and the total playing time for an MD will appear.
(Continued) ■ To create a track name DISC-1 1 DISC-2 2 DISC-3 3 TUNING CURSOR CD PLAY ON/STAND-BY CD MD VOLUME 3D SURROUND TUNER MODE ON/OFF (BAND) TRACK START NAME / TIMER / TOC EDIT DELETE DISPLAY REC ENTER 1 2 3 CD MD DIGITAL EDIT Name each track. A track’s name will be displayed whenever you select it and during playback. 1 1,6 3 4 2,5 During playback, press the NAME/TOC EDIT button. ● "TRACK NAME" will appear. 2 Within 10 seconds, press the ENTER button.
SM (Continued) ■ To change disc names and track names DISC-1 1 DISC-2 2 DISC-3 3 TUNING CURSOR CD PLAY ON/STAND-BY CD MD VOLUME 3D SURROUND TUNER MODE ON/OFF (BAND) TRACK START NAME / TIMER / TOC EDIT DELETE DISPLAY REC To change disc names: ENTER 1 2 3 CD MD DIGITAL EDIT ENTER NAME / TOC EDIT TUNING CURSOR 1 2 3 During playback, press the MD ■ button. Press the NAME/TOC EDIT button, and then select "DISC NAME" using the jog dial. Within 10 seconds, press the ENTER button.
(Continued) To erase a character: DISC-1 1 DISC-2 2 DISC-3 3 TUNING CURSOR CD PLAY ON/STAND-BY CD MD VOLUME 3D SURROUND TUNER MODE ON/OFF (BAND) TRACK START NAME / TIMER / TOC EDIT DELETE DISPLAY REC ENTER 1 2 3 CD After performing steps 1 to 3 on page 31, do the following: Example: To change "BESUT" to "BEST" MD DIGITAL EDIT ENTER NAME / TOC EDIT 4 TIMER / DELETE TUNING CURSOR 5 6 Press the 3 / 2 button to make the character you want to erase begin flashing.
HOW TO USE THE BUILT-IN TIMER ● Before setting the timer, make sure that the clock setting is correct. (Page 6) ● The start time and stop time, which are set with this operation, will be kept in memory until the AC power lead is unplugged or the setting is changed.
(Continued) ■ Function selection/volume adjustment 10Turn the jog dial to select the function. 10 Timer playback MD CD TUNER 1 2 3 AUX Timer recording 12 1 TUNER 2 3 AUX ● If TUNER is selected, press the ENTER button then select the preset number using the jog dial. 11Press the ENTER button. To change the programmed contents: 12Adjust the sound level using the jog dial. Turn the power on and start again from step 1. 13Press the ENTER button.
(Continued) ■ Sleep operation DISC-1 1 DISC-2 2 DISC-3 3 TUNING CURSOR CD PLAY ON/STAND-BY CD MD VOLUME 3D SURROUND TUNER MODE ON/OFF (BAND) TRACK NAME / TIMER / TOC EDIT DELETE DISPLAY START REC ENTER 1 2 3 CD MD DIGITAL EDIT 2 3 4,5 MD/CD/TUNER DIRECT KEY 1 2 3 4 5 6 7 8 9 10/0 ST-MODE TUNER 10 MD REC REC MODE AUTO MARK 1 2 3 Play back the desired sound source. Press the TIMER/DELETE button. Turn the jog dial so that the "SLEEP" display appears.
SM USING EXTERNAL UNITS ■ Connecting external units Before starting operation: ● Before connecting external units, turn off the power to each external unit. ● Connect each plug completely. If the units are not connected correctly, it may not be possible to record or playback properly. ● Recordings made from other equipment are made through an analogue connection. Other stereo etc. INPUT LEVEL MONITOR AUX OUT MIN MAX Phono plug LEFT Stereo 3.
(Continued) ■ To create track numbers automatically Before recording, press the AUTO MARK button on the remote control. ● Track numbers are automatically created with a blank space of at least 1.5 seconds between tracks. (Auto marker function) If there is too much noise, track numbers may not be created. ● "A.MARK ON" will appear. ■ To record tracks as a single track You can record several pieces of music as a single track by disabling using the auto marker function.
WHAT IS A MINIDISC? The disc is stored in a cartridge. You can handle it easily without worrying about dust, fingerprints, etc. However, dust entering the opening of the cartridge, dirt on the cartridge, warping, etc. may cause malfunctions. Please note the following. ■ Handling the MiniDisc ■ To prevent recorded discs from being erased accidentally (accidental erasure prevention) Do not touch the disc directly! Do not open the shutter or touch the disc directly.
(Continued) ■ How to apply labels ■ Types of discs There are two types of discs: playback-only and recordable type. ● Playback-only MiniDisc: This type of MiniDisc is used for commercially available pre-recorded music. This is the same kind of optical disc as CDs. Playback is performed using an optical pickup. (Recording and editing are not possible.) A Shutter will be used on only one side (back). ● Recordable MiniDisc: This is a "raw disc" on which recording can be performed.
TROUBLESHOOTING ■ If a problem occurs If this unit functions abnormally during operation, first check the following items. If the unit continues to function abnormally, or if an abnormality appears other than listed below, turn off the player’s power and disconnect the AC power plug, then consult your SHARP dealer or service personnel. ●General SYMPTOM ● The clock is wrong. POSSIBLE CAUSE REMEDY ● Did a power failure occur? ● When a button is pressed, the unit does not respond.
SM (Continued) When an error message is displayed, proceed as follows: Meaning Error messages Remedy BLANK MD ● Nothing is recorded. ● Replace the disc with a recorded disc. Can’t COPY ● You tried to record from a copy-protected disc. ● Replace it with a regular disc that can be copied. Can’t EDIT ● A track cannot be edited. ● Change the stop position of the track and then try editing it. Can’t REC ● Recording cannot be performed correctly due to vibration or shock in the unit.
(Continued) ■ Moisture condensation In the following cases, condensation may form inside the unit. ● Shortly after turning on a heater. ● When the unit is placed in a room where there is excessive steam or moisture. ● When the unit is moved from a cool place to a warm place. When the unit has condensation inside, the disc signals cannot be read, and the product may not function properly. ● If this happens, remove the disc. The condensation should evaporate in approximately 1 hour.
MAINTENANCE ■ External care ● Periodically wipe the cabinet with a soft cloth and a diluted soap solution, then wipe with a dry cloth. ● Do not use chemically treated cleaning cloths or other chemicals.
SHARP CORPORATION A9703.