MODEL: MX-2300G MX-2300N MX-2700G MX-2700N Scanner Guide MX-3500N MX-3501N MX-4500N MX-4501N
TABLE OF CONTENTS ABOUT THIS MANUAL . . . . . . . . . . . . . . . . . . . . . . . . 3 • MANUALS PROVIDED WITH THE MACHINE . . . 4 1 3 BASIC PROCEDURE FOR TRANSMISSION IN SCAN MODE SCANNING TO E-MAIL, FTP, DESKTOP, AND NETWORK FOLDER . . . . . . . . . . . . . . . . . . . . . . . . . 27 BEFORE USING THE MACHINE AS A NETWORK SCANNER CHANGING THE EXPOSURE AND EXPOSURE MODE . . . . . . . . . . . . . . . . . . . . . . . . . . . . . . . . . . . . . 31 NETWORK SCANNER FUNCTION . . . . . . . . . . . . . . .
5 SCANNING MANY ORIGINALS AT ONCE (Job Build) . . . . . . . . . . . . . . . . . . . . . . . . . . . . . . . . . . . . 103 BASIC PROCEDURE FOR TRANSMISSION IN INTERNET FAX MODE SCANNING ORIGINALS OF DIFFERENT SIZES (Mixed Size Original) . . . . . . . . . . . . . . . . . . . . . . . . 106 SENDING A FAX IN INTERNET FAX MODE. . . . . . . 62 SCANNING THIN ORIGINALS (Slow Scan Mode) . 109 CHANGING THE EXPOSURE . . . . . . . . . . . . . . . . . . 65 STORING SCAN OPERATIONS (Programs) . . . . .
ABOUT THIS MANUAL This manual explains the procedures for using scan mode, Internet fax mode, USB memory mode, and PC scan mode on the machine. Please note • To use the Internet fax function, the Internet fax expansion kit must be installed. • To use the network scanner function on the MX-2300G/2700G, the network scanner expansion kit and 256 MB expansion memory board must be installed. The Internet fax function can be used on these models even if the network scanner expansion kit is not installed.
MANUALS PROVIDED WITH THE MACHINE Printed manuals and manuals stored in PDF format on the machine's hard drive are provided with the machine. When using the machine, read the appropriate manual for the feature you are using. Printed manuals Manual name Contents Safety Guide This manual contains instructions for using the machine safely and lists the specifications of the machine and its peripheral devices.
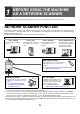
1 BEFORE USING THE MACHINE AS A NETWORK SCANNER This chapter provides basic information that is necessary to use the machine as a network scanner. NETWORK SCANNER FUNCTION The network scanner function of the machine can be used to scan an original, create an image file, and send the file over a network to a computer, FTP server, or other destination. Scanning is also possible from your computer using a TWAIN-compliant application. The network scanner function provides the following scanning modes.
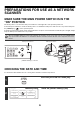
PREPARATIONS FOR USE AS A NETWORK SCANNER MAKE SURE THE MAIN POWER SWITCH IS IN THE "ON" POSITION The main power is "on" when the main power indicator on the right side of the operation panel is lit. If the main power indicator is not lit, the main power is off. Switch the main power switch to the "on" position and press the [POWER] key ( ) on the operation panel.
Touch the [Clock] key. System Settings OK Default Settings Display Contrast 3 Clock Keyboard Select Check the date and time. System Settings OK Clock Adjust 4 Year Month Day Hour Minute 2005 08 01 10 50 • If the date and time are correct, touch the [OK] key. • To change the date and time, touch the [Year], [Month], [Day], [Hour], and/or [Minute] keys and use the keys to adjust each value. When the correct date and time appear, touch the [OK] key.
STORING DESTINATION ADDRESSES FOR EACH SCAN MODE IN THE ADDRESS BOOK To use Scan to FTP, Scan to Desktop, and Scan to Network Folder, destinations must be stored in the address book. Although destinations for Scan to E-mail and Internet fax do not need to be stored in the address book (they can be entered directly or looked up in a global address book at the time of transmission), storing these destinations in the address book makes it easier to specify them.
STORING A DESTINATION FOR SCAN TO DESKTOP To store your computer in the machine as the destination of Scan to Desktop, Network Scanner Tool must be installed from the "Sharpdesk/Network Scanner Utilities" CD-ROM that accompanies the machine (or that accompanies the network scanner expansion kit when the MX-2300G/2700G is used). To scan an image to your computer, the Network Scanner Tool must be running on your computer.
BASE SCREEN Scan mode, Internet fax mode, USB memory mode, and PC scan mode are operated by selecting settings and commands in the base screens of these modes. To display the base screen of a mode, press the [IMAGE SEND] key and then touch the [Mode Switch] key to select the desired mode. PRINT READY DATA DOCUMENT FILING LINE DATA IMAGE SEND COPY SYSTEM JOB STATUS SETTINGS LOGOUT Ready to send.
BASE SCREENS Settings are selected in the base screen of each mode. Base screen of scan mode (1) (5) (6) Ready to send. Resend (2) Scan Mode Switch Address Book (7) (3) (4) Image Settings Address Entry (8) Send Settings Special Modes File (9) Quick File (10) Base screen of USB memory mode (1) Base screen of Internet fax mode (5) Ready to send. Ready to send. (1) (2) USB Mem.
(9) (10) Customized keys The keys that appear here can be changed to show settings or functions that you prefer. The keys are changed in "Customize Key Setting" in the system settings (administrator). The following keys appear by factory default: • [Special Modes] key Touch this key to use a convenient special mode. This is the same [Special Modes] key that appears when the [Image Settings] key is touched.
[Image Settings] key When the [Image Settings] key is touched, the [Special Modes] key and keys for selecting scan settings appear. The current setting of each scan setting key appears in the top of the key.
ADDRESS BOOK SCREEN This screen is used to select transmission destinations. (2) (3) (4) (5) (6) AAA AAA XXX@XX.XXX.com To (1) Cc AAA AAA BBB BBB CCC CCC DDD DDD EEE EEE Frequent Use Condition Settings Bcc 1/1 Global Address Search FFF FFF ABCD EFGHI JKLMN OPQRST UVWXYZ (1) One-touch key display The destinations (one-touch keys) stored in each index are displayed. This manual refers to keys in which destinations and groups are stored as one touch keys.
CHANGING THE DISPLAY OF ONE-TOUCH KEYS IN THE ADDRESS BOOK SCREEN You can show only destinations of a specific transmission mode in the Address Book screen, or change the displayed index tabs from the alphabetical tabs to the custom tabs. The procedure for selecting destinations does not change. To 1 Cc AAA AAA BBB BBB CCC CCC DDD DDD EEE EEE Touch the [Sort Address] key.
SCANNING AND TRANSMISSION SEQUENCE This section explains the basic procedure for scanning and transmission. Select settings in the order shown below to ensure smooth transmission. For the detailed procedures for selecting the settings, see the explanation of each setting in this manual. Place the original 1 Place the original in the document feeder tray of the automatic document feeder, or on the document glass. ☞ 3. BASIC PROCEDURE FOR TRANSMISSION IN SCAN MODE (page 27) ☞ 4.
Select convenient special modes Ready to send. Scan Mode Switch Scan A4 Resend Send Address Book Auto Image Settings Address Entry Send Settings Special Modes Convenient special modes and document filing settings can be selected. ☞ 7. CONVENIENT FUNCTIONS (page 83) File Quick File Enter the destination Ready to send.
ORIGINAL SIZES ORIGINAL SIZES THAT CAN BE TRANSMITTED The following original sizes can be transmitted Minimum original size Using the automatic document feeder A5: 210 mm (width) x 148 mm (length) (8-1/2" (width) x 5-1/2" (length)) A5R: 148 mm (width) x 210 mm (length) (5-1/2" (width) x 8-1/2" (length)) Using the document glass Maximum original size 297 mm (width) x 800 mm* (length) (11-5/8" (width) x 31-1/2"* (length)) *A long original can be transmitted.
2 ENTERING DESTINATIONS This chapter explains how to specify destination addresses, including selecting an address from the Address Book and retrieving an address by entering a search number. SPECIFYING DESTINATIONS IN THE ADDRESS BOOK The Address Book screen shows destinations as one-touch keys. The destinations are displayed in order by search number. To make it easy to find a destination, the destinations are grouped on alphabetical index tabs.
CALLING UP A DESTINATION A destination is called up by selecting its one-touch key. Ready to send. Scan Mode Switch 1 Resend Scan Send Touch the [Address Book] key. Address Book Auto A4 Image Settings Address Entry Send Settings Special Modes File Quick File To 2 Cc AAA AAA BBB BBB CCC CCC DDD DDD EEE EEE Condition Settings Bcc 1/1 Address Review Touch the index tab where the destination is stored.
CHECKING AND DELETING THE SELECTED DESTINATIONS When multiple destinations have been selected, you can display and check the destinations. You can also delete a destination from the list (cancel selection of the destination).
USING A SEARCH NUMBER TO SPECIFY A DESTINATION A destination stored in the Address Book can be called up using the any of the modes or in the Address Book screen. Ready to send. Scan Mode Switch 1 Scan A4 Resend Send key. This can be done in the base screen of Touch the key. Address Book Auto Image Settings Address Entry Send Settings Special Modes File Quick File Enter the 3-digit search number of the address with the numeric keys.
ENTER THE ADDRESS MANUALLY Destination addresses for Scan to E-mail and Internet fax can be entered manually. 1 Fax Mode Switch Scan Image Settings Internet Fax Send Settings Address Book Address Entry Special Modes USB Mem. Scan File PC Scan Data Entry Quick File (1) (1) Touch the [Mode Switch] key. (2) Touch the key of the mode that you wish to use. (2) Ready to send. Scan Mode Switch 2 Change the mode. Resend Scan A4 Send Touch the [Address Entry] key.
CALLING UP A DESTINATION FROM A GLOBAL ADDRESS BOOK When an LDAP server is configured in the Web page, you can look up an address in a global address book and retrieve the address for Scan to E-mail or Internet fax transmission. Ready to send. Scan Mode Switch 1 Resend Scan Send Touch the [Address Book] key.
Select the destination. Ready to send. To Cc XXX (2) Condition Settings Bcc Detail XXX AAA xxx@xx.xxx.com XXX BBB yyy@xx.xxx.com XXX CCC zzz@xx.xxx.com (1) Touch the key of the desired destination. If there are more destinations than can be displayed in the screen, touch the keys to change pages. Address Review Search Again Address Book (2) Touch the [To] key. This enters the selected destination. If you wish to enter another destination, repeat steps (1) and (2) above.
USING THE RESEND FUNCTION The last 8 destination addresses used for Scan to E-mail and Internet fax transmissions are saved in memory and can be selected to resend to those destinations. Ready to send. Scan Mode Switch 1 Scan A4 Resend Send Touch the [Resend] key. Address Book Auto Image Settings Address Entry Send Settings Special Modes File Quick File Cancel 2 No.01 AAA AAA No.02 BBB BBB No.03 CCC CCC No.04 DDD DDD No.05 EEE EEE No.06 FFF FFF No.07 GGG GGG No.
3 BASIC PROCEDURE FOR TRANSMISSION IN SCAN MODE SCANNING TO E-MAIL, FTP, DESKTOP, AND NETWORK FOLDER This section explains the basic procedure for transmission in scan mode (Scan to E-mail, Scan to FTP, Scan to Desktop, and Scan to Network Folder). When a default address is configured in "Default Address Setting" in the system settings (administrator), the mode cannot be changed, the destination cannot be changed, and destinations cannot be added.
2 Fax Mode Switch Scan Image Settings Internet Fax Send Settings Address Book Address Entry Special Modes USB Mem. Scan Change to scan mode. (1) Touch the [Mode Switch] key. (2) Touch the [Scan] key. File PC Scan Data Entry Quick File (1) (2) Scan Mode Switch Image Settings Address Book Auto Exposure Mono2/Auto Colour Mode 200X200dpi Resolution PDF/PDF File Format Special Modes Special Modes File Address Entry Send Settings Auto A4 Original Display the original settings screen.
(2) To Cc BBB BBB CCC CCC DDD DDD EEE EEE FFF FFF ABCD Condition Settings Bcc AAA AAA Frequent Use Specify the destination. (1) EFGHI 1/1 Address Review (1) Touch the one-touch key of the desired destination. The icon on the key indicates the type of destination stored in the key. : Scan to E-mail : Scan to FTP : Scan to Network Folder : Scan to Desktop Global Address Search JKLMN OPQRST UVWXYZ Sort Address (2) Touch the [To] key. The destination is specified.
or 8 If the original was placed on the document glass, replace it with the next original and press the [COLOUR START] key ( ) or the [BLACK & WHITE START] key ( ). Repeat until all originals have been scanned. The exposure, resolution, and scan size/send size can be changed for each original page that is scanned. Place next original. (Pg.No.x) Press [Start]. When finished, press [Read-End] Read-End Touch the [Read-End] key. A beep will sound to indicate that the operation is completed.
CHANGING THE EXPOSURE AND EXPOSURE MODE The exposure can be changed to match the darkness of the original. The exposure mode can be changed to match the original type. Scan Mode Switch Image Settings 1 Address Book Auto Exposure Mono2/Auto Colour Mode 200X200dpi Resolution PDF/PDF File Format Special Modes Special Modes File Address Entry Send Settings Auto A4 Original Display the exposure setting screen. (1) Touch the [Image Settings] key. (2) Touch the [Exposure] key.
How to select the exposure Exposure Auto When to select This setting automatically adjusts the exposure for light and dark parts of the original. Manual 1 to 2 Select this setting when the original consists of dark text. 3 Select this setting for a normal original (neither dark nor light). 4 to 5 Select this setting when the original consists mostly of faint text. How to select the exposure mode Setting Description Text/Prtd.
CHANGING THE RESOLUTION The resolution setting can be selected. Scan Mode Switch Image Settings Send Settings 1 Address Book Auto Exposure Mono2/Auto Colour Mode 200X200dpi Resolution PDF/PDF File Format Special Modes Special Modes File Address Entry Auto A4 Original Display the resolution setting screen. (1) Touch the [Image Settings] key. (2) Touch the [Resolution] key. Quick File (1) Scan Resolution (2) Select the resolution. 100X100dpi (1) Touch the key of the desired resolution.
AUTOMATICALLY SCANNING BOTH SIDES OF AN ORIGINAL (2-Sided Original) The automatic document feeder can be used to automatically scan both sides of an original. Scan transmission Two-sided original Scan Mode Switch Image Settings 1 Front and reverse sides are scanned Address Book Auto Exposure Mono2/Auto Colour Mode 200X200dpi Resolution PDF/PDF File Format Special Modes Special Modes File Address Entry Send Settings Auto A4 Original Display the original settings screen.
SPECIFYING THE ORIGINAL SCAN SIZE AND SEND SIZE (Enlarge/Reduce) When the original is placed, its size is automatically detected and displayed in the base screen. The size of the placed original is indicated as the scan size, and the size to be transmitted is indicated as the send size. Ready to send.
SPECIFYING THE SCAN SIZE OF THE ORIGINAL If the original is a non-standard size or you wish to change the scan size, touch the [Original] key to specify the original size manually. Place the original in the document feeder tray or on the document glass and follow the steps below.
Specifying the size by entering numerical values. When scanning a non-standard size original such as a postcard or card, follow these steps to specify the original size. The width can be from 64 mm to 432 mm (2-1/2" to 17"), and the length can be from 64 mm to 297 mm (2-1/2" to 11-5/8").
SPECIFYING THE SEND SIZE OF THE ORIGINAL Specify the send size as a paper size. If a send size bigger than the scan size is selected, the image will be enlarged. If a send size smaller than the scan size is selected, the image will be reduced. The send size cannot be specified when [Long Size] is selected for the scan size, or when the scan size is specified by numerical values.
CHANGING THE COLOUR MODE This procedure is used to change the colour mode used to scan the original when the [COLOUR START] key ( or the [BLACK & WHITE START] key ( ) is pressed. Start key Mode Scanning method Auto The machine detects whether the original is colour or black and white and automatically selects full colour or black and white (Mono 2 or Greyscale) scanning. Full Colour The original is scanned in full colour. This mode is best for full colour originals such as catalogues.
CHANGING THE FILE FORMAT The file format (file type and compression method / compression ratio) for sending a scanned image is specified when the destination is stored in a one-touch key; however, you can change the format at the time of transmission. In addition, if the scanned originals are divided into separate files, the number of pages per file can be changed.
Compression Ratio File Type PDF TIFF Low Encrypt PDF JPEG Medium OK B/W Colour/Grey High Programmed Specified Pages per File (1) 4 1 (1) Touch the [Specified Pages per File] checkbox so that a checkmark appears. (1-99) (2) To change the number of pages per file, enter the number of pages and exit the format settings. (3) (2) Set the number of pages per file with the keys. (3) Touch the [OK] key. • When a checkmark does not appear in the [Specified Pages per File] checkbox scanned pages.
CHANGING THE SUBJECT, FILE NAME, REPLY-TO, AND MESSAGE The subject, file name, reply-to, and message can be changed when performing a scan transmission. Preset items can be selected or text can be directly entered. • When performing Scan to FTP, Scan to Desktop, or Scan to Network Folder, only the file name is used. • If the subject and file name are not changed, the settings in the Web page are used. • If the sender name is not changed, the name set in "Default Sender Set" in the system settings is used.
Subject To change the file name, touch the [File Name] key. OK Send Settings Sub: Schedule coordination meeting File Name • The file name is entered in the same way as the subject. • If you are sending to a Scan to FTP, Scan to Desktop, or Scan to Network Folder destination, go to step 9. Reply-To 4 Body Text Add 'Reply to' to Cc Up to 54 characters can be entered for the file name. Subject File Name To change "Reply-To", touch the [Reply-To] key.
Clear All Body Entry Enter the message and touch the [OK] key. OK Thank you for your continuous support. We have attached scanned data, which you have requested. • To select a pre-set message previously stored in the Web page, touch the [Pre-Set Select] key. • To directly enter the message, touch the [Edit] key. Pre-Set Select Edit 8 • 1800 characters can be entered. (A line break counts as one character.) • To clear all the entered text, touch the [Clear All] key.
4 BASIC PROCEDURE FOR SCANNING IN USB MEMORY MODE SCANNING TO USB MEMORY Follow the steps below to send a scanned file to a commercially available USB memory device that has been connected to the machine. This stores the file in the USB device. • Consult your dealer or retailer for USB memory devices that can be used. • When a default address is configured in "Default Address Setting" in the system settings (administrator), the mode cannot be changed.
Place the original. 1 Original size detector • When placing the original, orient it as explained below. Document glass Document feeder tray Original Place the originals face up. Place the original face down and align the corner with the tip of the arrow mark in the top left corner of the document glass scale.
USB Mem. Scan Mode Switch Image Settings File Name Auto Exposure Mono2/Auto Colour Mode 200X200dpi Resolution PDF/PDF File Format Auto A4 Original 4 (1) Display the original settings screen. (1) Touch the [Image Settings] key. Special Modes (2) Touch the [Original] key. Special Modes (2) The current settings of the [Exposure], [Resolution], [Original], [Colour Mode], and [File Format] keys appear in the top half of each key. Touch each key to change the settings.
Press the [COLOUR START] key ( or the [BLACK & WHITE START] key ( or ) ). Scanning begins. • If the original is placed on the document glass, the [Read-End] key appears in the touch panel. To scan only one original, go to step 8. To scan multiple originals, go to the next step. • If the original was inserted in the document feeder tray, a beep will sound when scanning is completed and transmission will begin. Go to step 9. 6 Do not disconnect the USB memory until "Sending data has been completed.
When "Sending data has been completed." appears in the touch panel, disconnect the USB memory. 9 Do not disconnect the USB memory while "Processing data." or "Sending data." appear in the touch panel. • When transmission to USB memory is completed, "Sending data has been completed." is displayed. After a brief interval the message is cleared and the base screen of image send mode reappears.
CHANGING THE EXPOSURE AND EXPOSURE MODE The exposure can be changed to match the darkness of the original. The exposure mode can be changed to match the original type. USB Mem. Scan Mode Switch Image Settings File Name 1 Auto Exposure Mono2/Auto Colour Mode 200X200dpi Resolution PDF/PDF File Format Auto A4 Original (1) Display the exposure setting screen. (1) Touch the [Image Settings] key. Special Modes (2) Touch the [Exposure] key. Special Modes (2) (1) USB Mem.
How to select the exposure Exposure Auto When to select This setting automatically adjusts the exposure for light and dark parts of the original. Manual 1 to 2 Select this setting when the original consists of dark text. 3 Select this setting for a normal original (neither dark nor light). 4 to 5 Select this setting when the original consists mostly of faint text. How to select the exposure mode Setting Description Text/Prtd.
CHANGING THE RESOLUTION The resolution setting can be selected. USB Mem. Scan Mode Switch Image Settings File Name 1 Auto Exposure Mono2/Auto Colour Mode 200X200dpi Resolution PDF/PDF File Format Auto A4 Original (1) USB Mem. Scan Resolution Display the resolution setting screen. (1) Touch the [Image Settings] key. Special Modes (2) Touch the [Resolution] key. Special Modes (2) Select the resolution. 100X100dpi 200X200dpi (1) Touch the key of the desired resolution.
AUTOMATICALLY SCANNING BOTH SIDES OF AN ORIGINAL (2-Sided Original) The automatic document feeder can be used to automatically scan both sides of an original. Scan transmission Two-sided original USB Mem. Scan Mode Switch Image Settings 1 File Name Auto Exposure Mono2/Auto Colour Mode 200X200dpi Resolution PDF/PDF File Format Auto A4 Original (1) Front and reverse sides are scanned Display the original settings screen. (1) Touch the [Image Settings] key.
SPECIFYING THE ORIGINAL SCAN SIZE AND SEND SIZE (Enlarge/Reduce) When the original is placed, its size is automatically detected and displayed in the base screen. The size of the placed original is indicated as the scan size, and the size to be transmitted is indicated as the send size. Ready to send. USB Mem. Scan Scan Mode Switch A4 Image Settings Send Auto File Name Special Modes In the above screen, the scan size (the placed original) is A4 (8-1/2" x 11") and the send size is auto.
SPECIFYING THE SCAN SIZE OF THE ORIGINAL If the original is a non-standard size or you wish to change the scan size, touch the [Original] key to specify the original size manually. Place the original in the document feeder tray or on the document glass and follow the steps below. Specifying the size using paper sizes USB Mem.
Specifying the size by entering numerical values. When scanning a non-standard size original such as a postcard or card, follow these steps to specify the original size. The width can be from 64 mm to 432 mm (2-1/2" to 17"), and the length can be from 64 mm to 297 mm (2-1/2" to 11-5/8"). USB Mem. Scan Mode Switch Image Settings File Name 1 Auto Exposure Mono2/Auto Colour Mode 200X200dpi Resolution PDF/PDF File Format Auto A4 Original (1) (1) Touch the [Image Settings] key.
SPECIFYING THE SEND SIZE OF THE ORIGINAL Specify the send size as a paper size. If a send size bigger than the scan size is selected, the image will be enlarged. If a send size smaller than the scan size is selected, the image will be reduced. The send size cannot be specified when [Long Size] is selected for the scan size, or when the scan size is specified by numerical values. USB Mem.
CHANGING THE COLOUR MODE This procedure is used to change the colour mode used to scan the original when the [COLOUR START] key ( or the [BLACK & WHITE START] key ( ) is pressed. Start key Mode Scanning method Auto The machine detects whether the original is colour or black and white and automatically selects full colour or black and white (Mono 2 or Greyscale) scanning. Full Colour The original is scanned in full colour. This mode is best for full colour originals such as catalogues.
CHANGING THE FILE FORMAT The file format (file type and compression method / compression ratio) for sending a scanned image can be changed at the time of transmission. In addition, if the scanned originals are divided into separate files, the number of pages per file can be changed. USB Mem. Scan Mode Switch Image Settings File Name 1 Auto Exposure Mono2/Auto Colour Mode 200X200dpi Resolution PDF/PDF File Format Auto A4 Original Display the format setting screen. (1) Touch the [Image Settings] key.
Compression Ratio File Type PDF TIFF Low Encrypt PDF JPEG Medium OK B/W Colour/Grey High Specified Pages per File (1) 3 1 (1) Touch the [Specified Pages per File] checkbox so that a checkmark appears. (1-99) (2) To change the number of pages per file, enter the number of pages and exit the format settings. (3) (2) Set the number of pages per file with the keys. (3) Touch the [OK] key. • When a checkmark does not appear in the [Specified Pages per File] checkbox scanned pages.
ENTERING THE FILE NAME The file name can be directly entered when performing a scan transmission. If the file name is not changed, the settings in the Web page are used. Ready to send. USB Mem. Scan Scan Mode Switch A4 Image Settings Send Auto File Name Special Modes Touch the [File Name] key. A text entry screen will appear. Enter the file name and touch the [OK] key. Up to 54 characters can be entered. For the procedure for entering text, see "6. ENTERING TEXT" in the User's Guide.
BASIC PROCEDURE FOR TRANSMISSION IN INTERNET FAX MODE 5 SENDING A FAX IN INTERNET FAX MODE When a default address is configured in "Default Address Setting" in the system settings (administrator), the mode cannot be changed, the destination cannot be changed, and destinations cannot be added. To switch to Internet fax mode, touch the [Cancel] key in the touch panel and follow the steps below. Place the original. Place the original face up in the document feeder tray, or face down on the document glass.
Internet Fax Mode Switch Auto Exposure Image Settings 200X100dpi Resolution Send Settings Manual RX Address Book Auto A4 Original Display the original settings screen. Address Entry TIFF-F File Format (1) Touch the [Image Settings] key. Special Modes File (2) Touch the [Original] key. Special Modes Quick File 3 (1) (2) The current settings of the [Exposure], [Resolution], [Original], and [File Format] keys appear in the top half of each key. Touch each key to change the settings.
Press the [BLACK & WHITE START] key ( ). Scanning begins. • If the original is placed on the document glass, the [Read-End] key appears in the touch panel. To scan only one original, go to step 9. To scan multiple originals, go to the next step. • If the original was inserted in the document feeder tray, a beep will sound when scanning is completed and transmission will take place.
CHANGING THE EXPOSURE The exposure can be changed to match the darkness of the original. Internet Fax Mode Switch Image Settings Address Entry 200X100dpi Resolution Send Settings 1 Address Book Auto Exposure Manual RX Auto A4 Original TIFF-F File Format Special Modes Special Modes File Display the exposure setting screen. (1) Touch the [Image Settings] key. (2) Touch the [Exposure] key. Quick File (1) (2) Internet Fax Exposure OK Auto (1) Touch the [Manual] key.
CHANGING THE RESOLUTION The resolution setting can be selected. Internet Fax Mode Switch Image Settings Send Settings 1 Manual RX Address Book Auto Exposure Address Entry 200X100dpi Resolution Auto A4 Original TIFF-F File Format Special Modes Special Modes File Display the resolution setting screen. (1) Touch the [Image Settings] key. (2) Touch the [Resolution] key. Quick File (1) (2) Internet Fax Resolution OK 200X100dpi 200X200dpi Select the resolution.
AUTOMATICALLY SCANNING BOTH SIDES OF AN ORIGINAL (2-Sided Original) The automatic document feeder can be used to automatically scan both sides of a two-sided original. Scan transmission Two-sided original Internet Fax Mode Switch Image Settings Send Settings 1 Manual RX Auto Exposure Front and reverse sides are sent Address Book Address Entry 200X100dpi Resolution Auto A4 Original TIFF-F File Format Special Modes Special Modes File Display the original settings screen.
SPECIFYING THE ORIGINAL SCAN SIZE AND SEND SIZE (Enlarge/Reduce) When the original is placed, its size is automatically detected and displayed in the base screen. The size of the placed original is indicated as the scan size, and the size to be transmitted is indicated as the send size. Ready to send.
SPECIFYING THE SCAN SIZE OF THE ORIGINAL If the original is a non-standard size or you wish to change the scan size, touch the [Original] key to specify the original size manually. Place the original in the document feeder tray or on the document glass and follow the steps below.
Specifying the size by entering numerical values. When scanning a non-standard size original such as a postcard or card, follow these steps to specify the original size. The width can be from 64 mm to 432 mm (2-1/2" to 17"), and the length can be from 64 mm to 297 mm (2-1/2" to 11-5/8").
SPECIFYING THE SEND SIZE OF THE ORIGINAL Specify the send size as a paper size. If a send size bigger than the scan size is selected, the image will be enlarged. If a send size smaller than the scan size is selected, the image will be reduced. • The send size cannot be specified when [Long Size] is selected for the scan size, or when the scan size is specified by numerical values. • The send size cannot be specified when [TIFF-S] is selected for the format. (The send size is fixed at A4R (8-1/2" x 11"R).
CHANGING THE FILE FORMAT The file format for sending an Internet fax is normally set to [TIFF-F]. If the destination Internet fax machine does not support full mode (it only supports simple mode), follow the steps below to select [TIFF-S]. Internet Fax Mode Switch Image Settings 1 Send Settings Manual RX Auto Exposure 200X100dpi Resolution Auto A4 Original Address Book Display the format setting screen. Address Entry TIFF-F File Format (1) Touch the [Image Settings] key.
CHANGING THE SUBJECT, FILE NAME, AND MESSAGE The subject, file name, and message can be changed when performing an Internet fax transmission. Preset items can be selected or text can be directly entered. • If the subject and file name are not changed, the settings in the Web page are used. • Selections for the subject, file name, and message are configured by clicking [Application Settings] and then [Network Scanner Settings] in the Web page menu. (Administrator rights are required.
OK Send Settings Subject File Name Sub: Schedule coordination meeting To change the message, touch the [Body Text] key. Material for planning meeting 5 Body Text Clear All Body Entry OK Thank you for your continuous support. We have attached scanned data, which you have requested. Enter the message and touch the [OK] key. • To select a pre-set message previously stored in the Web page, touch the [Pre-Set Select] key. • To directly enter the message, touch the [Edit] key.
6 CHECKING THE STATUS OF TRANSMISSION/RECEPTION JOBS This chapter explains how to check the status of reserved transmission jobs and received Internet faxes. JOB STATUS SCREEN The job status screen is displayed when the [JOB STATUS] key on the operation panel is pressed. The job status screen shows the status of jobs by mode. When the [JOB STATUS] key is pressed, the job status screen of the mode that was being used before the key was pressed appears.
JOB QUEUE SCREEN AND COMPLETED JOB SCREEN The job status screen consists of two screens: the job queue screen that shows reserved jobs and the job currently in progress, and the completed jobs screen. To switch between the two screens, touch the job status screen selector key ((2) below).
Job key display The following information is shown in the job queue keys and completed job keys that appear in the job status screen. AAA AAA (1) (2) (1) 10:22 11/01 000/004 Waiting (3) (6) Displays the number (position) of the job in the job queue. (6) Status Shows the job status. • Job in progress When the job currently being transmitted is finished, the job moves up one position in the job queue. This number does not appear in keys in the completed jobs screen.
Display Status "Number of successful transmission destinations / Total destinations OK" A broadcast transmission has been completed. If transmission to 3 destinations was successful out of a total of 5, "003/005 OK" will appear. "No Response" An error occurred because there was no response from the destination. "OK Report" A receive report was requested for a transmission, the transmission was completed normally, and the receive report was received from the destination.
OPERATION WHEN A JOB IN THE JOB QUEUE IS COMPLETED When a normal transmission job is completed, it moves to the completed jobs screen and "Send OK" appears in the status column. Received Internet faxes, timer transmission jobs, and forwarding jobs are handled in the job status screen as explained below. Internet fax reception jobs While an Internet fax is being received, "Receiving" appears. When reception is completed, the job moves to the completed jobs screen and "In Memory" appears.
CHECKING COMPLETED JOBS You can check a list of the destinations, the destinations for which transmission failed, and other detailed information on completed broadcast transmission jobs and jobs that used document filing function. Touch the key of the job for which you wish to display information in the completed jobs screen and touch the [Detail] key. The job detail screen (see below) will appear.
STOPPING A SCAN JOB BEING TRANSMITTED OR WAITING TO BE TRANSMITTED Follow the steps below to stop a job that is being transmitted or is waiting to be transmitted. Press the [JOB STATUS] key.
GIVING PRIORITY TO A SCAN TRANSMISSION JOB When multiple jobs are waiting to be transmitted, the jobs are normally transmitted in the order they were reserved. If you need to give priority to a job and send it ahead of the other jobs, follow the steps below. Press the [JOB STATUS] key.
7 CONVENIENT FUNCTIONS This chapter explains convenient functions for performing scan transmissions. These functions make it easy to perform scan transmissions for a variety of purposes. SENDING THE SAME IMAGE TO MULTIPLE DESTINATIONS (Broadcast Transmission) The same scanned image can be sent to multiple scan mode destinations (Scan to E-mail, Scan to FTP, Scan to Desktop), Internet fax mode destinations, and fax mode destinations in a single operation.
Ready to send. Scan Mode Switch 2 Resend Scan Send Address Book Auto A4 Image Settings Address Entry Send Settings Special Modes Touch the [Address Book] key. To directly enter a destination address, touch the [Address Entry] key. File Quick File (2) To Cc BBB BBB CCC CCC DDD DDD EEE EEE FFF FFF ABCD Condition Settings Bcc AAA AAA Frequent Use Specify the destination. (1) EFGHI 1/1 Address Review Global Address Search (1) Touch the one-touch key of the desired destination.
Check the destinations. OK Address Review 001 AAA AAA 002 BBB BBB 003 GGG GGG 004 HHH HHH 005 III III 006 JJJ JJJ To (1) Check the destinations. 1/1 (2) Touch the [OK] key. Cc Bcc (1) (2) If the transmission includes Cc or Bcc destinations, touch the [Cc] tab or the [Bcc] tab to check those destinations. To cancel a specified destination... 5 (1) Touch the key of the destination that you wish to cancel.
BROADCAST TRANSMISSIONS THAT INCLUDE INTERNET FAX DESTINATIONS When a broadcast transmission includes both scan mode and Internet fax mode destinations, the Internet fax mode settings (original orientation and other settings) are given priority. When performing this type of broadcast transmission, note the information below. Original placement orientation The orientation of Internet fax mode is given priority.
Resending to unsuccessful broadcast transmission destinations The results of a completed broadcast transmission can be checked in the job status screen. If transmission to any of the addresses failed, resend the image to those addresses. Press the [JOB STATUS] key.
ERASING PERIPHERAL SHADOWS ON THE IMAGE (Erase) The erase function is used to erase shadow lines on images produced when scanning thick originals or books on the document glass. (This function erases the parts of the image where shadows tend to form. The function does not detect shadows and erase only the shadows.) Scanning a thick book Not using the erase function Using the erase function Shadows appear here Shadows appear in the image. No shadows appear.
Ready to send. Scan Mode Switch 3 Resend Scan Send Touch the [Special Modes] key. Address Book Auto A4 Image Settings Address Entry Send Settings Special Modes File Quick File Scan Special Modes 4 OK 1/2 Dual Page Scan Program Erase Timer Suppress Background Card Shot OK Special Modes Erase Edge Erase Cancel Centre Erase Edge+Centre Erase Touch the [Erase] key. OK Select the erase settings. (1) Touch the desired erase mode. Edge 10 (0 mm Select one of the three erase modes.
Press the [COLOUR START] key ( ) or the [BLACK & WHITE START] key ( ). or Scanning begins. • If you inserted the original pages in the document feeder tray, all pages are scanned. A beep will sound to indicate that scanning is finished. • If you are scanning the original on the document glass, scan each page one page at a time. When scanning of one page finishes, replace it with the next page and press the [COLOUR START] key ( ) or the [BLACK & WHITE START] key ( ).
SCANNING AN ORIGINAL AS TWO SEPARATE PAGES (Dual Page Scan) The left and right sides of an original can be scanned as two separate pages. This function is useful when you wish to successively scan each page of a book or other bound document. Example: Scanning the left and right pages of a book Book or bound document The pages are scanned as two separate pages.
Ready to send. Scan Mode Switch 3 Resend Scan Send Touch the [Special Modes] key. Address Book Auto A3 Image Settings Address Entry Send Settings Special Modes File Quick File Scan Special Modes 4 OK Erase Timer Suppress Background Card Shot (1) Ready to send. Scan Mode Switch 1/2 Dual Page Scan Program Send (2) Address Book Auto A3 (1) Press the [Dual Page Scan] key so that it is highlighted. (2) Touch the [OK] key. Resend Scan Select Dual Page Scan.
Press the [COLOUR START] key ( ) or the [BLACK & WHITE START] key ( ). or Scanning begins. When scanning finishes, place the next two open pages and press the [COLOUR START] key ( ) or the [BLACK & WHITE START] key ( ). Repeat until all pages have been scanned and then press the [Read-End] key. A beep will sound to indicate that scanning is finished. 7 If the destination is an Internet fax destination, press the [BLACK & WHITE START] key ( To cancel scanning... Press the [STOP] key ( ).
SENDING AN IMAGE AT A SPECIFIED TIME (Timer Transmission) This function lets you specify a time at which a transmission or broadcast transmission will automatically take place. Transmission begins automatically at the specified time. Set a transmission to take place at 20:00 At 20:00, the transmission begins automatically • When a timer transmission is stored, keep the main power switch in the "on" position.
Ready to send. Scan Mode Switch 3 Scan Resend Send Touch the [Special Modes] key. Address Book Auto A4 Image Settings Address Entry Send Settings Special Modes File Quick File Scan Special Modes OK Erase Timer Suppress Background 4 1/2 Dual Page Scan Program Card Shot Special Modes OK Cancel Timer Day of the Week Touch the [Timer] key. OK Set the time with the keys. (1) Specify the day. Time --- 0 (1) 00 hh. (2) If you do not wish to specify a day, select [---].
To Cc AAA AAA Specify the destination. • Touch the one-touch key for the desired destination and then the [To] key. ☞SPECIFYING DESTINATIONS IN THE ADDRESS BOOK (page 19) • To specify a destination address in a global address book, touch the [Global Address Search] key and specify the address.
WHITENING FAINT COLOURS IN THE IMAGE (Suppress Background) This feature is used to suppress light background areas. Level [+] The lightness level at which suppression takes place can be adjusted. Level [-] • This function cannot be used in Internet fax mode. • When using USB memory mode, connect the USB memory device to the machine before performing the procedure below. Place the original. Place the original face up in the document feeder tray, or face down on the document glass.
Scan Special Modes OK Erase Timer Suppress Background 4 1/2 Dual Page Scan Program Touch the [Suppress Background] key. Read the message that appears and then touch the [OK] key. Card Shot OK Special Modes Cancel Suppress Background OK Select the suppress background setting. (1) Adjust the background suppression level. Light areas of the original may be suppressed as background. 1 Three levels are available for the contrast.
Press the [COLOUR START] key ( ) or the [BLACK & WHITE START] key ( ). or Scanning begins. • If you inserted the original pages in the document feeder tray, all pages are scanned. A beep will sound to indicate that scanning is finished. • If you are scanning the original on the document glass, scan each page one page at a time. When scanning finishes, place the next original and press the [COLOUR START] key ( ) or the [BLACK & WHITE START] key ( ).
SCANNING BOTH SIDES OF A CARD ONTO A SINGLE PAGE (Card Shot) This function lets you send the front and reverse sides of a card as a single page, without the need to send each side separately. Scanned image Original Transmission Front Back Example of an A4 (8-1/2" x 11") Example of an A4 (8-1/2" x 11") size landscape scan transmission size portrait scan transmission • When using card shot, the original must be placed on the document glass.
Scan Special Modes Program Erase Timer Suppress Background 4 1/2 Dual Page Scan Card Shot Special Modes Cancel Card Shot X Touch the [Card Shot] key. OK X 86 (25 mm 210) 54 (25 mm 210) OK Specify the original size. OK (1) Enter the original size. Size Reset • Touch the [X] key and enter the horizontal dimension (X) of the original with the keys. • Touch the [Y] key and enter the vertical dimension (Y) of the original with the keys.
To Cc AAA AAA Address Review Global Address Search DDD DDD EEE EEE 7 1/1 BBB BBB CCC CCC Frequent Use Condition Settings Bcc FFF FFF ABCD EFGHI JKLMN OPQRST UVWXYZ Sort Address Specify the destination. • Touch the one-touch key for the desired destination and then the [To] key. ☞SPECIFYING DESTINATIONS IN THE ADDRESS BOOK (page 19) • To specify a destination address in a global address book, touch the [Global Address Search] key and specify the address.
SCANNING MANY ORIGINALS AT ONCE (Job Build) When you have a large number of originals to transmit, this function lets you separate the originals into sets. The sets are scanned in the automatic document feeder one set at a time and then sent together as a single transmission. Use this function when the number of originals that you wish to scan exceeds the maximum number of sheets that can be inserted in the automatic document feeder at once.
Scan Special Modes OK Mixed Size Original Job Build 4 File Slow Scan Mode 2/2 Select job build mode. (1) Touch the the screens. keys to switch through If you selected Internet fax mode, go to the 3rd screen. Quick File (2) (3) (1) (2) Touch the [Job Build] key so that it is highlighted. (3) Touch the [OK] key. Ready to send. Scan Mode Switch Resend Scan Send Address Book Auto A4 Image Settings Address Entry Send Settings Special Modes Touch the [Address Book] key.
1 10 or Insert the next set of originals and press the [COLOUR START] key ( ) or the [BLACK & WHITE START] key ( ). Press the [START] key pressed in step 7. Repeat until all originals have been scanned. 8 The exposure and resolution can be changed between sets of originals. Place next original. (Pg.No.x) Press [Start]. When finished, press [Read-End] Touch the [Read-End] key in the touch panel.
SCANNING ORIGINALS OF DIFFERENT SIZES (Mixed Size Original) This feature lets you scan originals of different sizes at the same time; for example, B4 (8-1/2" x 14") size originals mixed together with A3 (11" x 17") size originals. When scanning the originals, the machine automatically detects the size of each original.
Ready to send. Scan Mode Switch 3 Resend Scan Send Touch the [Special Modes] key. Address Book Auto A3 Image Settings Address Entry Send Settings Special Modes File Quick File Scan Special Modes OK Mixed Size Original Job Build File 2/2 Slow Scan Mode Select the mixed size original setting. (1) Touch the the screens. If you selected Internet fax mode, go to the 3rd screen.
Press the [COLOUR START] key ( ) or the [BLACK & WHITE START] key ( ). or Scanning begins. A beep will sound to indicate that scanning is finished. 7 If the destination is an Internet fax destination, press the [BLACK & WHITE START] key ( To cancel scanning... Press the [STOP] key ( ). ) to cancel the operation. • If an original scan size is specified after selecting the Mixed Size Original setting, the original scan size setting will be enabled and the Mixed Size Original setting will be cleared.
SCANNING THIN ORIGINALS (Slow Scan Mode) Use this function when you wish to scan thin originals using the automatic document feeder. This function helps prevent thin originals from misfeeding. A A B C D B C D When using USB memory mode, connect the USB memory device to the machine before performing the procedure below. Insert the originals face up in the document feeder tray. 1 Adjust the original guides slowly. 1 If the originals are inserted with too much force, they may crumple and misfeed.
Scan Special Modes Select slow scan mode. OK 2/2 Job Build 4 Mixed Size Original File (1) Touch the the screens. Slow Scan Mode keys to switch through If you selected Internet fax mode, go to the 3rd screen. Quick File (2) (2) Touch the [Slow Scan Mode] key so that it is highlighted. (3) (1) (3) Touch the [OK] key. Ready to send. Scan Mode Switch Touch the [Address Book] key. Resend Scan Send To directly enter a destination address, touch the [Address Entry] key.
STORING SCAN OPERATIONS (Programs) A destination, original settings, and functions can be stored in a program. When you wish to use those settings for a scan transmission, they can be called up with ease. For example, suppose A4 (8-1/2" x 11") size documents are scanned into a file and sent to each branch office once a month.
Place the original. 1 1 Place the original in the document feeder tray or on the document glass as appropriate for the functions stored in the program. Ready to send. Scan Scan Mode Switch 2 A4 Resend Send Touch the [Special Modes] key.
or 6 Press the [COLOUR START] key ( ) or the [BLACK & WHITE START] key ( ). Scanning begins. • If you inserted the original pages in the document feeder tray, all pages are scanned. A beep will sound to indicate that scanning is finished. • If you are scanning the original on the document glass, scan each page one page at a time. When scanning finishes, place the next original and press the [COLOUR START] key ( ) or the [BLACK & WHITE START] key ( ).
FORWARDING A RECEIVED INTERNET FAX TO AN E-MAIL ADDRESS (Inbound Routing Settings) Received Internet faxes can be automatically forwarded to a specified E-mail address. This function can be used to forward received Internet faxes directly to an e-mail address without printing the Internet faxes. The machine Forwarding Received Internet fax To configure inbound routing settings, click [Application Settings] and then [Inbound Routing Settings] in the Web page menu. (Administrator rights are required.
8 INTERNET FAX FUNCTIONS This chapter explains Internet fax communication functions, including the basic procedure for receiving Internet faxes and the procedure for selecting conditions for printing a transaction report. RECEIVING AN INTERNET FAX The Internet fax function periodically* connects to the mail server (POP3 server) and checks whether or not Internet faxes have been received. If so, the faxes are automatically retrieved and printed. *The default setting is once in five minutes.
MANUALLY RECEIVING INTERNET FAXES If the interval for checking for received faxes is somewhat long and you wish to check immediately, you can manually initiate reception. 1 Mode Switch Scan Image Settings Internet Fax Send Settings Fax USB Mem. Scan Address Book Change to Internet fax mode. Address Entry (1) Touch the [Mode Switch] key. Special Modes (2) Touch the [Internet Fax] key. File PC Scan Data Entry Quick File (2) (1) Ready to send.
PRINTING FAXES RECEIVED TO MEMORY "Hold Setting for Received Data Print" in the system settings (administrator) can be enabled to have faxes received to memory without being printed. To print the faxes, a password must be entered. When this function is enabled, a password entry screen appears in the touch panel when Internet faxes are received. Received data is stored. Enter password via the 10-key. Cancel When the previously programmed 4-digit password is entered with the numeric keys, printing begins.
SENDING TWO PAGES AS A SINGLE PAGE (2in1) Two original pages can be reduced to half their original size and sent together as a single page. Portrait-oriented originals Transmission 1 1 2 2 Landscape-oriented originals Transmission 1 1 2 2 1 Place the original(s). • The 2in1 function cannot be used when the originals are larger than A4 (8-1/2" x 11") size. • When placing the originals, orient them as explained below. Originals Document glass Place the original face up.
2 Mode Switch Scan Image Settings Internet Fax Send Settings Fax Address Book USB Mem. Scan Change to Internet fax mode. Address Entry (1) Touch the [Mode Switch] key. Special Modes (2) Touch the [Internet Fax] key. File PC Scan Data Entry Quick File (2) (1) Ready to send. 3 Resend Internet Fax Scan Mode Switch A4 Image Settings Send Touch the [Special Modes] key.
Ready to send. Send To directly enter a destination address, touch the [Address Entry] key. ☞ ENTER THE ADDRESS MANUALLY (page 23) Address Book Auto Address Entry Send Settings 7 Touch the [Address Book] key. Resend Internet Fax Scan Mode Switch A4 Image Settings Special Modes Manual RX File Quick File You can touch the key to display a list of the selected special mode settings or two-sided scanning. To return to the previous screen after checking the settings, touch the [OK] key.
CHANGING THE PRINT SETTINGS FOR THE TRANSACTION REPORT (Transaction Report) A transaction report is automatically printed out to alert you when an Internet fax transmission fails or when a broadcast transmission is performed. The transaction report contains a description of the transmission (date, start time, name of other party, time required, number of pages, result, etc.).
(2) (1) OK Special Modes Cancel Transaction Report Always Print 5 Print at Error OK Select print conditions. (1) Select the print conditions. (2) Touch the [OK] key. Do not Print Print Original Image • When the [Print Original Image] checkbox is selected transaction report. , part of the transmitted original is included on the • Touch the [OK] key next to the [Cancel] key to complete the setting and return to the screen of step 4. Ready to send.
Press the [BLACK & WHITE START] key ( ). Scanning begins. • If you inserted the original pages in the document feeder tray, all pages are scanned. A beep will sound to indicate that scanning is finished. • If you are scanning the original on the document glass, scan each page one page at a time. When scanning finishes, place the next original and press the [BLACK & WHITE START] key ( ). Repeat until all pages have been scanned and then press the [Read-End] key.
CHECKING THE ACTIVITY LOG (Image Sending Activity Report) You can have the machine print a log of recent image sending activity (date, name of other party, time required, result, etc.). The Image Sending Activity Report contains useful information such as the types of errors that occurred. The most recent 199 transactions are included in the report. You can have the machine print the Image Sending Activity Report each time the number of transactions reaches 200, or at a specified time (once a day only).
SENDING AN INTERNET FAX FROM A COMPUTER (PC-I-Fax) A file on a computer can be sent via the machine as an Internet fax (PC-I-Fax function). Internet faxes are sent using the PC-I-Fax function in the same way as documents are printed. Select the PC-Fax driver as the printer driver for your computer and then select the Print command in the software application. Image data for transmission will be created and sent as an Internet fax. PC-I-Fax transmission For information, see the PC-Fax driver Help.
SCANNING FROM A COMPUTER (PC SCAN MODE) 9 BASIC SCANNING PROCEDURE You can install the scanner driver on your computer from the CD-ROM that accompanies the machine, and use a TWAIN* compliant application to execute scanning from your computer. Scanning from your computer is most useful for scanning a single original such as a photo, particularly when you want to adjust scan settings as you scan. By contrast, scanning at the machine is most useful for continuous scanning of multiple originals.
[At your computer] Start the TWAIN-compliant application on your computer and select [Select Scanner] from the [File] menu. 3 Select the scanner driver of the machine. (1) Select [SHARP MFP TWAIN K]. (2) Click the [Select] button. 4 (1) (2) Select [Acquire Image] from the [File] menu. The scanner driver opens.
Preview the image. (1) Select the location where the original is placed. "Scanning Source" menu: • If the original is a one-sided original and is placed in the document feeder tray, select [SPF(Simplex)]. • If the original is a two-sided original and is placed in the document feeder tray, select [SPF(Duplex - Book)] or [SPF(Duplex - Tablet)] depending on whether the original is a book-style or tablet-style original.
Select scanning settings while viewing the image. 7 [Rotate] button: Each time this button is clicked, the preview image rotates 90 degrees. This lets you change the orientation of the image without picking up and placing the original again. The image file will be created using the orientation that appears in the preview window. [Image Size] button: Click this button to specify the scan area by entering numerical values. Pixels, mm, or inches can be selected for the units of the numerical values.
[At the machine] This machine is in the PC scan mode. Do not remove the original. 9 Scanner IP address:250.160.102.106 Exit Touch the [Yes] key. PC scan in progress. Finish PC scan mode? 10 Touch the [Exit] key in the touch panel.
Scanner Guide MODEL: MX-2300G MX-2300N MX-2700G MX-2700N MX-3500N MX-3501N MX-4500N MX-4501N MX4500-EX-SCN-Z1