MODEL: MX-2300N MX-2700N Document Filing Guide
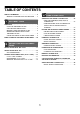
TABLE OF CONTENTS ABOUT THIS MANUAL . . . . . . . . . . . . . . . . . . . . . . . . 2 • MANUALS PROVIDED WITH THE MACHINE . . . 2 1 3 SEQUENCE FOR USING A STORED FILE. . . . . . . . 22 • REGULAR SEQUENCE FOR USING A STORED FILE . . . . . . . . . . . . . . . . . . . . . . . . . . . 22 • SEQUENCE FOR USING A STORED FILE WHEN USER AUTHENTICATION IS ENABLED . . . . . . . . . . . . . . . . . . . . . . . . . . . . . . . 24 DOCUMENT FILING OVERVIEW . . . . . . . . . . . . . . . . . . . . . . . . . . . . . . .
ABOUT THIS MANUAL Please note • Considerable care has been taken in preparing this manual. If you have any comments or concerns about the manual, please contact your dealer or nearest authorised service representative. • This product has undergone strict quality control and inspection procedures. In the unlikely event that a defect or other problem is discovered, please contact your dealer or nearest authorised service representative.
Operation manuals in PDF format The manuals in PDF format provide detailed explanations of the procedures for using the machine in each mode. To view the PDF manuals, download them from the hard drive in the machine. The procedure for downloading the manuals is explained in "How to download the manuals in PDF format" in the Quick Start Guide. Manual name Contents User's Guide This manual provides information, such as basic operation procedures, how to load paper, and machine maintenance.
1 DOCUMENT FILING This chapter provides information that you should know before using the document filing function, including an overview of document filing, the features and functions of document filing, and points to keep in mind when using document filing. OVERVIEW The document filing function allows you to save the document image of a copy or fax transmission job, or the data of a print job, as a file on the machine's hard drive. The saved file can be called up and printed or transmitted as needed.
USES OF DOCUMENT FILING Several examples of how document filing can be used are provided below. Quickly using a file Example: You prepared handouts consisting of numerous pages for a meeting, however, another handout is needed for a newly added participant. The handout was not saved using document filing The handout was saved using document filing All the numerous original pages must be scanned again. The scanned original pages are stored on the hard drive. The file can be called up at any time.
BEFORE USING DOCUMENT FILING Before using File, it is convenient to create user names and Custom Folders. If user authorization is used, it is convenient to create My Folder. The user name, Custom Folders, and My Folder are created in the system settings. User Name The user name is configured in "User Registration" in the system settings (administrator). Custom Folder Custom Folders are created in "Document Filing Control" in the system settings.
Approximate number of pages and files that can be stored by document filing Examples of original types Colour Full colour original (Example: text and photo) Size: A4 (8-1/2" x 11") Black and white Text original Size: A4 (8-1/2" x 11") • A combined maximum of 1400 1-sided pages in black and white or 400 1-sided pages in colour (for the above examples) can be stored in the main and Custom Folders. However, for the above black and white originals, the maximum number of files that can be stored is 1000.
IMPORTANT POINTS WHEN USING DOCUMENT FILING Note the following when using document filing: • Documents saved with [Quick File] are "Sharing" files that can be called up by anyone and printed or transmitted. For this reason, do not use Quick File for sensitive documents or documents that you do not want to be used by others. • When saving a file with "File", if you wish to prevent others from using the file, specify "Confidential" to enable the use of a password.
USING DOCUMENT FILING IN EACH MODE In copy, fax, or image send mode, the original can be saved as an image file on the hard drive at the same time it is copied or transmitted. In scan to HDD mode, the original can be stored as a file on the hard drive without being copied or transmitted. Copy mode The original is saved as an image file at the same time it is copied. Ready to scan for copy.
BASE SCREEN OF DOCUMENT FILING MODE When the [DOCUMENT FILING] key is pressed on the operation panel, the following screen appears. This screen is used to call up and use image files saved during copying or scanning.
2 SAVING FILES WITH DOCUMENT FILING This chapter explains how to save an original as a image file using the Quick File, File, and Scan to HDD functions of document filing mode. SAVING A FILE WITH "Quick File" When copying, printing or transmitting a document in copy mode, print mode, or image send mode, "Quick File" can be selected to save an image of the document to the Quick File Folder.
Select copy settings and then press the [COLOUR START] key ( ) or the [BLACK & WHITE START] key ( ). or • When copying begins, the scanned document image is saved to the hard drive. The selected copy settings are also saved. • To prevent accidental saving of the document, "The scanned data is stored in the quick file folder." appears as a message for 6 seconds after the [START] key is pressed.
SAVING A FILE WITH "File" When copying, printing, or transmitting a document in copy mode, print mode, or image send mode, "File" can be selected to save an image of the document to the Main Folder or a previously created Custom Folder. The image can be called up at a later time, allowing you to print or transmit the document without having to locate the original. As an example, the procedure for using "File" while copying is explained below. Place the original.
Select copy settings and then press the [COLOUR START] key ( ) or the [BLACK & WHITE START] key ( ). or • When copying begins, the scanned document image is saved to the hard drive. The selected copy settings are also saved. • If you inserted the original pages in the document feeder tray, all pages are scanned. • If you placed the original on the document glass, scan each page one page at a time. When scanning of one page finishes, replace it with the next page and press the [START] key.
FILE INFORMATION This section explains the settings that are configured in step 3 of "SAVING A FILE WITH "File"" (page 13). Specifying a user name, file name, folder, and confidential setting makes it easier to manage and search for files. In addition, when confidential is selected and a password is established, other people will not be able to view the file without permission. Specifying a user name Confidential 1 Touch the [User Name] key.
Specifying a folder Cancel File Information Confidential 1 Touch the [Stored To:] key. OK Password User Name Name 1 File Name file-01 Stored to: Main Folder When user authentication is used, My Folder appears. If My Folder is not specified for the user that logged in, the Main Folder will appear. Select the folder.
STORING A DOCUMENT ONLY (Scan to HDD) Scan to HDD is used to store the image file of a scanned document in the Main Folder or a Custom Folder. Neither printing nor transmission are performed. "Scan to HDD" SCREEN The following screen appears when the [Scan to HDD] key is touched in the base screen of document filing mode. Touch the keys described below as needed to select Scan to HDD settings. Ready to scan to HDD. Press [Start] to scan original.
Press the [DOCUMENT FILING] key. DOCUMENT FILING 2 HDD Status 3 Search File Store File Retrieve Scan to HDD File Folder Touch the [Scan to HDD] key. Quick File Folder External Data Access Mono2/Auto Colour Mode Back Select Scan to HDD settings. If you do not wish to select settings, go to the next step. Job Detail Settings Auto A4 Original Special Modes File Information (1) (2) (1) Select the colour mode, job detail settings, and the original size.
ORIGINAL SETTINGS FOR "Scan to HDD" Settings for Scan to HDD are described below. [Colour Mode] key Touch the [Colour Mode] key to open the colour mode setting screen for Scan to HDD. When you have finished selecting the colour mode, touch the [OK] key. Scan to HDD Colour Mode OK Full Colour Mono2/Auto Colour Mode Colour Auto 2 Colour B/W Mono2 Greyscale The following settings can be selected for the scanning colour when the [COLOUR START] key ( & WHITE START] key ( ) is pressed.
Exposure adjustment To adjust the exposure and select the exposure mode, touch the [Exposure] key. Select an appropriate exposure mode for the original and touch the or key to adjust the exposure level. After selecting the settings, touch the [OK] key. (A) Scan to HDD Exposure (3) OK Moiré Reduction Auto Text/ Prtd.Photo Text/Photo Text Photo Printed Photo Map Manual 1 3 5 (2) (1) (1) Select the appropriate exposure mode for the original type.
[Original] key Selecting the original size and two-sided document scanning (1) Scan to HDD Original Scan Size Auto Auto A4 Original (2) 100% Store Size A4 (4) OK Auto 2-Sided Booklet Image Orientation 2-Sided Tablet (3) (1) Touch the [Scan Size] key. If the original is a non-standard size that cannot be detected by auto original size detection, touch the [Scan Size] key and specify the original size. (2) Touch the [Store Size] key.
3 USING STORED FILES This chapter explains how to call up a file stored by document filing and print or transmit the file. SEQUENCE FOR USING A STORED FILE The basic procedure for calling up and using a stored file is explained here. The procedures and displayed screens vary depending on whether or not user authentication is enabled. See the sequence that applies to your situation. For information on user authentication procedures, see "USER AUTHENTICATION" in the User's Guide.
Touch the key of the folder that contains the desired file. Example: Searching from a Custom Folder Main Folder Custom Folder User 1 User 2 User 3 User 4 User 5 User 6 User 7 User 8 Back Search 1/1 ABCD All Folders EFGHI JKLMN OPQRST • To display the file selection screen of the Main Folder, touch the [Main Folder] key. • If you touch a folder key that has a password, a password entry screen appears. Enter the password (5 to 8 digits) for the folder with the numeric keys.
SEQUENCE FOR USING A STORED FILE WHEN USER AUTHENTICATION IS ENABLED The following explanation assumes that the user has already logged in using a user number or login name and password. The explanation also assumes that "My Folder" was specified when the "User Registration" settings were configured in the system settings (administrator). Press the [DOCUMENT FILING] key. DOCUMENT FILING Touch the [File Folder] key.
FOLDER AND FILE SELECTION SCREENS To call up and use a stored file, the folder and file must be selected. The folder selection screen and file selection screen are explained below. FOLDER SELECTION SCREEN Two different screens appear depending on whether or not user authentication is enabled on the machine.
FILE SELECTION SCREEN The file selection screen of the Quick File Folder, Main Folder, and Custom Folders is explained below. (1) (2) Main Folder (3) (4) Custom Folder Search File Name (5) (6) Back 1 User Name Date file-01 Name 1 01/08/2005 file-02 Name 2 01/08/2005 file-03.tiff Name 3 01/08/2005 1 All Files Filter by Job (7) (1) Batch Print (8) (9) File keys (5) The stored files are displayed.
JOB SETTINGS SCREEN When a file key is touched, the following screen appears. Touch the key of the operation that you wish to perform and select settings. (1) (2) Cancel Job Settings Custom Folder Main Folder File Name Search file-01 Back 1 User Name Date file-01 Name 1 01/08/2005 file-02 Name 2 01/08/2005 Name 3 01/08/2005 1 file-03.
PRINTING A STORED FILE A file stored using document filing can be called up and printed when needed. The settings used when the file was stored are also stored, and thus the file can be printed again using those settings. The file can also be modified before printing by changing the print settings. Press the [DOCUMENT FILING] key. DOCUMENT FILING 1 If the file was stored using "File", touch the [File Folder] key. If the file was stored using "Quick File", touch the [Quick File Folder] key.
file-01 5 A4 Name 1 F. Colour Select the job. Print Send Property Change Move Delete Detail file-01 Auto Paper Select Touch the [Print and Delete the Data] key or the [Print and Save the Data] key. Cancel Job Settings / Print 6 Touch the [Print] key. Cancel Job Settings A4 Name 1 F. Colour If the [Print and Delete the Data] key is touched, the file will be deleted after printing. If the [Print and Save the Data] key is touched, the file will be saved after printing.
BATCH PRINTING All files that have the same user name and password can be printed at once. Search User 1 File Name Touch the [Batch Print] key. Back 1 User Name Date file-01 Name 1 01/08/2005 file-02 Name 2 01/08/2005 file-03.tiff Name 3 01/08/2005 1 1 All Files Filter by Job Batch Print Cancel Batch Print User 1 Touch the [User Name] key. All Files User Name 2 Change PRT.No. Password Print and Delete the Data Delete the Data Print and Save the Data Select the user name.
Cancel Batch Print User 1 All Files User Name Name 1 Change PRT.No. Password 4 Print and Delete the Data Print and Save the Data Delete the Data If a password has been established, touch the [Password] key. Enter the password with the numeric keys (5 to 8 digits) and touch the [OK] key. Only files that have the same password will be selected. Enter password via the 10-key pad. CANCEL OK If you do not wish to enter a password, go to the next step.
SENDING A STORED FILE A file stored by document filing can be called up and transmitted. The transmission settings that were stored with the file are also called up, allowing you to resend the file using the same settings. If needed, you can also change the transmission settings. Press the [DOCUMENT FILING] key. DOCUMENT FILING 1 If the file was stored using "File", touch the [File Folder] key. If the file was stored using "Quick File", touch the [Quick File Folder] key.
Cancel Job Settings file-01 Name 1 A4 Touch the [Send] key. F. Colour Select the job. 5 Print Send Property Change Move Delete Detail Ready to send. Cancel Scan Mode Switch 6 Address Book Image Settings Address Entry Select transmission settings. For information on the settings, see "SEND SETTINGS SCREEN" (page 34). Send Settings file-01 AAA AAA F. Colour or 7 Press the [COLOUR START] key ( ) or the [BLACK & WHITE START] key ( ).
SEND SETTINGS SCREEN The keys that appear in the send settings are explained below. For more information on each of the settings, see "BASE SCREEN OF FAX MODE" in the Facsimile Guide and "BASE SCREEN" in the Scanner Guide. Example of scan mode (1) (2) (3) (4) (5) Ready to send. Cancel Scan Mode Switch Address Book Image Settings Address Entry Send Settings file-01 Name 1 F. Colour (6) (1) (7) (3) [Mode Switch] key (9) [Send Settings] key This key appears in scan mode and Internet fax mode.
PROPERTIES OF STORED FILES FILE PROPERTIES The protect setting can be selected for files saved with the document filing function. This prevents a file from being moved or automatically or manually deleted. Three attributes are available for saved files: [Sharing], [Protect], and [Confidential]. When saved with the [Sharing] attribute, a file is not protected. When saved with the [Protect] or [Confidential] attribute, a file is protected. Files saved to the Quick File Folder are all [Sharing].
Search User 1 File Name User Name Touch the key of the desired file. Back 1 Date 1 file-01 Name 1 01/08/2005 file-02 Name 2 01/08/2005 file-03.tiff Name 3 01/08/2005 All Files If a password is set for the selected file, a password entry screen will appear. Enter the password with the numeric keys (5 to 8 digits) and touch the [OK] key. Batch Print Filter by Job Enter password via the 10-key pad.
MOVING A STORED FILE The folder in which a file is stored can be changed. (The file can be moved to a different folder.) Press the [DOCUMENT FILING] key. DOCUMENT FILING 1 If the file was stored using "File", touch the [File Folder] key. If the file was stored using "Quick File", touch the [Quick File Folder] key. Search HDD Status File Store File Retrieve Scan to HDD File Folder Quick File Folder 2 If you touched the [Quick File Folder] key, go to step 4. The Quick File Folder opens in step 4.
Touch the [Move] key. Cancel Job Settings file-01 Name 1 A4 F. Colour Select the job. 5 Print Send Property Change Move Delete Detail Touch the [Move to:] key. Cancel Job Settings / Move file-01 Name 1 A4 F. Colour Select the folder the file is moved to. File Name file-01 Move to: Move 6 • A file cannot be moved to the Quick File Folder. • When the file name is changed, the file is moved to the new folder with the new name. The file is not copied to the new folder.
DELETING A STORED FILE Stored files that are no longer needed can be deleted. Press the [DOCUMENT FILING] key. DOCUMENT FILING 1 If the file was stored using "File", touch the [File Folder] key. If the file was stored using "Quick File", touch the [Quick File Folder] key. Search HDD Status File Store File Retrieve Scan to HDD File Folder Quick File Folder 2 If you touched the [Quick File Folder] key, go to step 4. The Quick File Folder opens in step 4.
Cancel Job Settings file-01 Name 1 A4 F. Colour Select the job. 5 Print Send Property Change Move Delete Detail Touch the [Delete] key. When the [Delete] key is touched, a confirmation message appears. Touch the [Yes] key. Delete the file data? Name 1 file-01 No Yes A file whose property is "Protect" cannot be deleted. To delete a protected file, change its property to "Sharing" or "Confidential".
CALLING UP AND USING A FILE FROM THE JOB STATUS SCREEN Files stored using File and Quick File appear as keys in the Complete job status screen. This is convenient when you need to quickly print the saved data of a copy job or quickly send a saved fax to another destination. Press the [JOB STATUS] key.
SEARCHING FOR A STORED FILE When there are many stored files, it may take time to find a file. The search function of document filing mode can be used to find a file quickly. BASIC SEARCH PROCEDURE The basic procedure for searching all folders on the hard drive is explained here. Searching is possible even when you only know part of the file name or folder name.
Using the user name to search (B) Search Select user name. Cancel Name 1 Name 2 Name 3 Name 4 Name 5 Name 6 1 25 OK Default User Direct Entry Name 8 Name 7 All Users ABCD EFGHI JKLMN OPQRST UVWXYZ (A) ABC User (C) (D) 4 There are four ways to select the user name: (A)Touch the one-touch key of the user name. The touched user name is highlighted. If you accidentally select the wrong user name, touch the key of the correct name. (B)Touch the [Default User] key.
Searching within a folder You can specify a folder to restrict the search range to that folder. To search within a specified folder, follow the steps below. Press the [DOCUMENT FILING] key. DOCUMENT FILING 1 HDD Status To search the Main Folder or a custom folder, touch the [File Folder] key. To search the Quick File folder, touch the [Quick File Folder] key. Search File Store File Retrieve Scan to HDD File Folder Quick File Folder 2 If you touched the [Quick File Folder] key, go to step 4.
Using the user name to search (B) Search Select user name. Cancel Name 1 Name 2 Name 3 Name 4 Name 5 Name 6 1 25 OK Default User Direct Entry Name 8 Name 7 All Users ABCD EFGHI JKLMN OPQRST UVWXYZ (A) ABC User (C) (D) 6 There are four ways to select the user name: (A)Touch the one-touch key of the user name. The touched user name is highlighted. If you accidentally select the wrong user name, touch the key of the correct name. (B)Touch the [Default User] key.
Document Filing Guide MODEL: MX-2300N MX-2700N MX2700-GB-FIL-Z1