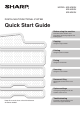
MODEL: MX-M363U MX-M453U MX-M503U DIGITAL MULTIFUNCTIONAL SYSTEM Quick Start Guide Before using the machine Functions of the machine and procedures for placing originals and loading paper. Copying Using the copy function. Printing Using the printer function. Faxing Using the fax function. Scanning Using the scan function. Document filing Storing jobs as files on the hard drive. System settings Configuring settings to make the machine easier to use.
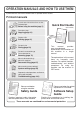
OPERATION MANUALS AND HOW TO USE THEM 3 printed manuals and a manual in PDF format are provided with the machine. Printed manuals To learn the parts of the machine and how to use them To load paper Before using the machine (page 7) Quick Start Guide (this manual) To make a copy Copying (page 21) To print a file Printing (page 41) To send a fax This manual provides easy-to-understand explanations of the functions of the machine in a single manual.
Manuals in PDF format Detailed explanations of the functions that can be used on the machine are provided in the Operation Guide in PDF format. The Operation Guide is on the CD-ROM that accompanies the machine. The "MX-M363U/M453U/M503U Series Operation Guide" CD-ROM that accompanies the machine contains the Operation Guide. Operation Guide For detailed information Convenient methods for using the Operation Guide The first page contains a regular table of contents as well as an "I want to...
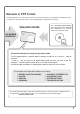
CHECKING THE IP ADDRESS To check the IP address of the machine, print out the printer test page in the system settings. SYSTEM SETTINGS System Settings Admin Password Total Count Default Settings List Print (User) Paper Tray Settings Address Control Fax Data Receive/Forward Printer Condition Settings Document Filing Control USB-Device Check Exit 1 Press the [SYSTEM SETTINGS] key. 2 Select the all custom setting list in the touch panel. (1) Touch the [List Print (User)] key.
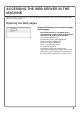
ACCESSING THE WEB SERVER IN THE MACHINE When the machine is connected to a network, the machine's built-in Web server can be accessed from a Web browser on your computer. Opening the Web pages Access the Web server in the machine to open the Web pages. Start a Web browser on a computer that is connected to the same network as the machine and enter the IP address of the machine. Recommended Web browsers Internet Explorer: 6.0 or higher (Windows®) Netscape Navigator: 9 (Windows®) Firefox: 2.
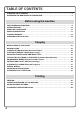
TABLE OF CONTENTS CHECKING THE IP ADDRESS. . . . . . . . . . . . . . . . . . . . . . . . . . . . . . . . . . . . . . . . . . . . . . . . . . . . . .2 ACCESSING THE WEB SERVER IN THE MACHINE . . . . . . . . . . . . . . . . . . . . . . . . . . . . . . . . . . . .3 Before using the machine PART NAMES AND FUNCTIONS . . . . . . . . . . . . . . . . . . . . . . . . . . . . . . . . . . . . . . . . . . . . . . . . . . .8 OPERATION PANEL . . . . . . . . . . . . . . . . . . . . . . . . . . . . . . . . . . . . . . . .
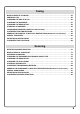
Faxing BASE SCREEN OF FAX MODE . . . . . . . . . . . . . . . . . . . . . . . . . . . . . . . . . . . . . . . . . . . . . . . . . . . .54 SENDING A FAX. . . . . . . . . . . . . . . . . . . . . . . . . . . . . . . . . . . . . . . . . . . . . . . . . . . . . . . . . . . . . . . .55 CHANGING THE SIZE OF A FAX . . . . . . . . . . . . . . . . . . . . . . . . . . . . . . . . . . . . . . . . . . . . . . . . . .56 CHANGING THE EXPOSURE . . . . . . . . . . . . . . . . . . . . . . . . . . . . . . . . . . . . . . . . .
Document filing DOCUMENT FILING . . . . . . . . . . . . . . . . . . . . . . . . . . . . . . . . . . . . . . . . . . . . . . . . . . . . . . . . . . . . .88 QUICKLY SAVING A JOB (Quick File) . . . . . . . . . . . . . . . . . . . . . . . . . . . . . . . . . . . . . . . . . . . . . .90 APPENDING INFORMATION WHEN STORING A FILE (File) . . . . . . . . . . . . . . . . . . . . . . . . . . . .91 SAVING A DOCUMENT ONLY (Scan to HDD) . . . . . . . . . . . . . . . . . . . . . . . . . . . . . . . . . . . . . . . .
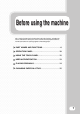
Before using the machine This section provides general information about the machine, including the names and functions of the parts of the machine and its peripheral devices, and the procedures for placing originals and loading paper. X PART NAMES AND FUNCTIONS . . . . . . . . . . . . . . . . . . 8 X OPERATION PANEL . . . . . . . . . . . . . . . . . . . . . . . . . . . 10 X USING THE TOUCH PANEL . . . . . . . . . . . . . . . . . . . . . 12 X USER AUTHENTICATION . . . . . . . . . . . . . . . . . . . . . .
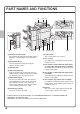
PART NAMES AND FUNCTIONS (1) (5) (6) (1) Automatic document feeder This automatically feeds and scans multiple originals. Both sides of 2-sided originals can be scanned at once. (2) Document feeder tray Place the originals in this tray when using the automatic document feeder. (3) Operation panel (4) Output tray (centre tray) Copy jobs and print jobs are delivered to this tray. (When a finisher or saddle stitch finisher is installed, the output tray (centre tray) cannot be used.
(13) (14) (15) (13) Document glass This is used to scan books and other originals that cannot be scanned using the automatic document feeder. (14) Main power switch This is used to power on the machine. When using the fax or Internet fax functions, keep this switch in the "on" position. (16) (17) (18) (16) Bypass tray Special types of paper can be fed from the bypass tray. (17) Exit tray unit (right tray)* When installed, output can be delivered to this tray.
OPERATION PANEL Touch panel Function key Messages and keys appear. Operations are performed by directly touching the keys with your fingers. To use the Sharp OSA function, press this key to switch to Sharp OSA mode. Print mode indicators READY indicator Print data can be received when this indicator is lit. DATA indicator This blinks while print data is being received and lights steadily while printing is taking place. Ready to scan for copy. 0 Original Job Detail Settings A4 2-Sided Copy A4 1. 2.
Numeric keys These are used to enter the number of copies, fax numbers, and other numbers. [LOGOUT] key ( ) When user authentication is enabled, press this key to log out after using the machine. When using the fax function, this key can be pressed to send tone signals on a pulse dial line. [#/P] key ( ) Press this key to use a job program when using the copier function. When using the fax function, press this key to dial using a program.
USING THE TOUCH PANEL The touch keys that appear in the touch panel are grouped for easy operation. The layout and functions of the touch keys are explained below. Settings related to the original are generally grouped together on the left side of the base screen. This appears when one or more special modes are selected. Touch the icon to check what modes are selected. Ready to scan for copy. 0 Original A4 Job Detail Settings 1. 2. 100% Copy Ratio 3. 4.
USER AUTHENTICATION When user authentication is enabled in the system settings, you must log in before using the machine. User authentication is initially disabled. When you have finished using the machine, log out. User authentication methods There are two methods for performing user authentication: login by user number and login by login name and password. Ask the administrator of the machine for the information that is required to log in.
PLACING ORIGINALS The automatic document feeder can be used to automatically scan many originals at once. This saves you the trouble of manually feeding each original. For originals that cannot be scanned using the automatic document feeder, such as a book or a document with notes attached, use the document glass. Using the automatic document feeder When using the automatic document feeder, place the originals in the document feeder tray. Make sure an original has not been placed on the document glass.
CHANGING PAPER IN A TRAY Names of the trays The names of the trays are shown below. For the number of sheets of paper that can be loaded in each tray, see the following manuals: • Operation Guide, "Paper Tray Settings" in "7.
Loading paper in a tray To change the paper in a tray, load the desired paper in the tray and then change the tray settings in the machine to specify the loaded paper. The procedure for changing the tray paper size is explained below. As an example, the paper in tray 1 is changed from B4 (8-1/2" x 14") size plain paper to A4 (8-1/2" x 11") size recycled paper. Gently pull out the paper tray. If paper remains in the tray, remove it. Move the two guides on the tray.
Changing the tray settings When you change the paper in a tray, the tray settings in the system settings must also be changed. SYSTEM SETTINGS System Settings Admin Password Exit Total Count Default Settings List Print (User) Paper Tray Settings Address Control Fax Data Receive/Forward Document Filing Control USB-Device Check (1) Printer Condition Settings 1 Press the [SYSTEM SETTINGS] key. 2 Configure the tray settings in the touch panel.
Loading paper in other trays Bypass tray The side to be copied on must be face down! When loading A3W, A3 or B4 size paper, pull out the tray extension. The maximum number of sheets that can be loaded in the bypass tray is approximately 100 for plain paper and approximately 20 for envelopes. Example: Loading an envelope Place paper that is A5 (7-1/4" x 10-1/2") or smaller in the horizontal orientation. Only the address side of envelopes can be printed on. Place envelopes with the address side face down.
Large capacity tray The paper size of tray 5 can only be changed by a service technician. Gently pull out the paper tray. Insert the paper with the print side face down. Fan the paper well before inserting it. Otherwise, multiple sheets may feed at once and cause a misfeed. Insert the paper and then gently push the tray into the machine. Do not load as shown below. Indicator line The indicator line indicates the maximum height of the paper that can be loaded in the tray.
Copying This section explains the basic procedures for using the copier function. This section also introduces the various types of copying that can be performed using the special modes. X BASE SCREEN OF COPY MODE . . . . . . . . . . . . . . . . . 22 X MAKING COPIES. . . . . . . . . . . . . . . . . . . . . . . . . . . . . . 23 X 2-SIDED COPYING (Automatic Document Feeder) . . 24 X COPYING ON SPECIAL PAPER (Bypass Copy). . . . . 25 X SELECTING THE EXPOSURE AND IMAGE TYPE . . .
BASE SCREEN OF COPY MODE Press the [COPY] key in the Operation panel to open the base screen of copy mode. Select copy settings in the base screen. (4) (5) (6) (7) Ready to scan for copy. (1) (2) 0 Original Job Detail Settings Auto Exposure Plain A4 1. 2. (3) 100% Copy Ratio A4 3. 4. A4 A4R B4 A3 5.
MAKING COPIES This is the most basic procedure for making copies. 1-sided original 1 COPY Ready to scan for copy. 2-Sided Copy Plain A4 Output Special Modes File 3. A4 A4R B4 4. A3 Quick File 1. 2. 100% Copy Ratio Press the [COPY] key. The base screen of copy mode appears. 0 Job Detail Settings Auto Exposure 1-sided copy The side to be scanned must be face up! 2 Place the originals. When using the document glass, place the original with the side to be scanned face down.
2-SIDED COPYING (Automatic Document Feeder) You can use the automatic document feeder to make automatic 2-sided copies without the bother of manually turning the originals over and re-inserting them. This section explains how to copy 1-sided originals onto both sides of the paper. 1-sided original The side to be scanned must be face up! Ready to scan for copy. 0 Original A4 Job Detail Settings Plain Auto Exposure A4 1. 2. 100% Copy Ratio 3. 4. A4 A4R B4 A3 1 Place the originals.
COPYING ON SPECIAL PAPER (Bypass Copy) Use the bypass tray to copy on special media such as heavy paper, envelopes, and tab paper. This section explains how to load A4 heavy paper in the bypass tray. Original 1 The side to be scanned must be face up! Copy on heavy paper Place the originals. When using the document glass, place the original with the side to be scanned face down.
Select settings in the touch panel. (Continued) Copy Mode Type Bypass Tray Type/Size Setting Heavy Paper Auto-Inch Auto-AB (5) Custom Size OK (5) Touch the [Auto-AB] key. (6) Size 12x18,11x17,81/2x14 81/2x11,81/2x11R,51/2x8 1/2R 71/4x101/2R,A3,A4,B4,B5 A3W,A3,A4,A4R,A5R,B4 B5,B5R,216x330(81/2x13) 11x17,81/2x11 Type Manual (6) Touch the [OK] key. X420 Y297 2/3 Paper Select (7) Touch the bypass tray key. OK (8) 1. A4 Plain A4 2. A4R Plain Heavy paper Pre-Printed 3. B4 Plain 4.
SELECTING THE EXPOSURE AND IMAGE TYPE You can specify the original image type to obtain a clearer copy. The example of making a copy of a map is explained below. Light original 1 The side to be scanned must be face up! Exposure adjustment Place the originals. When using the document glass, place the original with the side to be scanned face down. Ready to scan for copy. 0 Original Job Detail Settings 2-Sided Copy A4 Plain A4 Auto Exposure 1. (1) 100% 2. Copy Ratio 4. 3.
FITTING THE COPY IMAGE TO THE PAPER (Automatic Ratio Selection) You can copy an original onto any size of paper using automatic enlargement/reduction. This section explains how to copy an A4 original onto A3 paper. A4 1 The side to be scanned must be face up! A3 Place the originals. When using the document glass, place the original with the side to be scanned face down.
ENLARGEMENT/REDUCTION (Preset Ratios / Zoom) 55% For precise adjustment of the copy size, you can select a preset ratio and/or adjust the ratio in increments of 1%. As an example, this section explains how to reduce the image to 55%. Original 1 The side to be scanned must be face up! Ratio-specified copy Place the originals. When using the document glass, place the original with the side to be scanned face down. Ready to scan for copy. 0 Original Job Detail Settings 2-Sided Copy A4 A4 1. 2.
INTERRUPTING A COPY RUN (Interrupt Copy) When the machine is printing, you can temporarily interrupt the job and perform a copy job that you wish to prioritize. This feature is useful when you need to make an urgent copy during a long copy run. Original Printing Copies in progress from tray 1. Ready to scan for next copy job. Plain A4 1. 2. 100% Copy Ratio 1 2-Sided Copy Job Detail Settings Auto Exposure 5 Interrupt 3. 4.
STORING COPY OPERATIONS (Job Programs) You can store a group of copy settings. The settings can be retrieved and used whenever needed. When you frequently use the same group of settings, this saves you the trouble of manually selecting the settings each time you need to use them. Storing a job program Job Programs Exit Press program number. 1 2 3 4 5 6 7 8 Recall 1 Press the [#/P] key ( 2 Select settings in the touch panel. ). 1/6 (1) Touch the [Store/Delete] tab.
Job Programs Exit Press program number. 2 1/6 1 2 3 4 5 6 7 8 Recall Touch the key of the desired job program. After selecting the job program, set the number of copies and press the [START] key to begin copying. Store/Delete Deleting a job program Job Programs Exit Press program number . 1 2 3 4 5 6 7 8 Recall 1 Press the [#/P] key ( 2 Select settings in the touch panel. ). 1/6 (1) Touch the [Store/Delete] tab.
SPECIAL MODES The special modes can be used for a variety of special-purpose copy jobs. This section introduces the types of copies that can be made with the special modes. (The procedures for using each special mode are not explained.) Each special mode has its own settings and steps, however, the basic procedure is the same for all modes. The basic procedure for selecting a special mode is explained on the next page using "Margin Shift" as an example.
SELECTING A SPECIAL MODE The procedure for selecting settings for "Adding margins (Margin Shift)" is explained below as an example. Although the specific settings for each special mode vary, the general procedure is the same. 1 The side to be scanned must be face up! Place the originals. When using the document glass, place the original with the side to be scanned face down. Ready to scan for copy. 0 Original Job Detail Settings 2-Sided Copy A4 Plain A4 Auto Exposure 1. 2. 100% Copy Ratio 3. 4.
CONVENIENT COPY FUNCTIONS Adding margins (Margin Shift) Use this function to shift the image on the copy to create binding margins. This function is convenient when you will be binding the copies with a string or placing them in a binder. Erasing peripheral shadows (Erase) Use this function to erase peripheral shadows that occur when making copies of books and other thick originals.
Copying a large number of originals at once (Job Build) A stack of originals higher than the indicator line on the automatic document feeder cannot be fed through the feeder. The job build function lets you divide the stack of originals into sets, feed each set, and copy the sets as a single job. Using two machines to make a large number of copies (Tandem Copy) You can divide a copy job between two machines connected to the same network. This saves considerable time when running a large copy job.
Copying multiple pages onto one sheet of paper (Multi Shot) Use this function to copy two or four original pages onto one sheet of paper. 12 34 1 2 3 4 Copying a pamphlet (Book Copy) Use this function to copy a book, pamphlet, or other bound original. The copies will be arranged in the same pamphlet-style layout. When a saddle stitch finisher is installed, the output is automatically folded at the centre and stapled.
Printing the date or a stamp on copies (Stamp) Date print Stamp Page number CONFIDENTIAL Text Water mark IA L 04/04/2010 ID 2 EN T Planning Meeting 1 3 CO NF Use this function to print the date, a stamp, the page number, or text on copies. In addition, specific text can be added to a copy as a watermark. Repeating photos on a copy (Photo Repeat) Use this function to print up to 24 copies of one photo on one sheet of paper.
Copying an A3 size original without cutting off the edges (A3 Full Bleed) Use this feature to make a full-size copy of an A3 original on A3W paper so that the edges are not cut off. The original must be placed on the document glass. Copying in the centre of the paper (Centring) Use this function to position the copy image at the centre of the paper. This is convenient when the image is reduced or copied onto paper that is larger than the original.
Checking the number of scanned original sheets before copying (Original Count) The number of scanned original sheets can be counted and displayed before copying is executed. By allowing you to check the number of original sheets that were scanned, this helps reduce the occurrence of copy mistakes.
Printing This section explains the basic procedure for printing using the printer driver of the machine. The settings that can be selected in the printer driver are also introduced. The explanations of screens and procedures are primarily for Windows Vista® in Windows® environments, and Mac OS X v10.4 in Macintosh environments. The window varies depending on the operating system version, the printer driver version, and the application. The printer expansion kit is required to use the printer function.
PRINTING This section explains the basic procedures for printing. Windows The following example explains how to print an A4 size document from WordPad, which is a standard accessory program in Windows. To install the printer driver and configure settings in a Windows environment, see "2. SETUP IN A WINDOWS ENVIRONMENT" in the Software Setup Guide. For information on the available printer drivers and the requirements for their use, see "PRINTER FUNCTION OF THE MACHINE" in "3.
3 Select print settings. (1) Click the [Paper] tab. (1) (2) Select [A4]. (3) Click the [OK] button. (2) (3) 4 Click the [Print] button. Printing begins. In Windows 98/Me/NT 4.0, click the [OK] button.
Using printer driver help When selecting settings in the printer driver properties window, you can display Help to view explanations of the settings. (Only in Windows) 1 Open the printer driver properties window. (1) Select the printer driver of the machine. (2) Click the [Preferences] button. In Windows 2000, the [Preferences] button does not appear. Click the tabs in the "Print" dialog box to adjust the settings on the tabs. In Windows 98/Me/NT 4.0, click the [Properties] button.
Macintosh The following example explains how to print an A4 size document from "TextEdit" ("SimpleText" in Mac OS 9), which is a standard accessory program on Macintosh computers. To print from a Macintosh, the PS3 expansion kit must be installed in the machine and the machine must be connected to a network. To install the printer driver and configure settings in a Macintosh environment, see "3. SETUP IN A MACINTOSH ENVIRONMENT" in the Software Setup Guide.
Printing a file 1 (1) Execute printing from TextEdit. (1) Open the [File] menu. (2) Select [Print]. In Mac OS 9, select [Print] from the [File] menu of SimpleText. (2) 2 (1) Select print settings and click the [Print] button. (1) Make sure the correct printer is selected. (2) (3) The machine name that appears in the "Printer" menu is normally [SCxxxxxx]. ("xxxxxx" is a sequence of characters that varies depending on your machine model.) (2) Select print settings.
CANCELLING PRINTING (AT THE MACHINE) You can cancel a print job if you cancel before printing actually begins. JOB STATUS Job Queue Sets / Progress Spool Status 1 Copy 020 / 001 Copying 2 Copy 020 / 000 Waiting 1/1 Job Queue Complete (2) Detail 3 Computer01 020 / 000 4 0312345678 002 / 000 (3) Print Job Waiting Priority Waiting Stop/Delete Scan to (4) Fax Job Internet Fax (1) 1 Press the [JOB STATUS] key. 2 Select settings in the touch panel.
SELECTING PRINT SETTINGS To use the print function of the machine, the settings in the printer driver properties window must be configured. See "PRINTING" (page 42) for the procedure for opening the printer driver properties window and the basic procedure for printing. Windows The procedure for selecting settings in the printer driver is explained below using "Fitting the print image to the paper (Fit To Paper Size)" as an example.
Macintosh The procedure for selecting printer driver settings is explained below using "Printing multiple images on one page (N-Up Printing)" as an example. This function reduces the size of each page to let you print multiple pages on one sheet of paper. The example of printing two pages on one sheet of paper with borderlines is explained. The procedures for configuring printer driver settings vary by setting.
CONVENIENT PRINTER FUNCTIONS Printing on both sides of the paper (2-sided printing) Use this function to print on both sides of the paper. You can use 2-sided printing to reduce the number of printed sheets when you are printing a large number of pages or when you wish to conserve paper. 12 34 1 3 Fitting the print image to the paper (Fit To Paper Size) Use this function to enlarge or reduce the print image to fit the paper size.
Punching holes in output (Punch) Use this function to punch holes in output. (When a punch module and saddle stitch finisher or finisher are installed.) The machine also has these functions For information on each of these functions, see "CONVENIENT PRINTING FUNCTIONS" in "3. PRINTER" in the Operation Guide.
Faxing This section explains the basic procedures for using the fax function of the machine. In addition, special modes that can be used with the fax function are introduced. The facsimile expansion kit is required to use the fax function. X BASE SCREEN OF FAX MODE . . . . . . . . . . . . . . . . 54 X SENDING A FAX . . . . . . . . . . . . . . . . . . . . . . . . . . . . 55 X CHANGING THE SIZE OF A FAX . . . . . . . . . . . . . . . 56 X CHANGING THE EXPOSURE . . . . . . . . . . . . . . . . . .
BASE SCREEN OF FAX MODE Press the [IMAGE SEND] key in the Operation panel to open the base screen of fax mode. If the fax screen does not appear, touch the [Mode Switch] key. Select fax settings in the base screen. (6) Ready to send.
SENDING A FAX The basic procedure for sending faxes is explained below. In fax mode, colour originals are sent as black and white images. Transmission Original 1 IMAGE SEND Ready to send. Speaker Resend Fax Mode Switch Address Book Image Settings Sub Address Memory TX Special Modes Direct TX File Auto Reception Fax Memory:100% Transmission result Press the [IMAGE SEND] key. The base screen of fax mode appears. (When the fax function is not installed, the base screen of scan mode appears.
CHANGING THE SIZE OF A FAX The size of the original and the transmission size can be specified before transmission. This is convenient when faxing an original that is small and difficult to read. The procedure for faxing both sides of an A4 original at A3 size is explained below. 1 The side to be scanned must be face up! Place the originals. When using the document glass, place the original with the side to be scanned face down.
CHANGING THE EXPOSURE The exposure can be changed as appropriate for the darkness or lightness of the original. The following example explains how to darken light colours in an original to make the image clearer. 1 The side to be scanned must be face up! Place the originals. When using the document glass, place the original with the side to be scanned face down.
CHANGING THE RESOLUTION The resolution can be selected to match the characteristics of the original, such as text or photo, the size of the text, and the darkness of the image. The following example explains how to set the resolution to [Fine] and [Half Tone] when sending an original with small text. 1 The side to be scanned must be face up! Place the originals. When using the document glass, place the original with the side to be scanned face down.
STORING A FAX NUMBER You can store fax numbers in one-touch keys. Stored fax numbers can be retrieved quickly and easily. If you frequently send faxes to the same group of fax machines, the numbers of those fax machines can be stored as a group (multiple fax numbers can be stored in one key). One-touch keys Group key A Corp.
Next Direct Address / Individual E-mail Internet Fax (4) 0001 Name AAA AAA Search Number Initial Exit Direct SMTP Fax (4) Touch the [Name] key. 1/2 Index A A software keyboard appears. Enter initials for the destination. E-mail Internet Fax Search Number Exit Next Direct Address / Individual Initial A software keyboard appears. Enter the name of the destination. (5) Touch the [Initial] key. (5) Fax No. Name Store the fax number in the touch panel.
FORWARDING RECEIVED FAXES (Fax Data Forward) When the machine cannot print because it is out of paper or out of toner, received faxes can be forwarded to another fax machine. To use this function, the fax number of the destination machine must be stored in "Set the Telephone Number for Data Forwarding" in the system settings (administrator).
CONVENIENT DIALLING METHODS Easy to use one-touch keys and the resend function can be used to prevent dialling errors and save time. One-touch keys A fax number stored in a one-touch key can be retrieved by a simple touch of the key. A one-touch key for a group can be selected to automatically transmit to each of the destinations stored in the group. Ready to send.
Speed dialling When you store an individual key or a group key, a 4-digit* search number is assigned to the key. You can select a destination using the key and the 4-digit* search number. * 3-digit when a hard drive is not installed. To check a search number, print the appropriate list in the sending address list menu in the system settings. Ready to send. Fax Mode Switch Scan A4 Speaker Send Resend key.
SENDING THE SAME FAX TO MULTIPLE DESTINATIONS (Broadcast Transmission) The same document/image can be sent to multiple fax mode, scan mode, and Internet fax mode destinations in a single operation. If you frequently send documents/images to the same group of destinations, it is recommended that you store those destinations as a group in a one-touch key. The following procedure explains how to enter a fax number with the numeric keys and then select a destination that is stored in a one-touch key.
Select settings in the touch panel. (Continued) OK Address Review 001 0120000001 To 002 CCC CCC (5) Check the destinations and then touch the [OK] key. (5) To delete a destination, touch the key of the destination that you wish to delete. A message will appear to confirm the deletion. Touch the [Yes] key. Cc 4 Press the [START] key.
SPECIAL FAX MODES The special modes can be used for a variety of special-purpose fax transmission jobs. The following pages show the types of fax transmissions that can be performed. (The procedures for using each special mode are not explained.) Each special mode has its own settings and steps, however, the basic procedure is the same for all modes. The basic procedure for selecting a special mode is explained on the next page using "Erase" as an example.
SELECTING A SPECIAL MODE The procedure for selecting a special mode for fax is explained below. The settings that must be selected vary for each special mode, however, the general procedure is the same. The procedure for erasing shadows at the edges of the image when sending a fax is explained below as an example. 1 The side to be scanned must be face up! Place the originals. When using the document glass, place the original with the side to be scanned face down. Ready to send.
CONVENIENT FAX FUNCTIONS Erasing peripheral shadows (Erase) Use this function to erase peripheral shadows that occur when faxing books and other thick originals. Without erase Transmission Transmission With erase Sending the left and right pages of a bound document as two separate pages (Dual Page Scan) Use this function to send the left and right pages of a pamphlet or other bound document as two separate pages.
Sending a large number of pages as a single transmission job (Job Build) A stack of originals higher than the indicator line on the automatic document feeder cannot be fed through the feeder. The job build function lets you divide the stack of originals into sets, feed each set, and send the sets as a single transmission. Transmission Sending a fax directly from a computer (PC-Fax) A document on a computer can be sent via the machine as a fax.
Scanning This section explains the uses of the network scanner function and the basic procedure for using scan mode. In addition, special modes that can be used with the network scanner function are introduced. USB memory mode can be used without installing a peripheral device. The network scanner expansion kit is required to use the network scanner function. The Internet fax expansion kit and the Printer expansion kit with hard drive is required to use the Internet fax function.
NETWORK SCANNER FUNCTION The network scanner function of the machine can be used to transmit scanned images by a variety of methods. The network scanner function has the following modes. USB memory mode Scan modes Use this mode to save an image to USB memory To send an image to an e-mail address, use Scan to E-mail Internet fax mode To upload an image to an FTP server, use Scan to FTP Scan the original, and then... Use this mode to send a fax via the Internet The machine supports Direct SMTP.
BASE SCREEN OF SCAN MODE Press the [IMAGE SEND] key in the operation panel to open the base screen of scan mode. If the scan screen does not appear, touch the [Mode Switch] key. Select various scan settings in the base screen. (4) (5) Ready to send. (2) Scan Mode Switch Image Settings (3) Send Settings (1) Resend Address Book (6) Address Entry (7) Special Modes File (8) Quick File (9) (1) [Mode Switch] key (6) [Address Book] key Touch this key to use a one-touch key or a group key.
SCANNING AN ORIGINAL The basic operation for scanning is explained below. This section explains how to send a scanned file by e-mail. Scan transmission Original 1 IMAGE SEND Scanned image Press the [IMAGE SEND] key. The base screen of scan mode appears. The side to be scanned must be face up! 2 Place the originals. When using the document glass, place the original with the side to be scanned face down. Ready to send. Scan Mode Switch Resend Scan Send 3 (1) Touch the [Address Entry] key.
CHANGING THE EXPOSURE AND ORIGINAL IMAGE TYPE Exposure and original image type settings can be selected as appropriate for the original. The procedure for darkening the exposure and setting the original image type to "Text/Prtd. Photo" is explained below. 1 The side to be scanned must be face up! Place the originals. When using the document glass, place the original with the side to be scanned face down.
CHANGING THE RESOLUTION You can select the resolution as appropriate for the original type. This section explains how to set the resolution to "300X300dpi", which creates a clearer image than the default resolution. 1 The side to be scanned must be face up! Place the originals. When using the document glass, place the original with the side to be scanned face down.
CHANGING THE FILE FORMAT The file format (file type and compression method) for sending a scanned image is specified when the destination is stored in a one-touch key; however, you can change the format at the time of transmission. The procedure for sending a scanned image in TIFF format is explained below. 1 The side to be scanned must be face up! Place the originals. When using the document glass, place the original with the side to be scanned face down.
STORING A DESTINATION The procedure for storing e-mail addresses in one-touch keys for Scan to E-mail is explained below. Stored e-mail addresses can be retrieved quickly and easily. If you frequently send images to the same group of destinations, those destinations can be stored as a group. To store destinations for the other modes of the network scanner function, see "STORING DESTINATION ADDRESSES FOR EACH SCAN MODE IN THE ADDRESS BOOK" in "5. SCANNER / INTERNET FAX" in the Operation Guide.
Next Direct Address / Individual Exit Store the Scan to E-mail destination in the touch panel. (Continued) (8) Touch the [OK] key. No.0001 OK Index Select the custom index where you register this address. User 1 User 2 User 3 User 4 (8) User 5 User 6 Do you register this address at the [Frequent Use], too? Yes No Next Direct Address / Individual E-mail Internet Fax Search Number Name (9) 0001 Direct SMTP Exit (10) Fax Registration is completed.
CONVENIENT TRANSMISSION METHODS One-touch sending, resending, and other convenient transmission functions that make it easy to send an image are available. One-touch key A destination stored in a one-touch key can be retrieved by a simple touch of the key. Ready to send. Scan Mode Switch Resend Scan Send (1) Touch the [Address Book] key.
Search number sending When you store an individual key or a group key, a 4-digit* search number is assigned to the key. You can select a destination using the key and the 4-digit* search number. * 3-digit when a hard drive is not installed. To check a search number, print the appropriate list in the sending address list menu in the system settings. Ready to send. Scan Mode Switch Scan A4 Resend Send Auto Image Settings Send Settings (1) Touch the key.
SENDING THE SAME IMAGE TO MULTIPLE DESTINATIONS (Broadcast Transmission) The same image can be sent to multiple scan mode, Internet fax mode, and fax mode destinations in a single operation. If you frequently send images to the same group of destinations, it is recommended that you store those destinations as a group in a one-touch key. The procedure for selecting multiple destinations stored in one-touch keys and sending an image to those destinations is explained below.
SPECIAL SCAN MODES The special modes can be used for a variety of special-purpose scan send jobs. The following pages show the types of scan send jobs that can be performed. (The procedures for using each special mode are not explained.) Each special mode has its own settings and steps, however, the basic procedure is the same for all modes. The basic procedure for selecting a special mode is explained on the next page using "Erase" as an example.
SELECTING A SPECIAL MODE The procedure for selecting a special mode for the scanner function is explained below. The settings that must be selected vary for each special mode, however, the general procedure is the same. The procedure for selecting "Erasing peripheral shadows on the image (Erase)" is explained here as an example. 1 The side to be scanned must be face up! Place the originals. When using the document glass, place the original with the side to be scanned face down. Ready to send.
CONVENIENT SCANNER FUNCTIONS Erasing peripheral shadows on the image (Erase) Use this function to erase peripheral shadows that occur when scanning books and other thick originals. Scan Without erase Scan With erase Scanning an original as two separate pages (Dual Page Scan) Use this function to scan the left and right pages of an open pamphlet or other bound document as separate pages.
Scanning many originals at once (Job Build) A stack of originals higher than the indicator line on the automatic document feeder cannot be fed through the feeder. The job build function lets you divide the stack of originals into sets, feed each set, and send the sets as a single transmission. Scan Sending two pages as a single page (2in1) Use this function to reduce two original pages to half their size and send them as a single page. This is a special function in Internet fax mode.
Document filing The document filing function is used to store the document or print image on the hard drive when performing a copy, print, or other job. A stored file can be called up and used whenever needed. This section introduces several of the document filing functions. The printer expansion kit with hard drive is required to use this function. X DOCUMENT FILING . . . . . . . . . . . . . . . . . . . . . . . . . . . . 88 X QUICKLY SAVING A JOB (Quick File) . . . . . . . . . . . . .
DOCUMENT FILING The document filing function allows you to save the document image of a copy or image send job, or the data of a print job, as a file on the machine's hard drive. The stored file can be retrieved and printed or transmitted as needed.
The document filing function is convenient in these situations In this situation... You prepared copies of a many-page handout for a meeting, but the number of participants suddenly increases and you need to quickly prepare more copies of the handout. Ready to scan for copy. 0 2-Sided Copy Job Detail Settings Plain Auto Exposure A4 1. 2. 100% Copy Ratio 3. 4. A4 A4R B4 A3 Output Special Modes File Quick File Document filing is convenient It takes time to scan all of the pages of the handout.
QUICKLY SAVING A JOB (Quick File) As an example, the procedure for using "Quick File" while copying is explained below. Quick File is the easiest way to save a file using the document filing function. 1 The side to be scanned must be face up! Place the originals. When using the document glass, place the original with the side to be scanned face down. Ready to scan for copy. 0 Original Job Detail Settings A4 Plain Auto Exposure A4 1. 2. 100% Copy Ratio 3. 4.
APPENDING INFORMATION WHEN STORING A FILE (File) As an example, the procedure for using "File" while copying is explained below. Unlike Quick File, a file name, user name, and folder can be specified when saving a file. 1 The side to be scanned must be face up! Place the originals. When using the document glass, place the original with the side to be scanned face down. Ready to scan for copy. 0 Original Job Detail Settings A4 2-Sided Copy Plain Auto Exposure A4 A4 A4R B4 A3 1. 2.
Select settings in the touch panel. (Continued) Select the folder. Main Folder User 1 (7) User 6 User 7 User 8 ABCD (8) Touch the [OK] key. User 4 User 5 All Folders (7) Touch the [User 1] key. (8) 1/2 User 2 User 3 OK EFGHI JKLMN OPQRST UVWXYZ Cancel File Information Confidential User Name Name 1 File Name file-01 Stored to: User 1 Password (9) Touch the [OK] key. OK (9) 3 Set the number of copies and then press the [START] key.
SAVING A DOCUMENT ONLY (Scan to HDD) You can save a document without performing a copy, print, or send job. The procedure for storing a document in the main folder is explained below. 1 DOCUMENT FILING Press the [DOCUMENT FILING] key. The base screen of document filing mode appears. HDD Status Search File Store File Retrieve Scan to HDD File Folder Quick File Folder External Data Access 2 The side to be scanned must be face up! Place the originals.
PRINTING A SAVED FILE You can retrieve a file stored by document filing and print or transmit the file. This section explains how to retrieve and print a file stored in the main folder.
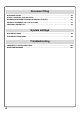
System settings The system settings let you adjust the operation of the machine to suit the needs of your workplace. This section briefly introduces several of the system settings. For detailed explanations of the system settings, see "7. SYSTEM SETTINGS" in the Operation Guide. X SYSTEM SETTINGS . . . . . . . . . . . . . . . . . . . . . . . . . . . . 96 X SYSTEM SETTINGS MENU. . . . . . . . . . . . . . . . . . . . . . .
SYSTEM SETTINGS The date and time can be set, fax and scan destinations can be stored, document filing folders can be created, and various other settings related to the operation of the machine can be configured in the system settings screen. The procedure for opening the system settings screen and the items in the screen are explained below. For detailed explanations of the system settings, see "7. SYSTEM SETTINGS" in the Operation Guide.
System settings (administrator) The system settings (administrator)* are system settings that can only be configured by the administrator of the machine. To configure these settings, the administrator password must be entered. However, when user authentication is enabled, users who log in with certain user rights may be able to configure these settings without entering the administrator password. Check with your administrator.
SYSTEM SETTINGS MENU System Settings Total Count Job Count Device Count Default Settings Display Contrast Clock Keyboard Select List Print (User) All Custom Setting List Printer Test Page Sending Address List Document Filing Folder List Paper Tray Settings Tray Settings Paper Type Registration Auto Tray Switching Custom Size Registration (Bypass) Address Control Direct Address/Program F-Code Memory Box Custom Index Fax Data Receive/Forward Fax Receive Settings Fax Data Forward Inter
Image Send Settings Operation Settings Must Input Next Address Key at Broadcast Setting Default Display Settings Hold Setting for Received Data Print Address Book Default Selection Scan Complete Sound Setting Default Verification Stamp Own Name and Destination Set Initial Resolution Setting The Number of File Name/Subject/Body Erase Width Adjustment Keys Displayed Setting The Number of Direct Address Keys Settings to Disable the Registration Displayed Setting of Destination Default Exposure Settings
Troubleshooting This sections contains answers to frequently asked questions and explains how to remove paper misfeeds. X FREQUENTLY ASKED QUESTIONS . . . . . . . . . . . . . . 102 X REMOVING MISFEEDS . . . . . . . . . . . . . . . . . . . . . . . . .
FREQUENTLY ASKED QUESTIONS Making a copy of a non-standard size original The procedure for making a copy of a payment slip or other non-standard size original is explained below. The "Centring" special mode of copy mode can be selected to position the copied image in the centre of the paper. 1 Place the originals. If the X dimension (width) of the document is less than 140 mm (5-1/2") or the Y dimension (height) is less than 131 mm (5-5/32"), place the original on the document glass.
Printing on an envelopes The procedure for printing on an envelope is explained below. Only the name and address side of an envelope can be printed on. It is recommended that you do a test print to check the print result before using an envelope. For detailed information on how to set paper in the bypass tray, see "LOADING PAPER IN THE BYPASS TRAY" in "1. BEFORE USING THE MACHINE" in the Operation Guide. 1 Place paper in the bypass tray. 2 Tray Settings.
Changing the paper size used for a print job When the size of paper specified for a print job is not loaded in any of the machine's paper trays, follow the steps below to change the paper size. Paper Empty 1 Check details on the job.
Adjusting the volume of the ringer If the ringing sound made when the machine receives a fax is too loud or too soft, follow the steps below to adjust the volume. The fax ringer volume is adjusted in the system settings (administrator). Press the [SYSTEM SETTINGS] key on the operation panel, touch [Image Send Settings] - [Fax Settings] - [Fax Default Settings] [Speaker Settings] - [Ringer Volume] in that order, and then select the desired volume.
REMOVING MISFEEDS When a paper misfeed occurs, the message "A misfeed has occurred." will appear in the touch panel and printing and scanning will stop. In this event, touch the [Information] key in the touch panel. When the key is touched, instructions for removing the misfeed will appear. Follow the instructions. When the misfeed is cleared, the message will automatically clear. The blinking mark in the image at left indicates the approximate position of the misfeed.
Please note • For information on your operating system, please refer to your operating system manual or the online Help function. • The explanations of screens and procedures in a Windows environment are primarily for Windows Vista®. The screens may vary depending on the version of the operating system or the software application. • The explanations of screens and procedures in a Macintosh environment are based on Mac OS X v10.4 in the case of Mac OS X.
MX-M363U/MX-M453U/MX-M503U Quick Start Guide PRINTED IN FRANCE TINSE4506GHZZ