
Operation Manual
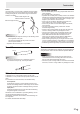
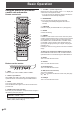
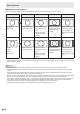
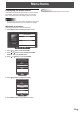
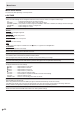
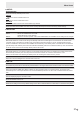

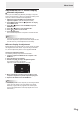

Table Of Contents
- IMPORTANT INFORMATION
- DEAR SHARP CUSTOMER
- SAFETY PRECAUTIONS
- TIPS AND SAFETY INSTRUCTIONS
- MOUNTING PRECAUTIONS
- Supplied Components
- System Requirements
- Part Names
- Connecting Peripheral Equipment
- Connecting the Power Cord
- Binding Cables
- Affixing the Stand Hole Protection Covers
- Preparing the Remote Control Unit
- Removing the Handles (PN-80SC5/PN-70SC5 only)
- Mounting a web camera
- Turning Power On/Off
- Touch action
- Basic Operation
- Menu Items
- Functional Restriction Setting (FUNCTION)
- Controlling the Monitor with a PC (RS-232C)
- Troubleshooting
- Specifications
- Mounting Precautions (For SHARP dealers and service engineers)

22
E
Basic Operation
Using the buttons on the remote
control unit and monitor
Remote control unit
1
2
3
4
5
6
7
8
9
10
11
12
13
14
15
16
17
18
19
20
Buttons on the monitor
POWER HDMI 1 D-SUBINPUT BL OFF VOL ─VOL + FREEZE
21 22 952317
1. HDMI
Switch the input mode to HDMI1, HDMI2 or HDMI3.
2. Numeric input buttons
When HDMI CEC LINK is set to ON, use these buttons to
operate the device connected through the HDMI interface.
3. MUTE
Turns off the volume temporarily.
Press the MUTE button again to turn the sound back to the
previous level.
4. MODE (Picture mode selection)
Each time you press this button, the picture mode changes in
the following order (see page 26):
PC* → DYNAMIC → DYNAMIC (FIXED) →
STANDARD → MOVIE → PC*...
* For PC, switch only when the input mode is HDMI1,
HDMI2, HDMI3, and D-SUB (PC).
5. VOLUME +/- (Volume adjustment)
When the menu does not appear, press + or - to display the
volume menu and adjust the volume.
* If you do not press any buttons for about 3 seconds, the
VOLUME menu automatically disappears.
6. INFORMATION
You can check the input signal and input terminal.
• The display automatically disappears after about 5
seconds.
7. FUNCTION
Use this to display the FUNCTION menu. (See page 30.)
8. ENTER
Conrms the setting.
9. FREEZE
Freezes the video shown on the monitor. The touch panel
remains enabled while the video is frozen and touch actions
can be reected. To cancel, press any button other than
the POWER button, the MUTE button, VOLUME + button
or VOLUME - button. Freeze is also canceled when the
input signal changes (switching to no signal, changing the
resolution, etc.).
Freezing the video for a long period could cause a residual
image.
10. Buttons for operating the HDMI-connected device
When HDMI CEC LINK is set to ON, use these buttons to
operate the device connected through the HDMI interface.
11. ID SET
This is not used with this monitor.
12. OPTION
This is not used with this monitor.
13. DP (DisplayPort)
This is not used with this monitor.
14. SIZE (Screen size selection)
The menu is displayed.
Press
or buttons to select the screen size. (See page
24.)
15. PIP/PbyP
This is not used with this monitor.