
Instruction manual
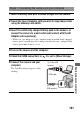

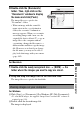


Table Of Contents
- Notes on using your camera
- Table of Contents
- Preparing the camera
- Before your operation
- Shooting images
- Using the shooting function
- Selecting the focus method
- Zooming in in one step
- Using the flash
- Adjusting the brightness of the image (Exposure, Flash compensation, Metering)
- Shooting with fixed brightness (AE Lock)
- Using brightness compensation for the entire image (Exposure compensation)
- Adjusting the amount of flash light (Flash compensation)
- Selecting the flash control mode to set the amount of flash light (Flash control)
- Selecting the method for measuring the brightness of a subject (Metering mode)
- Compensating for the brightness and contrast automatically (D-Range)
- Image processing
- Setting ISO
- Adjusting the color tones (White balance)
- Selecting the drive mode
- Capturing smiling faces (Smile Shutter)
- Using the viewing function
- Changing your setup
- Viewing images on a computer
- Printing images
- Others
- Index

148
x Macintosh
Recommended environment for using “Image Data Converter SR Ver.3”/
“Image Data Lightbox SR”
OS (pre-installed): Mac OS X v10.4/Mac OS X v10.5
CPU: Power PC G4/G5 series (1.0 GHz or faster is recommended)/Intel
Core Solo/Core Duo/Core 2 Duo or faster
Memory: 1 GB or more is recommended.
Display: 1024 × 768 dots or more
x Windows
• Log on as Administrator.
Installing the software
1 Turn on your computer, and insert
the CD-ROM (supplied) into the
CD-ROM drive.
The installation menu screen appears.
• If it does not appear, double-click
[Computer] (For Windows XP: [My
Computer]) t (SONYPICTUTIL)
t [Install.exe].
• Under Windows Vista, the AutoPlay
screen may appear. Select “Run
Install.exe” and follow the instructions
that appear on the screen to proceed
with the installation.
2 Click [Install].
• Verify that both “Sony Image Data Suite” and “Sony Picture Utility” are
checked and follow the instructions on the screen.