PG-A20X SERVICE MANUAL SERVICE-ANLEITUNG S83G3PG-A20XU LCD PROJECTOR LCD PROJEKTOR MODEL MODELL PG-A20X In the interests of user-safety (Required by safety regulations in some countries) the set should be restored to its original condition and only parts identical to those specified should be used. Im lnteresse der Benutzersicherheit (erforderliche Sicherheitsregeln in einigen Ländern) muß das Gerät in seinen Originalzustand gebracht werden.
PG-A20X CONTENTS Page Page • SPECIFICATIONS ............................................. 3 • IMPORTANT SERVICE SAFETY NOTES (for USA) ............................................... 4 • NOTE TO SERVICE PERSONNEL ................... 5 • OPERATION MANUAL ...................................... 9 • DIMENSIONS .................................................. 15 • REMOVING OF MAJOR PARTS ...................... 16 • RESETTING THE TOTAL LAMP TIMER .......... 20 • THE OPTICAL UNIT OUTLINE .....................
PG-A20X Specifications Product type LCD Projector Model PG-A20X Video system NTSC3.58/NTSC4.43/PAL/PAL-M/PAL-N/PAL-60/SECAM/ DTV480I/DTV480P/DTV540P/DTV580I/DTV580P/DTV720P/DTV1035I/DTV1080I Display method LCD panel × 3, RGB optical shutter method LCD panel Panel size: 0.79" (20.0 mm) (12 [H] × 16 [W] mm) No. of dots: 786,432 dots (1,024 [H] × 768 [V]) Standard lens 1–1.2 × zoom lens, F1.7–1.94, f = 26–31 mm Projection lamp SHP 180 W lamp Component input signal 15-pin mini D-sub connector (INPUT1) Y: 1.
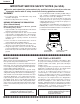
PG-A20X IMPORTANT SERVICE SAFETY NOTES (for USA) Ë Service work should be performed only by qualified service technicians who are thoroughly familiar with all safety checks and servicing guidelines as follows: » Use an AC voltmeter with sensitivity of 5000 ohm per volt., or higher, sensitivity to measure the AC voltage drop across the resistor (See Diagram). » All checks must be repeated with the AC plug connection reversed.
PG-A20X NOTE TO SERVICE NOTE POUR LE PERSONNEL PERSONNEL D’ENTRETIEN 123456789012345678901234567890121234567890123456 123456789012345678901234567890121234567890123456 123456789012345678901234567890121234567890123456 123456789012345678901234567890121234567890123456 UV-RADIATION PRECAUTION 123456789012345678901234567890121234567890123456 123456789012345678901234567890121234567890123456 PRECAUTION POUR LES RADIATIONS UV 123456789012345678901234567890121234567890123456 12345678901234567890123456789012123456
PG-A20X 123456789012345678901234567890121234567890123456 123456789012345678901234567890121234567890123456 123456789012345678901234567890121234567890123456 123456789012345678901234567890121234567890123456 123456789012345678901234567890121234567890123456 123456789012345678901234567890121234567890123456 UV-RADIATION PRECAUTION (Continued) 123456789012345678901234567890121234567890123456 123456789012345678901234567890121234567890123456 123456789012345678901234567890121234567890123456 PRECAUTION POUR LES RADI
PG-A20X WARNING: High brightness light source, do not stare into the beam of light, or view directly. Be especially careful that children do not stare directly in to the beam of light. WARNING: TO REDUCE THE RISK OF FIRE OR ELECTRIC SHOCK, DO NOT EXPOSE THIS UNIT TO MOISTURE OR WET LOCATIONS. CAUTION The lighting flash with arrowhead within a triangle is intended to tell the user that parts inside the product are risk of electric shock to persons. RISK OF ELECTRIC SHOCK.
PG-A20X Precautions for using lead-free solder 1 Employing lead-free solder "PWBs" of this model employs lead-free solder. The LF symbol indicates lead-free solder, and is attached on the PWBs and service manuals. The alphabetical character following LF shows the type of lead-free solder. Example: LFa Indicates lead-free solder of tin, silver and copper. 2 Using lead-free wire solder When fixing the PWB soldered with the lead-free solder, apply lead-free wire solder.
PG-A20X Operation Manual Projector (Front and Top View) Lamp indicator Power indicator Illuminates green indicating normal function. Replace the lamp when the indicator illuminates red. Illuminates red when the projector is in standby. When the power is turned on, this indicator will illuminate green. Temperature warning indicator ON button For turning the power on. When the internal temperature rises, this indicator will illuminate red.
PG-A20X Projector (Rear View) INPUT 2 terminal Terminal for computer RGB and component signals. Terminal for connecting video equipment with an S-video terminal. RS-232C terminal INPUT 3 terminal INPUT 1 terminal Terminal for connecting video equipment. For controlling the projector using a computer. AUDIO INPUT terminal Shared audio input terminal for INPUT 1, 2 and 3.
PG-A20X Remote Control (Front View) ON button STANDBY button For turning the power on. For putting the projector into the standby mode. MENU button KEYSTONE button For displaying adjustment and setting screens. For entering the Keystone Correction mode. Adjustment buttons (', ", \, |) For selecting menu items. UNDO button For undoing an operation or returning to the previous display. ENTER button For setting items selected or adjusted on the menu.
PG-A20X Usable Range ■ The remote control can be used to control the projector within the ranges shown in the illustration. Remote control sensor 45 Note The signal from the remote control can be reflected off a screen for easy operation. However, the effective distance of the signal may differ depending on the screen material. 30 Remote control signal transmitters 30 When using the remote control: Be sure not to drop, expose to moisture or high temperature.
PG-A20X RS-232C Specifications and Command Settings PC control A computer can be used to control the projector by connecting an RS-232C serial control cable (cross type, sold separately) to the projector. (See page 20 for connection.) Communication conditions Set the serial port settings of the computer to match that of the table. Signal format: Conforms to RS-232C standard.
PG-A20X Connection Pin Assignments INPUT 1 RGB Signal Terminal: 15-pin Mini D-sub female connector RGB Input 5 10 15 1 6 11 1. 2. 3. 4. 5. 6. 7. 8. 9. 10. 11. 12. 13. 14. 15. Component Input Video input (red) Video input (green/sync on green) Video input (blue) Not connected Not connected Earth (red) Earth (green/sync on green) Earth (blue) Not connected GND Not connected Bi-directional data Horizontal sync signal: TTL level Vertical sync signal: TTL level Data clock 1. 2. 3. 4. 5. 6. 7. 8. 9. 10.
PG-A20X DIMENSIONS Rear View Top View 11 45/64 (297) Side View 9 1/32 (229) Side View ø 66.4 25/32 (19.5) 10 13/64 (258.8) 1 59/64 (48.5) 49/64 (81) 3 33/64 (89) 3 Front View 13/64 1 35/64 (39.2) 3 9/64 (79.5) (19.1) 6 21/32 (169) M4 7 7/64 (180.5) 7 3/32 (180) 7 53/64 (198.5) Bottom View M4 M4 13/64 5 55/64 (148.
PG-A20X REMOVING OF MAJOR PARTS 1. Removing the lamp unit. 1-1. Loosen a screw and detach the lamp door. 1-2. Loosen the two screws. Hold the lamp unit by the handle and pull it in the direction of allow. Lamp Unit 1-2 1-2 Lamp Door 1-1 2. Removing the top body 2-1. Remove a screw from behind of the set. 2-2. Remove the six lock screws from bottom of the set. 2-3. Remove the two hooks and detach the top body.
PG-A20X 3. Removing the main PWB unit 3-1. 3-2. 3-3. 3-4. Remove the seven screws. Remove all the connectors from main PWB. Detach the main PWB. Remove the two screws and detach the operation button unit. 3-1 Operation Button 3-1 [FA] 3-1 [FC] [EA] [BP] 3-2 [RC] 3-3 3-2 [TF] [GP] [FD] [FG] MAIN PWB [RP] [TH] [FB] [LF] [FE] [SP] [TI] 3-2 3-4 3-1 4. Removing the exhaust cover, optical mechanism unit, R/C receiver PWB and speaker 4-1. 4-2. 4-3. 4-4. 4-5. 4-6.
PG-A20X 5. Removing the AC inlet, power/ballast unit and cooling fan 5-1. 5-2. 5-3. 5-4. 5-5. Remove a screw from behind of the set. Remove a screw and take out of the power/ballast assembly. Detach the bottom shield and shield cover. Remove a connector and detach the AC inlet. Remove the two hooks and take out of the ballast unit from power/ballast case. Remove the all connectors from power PWB. 5-6. Remove the two screws and detach the power PWB. 5-7 5-6 5-7. Remove the two screws and cooling fan.
PG-A20X 6. Removing the intake duct assembly 6-1. 6-2. 6-3. 6-4. 6-5. Remove the two screws and take out of the intake duct assembly. Remove a screw and detach the leaf switch. Remove a screw and two hooks. Detach the spacer B. Take out of the fan LCD R/G-intake duct B assembly. Remove a screw and detach the fan LCD R/G. Remove the two screws and detach the fan LCD B.
PG-A20X RESETTING THE TOTAL LAMP TIMER ● Resetting the total lamp timer When replacing the lamp, reset the total lamp timer in the procedure below. Resetting the Lamp Timer Reset the lamp timer after replacing the lamp. 1 Connect the power cord. Plug the power cord into the AC socket of the projector. 2 AC socket Reset the lamp timer. ON button While simultaneously holding down and on the projector, press and on the projector. “LAMP 0000H” is displayed, indicating that the lamp timer is reset.
PG-A20X THE OPTICAL UNIT OUTLINE Layout for proper setup of the optical components and parts (top view) Projection lens LIGHT SOURCE (LAMP) Input polariser R Input polariser B LCD(R) Relay lens 3 LCD(B) Output pre-polariser R Output pre-polariser B R or pr M B ic irr ro or ch irr di M 2 ss ro Condensing lens B C m is LCD(G) Fly-eye lens(Input) Fly-eye lens(Output) Output pre-polariser G R dichroic filter UV reflector PBS Condensing lens G or ct le ct fle re f re G or 21
PG-A20X Replacing the prism holder unit 1. Remove the two lock screws, and take the prism holder unit and the projection lens assembly out of the optical unit. 2. Remove the four lock screws, separate the prism holder unit and the projection lens assembly from each other. 3. Replace the prism holder unit with new one. Take the above steps 1 and 2 in reverse order. Note: Even if just one of the LCD panels is defective, it is necessary to replace the entire prism holder unit.
PG-A20X ELECTRICAL ADJUSTMENT No. Adjusting point Adjusting conditions Adjusting procedure EEPROM initialization 1. Turn on the power (with the lamp on) and warm up the set for 15 minutes. » Make the following settings. Press S2002 to call the process mode and execute "SS2" on SS menu. 2-1 R/G/B Brightness adjustment 1. Select the following group and subjects. Group : AD Subject : R-Bright G-Bright B-Bright (Process GAMMA interlock) 2. Feed the XGA 16-step signal with an amplitude level of 50% (0.
PG-A20X No. Adjusting point Adjusting conditions Adjusting procedure 5 Video Brightness/Contrast adjustment 1. Feed an NTSC composite video 10-step signal (no setup) with 100% amplitude. 2. Select the following group and subjects. Group : VIDEO Subject : Bright Contrast (Process GAMMA interlock) 1. Check the setting value. Contrast (White Level): 0 Bright (Black Level): 13 6 PSIG adjustment 1. Select the following group and subjects. Group : OUTPUT2 Subject : PSIG-H PSIG-L 2.
PG-A20X No. Adjusting point Adjusting conditions Adjusting procedure 8 RGB countervoltage adjustment 1. Feed the counter voltage adjustment signal. (SVGA) 2. Select the following group and subjects. Group : OUTPUT3 Subject : RC (R) GC (G) BC (B) 1. Using the remote controller’s button, adjust the setting so that the flickering be minimum. 2. Adjust the setting so that the image comes to the center of the screen. 9 Chiral phase selection of LCD panel 1. Group : OUTPUT3 Subject : OPT-MECH 1.
PG-A20X No. Adjusting point Adjusting conditions Adjusting procedure 15 Automatic color irregularity correction 1. Apply the automatic color correction using the automatic color irregularity correction system. 1. Make sure that no remarkable uneven color remains on the screen. 16 Video Tint adjustment 1. Select the following group and subject. Group : VIDEO Subject : N-Tint P-Tint S-Tint 1. Check the fixed value. N-Tint : 5 P-Tint : 5 S-Tint : 5 17 Video Color saturation adjustment 1.
PG-A20X No. Adjusting point Adjusting conditions Adjusting procedure 24 RGB tone reproduction adjustment 1. Feed the SMPTE pattern signal. 1. Make sure the 100% and 95% white as well as the 0% and 5% black gradations are visible. 25 White balance checking 1. Use the adjustment conditions in the item 9 for RGB input and item 10 for sRGB input. Check that there is no deviation of white balance with the monitor.
PG-A20X 1. Calling and quitting the process mode with the control keys on this model. 1-1. Calling and quitting With no menu onscreen, press the "UP", "UP", "DOWN", "DOWN", "RIGHT", "LEFT" and "ENTER" keys, in this order, on the remote controller (Type A10, or C50/45 and P25/20 series remote controllers). 1-2. Others Press the S2002 process key (toggle) on the main PWB to call and quit the process menu. 2. Resetting the lamp timer for this model 2-1.
PG-A20X Process menu1 First layer Adjustment Process Menu DTV Pedestal DVD VERSION VIDEO SS AD TEMP OUTPUT1 PATTERN OUTPUT2 LAMP OUTPUT3 LINE VIDEO1 EXIT second layer DTV Contrast Tint Color Sharpness CTI-Level LTI-Level CB-Offset CR-Offset Bright B-DRIVE R-DRIVE EXIT DVD Contrast Tint Color Sharpness CTI-Level LTI-Level CB-Offset CR-Offset Bright B-DRIVE R-DRIVE EXIT VIDEO Contrast N-Tint P-Tint S-Tint N-Color P-Color S-Color Sharpness CTI-Level LTI-Level CB-Offset VIDEO CR-Offset Bright B-DRIVE R-DRIVE
PG-A20X Process menu2 Pedestal VERSION SS TEMP PATTERN LAMP LINE R-Bright G-Bright B-Bright R-Contrast G-Contrast B-Contrast EXIT Build Boot Code Config Rom Code GUI EXIT SS2 SS3 EU SS4 US SS5 JPN SS6 CHIN EXIT Temp1 Temp2 Temp3 Temp4 EXIT Cross Hatch Color Bar EXIT Current Time History1 History2 History3 History4 TOTAL TIME EXIT OFF LED CHECK Calibration K-Sensor EXIT -10 -10 -10 +10 +10 +10 Parameter of sensor 1 Parameter of sensor 2 No Use No Use Current time of use One earlier Two earlier Thr
PG-A20X TROUBLE SHOOTING TABLE Checking the basic performance Is the POWER LED on or flickering in red or green? NO Go to "Checking the power unit" YES Is the set turned on by the set’s or remote controller’s power key? NO Go to "Checking the microcomputer peripherals". YES Is the cooling fan running? Is the lamp on? NO Go to "Checking the lamp light-up" YES NO Is the user menu displayed? YES Go to "Checking the RGB sync". Go to "Checking the RGB signal" Go to "Checking the video system".
PG-A20X Checking the power unit Are the connectors CN701, NO CN702 and CN751 inserted completely? Insert the connectors CN701, CN702 and CN751 tightly? YES Is the bimetal switch off? NO YES Is there AC voltage (110240V) applied across C701? Replace the bimetal NO Replace F701. YES Disconnect the CN751 connector. Is there 6V output at pins (3) and (4)? YES NO Check Q702 for damage. Replace as required. Check the MAIN PWB for short-circuit.
PG-A20X Checking the microprocessor peripherals Is a voltage of about 3.3V DC applied to pins (3) and (5) of IC1703? NO Check IC1703 and its peripheral circuits, or IC1702 and its peripheral circuits. YES Is about DC 2.5V applied between pins (5) and (8) of IC1704? NO Check IC1704 and its peripheral circuits. YES Is about DC 2.5V applied NO between pins (4) and (3) of IC8009? YES Is the lamp access lid open? Is the P2006 (LF) tight in the socket? YES Fully close the lamp access lid.
PG-A20X Checking the lamp light-up Is the lamp socket disconnected? YES NO Are DC350-400V voltages applied between the pins of CN703? Reconnect the lamp socket tightly. NO Go to "Checking the power unit". YES Are the CN751 and CN752 harnesses tight in position in the power unit and ballast unit as well? Are these harnesses free of damage? NO Reconnect the CN751 and CN752 harnesses tight enough. Or replace these harnesses.
PG-A20X Checking the RGB signal Are the RGB signals outputted from pin (9), (7) and (4) of IC3104? gradation signals? YES Check IC3104 and its peripheral circuits. NO Are their RIN2-RIN9, GIN2-GIN9, BIN2-BIN9 signals inputted into IC2601? NO Check IC8003 and its peripheral circuits. YES Are their signals inputted YES into pins(37)-(46) of IC1101, IC1201 and IC1301? Check IC2601 and its peripheral circuits.
PG-A20X No colour or unusual tone(NTSC, PAL) Are there RGB outputs at pins (23)(R-Y), (22)(B-Y) of NO IC3105? Check IC3105 and its peripheral circuits. YES Check C3126 and C3124. No or unusual Y signal Are there RGB outputs at pins (21)(Y) of IC3105? NO Check IC3506 and its peripheral circuits. YES Check C3121.
PG-A20X Checking the S-video system Is the lamp on ? NO YES Is the specified voltage EA connectors? Go to "Lamp light-up". NO Check power circuit and its parts. YES Is the video signal inputted into the pins(43) and (44) of IC3105? NO Check the video terminal and its peripheral circuits. YES Go to "Checking IC3102" Checking the video system Is the lamp on ? NO YES Is the specified voltage EA connectors? Go to "Lamp light-up".
PG-A20X Technische Daten Produkttyp LCD-Projektor Modell PG-A20X Videosystem NTSC3.58/NTSC4.43/PAL/PAL-M/PAL-N/PAL-60/SECAM/ DTV480I/DTV480P/DTV540P/DTV580I/DTV580P/DTV720P/DTV1035I/DTV1080I Anzeigeverfahren LCD-Panel × 3, optische RGB-Verschlussmethode LCD-Panel Panel-Größe: 0,79 tum (20,0 mm) (12 [H] × 16 [B] mm) Anzahl der Bildpunkte: 786.432 Bildpunkte (1.
PG-A20X HINWEISE FÜR DAS WARTUNGSPERSONAL 123456789012345678901234567890121234567890123456 123456789012345678901234567890121234567890123456 123456789012345678901234567890121234567890123456 ACHTUNG: UV-STRAHLUNG 123456789012345678901234567890121234567890123456 123456789012345678901234567890121234567890123456 123456789012345678901234567890121234567890123456 Die Beleuchtungsquelle des LCD-Projektors, eine UHP-Lampe, emittiert eine geringe Menge UV-Strahlung.
PG-A20X Vorsichtsmaßregeln für bleifreien Lötzinn 1 Verwendung von bleifreiem Lötzinn Bei den Platinen für dieses Modells wird bleifreies Lot verwendet. Das Symbol LF kennzeichnet bleifreies Lot und findet sich an den Platinen und in den Wartungshandbüchern. Der Buchstabe hinter LF bezieht sich auf die Art des bleifreien Lots. Beispiel: LFa Zeigt bleifreien Lötzinn aus Zinn, Silber und Kupfer an. 2 Bei Reparatur der mit bleifreiem Lötzinn gelöteten Platine immer bleifreien Lötzinn verwenden.
PG-A20X Bedienungsanleitung Projektor (Vorderansicht- und Draufsicht) Lampen-Anzeige Netz-Anzeige Bei vorschriftsmäßiger Funktion leuchtet diese Anzeige grün. Die Lampe austauschen, wenn die Anzeige rot leuchtet. Leuchtet rot, wenn sich der Projektor im Bereitschaftsbetrieb befindet. Wenn die Stromversorgung eingeschaltet ist, leuchtet diese Anzeige grün. ON-Taste TemperaturwarnAnzeige Schaltet die Stromversorgung ein. Wenn die interne Temperatur ansteigt, leuchtet diese Anzeige rot.
PG-A20X Projektor (Hintersicht) INPUT 2-Anschluss Anschluss für ein Videogerät mit einem SVIDEO-Anschluss. INPUT 1-Anschluss Anschluss für ComputerRGB- und Komponentensignale. INPUT 3-Anschluss RS-232C-Anschluss Anschluss für ein Videogerät. Für die Bedienung des Projektors unter Verwendung eines Computers. AUDIO INPUTAnschluss Geteilter Audioeingabeanschluss für INPUT 1, 2 und 3.
PG-A20X Fernbedienung (Vordersicht) ON-Taste STANDBY-Taste Schaltet die Stromversorgung ein. Schaltet den Projektor in den Standby-Modus. MENU-Taste KEYSTONE-Taste Für die Anzeige des Justierungs- und Einstellungsbildschirms. Für das Aktivieren des TrapezverzerrungsKorrekturmodus. Einstelltasten (', ", \, |) UNDO-Taste Für die Auswahl der Menüpunkte. Für das Rückgängigmachen eines Bedienschrittes oder für die Rückkehr zur vorherigen Anzeige.
PG-A20X Reichweite ■ Der Projektor kann mittels der Fernbedienung innerhalb der in der Abbildung dargestellten Bereiche gesteuert werden. Fernbedienungssensor 45 Hinweis Das Signal von der Fernbedienung kann für eine einfache Bedienung von der Bildwand reflektiert werden. Die tatsächliche Reichweite des Signals kann je nach Bildwandmaterial unterschiedlich sein.
PG-A20X RS-232C-Spezifikationen und Befehlseinstellungen PC-Steuerung Der Projektor kann durch einen Anschluss an einen Computer über ein serielles RS-232C-Steuerkabel (Kreuztyp, separat erhältlich) über den Computer gesteuert werden. (Siehe Seite 20 Anschlussanleitungen.) Kommunikationsbedingungen Legen Sie die seriellen Porteinstellungen des Computers so fest, dass sie denen der Tabelle entsprechen. Signalformat: Entspricht dem RS-232C-Standard. Paritätsbit: Keine Baud-Rate: 9.
PG-A20X Pin-Belegung INPUT-1-RGB-Signalanschluss: 15-Pin Mini-D-Sub weiblich RGB-Eingang 5 10 15 1 6 11 1. 2. 3. 4. 5. 6. 7. 8. 9. 10. 11. 12. 13. 14. 15. Komponenteneingang Videoeingang (rot) Videoausgang (grün/Sync. auf grün) Videoausgabe (blau) Nicht angeschlossen Nicht angeschlossen Erde (rot) Erde (grün/Sync. auf grün) Erde (blau) nicht angeschlossen GND Nicht angeschlossen Bi-direktionale Daten Horizontal-Sync-Signal: TTL-Pegel Vertikal-Sync-Signal: TTL-Pegel Datentakt 1. 2. 3. 4. 5. 6. 7. 8.
PG-A20X ABMESSUNGEN Ansicht von hinten Ansicht von oben Ansicht von der Seite Ansicht von der Seite 9 1/32 (229) 11 45/64 (297) ø 66,4 25/32 (19,5) 10 13/64 (258,8) 1 59/64 (48,5) 49/64 3 33/64 (89) Ansicht von vorne 3 13/64 (81) 1 35/64 (39,2) 3 9/64 (79,5) (19,1) 6 21/32 (169) M4 7 7/64 (180,5) 7 3/32 (180) 7 53/64 (198,5) Ansicht von unten M4 M4 13/64 5 55/64 (148,5) (5) 7 11/16 (195) Einheit:mm 47
PG-A20X ENTFERNEN DER HAUPTTEILE 1. Ausbau der Lampen-Einheit. 1-1. Die Schraube lösen, dann die Lampenabdeckung abnehmen. 1-2. Die beiden Schrauben lösen. Die Lampen-Einheit am Griff anfassen, dann in Pfeilrichtung ziehen. Lampen-Einheit. 1-2 1-2 Lampenabdeckung 1-1 2. Ausbau des oberen Gehäuses. 2-1. Die Schraube an der Rückseite des Geräts entfernen. 2-2. Die sechs Halteschrauben an der Unterseite des Geräts entfernen. 2-3. Die beiden Haken lösen, dann das obere Gehäuse abnehmen.
PG-A20X 3. Ausbau der Hauptleiterplatte 3-1. 3-2. 3-3. 3-4. Die sieben Schrauben entfernen. Alle Stecker von der Hauptleiterplatte abziehen. Die Hauptleiterplatte abnehmen. Die beiden Schrauben entfernen, dann die Bedienungstasten-Einheit abnehmen. 3-1 Bedienungstasten 3-1 [FA] 3-1 [FC] [EA] 3-3 3-2 [TF] [BP] 3-2 [RC] [GP] [FD] [FG] Hauptleiterplatte [RP] [TH] [FB] [LF] [FE] [SP] [TI] 3-2 3-4 3-1 4.
PG-A20X 5. Ausbau der AC-Netzsteckdose, Netzgerät-/Vorschaltwiderstands-Einheit und des Kühlgebläses 5-1. 5-2. 5-3. 5-4. Die Schraube an der Rückseite des Geräts entfernen. Die Schraube entfernen, dann die Netzgerät-/Vorschaltwiderstands-Einheit herausnehmen. Die Abschirmungsabdeckung entfernen. 5-7 5-6 Den Stecker abziehen, dann die 5-2 AC-Netzsteckdose abnehmen. 5-5.
PG-A20X 6. Ausbau der Einlaßluftführungs-Einheit 6-1. Die beiden Schrauben entfernen, dann die Einlaßluftführung herausnehmen. 6-2. Die Schraube entfernen, dann den Blattschalter abnehmen. 6-3. Die Schraube und die beiden Haken entfernen. Das Abstandsstück B abnehmen. Die Baugruppe KühlgebläseLCD R/G und die Einlaßluftführungs-Einheit B herausnehmen. 6-4. Die Schraube entfernen, dann die Baugruppe Kühlgebläse-LCD R/G ausbauen. 6-5. Die beiden Schrauben entfernen, dann die Kühlgebläse-LCD B herausnehmen.
PG-A20X RÜCKSTELLEN DES LAMPENBETRIEBSZEIT-TIMERS ● Rückstellung des Lampen-Timers Den Lampen-Timer nach dem Lampenaustausch zur ü ckzustellen. Rückstellung des Lampen-Timers Den Lampen-Timer nach dem Lampenaustausch zurückzustellen. 1 Das Netzkabel anschließen. Das Netzkabel am Netzanschluss des Projektors anschließen. Netzanschluss 2 ON-Taste Den Lampen-Timer zurückstellen. Während und auf dem Projektor gleichzeitig gedrückt werden, und auf dem Projektor drücken.
PG-A20X BESCHREIBUNG DER OPTIK-EINHEIT Erläuterungen für das korrekte Setup der optischen Komponenten und Baugruppen (Ansicht von oben) Projektionsobjektiv Beleuchtungsquelle (Lampe) Relaislinse 3 R2 Fliegenaugenoptik (Eingang) el B R-Kaltlichtfilter Zweifarbiges Kreuzprisma ieg el Sp S g pie Eingabe-polarisator B LCD(R) LCD(B) Ausgabe-polarisator R Ausgangs-Vorpolarisator B Sammellinse B Eingabe-polarisator R Fliegenaugenoptik (Ausgang) AusgangsVorpolarisator G LCD(G) UV-Reflektor PBS
PG-A20X Auswechseln der Prismenhalter-Einheit 1. Die beiden Halteschrauben entfernen, dann den Prismenhalter und die Projektionslinsen-Einheit aus der OptikEinheit herausnehmen. 2. Die vier Halteschrauben entfernen, dann die Prismenhalter-Einheit und die Objektiv-Einheit trennen. 3. Die Prismenhalter-Einheit durch ein Neuteil ersetzen. Die obigen Schritte 1 und 2 in umgekehrter Reihenfolge ausführen. Hinweis: Selbst wenn auch nur eine der LCD-Tafeln defekt ist, muß die Prismenhalter-Einheit ersetzt werden.
PG-A20X ELEKTRISCHE EINSTELLUNG Nr. Einstellgegenstand Einstellbedingungen Einstellverfahren EEPROM wird initialisiert 1. D e n N e t z s c h a l t e r einschalten und das Gerät für ca. 15 Minuten vorwärmen lassen. (Sicherstellen, daß die Kontrollampe aufleuchtet.) » Die folgenden Einstellungen vornehmen: S2002 drücken, um den Bearbeitungsmodus aufzurufen und "SS2" am SS-Menü zu aktivieren. 2-1 Helligkeitseinstellung für R/G/B. 1.
PG-A20X Nr. Einstellgegenstand Einstellbedingungen Einstellverfahren 5 Einstellung der Video-Helligkeit und des Kontrastes 1. Ein NTSC-Komposit-10Stufensignal (ohne Setup) mit einem Amplitudenpegel von 100% zuführen. 2. Die folgenden Gruppen und Positionen wählen: Gruppe : VIDEO Position : Bright Contrast (GAMMA-Synchronisationsablauf) 1. Den Einstellwert überprüfen. Contrast (Weißpegel): 0 Bright (Schwarzpegel): 13 6 PSIG-Einstellung 1.
PG-A20X Nr. Einstellgegenstand Einstellbedingungen Einstellverfahren 8 Einstellung der RGBGegenspannung 1. Ein GegenspannungsEinstellsignal im SVGAModus zuführen 2. Die folgenden Gruppen und Positionen wählen: Gruppe : OUTPUT3 Position : RC (R) GC (G) BC (B) 1. Die Taste der Fernbedienungseinheit verwenden, um die Einstellung so vorzunehmen, daß das Bildschirmflickern auf ein Minimum reduziert ist. 2. Die Einstellung so vornehmen, daß sich das Bild im Mittelpunkt des Bildschirms befindet.
PG-A20X Nr. Einstellgegenstand Einstellbedingungen Einstellverfahren 15 Automatische Korrektur von Farbabweichungen 1. Die automatische Korrektur von Farbabweichungen kann mit dem a u t o m a t i s c h e n FarbabweichungsKorrektur-system durchgeführt werden. 1. S i c h ve r g e w i s s e r n , d a ß ke i n e a u f f ä l l i g e Farbungleichheit am Bildschirm zu sehen ist. 16 VideofarbtonEinstellung 1. Die folgenden Gruppen und Positionen wählen: Gruppe : VIDEO Position : N-Tint P-Tint S-Tint 1.
PG-A20X Nr. Einstellgegenstand Einstellbedingungen Einstellverfahren 24 Einstellung der RGB-Farbtonwiedergabe 1. Das SMPTETestbildsignal zuführen. 1. Sich vergewissern, daß die 100- und 95%Abstufungen für Weiß sowie die 0- und 5%Abstufungen für Schwarz sichtbar sind. 25 Überprüfen des Weißabgleichs 1. Die in Punkt 9 für die RGBEingabe sowie in Punkt 10 für die sRGB-Eingabe verwendeten Einstellungsparameter verwenden.
PG-A20X 1. Aktivieren und Deaktivieren des Prozeßmodus unter Verwendung der Steuertasten dieses Modells. 1-1. Aktivieren und Deaktivieren Wenn am Bildschirm kein Menü angezeigt wird, in der angegebenen Reihenfolge an der Fernbedienungseinheit die Tasten "UP", "UP", "DOWN", "DOWN", "RIGHT", "LEFT" und "ENTER" drücken (Fernbedienungseinheiten des Typs A10 oder der Serie C50/45 und P25/20). 1-2.
PG-A20X Prozeßmenü 1 First layer AD Prozeßmenü für Einstellungen DTV Pedestal DVD VERSION VIDEO SS AD TEMP OUTPUT1 PATTERN OUTPUT2 LAMP OUTPUT3 LINE VIDEO1 EXIT second layer DTV Contrast Tint Color Sharpness CTI-Level LTI-Level CB-Offset CR-Offset Bright B-DRIVE R-DRIVE EXIT DVD Contrast Tint Color Sharpness CTI-Level LTI-Level CB-Offset CR-Offset Bright B-DRIVE R-DRIVE EXIT VIDEO Contrast N-Tint P-Tint S-Tint N-Color P-Color S-Color Sharpness CTI-Level LTI-Level CB-Offset VIDEO CR-Offset Bright B-DRIVE
PG-A20X Prozeßmenü 2 Pedestal VERSION SS TEMP PATTERN LAMP R-Bright G-Bright B-Bright R-Contrast G-Contrast B-Contrast EXIT Build Boot Code Config Rom Code GUI EXIT SS2 SS3 EU SS4 US SS5 JPN SS6 CHIN EXIT Temp1 Temp2 Temp3 Temp4 EXIT Cross Hatch Color Bar EXIT Current Time History1 History2 History3 History4 TOTAL TIME LINE EXIT OFF LED CHECK Calibration K-Sensor -10 -10 -10 +10 +10 +10 Parameter für Sensor 1 Parameter für Sensor 2 Nicht belegt Nicht belegt Gegenwärtige Verwendungszeit Vorherige
PG-A20X FEHLERSUCHTABELLE Überprüfung der grundlegenden Funktionen Ist die POWER LED eingeschaltet, oder blinkt sie rot oder grün? NEIN Mit dem Abschnitt "Überprüfung des Netzteils" fortfahren. JA Kann das Gerät mit der Einschalttaste oder über die Fernbedienungseinheit eingeschaltet werden? JA Läuft das Kühlgebläse? Ist die Lampe eingeschaltet? NEIN Mit dem Abschnitt "Überprüfung der MikrocomputerPeripherieschaltkreise" fortfahren. NEIN Mit dem Abschnitt "Überprüfung der Lampenfunktion" fortfahren.
PG-A20X Überprüfen des Netzteils Sind die Stecker CN701, CN702 und CN751 fest angeschlossen? NEIN Sind die Stecker CN701, CN702 und CN751 fest eingesteckt? JA Ist der Bimetall-Schalter ausgeschaltet? NEIN JA Liegt eine Wechselspannung (110 240 V) an C701 an? Den Bimetall-Schalter ersetzen. NEIN F701 ersetzen. JA Den Stecker CN751 abziehen. Liegt eine Ausgangsspannung von 6 V an den Stiften (3) und (4) an? JA NEIN Q702 auf Beschädigung überprüfen und nötigenfalls ersetzen.
PG-A20X Überprüfung der MikrocomputerPeripherieschaltkreise Liegt eine Gleichspannung von ca. 3,3 V an den Stiften (3) und (5) von IC1703 an? JA NEIN Liegt eine Gleichspannung von ca. 2,5 V zwischen den Stiften (5) und (8) von IC1704 an? NEIN IC1703 und seine PeripherieSchaltkreise bzw. IC1702 und seine Peripherie-Schaltkreise überprüfen. IC1704 und seine PeripherieSchaltkreise überprüfen. JA Liegt eine Gleichspannung von ca.
PG-A20X Überprüfung der Lampenfunktion Ist die Lampenfassung locker? JA NEIN Die Lampenfassung fest anschließen. Liegt eine Gleichspannung NEIN von 350 - 400 V zwischen den Stiften von CN703 an? Mit dem Abschnitt "Überprüfen des Netzteils" fortfahren. JA Sind die Zuleitungskabel für CN751 und CN752 fest am Netzteil bzw. an der VorschaltwiderstandsEinheit angeschlossen? Befinden sich die Kabel in einwandfreiem Zustand? NEIN Die Zuleitungskabel für CN751 und CN752 fest anschließen, bzw.
PG-A20X Überprüfung des RGBSignals Werden die RGB-Signale über die Stifte (9), (7) und (4) von IC3104 ausgegeben? JA IC3104 und seine Peripherie-Schaltkreise überprüfen. NEIN Werden die Signale RIN2 - NEIN RIN9, GIN2 - GIN9 und BIN2 - BIN9 zu IC2601 übermittelt? JA Liegen ihre Signale an den Stiften (37) - (46) von IC1101, IC1201 und IC1301 an? JA IC2601 und seine Peripherie-Schaltkreise überprüfen.
PG-A20X Keine Farbe, oder abweichender Farbton (NTSC, PAL) Liegen RGBAusgangssignale an den Stiften (23) (R-Y) und (22) (B-Y) von IC3105 an? NEIN IC3105 und seine Peripherie-Schaltkreise überprüfen. JA C3126 und C3124 überprüfen. Überhaupt kein oder ein irreguläres Y-Signal Liegt ein RGBAusgangssignal am Stift (21) (Y) von IC3105 an? NEIN IC3506 und seine Peripherie-Schaltkreise überprüfen. JA C3121 überprüfen.
PG-A20X Überprüfen des S-VideoSystems Leuchtet die Lampe auf? NEIN Mit dem Abschnitt "Überprüfung der Lampenfunktion" fortfahren. JA Liegt die spezifizierte Spannung an den EASteckern an? JA NEIN Liegt an den Stiften (43) und (44) von IC3105 ein Videosignal an? NEIN Den Leistungsschaltkreis und seine Komponenten überprüfen. Die Video-Anschlüsse und ihre PeripherieSchaltkreise überprüfen. JA Mit dem Abschnitt "Überprüfen von IC3102" fortfahren.
PG-A20X CHASSIS LAYOUT / CHASSIS-ANORDNUNG H G F E D C B A 1 2 3 4 5 6 70 7 8 9 10
PG-A20X 10 11 12 13 14 15 71 16 17 18 19
PG-A20X BLOCK DIAGRAM / BLOCKSCHALTBILD H G F E D C B A 1 2 3 4 5 6 72 7 8 9 10
PG-A20X 10 11 12 13 14 15 73 16 17 18 19
PG-A20X OVERALL WIRING DIAGRAM / GESAMTSCHALTPLAN H G F E D C B A 1 2 3 4 5 6 74 7 8 9 10
PG-A20X 10 11 12 13 14 15 75 16 17 18 19
PG-A20X DESCRIPTION OF SCHEMATIC DIAGRAM BESCHREIBUNG DES SCHEMATISCHEN SCHALTPLANS VOLTAGE MEASUREMENT CONDITION: SPANNUNGSMESSUNGEN: 1. Voltages at test points are measured at the supply voltage of AC 220V. Signals are fed by a color bar signal generator for servicing purpose and the above voltages are measured with a 20k ohm/V tester. 1.
PG-A20X WAVEFORMS / WELLENFORMEN 10 1 RTP(P1301-1) H:5µsec/div V:2V/div 2 GTP(P1301-2) H:F5µsec/div V:2V/div 3 BTP(P1301-3) H:5µsec/div V:2V/div 4 P-SIG(TP1101) H:10µsec/div V:2V/div 5 VST(IC2604-12) H:10µsec/div V:1V/div 6 HST10(IC2604-17) H:5µsec/div V:1V/div 7 Y(IC3506-25) H:20µsec/div V:0.2V/div 8 C(IC3506-27) H:20µsec/div V:0.2V/div 9 Video(J402-2) H:20µsec/div V:0.
PG-A20X Ë MAIN UNIT / HAUPTEINHEIT-1/12 H G F E D C B A 1 2 3 4 5 6 78 7 8 9 10
PG-A20X 10 11 12 13 14 15 79 16 17 18 19
PG-A20X Ë MAIN UNIT / HAUPTEINHEIT-2/12 H G F E D C B A 1 2 3 4 5 6 80 7 8 9 10
PG-A20X 10 11 12 13 14 15 81 16 17 18 19
PG-A20X Ë MAIN UNIT / HAUPTEINHEIT-3/12 H G F E D C B A 1 2 3 4 5 6 82 7 8 9 10
PG-A20X 10 11 12 13 14 15 83 16 17 18 19
PG-A20X Ë MAIN UNIT / HAUPTEINHEIT-4/12 H G F E D C B A 1 2 3 4 5 6 84 7 8 9 10
PG-A20X 10 11 12 13 14 15 85 16 17 18 19
PG-A20X Ë MAIN UNIT / HAUPTEINHEIT-5/12 H G F E D C B A 1 2 3 4 5 6 86 7 8 9 10
PG-A20X 10 11 12 13 14 15 87 16 17 18 19
PG-A20X Ë MAIN UNIT / HAUPTEINHEIT-6/12 H G F E D C B A 1 2 3 4 5 6 88 7 8 9 10
PG-A20X 10 11 12 13 14 15 89 16 17 18 19
PG-A20X Ë MAIN UNIT / HAUPTEINHEIT-7/12 H G F E D C B A 1 2 3 4 5 6 90 7 8 9 10
PG-A20X 10 11 12 13 14 15 91 16 17 18 19
PG-A20X Ë MAIN UNIT / HAUPTEINHEIT-8/12 H G F E D C B A 1 2 3 4 5 6 92 7 8 9 10
PG-A20X 10 11 12 13 14 15 93 16 17 18 19
PG-A20X Ë MAIN UNIT / HAUPTEINHEIT-9/12 H G F E D C B A 1 2 3 4 5 6 94 7 8 9 10
PG-A20X 10 11 12 13 14 15 95 16 17 18 19
PG-A20X Ë MAIN UNIT / HAUPTEINHEIT-10/12 H G F E D C B A 1 2 3 4 5 6 96 7 8 9 10
PG-A20X 10 11 12 13 14 15 97 16 17 18 19
PG-A20X Ë MAIN UNIT / HAUPTEINHEIT-11/12 H G F E D C B A 1 2 3 4 5 6 98 7 8 9 10
PG-A20X 10 11 12 13 14 15 99 16 17 18 19
PG-A20X Ë MAIN UNIT / HAUPTEINHEIT-12/12 H G F E D C B A 1 2 3 4 5 100 6 7 8 9 10
PG-A20X 10 11 12 13 14 15 101 16 17 18 19
PG-A20X Ë POWER UNIT / NETZTEILEINHEIT H G F E D C B A 1 2 3 4 5 102 6 7 8 9 10
PG-A20X 10 11 12 13 14 15 103 16 17 18 19
PG-A20X Ë R/C RECEIVER UNIT / FERNBEDIENUNGSEMPFänGERSEINHEIT H G F E D C B A 1 2 3 4 104 5 6
PG-A20X H PRINTED WIRING BOARD ASSEMBLIES LEITERPLATTENEINHEITEN G F Power Unit (Wiring Side) Netzteinheit (Leiterbahnseite) E D C B Power Unit (Component Side) Netzteinheit (Bestückungsseite) A 1 2 3 4 105 5 6
PG-A20X H G R/C Receiver Unit (Side-A) Fernbedienungsempfängerseinheit (Seite-A) F E D C B A Main Unit (Side-A) Haupt-einheit (Seite-A) 1 2 3 4 106 5 6
PG-A20X H G R/C ReceiverUnit (Side-B) Fernbedienungsempfängerseinheit (Seite-B) F E D C B A Main Unit (Side-B) Haupt-einheit (Seite-B) 1 2 3 4 107 5 6
PG-A20X Ref. No. Part No. ★ Description PARTS LIST Code Ref. No. ★ Part No. Description Code ERSATZTEILLISTE PARTS REPLACEMENT AUSTAUSCH VON TEILEN Parts marked with "å" are important for maintaining the safety of the set. Be sure to replace these parts with specified ones for maintaining the safety and performance of the set. Ersatzteile, die besondere Sicherheitseigenschften haben, sind in dieser Anleitung markiert.
PG-A20X Ref. No. ★ Part No.
PG-A20X Ref. No. ★ Part No.
PG-A20X Ref. No. Part No.
PG-A20X Ref. No. Part No.
PG-A20X Ref. No. Part No.
PG-A20X Ref. No. Part No. ★ Description Code Ref. No.
PG-A20X Ref. No. Part No.
PG-A20X Ref. No. Part No.
PG-A20X Ref. No. ★ Part No.
PG-A20X Ref. No. Part No. ★ Description Code RDENCA029WJN1 95C0R3Q0V6820 95C0R390T1000 95C0R390T3320 95C0R3Q0V5610 95C0R3Q0V1020 95C0R3Q0V1030 95C0R3Q1V2220 95C0R3Q1V1820 95C0R3Q0V3320 95C0R3Q0V6810 95C0R3Q0V3330 95C0R3Q0V5630 95C0R3Q0V1830 J J J J J J J J J J J J J 6.8k 10 3.3k 560 1k 10k 2.2k 1.8k 3.
PG-A20X Part No. ★ Description Code Ref. No. Part No. CABINET AND MECHANICAL PARTS ★ Ref. No.
PG-A20X Ref. No. ★ Part No. Description Code Ref. No.
PG-A20X Part No. ★ Description Code Ref. No. OPTICS MECHANISM PARTS Ref. No. Part No.
PG-A20X Ref. No. Part No. ★ Description Code å J J J J J å QACCDA016WJPZ J å QACCVA006WJPZ J å QACCLA005WJPZ J QCNWGA012WJPZ TiNS-A850WJZZ UDSKAA037WJZZ TLABZA191WJZZ J J J J Extra Air Filter Carrying Bag Remote Control Unit Battery Cover AC Cord (for U.K., Hong Kong and Singapore) AC Cord (for USA and Canada) AC Cord (for Europe except U.K.
PG-A20X Part No. ★ Description Ref. No. Part No. ★ Description PACKING OF THE SETCode / VERPACKEN DES GERÄTS Ref. No.
PG-A20X COPYRIGHT © 2003 BY SHARP CORPORATION ALL RIGHTS RESERVED. No part of this publication may be reproduced, stored in a retrieval system, or transmitted in any form or by any means, electronic, mechanical, photocopying, recording, or otherwise, without prior written permission of the publisher. TQ1601-S Aug. 2003 Printed in Japan Design and Production Information Design : Japan Production : Japan SY.