
Specifications

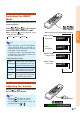
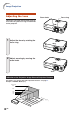
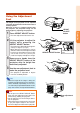
Table Of Contents
- Introduction
- Basic Operation
- Projection
- Functions
- Using the Menu
- Menu Items
- Using the Menu Screen
- Picture Adjustment
- Computer Image Adjustment
- Using the “Options” Menu
- Lamp Timer (Life) (Checking the Lamp Life Status)
- OSD Display (Setting On-screen Display)
- Video System (Setting the Video System)
- Background (Selecting a Startup and Background Image)
- Eco Mode (Setting the Eco Mode)
- Auto Power Off (Auto Power Off Function)
- Menu Position (Selecting the Menu Screen Position)
- Menu Color (Selecting the Menu Color)
- Password (Setting a Password)
- If You Forget Your Password
- Anti-Theft (Setting the Anti-Theft)
- Using the “Language” Menu
- Using the “PRJ Mode” Menu
- Connections
- Screen Setup
- Appendix
-23
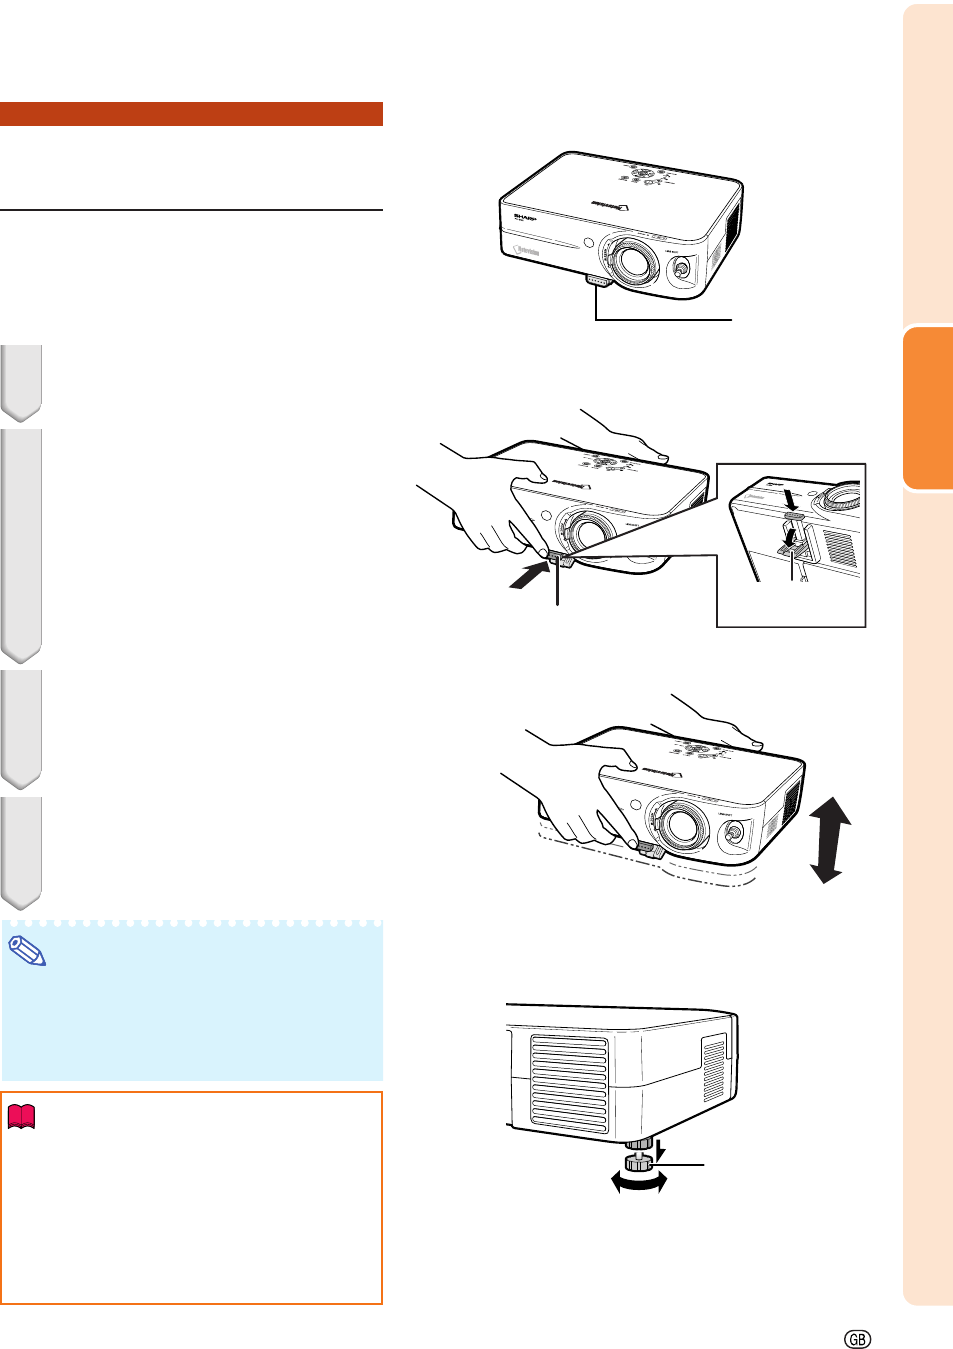
Projection
Using the Adjustment
Feet
The height of the projector can be adjusted
using the adjustment feet at the front and rear
of the projector.
When the screen is in a higher position than
the projector, the projection image can be
made higher by adjusting the projector.
1 Press HEIGHT ADJUST button.
• The front adjustment foot comes out.
2 Lift the projector to adjust its
height while pressing the
HEIGHT ADJUST button.
• The projector is adjustable up to approxi-
mately 12 degrees (5 steps).
• When lowering the projector, it may be
difficult to move the front adjustment foot
because the installation surface is diffi-
cult to slide. In this case, pull the pro-
jector back slightly and adjust its height.
3 Remove your hands from the
HEIGHT ADJUST button of the
projector after its height has
been finely adjusted.
4 Use the rear adjustment foot to
make the projector level.
• The projector is adjustable ±1 degree
from the standard position.
Note
• When the height of the image is being ad-
justed by the adjustment feet, the image be-
comes distorted trapezoidally. In this case,
see “Correcting Trapezoidal Distortion” on the
page 20 to correct the trapezoidal distortion.
Info
• Do not press the HEIGHT ADJUST button
when the front adjustment foot comes out
without firmly holding the projector.
• Do not hold the lens when lifting or lower-
ing the projector.
• When lowering the projector, be careful not
to get your fingers caught in the area be-
tween the adjustment foot and the projector.
HEIGHT
ADJUST
button
HEIGHT ADJUST button
Front adjustment
foot
Rear adjustment
foot
HEIGHT ADJUST button