
Specifications
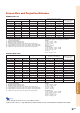
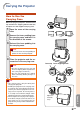
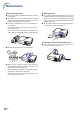
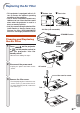
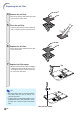
Table Of Contents
- Introduction
- Basic Operation
- Projection
- Functions
- Using the Menu
- Menu Items
- Using the Menu Screen
- Picture Adjustment
- Computer Image Adjustment
- Using the “Options” Menu
- Lamp Timer (Life) (Checking the Lamp Life Status)
- OSD Display (Setting On-screen Display)
- Video System (Setting the Video System)
- Background (Selecting a Startup and Background Image)
- Eco Mode (Setting the Eco Mode)
- Auto Power Off (Auto Power Off Function)
- Menu Position (Selecting the Menu Screen Position)
- Menu Color (Selecting the Menu Color)
- Password (Setting a Password)
- If You Forget Your Password
- Anti-Theft (Setting the Anti-Theft)
- Using the “Language” Menu
- Using the “PRJ Mode” Menu
- Connections
- Screen Setup
- Appendix
-62
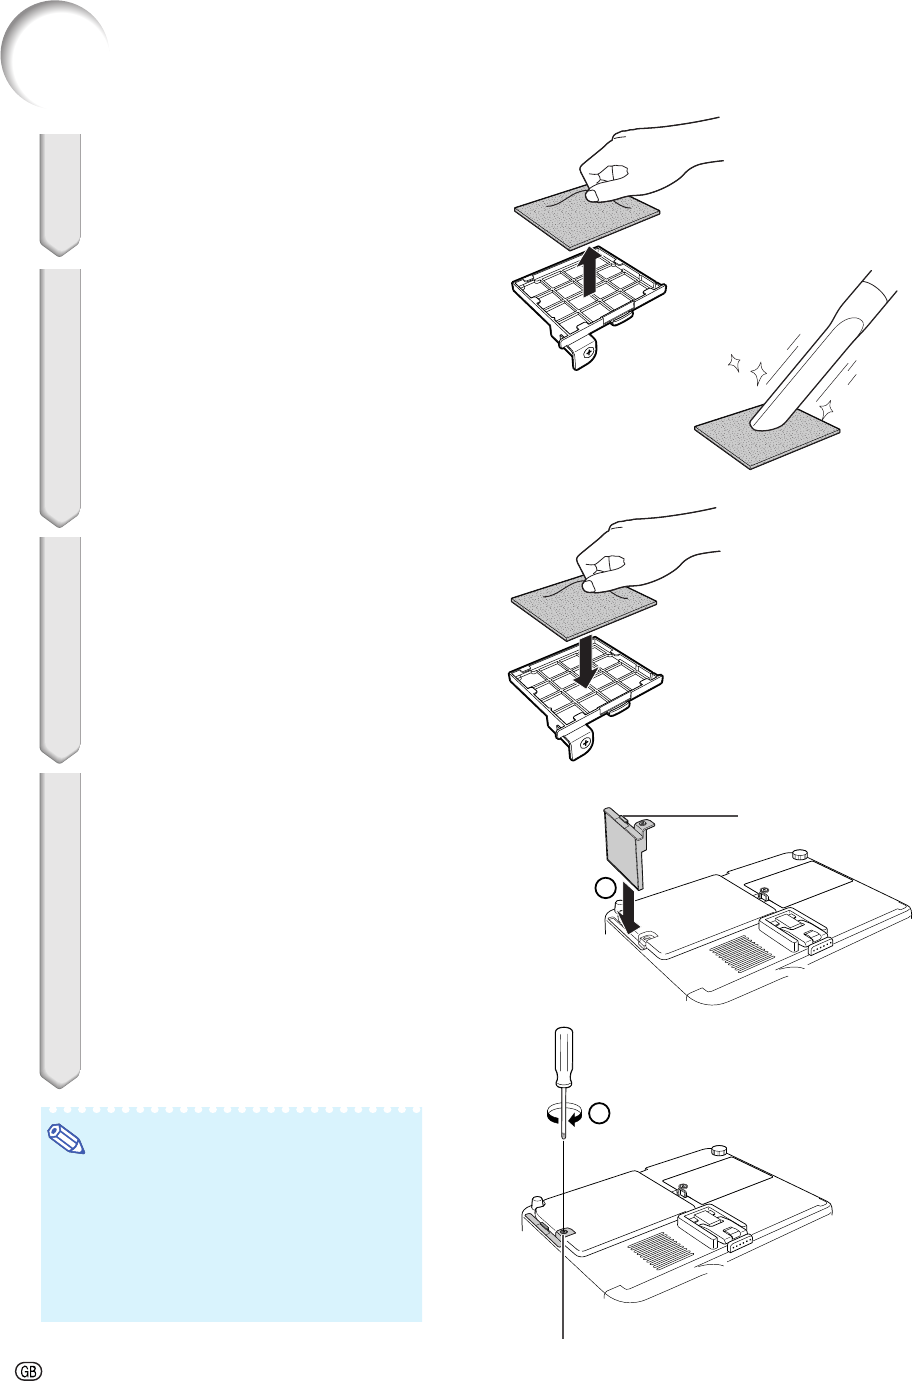
4 Remove the air filter.
• Pick the air filter up with your fingers and
lift it out of the filter cover.
5 Clean the air filter.
• Clean the dust off the air filter and cover
with a vacuum cleaner extension hose.
6 Replace the air filter.
• Place the air filter underneath the tabs
on the filter cover.
7 Replace the filter cover.
• Align the tab on the filter cover and place
it while pressing the tab to close it (1).
Then tighten the user service screw (2)
to secure the filter cover.
1
2
Tab
User service screw
Replacing the Air Filter
Note
• Be sure the filter cover is securely installed.
The power will not turn on unless it is
correctly installed.
• If dust or dirt has collected inside the rear
and bottom air filters (not removable), clean
the filter with a vacuum cleaner extension
hose.