
Specifications
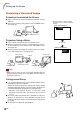
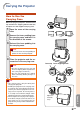
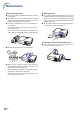
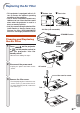
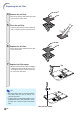
Table Of Contents
- Introduction
- Basic Operation
- Projection
- Functions
- Using the Menu
- Menu Items
- Using the Menu Screen
- Picture Adjustment
- Computer Image Adjustment
- Using the “Options” Menu
- Lamp Timer (Life) (Checking the Lamp Life Status)
- OSD Display (Setting On-screen Display)
- Video System (Setting the Video System)
- Background (Selecting a Startup and Background Image)
- Eco Mode (Setting the Eco Mode)
- Auto Power Off (Auto Power Off Function)
- Menu Position (Selecting the Menu Screen Position)
- Menu Color (Selecting the Menu Color)
- Password (Setting a Password)
- If You Forget Your Password
- Anti-Theft (Setting the Anti-Theft)
- Using the “Language” Menu
- Using the “PRJ Mode” Menu
- Connections
- Screen Setup
- Appendix
-66
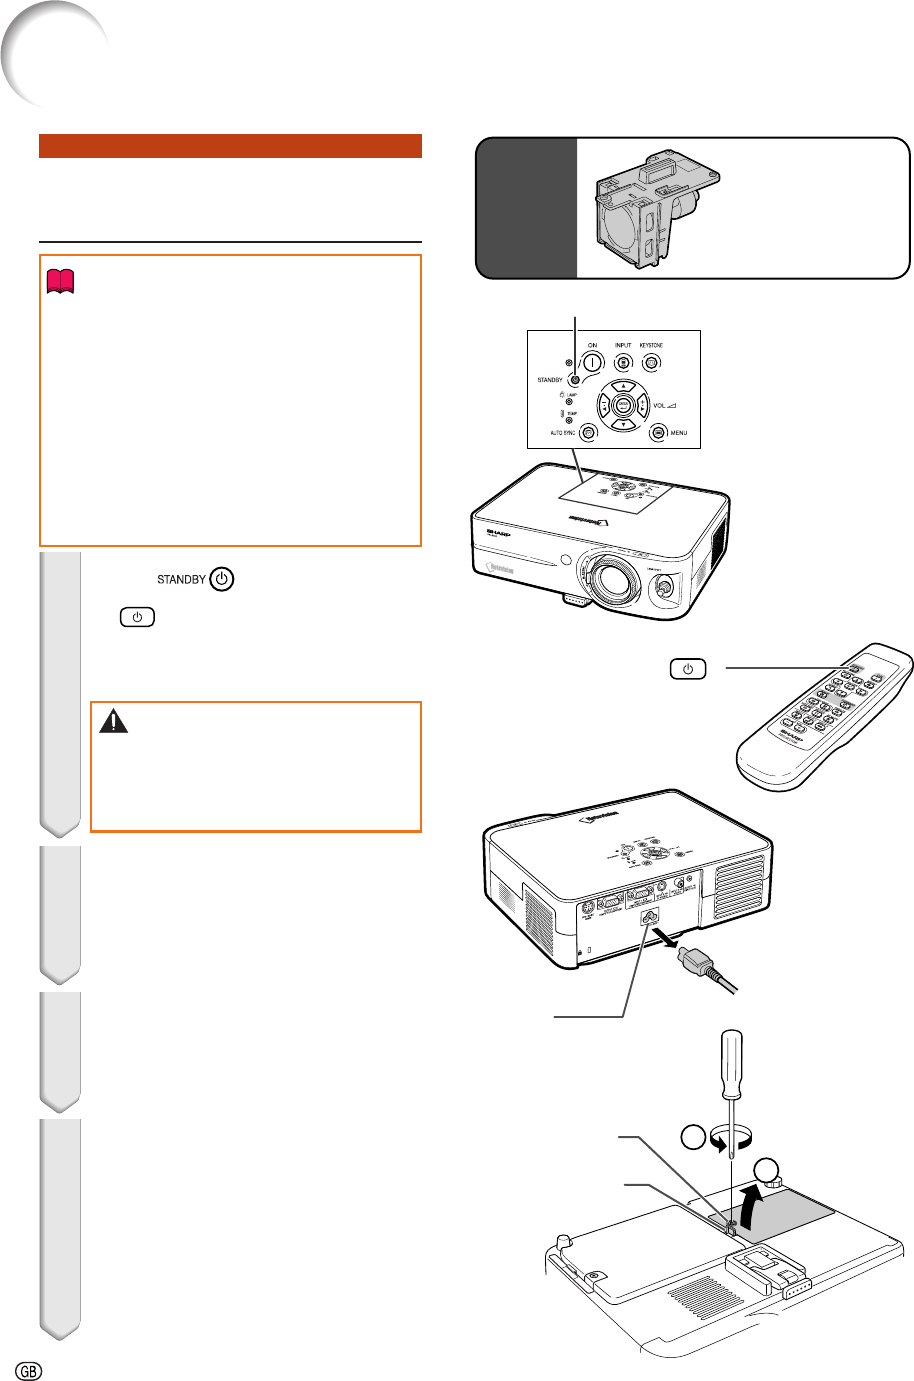
Lamp
unit
BQC-PGB10S//1
Removing and Installing
the Lamp Unit
Info
• Be sure to remove the lamp unit using the
handle. Be sure not to touch the glass sur-
face of the lamp unit or the inside of the
projector.
• To avoid injury to yourself and damage to
the lamp, be sure to carefully follow the
steps below.
• Do not loosen other screws except for the
lamp unit cover and lamp unit.
• Please refer to the installation manual in-
cluded with the lamp unit.
1 Press on the projector
or
STANDBY
on the remote control to
put the projector into the
standby mode.
• Wait until the cooling fan stops.
Warning!
• Do not remove the lamp unit from the
projector right after use. The lamp will
be very hot and may cause burn or
injury.
2 Disconnect the power cord.
• Unplug the power cord from the AC
socket.
• Leave the lamp until it has fully cooled
down (about 1 hour).
3 Change the air filter.
• Change the air filter whenever you in-
stall the lamp unit (see pages 61 and
62).
4 Remove the lamp unit cover.
• Turn the projector over. Loosen the user
service screw (1) that secures the lamp
unit cover. Pressing the tab, remove the
lamp unit cover (2).
1
2
AC socket
Tab
User
service screw
STANDBY button
STANDBY
button
STANDBY
Regarding the Lamp