
Specifications
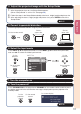
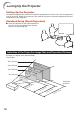
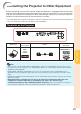
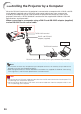
Table Of Contents
- Introduction
- Easy Start
- Setup
- Connections
- Basic Operation
- Useful Features
- Operating with the Remote Control
- Menu Items
- Using the Menu Screen
- Picture Adjustment (“Picture” Menu)
- Signal Adjustment (“SIG-ADJ” Menu)
- Adjusting the Projected Image (“SCR-ADJ” Menu)
- Adjusting the Projector Function (“PRJ-ADJ1/2” Menu)
- Auto Sync (Auto Sync Adjustment)
- Auto Power Off Function
- Auto Restart Function
- Speaker Setting
- Selecting the Transmission Speed (RS-232C)
- Fan Mode Setting
- System Lock Function
- Keylock Function
- Selecting the Quick Start Menu
- COMPUTER2 Select
- Setting the FUNCTION Button Operation
- STANDBY Mode
- DLP® LinkTM
- DLP® LinkTM Invert
- Returning to the Default Settings
- Checking the Lamp Life Status
- Setting Up the Projector Network Environment (“Network” Menu)
- Appendix
20
Setting Up the Projector (Continued)
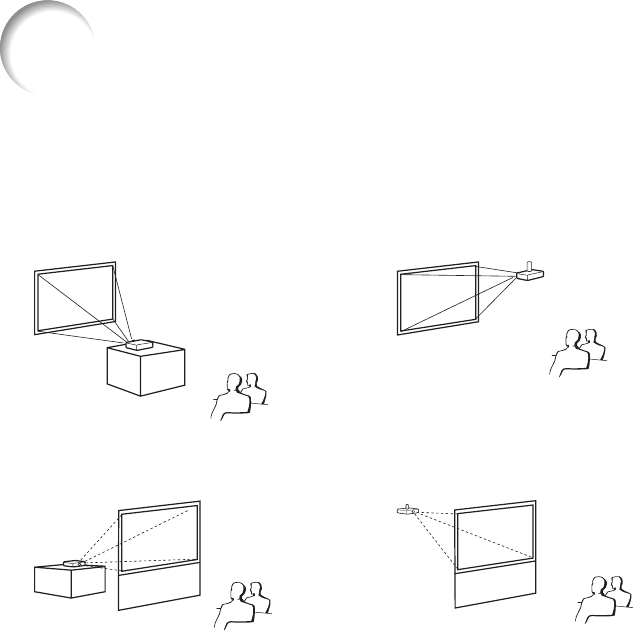
Projection (PRJ) Mode
The projector can use any of the 4 projection modes shown in the diagram below. Select the
mode most appropriate for the projection setting in use. (You can set the PRJ mode in “SCR-
ADJ” menu. See page 49.)
Table mounted, front projection
[Menu item ➞ “Front”]
Table mounted, rear projection
(with a translucent screen)
[Menu item ➞ “Rear”]
■
■
Ceiling mounted, front projection
[Menu item ➞ “Ceiling + Front”]
Ceiling mounted, rear projection
(with a translucent screen)
[Menu item ➞ “Ceiling + Rear”]
■
■
a
Ceiling-Mount Setup
It is recommended that you use the optional Sharp ceiling-mount adaptor and unit for this
installation. Before mounting the projector, contact your nearest Sharp Authorized Projector
Dealer or Service Center to obtain the recommended ceiling-mount adaptor and unit (sold
separately).