ENGLISH FRANÇAIS PN-E703 PN-E603 ESPAÑOL LCD MONITOR MONITEUR LCD MONITOR LCD LCD FARBMONITOR ЖК МОНИТОР DEUTSCH 香港電器安全規格 (國際電工委員會規格適合) РУССКИЙ SETUP MANUAL MANUEL D’INSTALLATION MANUAL DE INSTALACIÓN INSTALLATIONSANLEITUNG РУКОВОДСТВО ПО УСТАНОВКЕ ENGLISH ...... E1 FRANÇAIS ..... F1 ESPAÑOL .... S1 DEUTSCH ..... D1 РУССКИЙ...... Р1 ( .
NOTE FOR USERS IN U.K. IMPORTANT The wires in this mains lead are coloured in accordance with the following code: BLUE: “NEUTRAL” BROWN: “LIVE” CONNECTING PLUG TO MAINS LEAD: As the colours of the wires in the mains lead of this apparatus may not correspond with the coloured markings identifying the terminals in your plugs, proceed as follows: • The wire which is coloured BLUE must be connected to the terminal which is marked with the letter N or coloured BLACK.
Contents Turning Power On/Off ......................................................7 Specifications ..................................................................8 Mounting Precautions (For SHARP dealers and service engineers) .................8 ENGLISH IMPORTANT INFORMATION............................................1 DEAR SHARP CUSTOMER..............................................1 SAFETY PRECAUTIONS..................................................2 SAFETY INSTRUCTION ...........................
SAFETY PRECAUTIONS Electricity is used to perform many useful functions, but it can also cause personal injuries and property damage if improperly handled. This product has been engineered and manufactured with the highest priority on safety. However, improper use can result in electric shock and/or fire. In order to prevent potential danger, please observe the following instructions when installing, operating and cleaning the product.
SAFETY PRECAUTIONS (Continued) WARNING: This is a Class A product. In a domestic environment this product may cause radio interference in which case the user may be required to take adequate measures. ENGLISH 21. Do not stay in contact with the parts of the product that become hot for long periods of time. Doing so may result in low-temperature burns. 22. Do not modify this product.
MOUNTING PRECAUTIONS • This product is for use indoors. • A mounting bracket compliant with VESA specifications is required. • Since the monitor is heavy, consult your dealer before installing, removing or moving the monitor. • Mounting the monitor on the wall requires special expertise and the work must be performed by an authorized SHARP dealer. You should never attempt to perform any of this work yourself.
Supplied Components Liquid Crystal Display Monitor: 1 Remote control unit: 1 Cable clamp: 2 Power cord R-6 battery (“AA” size): 2 CD-ROM (Utility Disk for Windows): 1 Setup Manual (this manual): 1 Vertical sticker (Logo): 1 Cover SHARP logo: 1 Place this sticker onto the SHARP logo to cover the logo. ENGLISH If any component should be missing, please contact your dealer. * SHARP Corporation holds authorship rights to the Utility Disk program. Do not reproduce it without permission.
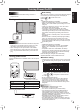
Connections Caution • Be sure to turn off the main power switch and disconnect the plug from the power outlet before connecting/disconnecting cables. Also, read the manual of the equipment to be connected. • Be careful not to confuse the input terminal with the output terminal when connecting cables. Accidentally reversing cables connected to the input and output terminals may cause malfunctions and the other problems. 8 9 10 11 12 13 14 1 1. 2. 3. 4. 5. 6. 7. 8. 9. 10. 11. 12. 13. 14.
Turning Power On/Off • Turn on the monitor first before turning on the PC or playback device. Turning on the main power Main power switch Caution • The main power must be turned on/off with the main power switch. Do not connect/disconnect the power cord or turn the breaker on/off while the main power switch is on. • When switching the main power switch or the POWER button off and back on, always wait for at least 5 seconds. • For a complete electrical disconnection, pull out the main plug.
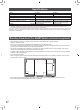
Specifications Model Power requirement Operating temperature * Operating humidity Power consumption Dimensions (excluding protrusions) Weight PN-E703 AC 100 - 240 V, 2.8 - 1.2 A, 50/60 Hz 32°F to 104°F (0°C to 40°C) 20% to 80% (no condensation) 225 W inch (mm) Approx. 62-1/8 (W) x 1-9/16 (D) x 36-1/16 (H) (1578 x 39.4 x 916) lbs. (kg) Approx. 94.8 (43) PN-E603 AC 100 - 240 V, 2.1 - 1.0 A, 50/60 Hz 180 W Approx. 54-1/4 (W) x 1-9/16 (D) x 31-1/4 (H) (1378 x 39.4 x 794) Approx. 70.
Table des matières INFORMATION IMPORTANTE .........................................1 CHER CLIENT ...................................................................1 PRÉCAUTIONS DE SÉCURITÉ .......................................2 MESURES DE SÉCURITÉ ................................................3 PRÉCAUTIONS POUR LE MONTAGE.............................4 Composants fournis ........................................................5 [FRANÇAIS] Préparation de la télécommande ................................
PRÉCAUTIONS DE SÉCURITÉ F 2 L’électricité remplit de nombreuses fonctions utiles, mais elle peut provoquer des blessures et des dégâts matériels si elle n’est pas utilisée correctement. Cet appareil a été conçu et fabriqué en attachant la plus grande importance à la sécurité. Cependant, une utilisation inadéquate peut entraîner une décharge électrique et/ou un incendie.
PRÉCAUTIONS DE SÉCURITÉ (Suite) 21. N’entrez pas en contact direct avec les parties du produit ayant chauffé pendant de longues périodes. Il pourrait en résulter des brûlures à basse température. 22. Ne modifiez pas ce produit. AVERTISSEMENT : Il s’agit d’un appareil de classe A. Dans un environnement résidentiel, cet appareil peut provoquer des interférences radioélectriques. Dans ce cas, il peut être demandé à l’utilisateur de prendre des mesures appropriées.
PRÉCAUTIONS POUR LE MONTAGE • Ce produit est destiné à être utilisé en intérieur. • Un support de montage conforme aux spécifications VESA est nécessaire. • Comme le moniteur est lourd, consultez votre revendeur avant l’installation, le démontage ou le déplacement du moniteur. • Le montage du moniteur sur le mur demande des compétences techniques spéciales et le travail doit être fait par un revendeur agréé par SHARP. Vous ne devez jamais tenter de faire ce travail vous-même.
Composants fournis Si un composant venait à manquer, veuillez contacter votre revendeur. * SHARP Corporation détient les droits d’auteur du programme de l’Utility Disk. Veuillez ne pas le reproduire sans autorisation de la société. * Pensez à votre environnement ! Ne pas jeter les piles avec les ordures ménagères, exige un traitement spécial.
Connexions Attention • Veillez à bien mettre hors tension l’interrupteur principal puis débranchez la prise de l’alimentation secteur avant de connecter ou de déconnecter les câbles. Lisez également le manuel de l’équipement à connecter. • Veillez à ne pas confondre la borne d’entrée avec la borne de sortie quand vous connectez les câbles. En confondant les câbles branchés aux bornes d’entrée et de sortie, vous pouvez causer des dysfonctionnements et d’autres problèmes. 8 9 10 11 12 13 14 1 1. 2. 3. 4. 5.
Mise sous tension et hors tension nRéglage des paramètres Attention • Mettez sous tension le moniteur d’abord avant de mettre sous tension le PC ou l’équipement de lecture. Mise sous tension de l’interrupteur principal Attention • La mise sous/hors doit être effectuée à l’aide de l’interrupteur d’alimentation. Ne branchez/débranchez pas le cordon d’alimentation ou ne mettez pas le disjoncteur sous/hors tension lorsque l’interrupteur d’alimentation est en position marche.
Caractéristiques Modèle Alimentation Température de fonctionnement * Hygrométrie de fonctionnement Consommation électrique Dimensions (à l’exclusion des éléments qui dépassent) Poids PN-E703 CA 100 - 240 V, 2.8 - 1.2 A, 50/60 Hz 0°C à 40°C 20 % à 80 % (sans condensation) 225 W (mm) Environ 1578 (L) x 39,4 (P) x 916 (H) (kg) Environ 43 PN-E603 CA 100 - 240 V, 2.1 - 1.
Índice INFORMACIÓN IMPORTANTE.........................................1 ESTIMADO CLIENTE DE SHARP ....................................1 PRECAUCIONES DE SEGURIDAD .................................2 INSTRUCCIONES DE SEGURIDAD ................................3 PRECAUCIONES DE MONTAJE......................................4 Componentes suministrados .........................................5 [ESPAÑOL] Preparación de la Unidad de control remoto ................5 Conexiones ......................................
PRECAUCIONES DE SEGURIDAD La electricidad se emplea para muchas funciones útiles pero también puede causar lesiones personales y daños en la propiedad si se manipula de forma inadecuada. Este producto se ha diseñado y fabricado poniendo el máximo énfasis en la seguridad. No obstante, el uso inadecuado podría tener como resultado descargas eléctricas y/o incendios. Para evitar peligros potenciales, observe las siguientes instrucciones cuando instale, utilice y limpie el producto.
PRECAUCIONES DE SEGURIDAD (Continuación) 20. El monitor no deberá utilizarse en lugares con riesgos o peligros fatales que pudieran provocar directamente la muerte, lesiones personales, daños físicos graves u otras pérdidas, incluyendo control de reacción nuclear en instalaciones nucleares, sistemas médicos de soporte vital y control de lanzamiento de misiles en sistemas armamentísticos. 21. No permanezca en contacto durante períodos prolongados de tiempo con componentes del producto que se recalienten.
PRECAUCIONES DE MONTAJE • Este producto es para uso en interiores. • Se requiere un soporte de montaje en conformidad con las especificaciones VESA. • Este monitor es pesado. Por consiguiente, consulte a su distribuidor antes de instalar, desinstalar o trasladar el monitor. • El montaje mural del monitor requiere un soporte especial y el trabajo deberá ser efectuado por un distribuidor autorizado de SHARP. Nunca deberá intentar realizar este trabajo usted mismo.
Componentes suministrados Si falta algún componente, póngase en contacto con su distribuidor. Monitor de pantalla de cristal líquido: 1 Control remoto: 1 Abrazadera para cable: 2 Cable de alimentación Pila de tamaño “R-6” (tamaño “AA”): 2 CD-ROM (Disco de utilidades para Windows): 1 Manual de Instalación (este manual): 1 Etiqueta vertical (Logotipo): 1 Cobertura logo SHARP: 1 Coloque esta etiqueta sobre el logotipo de SHARP para tapar el logotipo.
Conexiones Precaución • Asegúrese de apagar el interruptor primario y desconectar el enchufe de la toma de corriente antes de conectar/desconectar los cables. Asimismo, lea el manual del equipo que desea conectar. • Tenga cuidado de no confundir el terminal de entrada con el terminal de salida al conectar los cables. La inversión accidental de los cables conectados a los terminales de entrada y salida podría causar malfuncionamientos y otros problemas. 8 9 10 11 12 13 14 1 1. 2. 3. 4. 5. 6. 7. 8. 9. 10.
Encendido/apagado nAjustes del Modo Precaución • Encienda el monitor antes de encender el PC o el dispositivo de reproducción. Cuando se enciende el monitor por primera vez después de enviarlo de fábrica, se mostrará la pantalla de ajuste del modo. (1) Pulse o para seleccionar YES o NO. Encendido de la alimentación principal (2) Pulse Interruptor primario • La alimentación principal deberá encenderse/apagarse con el interruptor primario.
Especificaciones Modelo Requisitos de alimentación Temperatura de funcionamiento * Humedad de funcionamiento Consumo de energía Dimensiones (excluidas las protuberancias) Peso PN-E703 100 - 240 V ca, 2,8 - 1,2 A, 50/60 Hz 0°C a 40°C 20% al 80% (sin condensación) 225 W (mm) Aprox. 1578 (An) x 39,4 (Pr) x 916 (Al) (kg) Aprox. 43 PN-E603 100 - 240 V ca, 2,1-1,0 A, 50/60 Hz 180 W Aprox. 1378 (An) x 39,4 (Pr) x 794 (Al) Aprox.
Inhalt WICHTIGE INFORMATIONEN ..........................................1 VEREHRTE KUNDIN, VEREHRTER KUNDE ..................1 SICHERHEITSVORKEHRUNGEN ....................................2 SICHERHEITSANLEITUNG ..............................................3 WICHTIGE HINWEISE ZUR BEFESTIGUNG ...................4 Mitgelieferte Komponenten ............................................5 [DEUTSCH] Vorbereitung der Fernbedienung ...................................5 Anschlüsse ....................................
SICHERHEITSVORKEHRUNGEN D 2 Elektrizität erfüllt viele nützliche Aufgaben, kann aber auch Personen- und Sachschäden verursachen, wenn sie unsachgemäß gehandhabt wird. Dieses Produkt wurde mit Sicherheit als oberster Priorität konstruiert und hergestellt. Dennoch besteht bei unsachgemäßer Handhabung u.U. Stromschlag- und Brandgefahr. Um mögliche Gefahren zu vermeiden, befolgen Sie beim Aufstellen, Betreiben und Reinigen des Produkts bitte die nachstehenden Anleitungen.
SICHERHEITSVORKEHRUNGEN (Fortsetzung) 20. Bei der Verwendung des Monitors ist darauf zu achten, dass Gefahren für Leib und Leben, Schäden an Gebäuden und anderen Gegenständen sowie eine Beeinflussung von wichtigen oder gefährlichen Geräten, wie z.B. der Nuklearreaktionssteuerung in Atomanlagen, lebenserhaltenden Geräten in medizinischen Einrichtungen oder Raketenabschusssteuerungen in Waffensystemen vermieden werden. 21.
WICHTIGE HINWEISE ZUR BEFESTIGUNG • Dieses Produkt ist nicht für den Gebrauch im Freien gedacht. • Ein Montagewinkel, der den VESA-Spezifikationen entspricht, ist erforderlich. • Da der Monitor sehr schwer ist, sollten Sie Ihren Händler vor dem Befestigen, Abmontieren oder Transportieren des Monitors um Rat fragen. • Für die Wandbefestigung des Monitors sind Spezialkenntnisse erforderlich. Diese Arbeit darf daher nur von einem autorisierten SHARP-Händler durchgeführt werden.
Mitgelieferte Komponenten Sollte eine der angeführten Komponenten fehlen, kontaktieren Sie bitte Ihren Händler. LCD-Monitor: 1 Fernbedienung: 1 Kabelbinder: 2 Netzkabel R-6 Batterie (Größe “AA”): 2 CD-ROM (Utility Disk für Windows): 1 Installationsanleitung (diese Anleitung): 1 Vertikaler Aufkleber (Logo): 1 SHARP-Logo-Aufkleber: 1 Um das Logo zu verdecken, überkleben Sie das SHARP-Logo mit diesem Aufkleber. * Die SHARP Corporation besitzt die Autorenrechte am Utility Disk Programm.
Anschlüsse Vorsicht • Schalten Sie unbedingt den Hauptschalter aus und ziehen Sie den Netzstecker, bevor Sie Kabel anschließen oder abziehen. Lesen Sie auch das Handbuch des Gerätes, das Sie an den Monitor anschließen möchten. • Verwechseln Sie beim Anschließen nicht die Signaleingänge mit den Signalausgänge. Dies könnte zu Fehlfunktionen und anderen Problemen führen. 8 9 10 11 12 13 14 1 1. 2. 3. 4. 5. 6. 7. 8. 9. 10. 11. 12. 13. 14.
Ein- und ausschalten nEinstellung von Modus Vorsicht • Schalten Sie zuerst den Monitor und erst danach den PC oder ein anderes Wiedergabegerät ein. Einschalten des Netzstroms Wenn der Monitor nach der Auslieferung ab Werk zum ersten Mal eingeschaltet wird, wird das Modus-Einstellfenster angezeigt. (1)Drücken Sie auf oder , um YES oder NO auszuwählen. ENTER Hauptnetzschalter Vorsicht • Die Hauptstromversorgung muss mithilfe des Hauptnetzschalters ein- und ausgeschaltet werden.
Technische Daten Technische Daten Modell Leistungsaufnahme Betriebstemperatur * Relative Luftfeuchtigkeit Stromverbrauch Abmessungen (ohne Vorsprünge) Gewicht PN-E703 AC 100 - 240 V, 2,8 - 1,2 A, 50/60 Hz 0°C bis 40°C 20% bis 80% (Keine Kondensation) 225 W (mm) Ca. 1578 (W) x 39,4 (D) x 916 (H) (kg) Ca. 43 PN-E603 AC 100 - 240 V, 2,1 - 1,0 A, 50/60 Hz 180 W Ca. 1378 (W) x 39,4 (D) x 794 (H) Ca.
Содержание ВАЖНАЯ ИНФОРМАЦИЯ ...............................................1 УВАЖАЕМЫЙ КЛИЕНТ КОМПАНИИ SHARP ...............1 ПРАВИЛА ТЕХНИКИ БЕЗОПАСНОСТИ ........................2 Инструкции по безопасности .......................................3 МЕРЫ ПРЕДОСТОРОЖНОСТИ ПРИ КРЕПЛЕНИИ .....4 Комплектные принадлежности....................................5 Подготовка пульта дистанционного управления .....5 [РУССКИЙ] Соединения .....................................................................
ПРАВИЛА ТЕХНИКИ БЕЗОПАСНОСТИ Электричество используется для выполнения многих полезных функций, но оно также может причинять травмы персоналу и быть причиной повреждения имущества в случае неправильного обращения с ним. Данное изделие спроектировано и произведено с обеспечением максимальной безопасности. Однако неправильная эксплуатация может привести к поражению электрическим током и/или возникновению пожара.
ПРАВИЛА ТЕХНИКИ БЕЗОПАСНОСТИ (Продолжение) • Не используйте батарейки различных типов. Напряжение батареек одинаковой формы может отличаться. • Оперативно заменяйте разрядившуюся батарейку новой. • Если вы предполагаете не пользоваться пультом дистанционного управления длительное время, извлеките из него батарейки. • Если жидкость из батарейки попала на вашу кожу или одежду, немедленно и тщательно промойте их.
МЕРЫ ПРЕДОСТОРОЖНОСТИ ПРИ КРЕПЛЕНИИ • Монитор предназначен для эксплуатации в помещении. • Требуется крепежный кронштейн, соответствующий спецификации VESA. • Поскольку монитор имеет большой вес, проконсультируйтесь с дилером перед его установкой, снятием или перемещением. • Крепление монитора к стене требует специальных навыков, поэтому такая работа должна выполняться специалистами компании SHARP. Вам не следует предпринимать попыток сделать эту работу самостоятельно.
Комплектные принадлежности В случае отсутствия какого-либо компонента, свяжитесь со своим дилером. Монитор с жидкокристаллическим дисплеем: 1 Пульт дистанционного управления: 1 Зажим кабеля: 2 Шнур питания Батарейки R-6 (тип “AA”): 2 Компакт-диск (Компакт-диск с сервисными программами для Windows): 1 Руководство по установке (это руководство): 1 Вертикальный стикер (Логотип): 1 Стикер для логотипа SHARP: 1 Наклейте стикер на логотип SHARP, чтобы закрыть его.
Соединения Внимание • Проверьте, что вы выключили главный выключатель питания и вынули вилку из электрической розетки, прежде чем присоединять/отсоединять кабели. Также прочтите руководство пользователя того оборудования, которое будет подсоединяться. • Будьте внимательны и не перепутайте при подсоединении кабелей входной и выходной разъемы. Если кабели, подсоединенные к входному и выходному разъемам, будут случайно перепутаны, это может стать причиной возникновения неисправностей и других проблем.
Включение/выключение питания nУстановка режима Внимание • Включите монитор до того, как будет включен ПК или устройство воспроизведения. Подключение электропитания Главный выключатель питания Внимание • Питание должно включаться и выключаться с помощью основного выключателя. Не подсоединяйте/ отсоединяйте шнур питания и не меняйте положение выключателя, когда основной выключатель питания находится во включенном положении.
Спецификации Модель Требование к электропитанию Рабочая температура * Рабочая влажность Потребляемая мощность Размеры (исключая выступы) Вес PN-E703 AC 100 - 240 В, 2,8 - 1,2 A, 50/60 Гц 0°C - 40°C 20% - 80% (без конденсации) 225 Вт (мм) Прибл. 1578 (Ш) x 39,4 (Г) x 916 (В) (кг) Прибл. 43 PN-E603 AC 100 - 240 В, 2,1 - 1,0 A, 50/60 Гц 180 Вт Approx. 1378 (Ш) x 39,4 (Г) x 794 (В) Прибл.
WARNING This is a Class A product. In a domestic environment this product may cause radio interference in which case the user may be required to take adequate measures. WARNUNG Dies ist ein Produkt der Klasse A. Dieses Produkt kann im Wohnbereich Funkstörungen verursachen. In diesem Fall kann vom Benutzer verlangt werden, entsprechende Maßnahmen zu ergreifen. ADVERTENCIA Este es un producto Clase A.
Printed in China Imprimé en Chine Impreso en China Gedruckt in China Отпечатано в Китае 16F YT1 TINSM1380MPZ1(1)