ENGLISH FRANÇAIS PN-L601B ESPAÑOL LCD MONITOR MONITEUR LCD MONITOR LCD SETUP MANUAL MANUEL D’INSTALLATION MANUAL DE INSTALACIÓN ENGLISH ...... E1 FRANÇAIS..... F1 ESPAÑOL ....
IMPORTANT: To aid reporting in case of loss or theft, please record the product’s model and serial numbers in the space provided. The numbers are located in the rear of the product. Model No.: Serial No.: U.S.A. ONLY FOR CUSTOMERS IN U.K.
Contents Supplied Components......................................................5 Preparing the Remote Control Unit and the Touch Pen...................................................................5 Attaching the Holder........................................................5 Connections......................................................................6 Turning Power On/Of........................................................7 ENGLISH IMPORTANT INFORMATION......................................
SAFETY PRECAUTIONS Electricity is used to perform many useful functions, but it can also cause personal injuries and property damage if improperly handled. This product has been engineered and manufactured with the highest priority on safety. However, improper use can result in electric shock and/or fire. In order to prevent potential danger, please observe the following instructions when installing, operating and cleaning the product.
SAFETY PRECAUTIONS (Continued) WARNING: This is a class A product. In a domestic environment this product may cause radio interference in which case the user may be required to take adequate counter measures. ENGLISH 21. D o not stay in contact with the parts of the product that become hot for long periods of time. Doing so may result in low-temperature burns. If a monitor is not positioned in a sufficiently stable location, it can be potentially hazardous due to falling.
MOUNTING PRECAUTIONS • This product is for use indoors. • Since the monitor is heavy, consult your dealer before installing, removing or moving the monitor. • When installing, removing or moving the monitor, ensure that this is carried out by at least 2 people. • A mounting bracket compliant with VESA specifications is required. Do not use any screw holes other than VESA holes for installation.
Supplied Components Liquid Crystal Display Monitor: 1 Remote control unit: 1 Cable clamp: 2 Power cord R-6 battery (“AA” size): 2 CD-ROM (Utility Disk for Windows): 1 Setup Manual (this manual): 1 Stand hole protection cover: 2 Vertical sticker (Operation panel): 1 Eraser: 1 Holder: 1 (With 2 hook and loop fasteners) Vertical sticker (Logo): 1 Cover Sharp logo: 1 Touch pen: 1 Place this sticker onto the SHARP logo to Pen tip (for touch pen): 2 cover the logo.
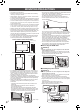
Connections Caution • Be sure to turn off the main power switch and disconnect the plug from the power outlet before connecting/disconnecting cables. Also, read the manual of the equipment to be connected. • Be careful not to confuse the input terminal with the output terminal when connecting cables. Accidentally reversing cables connected to the input and output terminals may cause malfunctions and the other problems. 1. 2. 3. 4. 5. 6. 7. 8. 9.
Turning Power On/Off • Turn on the monitor first before turning on the PC or playback device. Turning power on/off Press the POWER button or POWER switch to turn the power ON/OFF. Turning on the main power ENGLISH Caution Touch panel power LED Main power switch Power LED • Status of the power LED Status Caution • The main power must be turned on/off with the main power switch. Do not connect/disconnect the power cord or turn the breaker on/off while the main power switch is on.
Turning Power On/Off nDate/time setting • If the time has yet to be set when the monitor is first turned on, the date/time setting screen appears. Set the date and time. DATE/TIME SETTING / SET 20 / 10 / : 01 / 01 : 00 : 00 CANCEL OK···[MENU] 1. Press , , or to select the date and or to change the numerical time, and press values. 2. Select SET and then press MENU . • Be sure to set the date and time.
Table des matières INFORMATION IMPORTANTE..........................................1 CHER CLIENT....................................................................1 PRÉCAUTIONS DE SÉCURITÉ........................................2 MESURES DE SÉCURITÉ.................................................3 PRÉCAUTIONS POUR LE MONTAGE..............................4 [FRANÇAIS] Composants fournis.........................................................5 Préparation de la télécommande et du stylet................
PRÉCAUTIONS DE SÉCURITÉ L’électricité remplit de nombreuses fonctions utiles, mais elle peut provoquer des blessures et des dégâts matériels si elle n’est pas utilisée correctement. Cet appareil a été conçu et fabriqué en attachant la plus grande importance à la sécurité. Cependant, une utilisation inadéquate peut entraîner une décharge électrique et/ou un incendie.
PRÉCAUTIONS DE SÉCURITÉ (Suite) 21. N’entrez pas en contact direct avec les parties du produit ayant chauffé pendant de longues périodes. Il pourrait en résulter des brûlures à basse température. AVERTISSEMENT : Ce produit appartient à la Classe A. Dans un environnement résidentiel, il peut provoquer des interférences radio et, dans ce cas, l’utilisateur peut être obligé de prendre les mesures nécessaires.
PRÉCAUTIONS POUR LE MONTAGE • Ce produit est destiné à être utilisé en intérieur. • Comme le moniteur est lourd, consultez votre revendeur avant l’installation, le démontage ou le déplacement du moniteur. • L’installation, le démontage ou le déplacement du moniteur doit être fait par 2 personnes ou plus. • Un support de montage conforme aux spécifications VESA est nécessaire. N’utilisez pas de trous de vis autres que les trous standard VESA pour l’installation.
Composants fournis Si un composant venait à manquer, veuillez contacter votre revendeur.
Connexions Attention • Veillez à bien mettre hors tension l’interrupteur principal puis débranchez la prise de l’alimentation secteur avant de connecter ou de déconnecter les câbles. Lisez également le manuel de l’équipement à connecter. • Veillez à ne pas confondre la borne d’entrée avec la borne de sortie quand vous connectez les câbles. En confondant les câbles branchés aux bornes d’entrée et de sortie, vous pouvez causer des dysfonctionnements et d’autres problèmes. 1. 2. 3. 4. 5. 6. 7. 8. 9.
Mise sous tension et hors tension Attention • Mettez sous tension le moniteur d’abord avant de mettre sous tension le PC ou l’équipement de lecture. Mise sous/hors tension Appuyez sur la bouton POWER ou sur l’interrupteur d’alimentation pour mettre sous/hors tension.
Mise sous tension et hors tension nRéglage de la date/heure • Si l’heure doit être réglée lorsque le moniteur est mis sous tension pour la première fois, l’écran de réglage de la date/heure apparaît. Réglez la date et l’heure. DATE/TIME SETTING / SET 20 / 10 / : 01 / 01 : 00 : 00 CANCEL OK···[MENU] 1. Appuyez sur , , ou pour sélectionner la date et l’heure, puis appuyez sur ou pour changer les valeurs numériques. 2. Sélectionnez SET puis appuyez sur MENU .
Índice INFORMACIÓN IMPORTANTE..........................................1 ESTIMADO CLIENTE DE SHARP.....................................1 PRECAUCIONES DE SEGURIDAD..................................2 INSTRUCCIONES DE SEGURIDAD.................................3 PRECAUCIONES DE MONTAJE.......................................4 [ESPAÑOL] Componentes suministrados..........................................5 Preparación de la Unidad de control remoto y el Lápiz sensible al tacto.....................................
PRECAUCIONES DE SEGURIDAD La electricidad se emplea para muchas funciones útiles pero también puede causar lesiones personales y daños en la propiedad si se manipula de forma inadecuada. Este producto se ha diseñado y fabricado poniendo el máximo énfasis en la seguridad. No obstante, el uso inadecuado podría tener como resultado descargas eléctricas y/o incendios. Para evitar peligros potenciales, observe las siguientes instrucciones cuando instale, utilice y limpie el producto.
PRECAUCIONES DE SEGURIDAD (Continuación) 21. N o permanezca en contacto durante períodos prolongados de tiempo con componentes del producto que se recalienten. Podrían producirse quemaduras de baja temperatura. ADVERTENCIA: Éste es un producto de clase A. En un entorno doméstico, este producto puede causar interferencias de radio, en cuyo caso el usuario deberá adoptar las medidas adecuadas para solucionar el problema.
PRECAUCIONES DE MONTAJE • Este producto es para uso en interiores. • Este monitor es pesado. Por consiguiente, consulte a su distribuidor antes de instalar, desinstalar o trasladar el monitor. • Cuando instale, desinstale o traslade el monitor, asegúrese de agarrarlo entre 2 personas como mínimo. • Se requiere un soporte de montaje en conformidad con las especificaciones VESA. No utilice orificios de tornillos que no sean orificios VESA para la instalación.
Componentes suministrados Si falta algún componente, póngase en contacto con su distribuidor.
Conexiones Precaución • Asegúrese de apagar el interruptor primario y desconectar el enchufe de la toma de corriente antes de conectar/desconectar los cables. Asimismo, lea el manual del equipo que desea conectar. • Tenga cuidado de no confundir el terminal de entrada con el terminal de salida al conectar los cables. La inversión accidental de los cables conectados a los terminales de entrada y salida podría causar malfuncionamientos y otros problemas. 1. 2. 3. 4. 5. 6. 7. 8. 9.
Encendido/apagado Precaución • Encienda el monitor antes de encender el PC o el dispositivo de reproducción. Encendido/apagado Pulse el botón POWER o el interruptor de encendido para encender/apagar. Encendido de la alimentación principal LED indicador de panel sensible al tacto Interruptor primario LED indicador de conexión • Estado del LED indicador de conexión Precaución • La alimentación principal deberá encenderse/apagarse con el interruptor primario.
Encendido/apagado nAjuste de fecha y hora • Si aún no se ha ajustado la hora al encender el monitor por vez primera, aparecerá la pantalla de ajuste de la fecha y la hora. Ajuste la fecha y la hora. DATE/TIME SETTING / SET 20 / 10 / : 01 / 01 : 00 : 00 CANCEL OK···[MENU] 1. Pulse , , o para seleccionar la fecha o para cambiar los valores y la hora y pulse numéricos. 2. Seleccione SET y, a continuación, pulse MENU . • Asegúrese de ajustar la fecha y la hora.
Printed in China Imprimé en Chine Impreso en China 10J KS2 TINSE1181MPZZ(2)