
User Manual
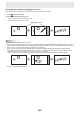
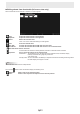

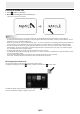
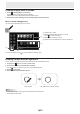
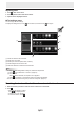
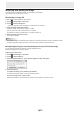
Table Of Contents
- Introduction
- Required Operating Environment
- Starting and Exiting the Software
- Layout of Basic Screen
- Saving and Sending a File by E-mail
- Opening Files
- Edit Operations
- Adding a board / changing the board to be edited
- Changing the sheet to edit
- Drawing with a Pen
- Erasing a drawn line
- Drawing shapes
- Drawing straight lines or arrows
- Drawing a shape with the figure pen
- Inputting text
- Searching for text and handwritten characters in the board
- Importing and pasting an image
- Editing an object
- Undo/redo operation
- Enlarging the view of the screen
- Using multiple touch pens simultaneously
- Launching an External Application (Full version only)
- Searching the Internet (Full version only)
- Importing a Document as an Image (Pen Software Printer Driver) (Full version only)
- Acquiring an Image From a Multifunction Machine
- Acquiring an image from a TWAIN device (Full version only)
- Linking to Microsoft PowerPoint (Full version only)
- Printing
- Using a Secondary Display (Full version only)
- Customizing the Settings
- Installing/Uninstalling the Software (Full version only)
- Intellectual Property Rights and Other Matters that Apply to This Software

26
E
Erasing a drawn line
1. Touch
“Eraser” in the menu.
2. With the pen touching the screen, move the pen.
The part you move over is erased.
TIPS
• You can switch through “Pen 1” to “Pen 3” and “Eraser” by repeatedly pressing Function Button 2 of a 2 button pen.
To change functions using Function Button 2, select the touch panel driver “Properties”, and set “Function Button 2” to “Pen
Software Link” on the “Operation Setting” tab.
When using 3 button pen, you can switch through “Pen 1” to “Pen 3” and “Eraser” by repeatedly pressing Function Button. To
use this function, set “Pen Software Link” to any function button on “Function Buttons” on “Advanced” in Touch Pen Utility.
• The eraser function can erase only the objects drawn with the pen function. You cannot use the “Eraser” button to erase
pasted images. You cannot use it either to erase the edges of a line to make the line thinner. Even if you erase the edges
only, the entire width of the line will be erased.
• An object drawn with the pen function cannot be erased if it is part of a group.
• If “Automatically Find Eraser” is set (page 49) and “Pen 1” to “Pen 3” or “Eraser” is selected on the PN-L series/PN-C series,
you can erase with the eraser.
Touch the screen with the eraser, and after the cursor changes to the eraser, move the eraser.
In this case, the eraser size of the eraser is the area of the screen that is touched.
n
Changing the eraser size
The size of the eraser can be changed in the “Eraser” settings menu.
To display the settings menu, touch
“Eraser” to select it, and then touch “Eraser” again.
To delete all objects from the sheet currently being edited, touch “Clear Sheet”.
When the conrmation dialog box appears, touch “Yes”.