
Manual


|UNPACKING AND INSTALLATION INSTRUCTIONS
5 TOOLSRECOMMENDEDFORINSTALLATION
• Phillips Screwdriver
• Electric Drill
• 1/2", 5/8" and 3/32" Drill Bits
• 1-1/2" Wood Bit or Metal Hole Cutter
(if metal cabinet is used)
• Saw to cut exhaust opening • Scissors
(if needed) • Pencil
• Protective Drop Cloth for product and
• Measure
range - you may also use carton for
protection • Tape
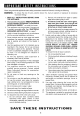
6 INSTALLATIONHARDWARE
The INSTALLATION HARDWARE items 1_ - (_) are in a small bag. Items (_) - _ are packed separately. All items
are in a small carton packed below the oven.
ITEM NAME QUANTITY PART CODE
(_ Wood Screw 5 X 30 mm 6* XTSSD50P35000
Toggle Bolt with nuts #10 - 24 X 50 mm 4** LX-BZ0195WRE0
(_ Top Cabinet Screw 5 X 60 mm 2 XBRSD50P60000
(_) Power Cord Hanger 1 LX-MZB001MRE0
(_ Tapping Screw 4 x 12 mm 8 XOTSE40P12000
(_) Flat Washer 30 mm diameter 2 XWHSD50-16300
(_ Grommet 1 LBSHC0040MRE0
_) Rear Cushion 1 PCUSUB059MRP0
(_) Exhaust Damper Assembly 1 FFTA-B005MRK0
_) Scale Plate 2 LANG-B004MRP0
@ Grease Filter 2 PFIL-B008MRE0
@ Bottom Sash 1 HDEC-B001MRF0
* Mustusetwo- mayuseremainingfour. **Maynotusealldependingon studlocation.
Figure 4
Partsshownnot to common scale.
¢ ® @ /_, ® ® ®
® ®
®
/ °
@