Contents Introduction 5 Your Ericsson R380e ................... 5 Documentation ............................ 5 Information and Communications Suite CD ...................................... 6 Getting Started 7 Checklist ...................................... 7 Operational modes ....................... 7 The Battery .................................. 8 The SIM card ............................. 11 Turning on and off ..................... 12 Flip closed ................................. 13 Flip open ...
Getting started with e-mail and WAP E-mail set up ............................ Automatically set up service provider and e-mail ..... Manually set up service provider and e-mail ..... Manually set up a service provider ....................... Manually set up e-mail ............ Sending an e-mail for the first time ....................... Using e-mail with several configurations installed Setting up WAP Services ........ WAP Profiles ........................... Automatically set up WAP ......
Ericsson R380e User’s Manual Third edition (September 2001) This manual is published by Ericsson Mobile Communications AB, without any warranty. Improvements and changes to this manual necessitated by typographical errors, inaccuracies of current information, or improvements to programs and/or equipment, may be made by Ericsson Mobile Communications AB at any time and without notice. Such changes will, however, be incorporated into new editions of this manual. All rights reserved.
Introduction Your Ericsson R380e Congratulations and thank you for buying the Ericsson R380e Smartphone, the ultimate mobile phone and personal digital assistant. This is an advanced, yet easy to use, product with a wide range of features, designed to make everyday life much easier. Your R380e gives you the freedom to communicate wherever you are and whenever you want.
Information and Communications Suite CD Insert the CD into your PC’s CD-ROM drive and the main menu should appear automatically. From the main menu you can start: A multimedia presentation, R380 Product Information, which is an on-screen description of the functions of the R380e. • The installation of the Ericsson R380 Communications Suite, for PC synchronization, backup and restore of R380e data.
Getting Started Checklist Make sure the following items are in the box when you unpack it: • R380e unit. • R380e battery with touchscreen stylus. • Charger with power plug and phone cable. • User’s Guides. • Quick Guide leaflets. • CD-ROM; Ericsson Mobile Communications and Information Suite which contains a multimedia presentation, Communications Suite software and the User’s Manual (pdf). • RS-232 cable for R380e to PC connectivity. • Desk stand. • 3 extra touchscreen styluses. • Battery leaflet.
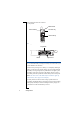
The operational modes are as follows: 1. Flip closed. Status indicator Volume slider key Voice memo key NETWORK 18-05-00 12:00 Power on/off key 2. Flip open. Program tabs A -Z Call Title bar Call log Settings Online services New ink note Program icons The Battery It is recommended that you charge the battery for 4 hours before you use the R380e for the first time.
When to charge the battery When the battery needs to be charged, a beep is heard, the indicator light (on the top of your R380e) blinks red and a battery low message appears in the display. The battery can also be charged whenever you wish without affecting the R380e’s performance. Note: The R380e automatically switches off if the voltage is too low. Charging Charge the battery by using the charger supplied with your R380e.
To insert the battery: 1. Ensure that the flip is closed. 2. First place the bottom of the battery into position and then push the upper section of the battery until it clicks into place. To charge the battery using the charger: 1. Make sure the battery is attached to your R380e. 2. Connect the charger to your R380e as follows: The flash symbol on the R380e plug must face upwards. Locate the flash symbol by the R380e connector.
Warning! The mains (power) supply plug may look different depending on the mains socket in your country. Do not connect the AC-plug-in unit to any other item than your Ericsson Travel Charger CTR-10. Do not separate it from the charger when plugged into the wall socket. Charging is indicated by: the battery meter on the display pulsing continuously. • the indicator on top of the R380e showing a steady red light (or green, if the R380e is switched on).
S IM S IM 3. Slide the SIM card into the SIM card holder. 4. Replace the battery. Note: If you already have a SIM card that contains phone book entries then this information can be imported to your R380e. See “SIM card phone book import” on page 21. To remove the SIM card: Warning! Always disconnect the charger and other accessories from your phone before inserting and removing your SIM card. 1. Ensure that the R380e is turned off and the flip is closed. 2. Remove the battery. 3.
SIM card locked Enter PIN: **** Entering a Personal Identification Number (PIN) Some SIM cards are protected with a PIN code. If Enter PIN: appears in the display after you have turned on the R380e: 1. Enter your PIN code. If you make a mistake while entering your PIN, erase the incorrect entry by pressing clear. The code you enter appears as asterisks (*) in the display, unless 1 or 9 is entered as the first digit, i.e. calling an emergency number. YE S . 2.
Note: See “Troubleshooting” on page 201 if you do not reach standby mode. When in the ‘Standby mode’ you can make and receive calls, use the Phone book to make a call, view e-mail and SMS messages, view the current days events, appointments and to-dos and activate/deactivate a limited number of settings.
Finding and using the stylus The stylus is located in the holder on the battery, at the back. Gently pull the stylus so that it slides out. To replace it, push it back in until it fits into place. Locating and removing the stylus from the holder Note: The stylus is only used with the flip open touchscreen. Selection using the stylus To make your selection tap the screen lightly with the stylus.
The desktop On opening the flip, your R380e shows the equivalent or nearest function that was immediately active with the flip closed. For example, if a contact within the Phone book is displayed and the flip is opened, then the contacts record within Contacts appears in the display. Note: A desktop view is shown for functions that have no nearest equivalent between flip closed and flip opened.
5. Tap the program function and carry out your task. NETWORK 6. Tap Desktop icon C 1 2 3 18-05-2000 4 5 6 12:00 7 8 9 0+ # the desktop icon to return to the desktop. Note: When returning to the desktop from a particular program, its title bar and icons are displayed along with all the other tabs.
To enter the clock program: 1. Select the Extras tab to display the functions. Extras Notepad Clock Calculator Games System 2. Tap the Clock icon. A view is displayed in which time and date is shown. To select the current and destination time zone: and select Timezones. The Timezones view appears in the display. 1. Tap Timezones Auto timezone: Timezone display: Home zone: Daylight saving: Destination zone: UTC+0 UTC+0 2.
6. Select the Daylight saving section you want to change, i.e. Home or Destination, and select On or Yes. 7. Tap OK to accept and save any changes you have made to the time zones. The display returns to the World clock view. Note: If at any time during the above operation you decide to cancel, select . The display returns to World clock view. To set time: and select Set time. The Set time view appears in the display. 2.
To enter your personal details: 1. Select Contacts. Contacts Contents list New contact My personal details Find 2. Tap My personal details and enter your personal details. 3. Tap the first name entry section and enter your name. 4. Continue with the following fields by tapping the next field icon. A previous field icon now appears if you wish to go back. to display all your entered personal details. 5. Tap 6. Tap OK to save the information displayed and return to the desktop.
4. Tap once at the centre of each of the three calibration points in numerical order. 1 Calibrate touch screen Tap the centre of point 1 3 2 5. After touching the third calibration point, a ‘Calibration complete’ message appears in the display. Tap Yes to accept and save the new settings. The display now reacts accordingly. You are also returned automatically to the system functions display. to return to the desktop. 6.
6. Make any required modifications to the record, for example, assign the phone number and name to a specific Contacts field. Note: The newly created record(s) will have the imported phone number from the SIM card phone list entered as a mobile phone number as default. However, if the imported phone number is not a mobile number, you must re-assign the phone number to its correct label, i.e. work, home, etc.
Note: The digits are not displayed and are shown as asterisks (*) for security protection. A maximum of ten attempts are usually allowed. Contact your network operator if unsuccessful. Emergency calls are still available in this state. 2. If the unblocking key is accepted, a new PIN code entry display is shown. Enter your PIN code and then press .
Getting Started
Flip Closed This section of the manual describes what functions and settings are available with the flip closed. Operation of the various menus is achieved by directly pressing key combinations. Menu selections are shown in the display. Tip! It is recommended that you familiarize yourself with the flip closed functions and settings, as you would with any other mobile phone. However most general settings, which cover both the flip closed and flip open modes, are managed with the flip open.
4. Turn on the backlight. Slide the key up then down, or vice versa. Use the Voice Memo key to record a voice memo: 1. A long press (approximately 2 seconds) to start the memo. 2. Press again to stop the memo. Use the Voice Memo key to play a recorded voice memo: 1. Press to play the recorded memo. 2. Press again to stop the memo. Keypad functions Keys on the lower keypad or flip section of your R380e have one or more distinctive functions associated to them.
Disconnect the microphone (mute function) when a call is in progress, press and hold. • Mute the ring signal during an incoming call. • Put the R380e into silent mode, when in the standby mode press and hold. • • Use the phone book shortcut key to: Enter the phone book directly. Use the numeric keys to: Enter the digits 0 to 9.
Divert calls. All incoming calls (unconditional) are diverted to a defined number. Mute. The microphone is muted. ! Deciphering. The present call is no longer being encrypted and may not be private. This function is accompanied by an alarm warning. The indicator appears in the display until ciphering resumes, or the call ends (whichever is first). Note: Ciphering is a network feature that scrambles your calls and messages to provide additional privacy. Voice mail.
00:01 Call timer. Total call time information from start to finish. Conference. Indicates a multiparty call is in progress. +4355545678 Connection number. The number of the active connection, either an incoming or outgoing call. Note: It is not always possible to show an incoming call number due to restrictions where unknown or withheld appear in the display instead. Ericsson John Connection name.
Note: When abroad, other networks may be used on the condition that your home network operator has entered into agreements that allow you to use other operator networks. +4355545678 To make a domestic call: 1. Enter the area code and the phone number. The network, time and date disappear and the number to be dialled is shown. Note: To erase a single digit, press . To erase all digits, press and hold until the digits disappear.
User busy +465551234578 Ericsson John Retry? • When Retry? appears in the display: Press if you want to re-dial the number, or if you do not. If you press , the number will be re-dialled automatically until the call is answered or the maximum number of retry attempts has been reached. The type of connection failure (i.e. user busy, no answer) determines the number of retry attempts. If you press any key, or you receive a call while the Retry? function is active, then the re-dialling is interrupted.
Receiving and answering a call When you receive a call, the R380e rings, the indicator light on the top blinks green rapidly and the display shows Answer?. Incoming call +465554567890 Ericsson John Answer? To answer a call: to answer the call. 2. When the call is finished, press 1. Press . Rejecting a call • To reject a call: Press when the R380e rings. The call is rejected and a busy tone is sent to the caller. All calls can be rejected in this way. The display shows Busy tone sent.
• Tap and select Mute microphone. appears in the display. To resume the conversation tap and select Turn off mute. Using the display notepad During a call you can enter a phone number or DTMF tone in the display from the keypad as if it were a notepad. When you have finished the call, the number remains in the display. To call the number press . Switching DTMF tones on and off DTMF tones can be turned off in the Phone menu for the benefit of the remote party during a call. To turn DTMF tones on or off: 1.
You can enter a number of pauses, for example: PHONE NO p CODE1 p CODE2 p CODE3 When the call has been connected, the code following each pause character, is sent automatically after 3 seconds. Note: During a pause you can press immediately. to send the DTMF tones It is also possible to access DTMF numbers stored in the Phone book (flip closed) or Contacts (flip open) and to send the digits as DTMF tones during a call. See “Phone book” on page 44 and “New contact” on page 96 for how to store a number.
01:00 Last call Last call information When all calls are ended, a call summary appears in the display for three seconds before returning to the default standby mode. Using area information Area information is an impersonal text message that is sent simultaneously to all subscribers in a certain cell of a network. The information may be a local road report or a local taxi phone number, depending on your network area and your list of predefined channels.
Phone menu The Phone menu provides you with a number of options that can be selected, i.e. Lock keypad, Divert calls, etc. Other options become available when the first digit of a phone number is entered or if an active call is in progress. • To access the phone menu: From the standby mode, press is displayed. . A list of phone menu options Tip! When accessing the phone menus press to return to the main menus or press and hold (2 seconds) to return to the standby mode.
Silent mode All sounds can be silenced without changing individual settings. To activate the silent mode: 1. From the Phone menu, scroll to highlight Silent mode and press . . 2. Scroll to On and press All sounds are now muted. The R380e remains in phone menu standby mode with ‘Silent mode’ highlighted. To re-instate sounds, repeat the above steps and select Off. Tip! You can also activate and deactivate Silent mode by pressing and holding .
2. Scroll to On and press . The R380e remains in phone menu standby mode with ‘Increasing ring’ highlighted. To deactivate increasing ring, repeat the above process and select Off. Divert voice calls Voice Call Diversion can be switched on or off. The current status is initially highlighted when selected. The number to which voice calls are diverted will depend on the call diversion criteria set with the flip opened. See “Divert calls” on page 76. To divert voice calls: 1.
Next incoming allows you to change the setting so that you can receive a voice or data call. Once you have set your phone for a specific incoming call, it stays like this until you change it. The normal setting is Voice. When expecting a data incoming call you must therefore select data. To change the next call type: 1. From the Phone menu, scroll to highlight Next incoming and press . . The R380e 2.
Call handling options When a call is active, and depending on the type of call in progress, there are a number of Phone menu options that become available. For example, with a conference call, more menu options become available with regards to conference call handling requirements. See the table below for more information. Menu Option Function Release all Terminates all calls. Extract Select a party in the conference to have a private conversation with.
Call switching You can switch between an active call and a call on hold. • To switch between an active and a held call: From the Phone menu, scroll to highlight Switch calls and press . The active call is put on hold and the held call is made active. Call transfer You can transfer an active call to a call that is on hold, while disconnecting yourself from both calls.
2. Select the participant to be extracted and press . The extracted call is made active and the conference is put on hold. You can put a conference on hold and make another call, and then switch between the new call and the conference. To put the conference on hold and make a new call: to highlight Hold call and press . The conference is put on hold. . 2. Enter the number of the person you want to call and press The display shows the active call with the on hold conference call below it. 1.
Calendar The Calendar shows the current day's events, appointments and to do’s. To do’s are tasks that you have allocated yourself to do. When you scroll to view an event (an untimed commitment), appointment (a timed commitment) or to-do, you can use the left and right scroll buttons to see all of the description and, if a location is present, the location text enclosed in brackets. See “Calendar” on page 121 for information on how to manage the Calendar with the flip open.
Tip! When accessing the Inbox you can press to return to the main menus or press and hold to return to the standby mode. Tip! Opening the flip when accessing the Inbox will provide you with a more detailed view. Inbox E Ericsson John SMS +43155567890 E Cheong Hank To delete a message: until Inbox is highlighted. and scroll to the message you want to delete. 2. Press . 3. Press and hold to complete 4. A confirmation view is displayed, Press deletion. 1.
2. Press to select the name. The contact details are displayed. to highlight a number in the list. to make the call. 4. Press . 5. To end the call, press 3. Scroll Tip! An alternative method of dialling is to press a specific digit key associated with the stored position of a number within the phone book SIM card and then press to automatically dial the associated phone number, e.g. press and to dial the phone number stored in position 1 on the phone book SIM card.
Warnings Low battery warning The warning is activated if the battery is low and a ‘Low Battery’ message appears in the display. • Press or to acknowledge the warning. Insufficient storage space warning The warning is activated if there is insufficient storage space and an ‘Insufficient data storage space’ message appears in the display. The current store operation is cancelled. • Press or to acknowledge the warning.
Flip Open Guidelines Operation of the various programs with the flip open is achieved by directly tapping the touchscreen with the stylus. The stylus is located in the holder on the battery. For information on how to start your R380e, see “Turning on and off” on page 12. The stylus selection technique is generally described with the use of the word ‘tap’. Select is also used when there are a number of choices, for example in a list.
The program tabs are: 1. Phone, for telephone functions and settings. A -Z 2. Contacts, for contact functions. 3. Messaging, for various message functions. 4. Calendar, for agenda functions. 5. WAP Services, for Internet functions. 6. Extras, for additional tool functions, settings and games. Title bar The title bar appears directly under the program tabs and indicates which program tab is currently selected. It has no function when tapped.
Some useful program specific icons: Today - displays the view around the current date in Calendar. New - displays a view for creating a new entry. abc abc - displays the text entry keyboard. 123 123 - displays the number entry keyboard. aeo àëó - displays the special characters entry keyboard. Call Waiting - appears when you have chosen Ignore from the Call Offering/Waiting view. The button returns you to the Call Offering/Waiting view. Voice Dialling - appears if voice activated dialling is on.
Entering information Flip open has different input methods which can be used to ‘enter’ information. These input methods are: 1. On-screen keyboards for text characters and digits, used to tap out information which then appears in the display. 2. Handwriting recognition, used to write in the display with the stylus and the information then appears in the display.
The special characters keypad Enter last name: Agren ? << a a a a a a ae e e e e e c o o o o o o o o n n u u u u y y << + abc 123 ! caps aeo To enter information: 1. Tap out the required information with the keypad. Switch between keypads by tapping aeo special characters icons. 2. Tap abc text, 123 numbers and to enter more information in the next field or back to view all entered information. 3. Tap OK to save the information.
The number keypads Enter number: 7890 7 4 1 0 8 5 2 . 9 6 3 The keypad shown is that used for real numbers and IP address numbers. The integer keypad is very similar, the only exception being that there is no decimal point key. The security access keypad Security access uses the standard keypads as shown. However, when the data is entered it is shown by asterisks (*).
• Stylus strokes written in the right of the display are recognized as numbers. Note: You can write items such as telephone numbers, birthdays, and Social Security numbers entirely to the right of the display because handwriting recognition accepts parentheses, slashes, and dashes in the number writing area. • • Most characters are written with a single stroke. Write accented (Western European) letters by writing an upper or lowercase letter, then write the accent mark to the right of the display.
Note: Tapping the display will reposition the cursor at the point of contact on the display. Tapping and holding for a short while enables text selection by dragging the stylus. Note: Periods are not entered by a single tap, they are entered by a single stroke as shown above. Write numbers and the following symbols to the right of the display, as shown.
Extended character set The extended character set consists of characters that require additional time to write before recognition occurs, e.g. # and %. The extended character gesture, a (stylus stroke from bottom to top) must be written to enter extended mode, signified by the disappearance of the letters at the top of the display and the mode marker. You can then write an extended character anywhere on the display.
Handwriting recognition allows you to enter any of the following extended characters. .
Using handwriting recognition As an alternative to tap typing with the on-screen keyboard, handwriting recognition with the stylus can be chosen from tasks menu on the toolbar. the To select handwriting recognition: tasks on the toolbar when entering information. 2. Select Write to activate handwriting recognition. 3. The display changes to the handwriting recognition screen. 1.
Warnings With the flip open, warnings are displayed and handled slightly different than with the flip closed. Low battery warning The warning is activated if the battery is low and a ‘Low Battery. Please replace your battery or connect a charger’ message appears in the display. • Tap OK to accept and dismiss the warning. Insufficient storage space warning The warning is activated if there is insufficient storage space and an ‘Insufficient data storage space. Please remove unwanted data.
Phone Phone functions with the flip open provide you with the means by which you can easily use phone functions and settings. You can make, receive and manage calls, check the call log and manipulate settings. Note: With the flip open your R380e provides you with greater functionality and viewing capabilities than that offered when the flip is closed. On selecting the Phone program tab, the desktop displays phone functions and settings icons.
Call display NETWORK C 2 3 4 5 6 12:00 7 8 9 0+ # Toolbar icons 1 18-05-2000 Tip! The keypad (default on the right) can be moved and shown on the left instead via a control in the Settings menu. See “General settings” on page 170 for more information. See “Flip Closed” on page 25 for a description of display indicators and keypad functions. See “The toolbar” on page 48 for a description of the desktop, tasks and view icons.
Outgoing calls During a call, the images and text displayed in the title bar and call status display are the same as those displayed with the flip closed. To enter a number and make a call: 1. Tap in the area code and phone number on the keypad, which is simultaneously displayed in the window. The network, time and date disappear and the number you have dialled is shown. Note: To erase a single digit, press .To erase all digits, press and hold down until the digits disappear. 2. Tap to dial the number.
If the auto retry is successful, the R380e sounds a single ring tone. Re-dialling To redial the last number or a previous number you called: or and or tap and select Last dialled numbers. 2. The display shows the last dialled numbers list with the last dialled number highlighted. Use the up and down scroll arrows to scroll and select a number from the list. 3. Tap the entry in the last dialled numbers list to initiate the call. 1.
Incoming calls When you receive a call, the R380e rings. The “Incoming call:” view displays who is calling and asks you if you want to “Answer?”. • To answer the call: Tap Yes to answer the call. When the call is finished, tap • To reject the call: Tap No. The call is rejected and a busy tone is sent to the caller. • . To ignore the call: Select Ignore. The call notification continues and the telephone button appears in the toolbar until the call is timed-out.
Note: If you tap to end an active call when there is a call on hold a ‘Call on hold’ message appears asking ‘Retrieve held call?’. If you do not select Yes or No within five seconds the call is automatically ended. Call waiting Call waiting allows you to manage incoming calls in a number of ways, while an active call is already in progress. • To place the active call on hold and answer the incoming call: Tap Yes in the “Incoming call:” view that appears in the display.
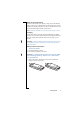
• Tap the number of the held call and select Switch call from the popup menu. The held call is made active and the active call is put on hold. Conference calls A conference occurs whenever you join two or more calls together so that individuals can communicate with each other at the same time, i.e. join an active call to a held call. An individual call can be ‘joined’ into a conference and ‘extracted’ from a conference. You can join up to five separate calls to form a conference.
2. Enter the number of the person you want to include in the conference and tap . The split screen displays the active call on the top screen and the conference call on the lower screen. NETWORK C +46 555 1234 Ericsson John 1 2 3 4 5 6 1. Steven Mutelezi 2. Hank Cheong 3.+1 555 3456 7 8 9 0+ # 123 3. Tap the number of the active call or tap the conference and select from the pop-up menu. The conference is once again active and the new participant is shown in the conference display.
To make a new call and switch between the new call and the conference: 1. Tap the conference and select Hold call from the pop-up menu to put the conference on hold. . 2. Enter the number of the person you want to call and tap The split screen displays the active call on the top screen and the conference call on the lower screen. 3. Tap the number of the new call and select Hold call from the pop-up menu. The new call is put on hold and the conference is made active.
Call log Call log details all incoming and outgoing calls and also provides a summary of total calls. Each call activity results in an entry in the call log, providing relevant information relating to the call. Call log Today 12:40 to John Ericsson 11:33 to Hank Cheong This week This month Before this month All calls The call log allows you to choose how you want the information to be displayed. You can choose whether you want to view All calls, Incoming calls, Outgoing calls or Missed calls.
• Duration: The total connection time of the call. Note: If the call is a Missed call, its duration is not displayed. To view a summary of total calls: 1. Tap Call log on the Phone desktop. The Call log view appears in the display. and select Total call info. The Total call info view appears in the display providing the following information: • All calls: The total duration of all calls held in the log. • Outgoing: The total duration of all outgoing calls.
To change the ring controls: 1. Tap Ring controls in the directory. The Ring controls view appears in the display. 2. To change the volume of the ringing tone, select Ring volume: and use the left and right scroll arrows to select 1 to 6 to set the required volume level. You also have the option to select Off. 3. To turn the increasing ring volume feature on or off, select Increasing ring and select On or Off .
To edit my melodies: 1. Tap My melodies in the directory. The Edit my melody #1 view appears in the display, providing you with a melody in the upper area of the view and a keyboard in the lower. The P key allows you to add a short pause in the melody. Use the left arrow key to delete the last note in the melody, or all notes in the melody by pressing and holding the key. Press and hold a melody key to produce a long note. and 2.
To turn Voice control on or off: 1. Tap Options in the Telephony/Settings/Voice Control directory. The Voice control options view appears in the display. Voice control options Voice answering: Voice dialling: 2. Select Voice answering and select On or Off. 3. Select Voice dialling and select On or Off. 4. Tap OK to implement and save the new settings. The display returns to the current expanded directory in the Telephony Settings view. To record an Answer or Busy voice command: 1.
Note: If a recording sequence is cancelled during the recording of one of the Answer or Busy commands, this will cause the deletion of both Answer and Busy commands. To record a new voice command or edit an existing voice command: 1. Tap Voice commands in the Telephony/Settings/Voice Control directory. The Voice commands view appears in the display. and select New. The 2. To record a new voice command, tap New voice command view appears in the display.
To play a voice command: 1. Tap Voice commands in the Telephony/Settings/Voice Control directory. The Voice commands view appears in the display. 2. To play a voice command, scroll and select the voice command you want to play, tap and select Play 3. When finished, tap OK to return to the Voice commands view. To delete a voice command: 1. Tap Voice commands in the Telephony/Settings/Voice Control directory. The Voice commands view appears in the display. 2.
2. Select Call waiting and select On or Off. 3. Tap OK to implement and save the new settings. The display returns to the current expanded directory in the Telephony Settings view. Note: Call waiting is a network setting that requires access to your network. Restrict calls Restrict calls allows you to bar different types of outgoing and incoming calls. 1. 2. 3. 4.
Divert calls Divert calls allows you to change the settings of your conditional and all call diverts. The all calls settings allow you to specify a single telephone number for each of the voice, data and fax calls you receive. The conditional settings (voice only) will let you specify a number to divert calls to: • if you are already on the phone, When busy:. • if you do not answer within a specified time (operator dependent), No reply:.
5. To change or enter a phone number that calls are to be diverted to when you are unreachable, select Not reachable: and enter a number. 6. To turn the divert calls on or off for any of the above conditions, select the Active: relevant to the diversion criteria specified in steps 3 to 5 and select On or Off. and select 7. To refresh using the current network settings, tap Check divert status. 8. Tap OK to implement and save the new settings.
2. Select a network from the list and tap OK . A registration attempt is now made to this network. If successful, the display returns to the current expanded directory in the Telephony - Settings view. To change the network search mode: 1. Tap Search mode in the Telephony - Settings directory. The Network search mode view appears in the display. 2. Select Search mode: and tap: Automatic - your R380e, when switched on, searches for the last accessed network.
5. To delete a network from the list, select the network. A view with the network name as its title appears in the display. Tap and select Delete. The network is deleted and the Edit preferred list view appears in the display with an updated network list. Call meter Note: Call meter is only available in the Telephony - Settings directory if your SIM supports Advice of Charge.
Note: If Price per unit is set to 1 the Currency field is unavailable and no currency code is displayed in the call meter during an active call.does not appear. Note: Credit status, Remaining credit, Price per unit and Currency fields are all protected by PIN2, this can be obtained from your network operator. 7. Tap OK to implement and save the new settings.
To enter your own speech and data numbers: 1. Tap My numbers in the Telephony - Settings directory. The My numbers view appears in the display. 2. Select Voice: and enter your phone number (maximum of 20 digits). 3. Select Data: and enter your data number (maximum of 20 digits). 4. Select Fax: and enter your fax number (maximum of 20 digits). 5. Tap OK to implement and save the new settings. The display returns to the current expanded directory in the Telephony Settings view.
3. Tap OK to implement and save the new settings. If you have made any changes, you have to enter your lock code. If successful, the display returns to the current expanded directory in the Telephony - Settings view. If the lock code is incorrect, a “Wrong phone lock” error message appears in the display and you are returned to the Phone lock view. To change the phone lock code: 1. Tap Change phone Lock code in the Telephony - Settings directory.
Handsfree equipment Handsfree equipment settings allow you to select the way in which your R380e handles handsfree speech and the mode in which the R380e is answered when handsfree equipment is fitted. To change the handsfree settings: 1. Tap Handsfree equipment in the Telephony - Settings directory. The Handsfree equipment view appears in the display. 2. To turn auto answering of a call on or off, select Answering mode and select Normal, Any key or Automatic. you have to answer calls as normal.
Last dialled numbers list Last dialled numbers list allows you to turn the storing of previously dialled numbers on or off. To turn the Last dialled numbers list on or off: 1. Tap Last dialled numbers list in the Telephony - Settings directory. The Last dialled numbers list view appears in the display. 2. Select Last dialled numbers list and select On or Off. If Off is selected the current contents of the Last dialled numbers list is deleted. 3. Tap OK to implement and save the new settings.
New ink note This program provides you with the means of quickly writing or sketching a note, for example, making a quick note of a phone number or sketching out verbal directions during an active call. To create an ink note you need to use the stylus, the keyboard option is not available. To enter the New ink note program: 1. Tap New ink note on the Phone desktop. The New ink note view appears in the display. New entry To create a new ink note: 1.
Phone
Z A- Contacts The Contacts program in your R380e provides you with the means by which you can easily access and communicate with business contacts and friends. You can create, edit and store entries in the Contacts database, scroll and select contacts from a contents list, or alternatively, you can search for a specific name. The Phone book that you access with the flip closed, is created from the Contacts that you have stored in the R380e.
To enter or edit your personal details: 1. Tap My personal details on the Contacts desktop. If you have not entered any details, you are asked to create a new entry. The title bar contains the text ‘Enter your personal details’. After your Personal details have been entered, selection of the My personal details icon displays an Entry view containing your personal details. 2. Tap . Enter your first name. 3. Tap or and select . Enter your last name. 4.
To send your personal details via infrared to another device: 1. Make sure your R380e’s infrared port faces the infrared port of your target device. Tip! The maximum recommended distance between the infrared ports is 0.2 metre and they must also be at an angle of 30 degrees or less. 2. Tap My personal details on the Contacts desktop. Your personal details entry appears in the display. and select Infrared send. 4. The Infrared send progress view appears in the display.
Similarly, when viewing Contacts entries the amount of information displayed can be changed using the following options: Summary - displays one line of information, consisting of the contacts name. • Detail - displays a second line of information, consisting of the last contact method used for that entry. (By default this is the first contact method entered for that entry). If there are no contact methods available then No contact method available appears instead.
1. 2. 3. 4. 5. To send an e-mail, SMS or fax via SMS message from an entry in the contents list: Select the relevant tab at the top of the display. Scroll to the required name and select it. To send an e-mail, select the e-mail address. The New message view appears in the display allowing you to compose a message before sending it. See “Messaging” on page 99 for more information on sending e-mails. To send an SMS message, select <“mobile number”> SMS.
To edit an entry in the contacts database: 1. Select the relevant tab at the top of the display. 2. Scroll to the required name and select it. 3. Tap the Title bar, or tap and select Edit. 4. Scroll to a field that you want to edit and select it. Change or enter any new information. 5. Continue to select and edit. When finished, tap OK to save your changes in the Contacts database. To delete an entry in the contacts database: 1. Select the relevant tab at the top of the display. 2.
To receive an entry via infrared from another device: 1. Make sure your R380e infrared port faces the infrared port of the target device. Tip! Maximum recommended distance between infrared ports is 20 centimetres or 8 inches and they must also be at an angle of 30 degrees or less. 2. Tap and select Infrared receive. 3. The Infrared receive progress view appears in the display. If during receipt, you want to stop receiving the entry, select Cancel. 4.
Warning! If the SIM card position selected is occupied a warning message is displayed. Select Yes to overwrite the entry and return to the SIM phone book view or No to select a different position. To import one or all phone numbers from a SIM card into the contacts database: and select SIM phone book. 1. Tap The SIM phone book view appears in the display. 2. Scroll to the entry you want to import and select it. 3. Tap and select Copy to contacts. The Copy to contacts view appears in the display. 4.
To export a phone number from contacts to a SIM card: and select SIM phone book. The SIM phone book view appears in the display 1. Tap 2. Tap and select Copy from contacts. The Select contact view appears in the display. An information message appears informing you how many empty SIM positions are available. Note: An entry in Contacts may hold home, work and mobile telephone numbers for an individual, this record would be split into three separate entries in the Select contact view.
Z New contact New contact allows you to create and store a new entry in the Contacts database. To create a new entry in Contacts: 1. Tap New contact on the Contacts desktop. 2. Tap in the New entry view. Enter the first name and tap to return to the New entry view. 3. Tap in the New entry view. Enter the last name and tap to return to the New entry view. 4.
Find Find allows you to search the Contacts database for an entry containing a specific text. To search for an entry containing a specific text in the database: 1. Tap Find on the Contacts desktop. 2. Enter a name (or part of a name) and tap OK to start the search. 3. A Progress Message view appears in the display. If required, a Stop button allows you to interrupt the search and display the entries found up to the point of interruption. Otherwise, all results are displayed when the search is complete.
Contacts
Messaging The Messaging program within your R380e allows you to send and receive a number of different types of message from your business contacts and friends. Messaging provides access to various functions which enable you to create and send e-mail/SMS messages, receive and view e-mail/SMS messages, perform a search for specific messages and generate a secure access passcode.
Similarly, the amount of information displayed can be changed using the following options: • Summary - less detail. • Detail - more detail. Note: The currently selected setting, Summary or Detail, will not appear as an option when the View menu is selected.
- Multiple message type notification saved on a SIM card. - E-mail synchronization message. - E-mail synchronization message with attachments. - SMS messages. - SMS messages saved on a SIM card. - Area information. - Area information saved on SIM card. - E-mail via SMS messages. - Fax via SMS messages. - Voice mail notification. - Voice mail notification saved on SIM. - Auto configuration message. - Auto configuration message saved on SIM. Message status indicators: - Unread. - Read.
Get mail The Message program in your R380e provides you with the means by which you can connect to a remote e-mail server. You can copy or move messages you have received from the Remote inbox on the server to the Local inbox in your R380e. You can also delete messages stored in the Remote inbox that you no longer want. To copy or move new messages from the remote inbox to your local inbox: 1. Tap Inbox on the Messaging desktop.
If you have more than one internet service provider, you are presented with a Select service provider view. Select the service provider to be used and tap OK . A Progress Message view appears in the display informing you of the current status of the connection: Dialling....; Authenticating...; Connecting....; Sending.... Note: If authentication is required, see “Authentication in dial-up access” on page 112 for more information. 3. The Remote inbox appears in the display containing a list of all messages.
The type of attachments supported by your R380e are: - downloaded. - not downloaded. - downloaded. - not downloaded. abc - downloaded. ! - not downloaded. abc - downloaded. ! - not downloaded.
• To view a text attachment: Select the attachment and select View attachment from the pop-up menu. The attachment is opened and its content appears in the display. To delete an attachment from your R380e: 1. With the attachment downloaded and selected, tap and select Delete attachment. 2. A message appears in the display stating “The attachment has been deleted from the device” and the attachment icon changes to indicate that the attachment is no longer held on the device.
Forward When in the Inbox view you can choose to forward a message. To forward an e-mail or SMS message: and select Forward. The New Message view appears in the display. Tap and use the left and right Alphabet scroll arrows and the up and down scroll arrows to the right of the screen to locate and select the recipient from the list of contacts.
Note: If the Global delete preference is set to Do not confirm deletions then this confirmation view will not be displayed and the record will be deleted. 3. Tap Yes to confirm that the records are to be deleted. Otherwise, tap No to cancel the deletion of the selected messages. Edit message When in the Inbox view you can edit a message. To edit a message: 1. With the e-mail or SMS message selected and the contents displayed in the Inbox view, tap and select Edit.
To send messages held in the outbox: 1. With the e-mail or SMS messages displayed in the Outbox view, tap and select Send messages. Outbox: 3 messages E John Ericsson Quarterly Report Steven Mutelezi Regional Order E Pamela Gonzalez Latest Advertisement 18/05/2000 11.2kb 18/05/2000 3.0kb 17/05/2000 9.4kb The Send messages view appears displaying a list of the different types, and the number of each type, of messages being held in the Outbox.
3. If you have more than one internet service provider, then the Select service provider view appears in the display so that you can choose a provider. Select a service provider from the list and tap OK . Select service provider Ericsson EricNet 4. A Progress message view appears in the display informing you of the current status of the connection: Dialling....; Authenticating...; Connecting....; Sending.... Dialling...
The remainder of the procedure is the same as that described in steps 3 to 5 for sending messages. Edit message When in the Outbox view you can edit a message. To edit a message: 1. With the e-mail or SMS message selected and the contents displayed in the Outbox view, tap and select Edit. The Message edit view appears in the display. 2. Select the required fields for editing. and select the type of file to be 3. If you want to attach a file, tap attached.
Delete messages When in the Sent items view you can choose to delete a message or all messages. See “View Messages” on page 100 for more information on deleting messages. Forward message When in the Sent items view you can choose to forward a message. See “View Messages” on page 100 for more information on forwarding messages. Drafts The Drafts folder allows you to store messages which are not complete. You can also move a message from the Outbox folder to the Drafts folder.
Authentication in dial-up access Static password If a ‘Static password’ has been defined in the ISP settings, then authentication will be performed using the stored User name and Password. Access security “strong authentication” Your R380e has built in one-time password generators, which enable secure automatic connection to the corporate network for e-mail and WAP services.
New e-mail New e-mail allows you to create and send new e-mail messages. To create and send a new e-mail message: 1. Tap New e-mail on the Messaging desktop or if you are in the Inbox, Outbox, Drafts or Sent items view tap and select New e-mail. The Message edit view appears in the display. 2. Tap and use the left and right Alphabet scroll arrows and the up and down scroll arrows to the right of the screen to locate and select the recipient. 3.
This option allows you to select an Appointment or All day event from the Select entry attachment list that appears in the display. Use the left and right Date scroll arrows and the up and down scroll arrows to the right of the screen to locate the calendar entry and select it. If the entry is a recurring event, then an “Attach which occurrences” message appears in the display. Select All to attach all occurrences or This one to attach the specific entry you selected.
Note: If you synchronise with your work e-mail and then reply using internet e-mail, your message will be transmitted over the internet and will be less secure. It may be possible to access the same account as your PC sync mail with dial-up networking. 1. 2. 3. 4. To immediately forward or send a reply to a PC mail message from your R380e: From the Inbox view, tap the required PC sync e-mail message with the stylus. The message opens and appears in the display.
If you have access to more than one computer, it is essential that you specify different accounts (called PC mail accounts) with different names for each computer. For example, you have a computer at work and one at home. The computer at work has the account Work and the computer at home has the account Home. When you synchronize, only the e-mails marked with that specific account are synchronized.
Note: A character counter appears in the top right corner; this displays the maximum number of characters currently available in the SMS. The counter decreases as you type your message. If the number of characters you type exceeds the amount of one SMSs, the counter displays the number of characters remaining in the second SMS with a /n, where n is the number of SMSs that have to be sent to transport the message. 7. To send the SMS message, tap OK .
5. To send the e-mail or fax via SMS, tap OK . If the message is not sent or is only delivered to some of the recipients, then an appropriate warning message appears in the display and the message is placed in the Outbox folder. You can also see a list of recipients who failed to receive the message. Find Find allows you to search for a specific message in all folders within messaging. A search can also be initiated locally within a folder by selecting .
Area information or SMS message notification If you receive area information or a SMS message notification when either the flip is opened or closed, the message immediately appears in that view. If you then close the flip or open the flip (depending on the current status), the area information or a SMS message notification continues to be displayed in the subsequent view until you have read the message.
Auto configuration Whenever you receive new auto configuration settings for your R380e, an auto configuration icon along with the text “Auto configuration” appears in your Inbox. To auto configure your R380e: 1. Select the auto configuration message in the Inbox. Inbox: 7 messages - 1 unread Ericsson John Agenda for Friday's meeting +43155567890 How are you? Auto configuration Operator 1 18-05-2000 13.2kb 15-05-2000 2.0kb 12-05-2000 10.0kb 2.
Calendar Calendar, with the flip open, consists of an appointment book and a to-do list. It has five views, a month view, a week view, a day view, a to-do view and a new appointment view. You have the option of choosing whether you want the week to start on Sunday or Monday. You can create, edit and delete appointments, to-do items and all day events and also create recurring appointments. You can set how far in advance of an appointment or to-do you want the reminder to activate.
Month view When you select Month from the top level menu, you are presented with the view for the current month. 2000 Wk 18 19 20 21 22 23 May M 01 08 15 22 29 05 T 02 09 16 23 30 06 W 03 10 17 24 31 07 T 04 11 18 25 01 08 F 05 12 19 26 02 09 S 06 13 20 27 03 10 S 07 14 21 28 04 11 The year and month appear in the title bar at the top of the display. To display/choose from a list of years, tap the year. You can move to the previous and next month by selecting the left and right arrows.
Week view When you select Week from the top level menu, you are presented with the view for the current week. May Wk M15 T 16 Week 20 2000 19 W 17 T 18 F S 20 S 21 8 am 10 am 12 am 2 pm 4 pm 6 pm The month and week number are displayed in the title bar at the top of the display. You can move to the previous and next week by selecting the left and right arrows. Selecting the month takes you to the month view.
Day view When you select Day from the top level menu, you are presented with the view for the current day. Alternatively, when you select and Day view from the pop-up menu, when in the Month or Week view, the first day of the currently viewed month or week is displayed. The day and date and week number are displayed in the title bar at the top of the display. You can move to the previous and next day by selecting the left and right arrows.
To do When you select To do from the top level menu, depending on your settings, you are presented with the To do list in either Summary view or Detail view. To do’s are listed by those not completed first, in chronological order, followed by completed to do’s. Uncompleted to do’s are shown with an empty box next to them. Completed to do’s have a tick in the box. When you have completed a to do, select the empty box and a tick is entered automatically. Clicking the box again deletes the tick.
10. Tap and select the End: time field or tap . A clock appears in the display allowing you to select the start time of the appointment. 11. Use the up and down scroll arrows to select the end time of the appointment. . The New appointment view appears in the display 12. Tap showing the details you have selected. 13. If you want to be reminded of the appointment, select Reminder:. and select On from the pop-up menu.
5. If you want to be reminded of the to do, select Reminder: and select On from the pop-up menu. The default is Off. 6. If Reminder: is set to On, select the Remind at: date and time fields and use the up and down scroll arrows to select the date and time of the reminder. 7. Select Notes: and enter a brief description about any other information you may need for the To do entry. 8. When you are happy with your selections for the To do, tap OK . The To do list appears in the display.
Deleting calendar entries To delete a calendar entry: 1. Select an entry from one of the Calendar views. The details of the entry appears in the display. and select the type of delete you require from the pop-up menu. • Delete - only available if the Appointment or All day event is not recurring. • Delete this occurrence - only available if the Appointment or All day event is recurring. • Delete all occurrences - only available if the Appointment or All day event is recurring.
1. 2. 3. 4. To send an appointment, all day event or to do via infrared to another device: Select the relevant Appointment, All day event or To do. Tap and select the type of send via infrared you require from the pop-up menu. • Infrared send - only available if the Appointment or All day event is not recurring. • Infrared send this occurrence - only available if the Appointment or All day event is recurring. Initiates the sending of this occurrence only.
Calendar
WAP Services WAP Services is a program providing the functionality required to browse the Internet. It consists of an Internet browser using a standard called Wireless Application Protocol (WAP) and a language called Wireless Mark-up Language (WML). This standard was specially created for wireless communication through mobile phones, such as your R380. The WAP services browser is suitable for interaction with services such as ticket and hotel reservations, or online banking and electronic commerce.
Browser The WAP services browser allows you to: • Connect to the Internet and interact with specially designed WAP services. • View pages on the Internet designed for WAP services. WAP Services Page A WAP services page is self-explanatory, where guidance to the available information is through typical controls. A WAP services page consists of the following components: • a title bar with page titles, decks and card .
To open a location and view a page: 1. Tap Browser on the WAP services desktop. The WAP services browser page appears in the display. 2. Do one of the following: Tap to display your homepage. or and select Open location. An ‘Open location’ view • Tap appears in the display. Enter a URL address, and tap OK to open the WAP services page. or • If you have previously visited one or more WAP services pages, the location you require may be listed in the history list.
2. When you see the message “Are you sure you want to disconnect from the service provider?”, select Yes to disconnect. The connection status symbol changes to show you are disconnected. Ericsson’s WAP services portal A great starting point for exploring WAP services is Ericsson’s WAP services portal at http://mobileinternet.ericsson.com. It provides you with easy access to a multitude of information, and is handy when you are on the move. The R380e homepage is factory configured to Ericsson’s WAP portal.
Ending the browsing session To end the session: and select Disconnect. 2. When you see the message “Are you sure you want to be disconnected from the service provider”, select Yes to disconnect. The connection status symbol changes to show you are disconnected. 1. Tap Bookmarks A quick way of accessing a WAP services page that you have previously visited, is to bookmark it. A bookmark is a “place holder” you assign to a page.
2. Tap and select New bookmark. Note: You can also tap bookmarks view. and select New bookmark when in the Edit The New bookmark view is shown: New Bookmark Name: Location: WAP profile: <[Use default]> 3. Enter the appropriate information. Enter a name for the bookmark. the URL address for the location you are bookmarking. • WAP profile: Tap this field to select the required WAP profile to use when connecting to this page.
Open Location Open location provides you with a short cut to opening and viewing a page. To open a location and view a page: 1. Tap Open location on the WAP services desktop. An ‘Open location’ view is displayed. 2. Enter a URL address. 3. Tap OK to open the WAP services page. History History allows you to connect quickly to a WAP services page that you have previously visited. The history contains a list of the last few pages you have viewed. To open a WAP services page from the History list: 1.
To view secure connection information: in the title bar. 1. When browsing a secure site, tap 0:04 Opening page... Login Annoucements Information Entertainment Products The server certificate is displayed.
Getting started with e-mail and WAP Before the R380e can access e-mail and WAP you must enter specific user related details. When you are ready to start using e-mail and WAP you will need a service provider to connect your R380e to the network. The service provider could be: • an internet service provider which connects you to the internet. • an access point provided by your network operator. • a private service provider such as your company or your bank.
Automatically set up service provider and e-mail The easiest way to set up the R380e is automatically, through your service provider. Check your service provider’s web site for information or telephone/e-mail their support desk and ask about automatic remote configuration. If remote configuration is possible, tell your service provider that you require internet service provider and e-mail settings, they will send you an auto configuration message for these by SMS.
Manually set up service provider and e-mail Alternatively you can enter the service provider and e-mail settings yourself. First collect all the information you will need. You can obtain this information from one of the following sources: • If your mobile operator offers an e-mail service you can get the necessary details from them. • Your internet service provider. • Your IT Manager in the case of connecting to the corporate network to access your work e-mail account.
Required 142 Actual Useful information IP assignment Server / Static An 'address' that the service provider knows you by and uses to route information to and from you. Your IP address will either be: Server - assigned by the service provider when you connect. Static - assigned once by the service provider or the IT Manager.
Required Actual Useful information e-mail address Use your normal e-mail address, e.g. fred@myserviceprovider.com or me@acmeservices.com. Any e-mails that you send are shown as ‘from’ this address when the e-mail is opened by the recipient Protocol POP3 / IMAP4 POP3 is commonly used by internet service providers Username The username your service provider gave you when the account was set up. It is the part before the @.
Manually set up a service provider To manually set up service provider: 1. With the flip open, tap Extras, System, Preferences and settings and Service Providers. 2. Tap and select New service provider. New service provider Name: Tel. number: Bearer capability: Username: Password: Confirm password: 3. Use the information given in the previous table (page 141) to complete the form.
Manually set up e-mail To manually set up e-mail: 1. With the flip open, tap Extras, System, Preferences and settings and Messaging. From the messaging display select e-mail accounts (you need to scroll down to find it). and select new e-mail account. 2. Tap the 3. Use the information given in the previous table (page 141) to complete the form. You will have to use the scroll bar to see all the items.
3. Tap and select , type in a subject e.g. test mail. and select . Enter your message. 5. You must send the e-mail using your new account. If a different account is displayed tap and select Account:. The pop-up menu displays a list of accounts that you defined in the e-mail settings. Select the new account. 6. To send the e-mail, tap OK . The Send confirmation view appears in the display.
Using e-mail with several configurations installed Your R380e can read mail from several e-mail accounts. When you select an e-mail account to connect to, see above, it is important that you select the service provider associated with that account. Otherwise the send mail operation may fail and you will be unable to access the remote inbox. Try to set the names of the internet service provider and the e-mail accounts so that you will easily remember which one to use, e.g. SP Acme Internet, Mail at Acme.
WAP Profiles A WAP profile defines a service provider and gateway that should be used when making a connection. A WAP service may require the use of a specific combination of service provider and gateway to make a successful connection. You can create different WAP profiles for different connections, and thus simplify the process of accessing WAP services. If you save a location in your bookmarks the WAP profile is also saved.
Manually set up WAP Alternatively you may enter the information yourself. Note: You need to set up your internet service provider before you can set up WAP, see “Manually set up a service provider” on page 144 before continuing. First collect all the information you will need. The service provider you need to contact for details will be one of the following: • Your network operator. • Your internet service provider. • Your IT Manager in the case of connecting to the corporate network to get work e-mail.
Security* Set to ON if the WAP site you are accessing requires a trusted certificate. See page 155 for more details. Connection* Set this to Connectionless unless your service provider has advised you to select the alternative setting of Connection oriented. Note: You will need to obtain the items marked with a * from your service provider. To create a new profile: 1. From within the Extras tab, tap System and choose Preferences and settings. 2. Select WAP Services from the list. 3.
5. Enter the required information. Enter a name for this profile. • Service provider: Tap the service provider field and select which service provider to use for this profile. If you would like to select a service provider whenever you use this profile, choose • Name: [Always ask] Enter the IP address for the WAP gateway. Enter the your username for the gateway. • Gateway password: Enter your password. • Confirm password: Re-enter your password for confirmation.
3. Tap the required profile in the list. The edit view is displayed. Edit Banking Name: Service provider: Gateway: Gateway username: Gateway password: Confirm password: Connection mode: Security: <195.100.108.76> 4. To delete the profile or set it as the default, tap and select or Set as default as appropriate. 5. To edit the profile, tap the item to edit.
Using WAP with several configurations installed You can have several WAP profile configurations set up on your R380e, for example one from your network operator and one from your company. To access the service you want it is important to select the correct WAP profile. This will ensure that the appropriate service provider and gateway are used when dialling.
Username Click Cancel to close the dialog box. Double click the icon to display the Connect To dialog. See the User Name: field. Password The password you normally enter in the Password box beneath the User Name. If Windows remembers this for you it will be shown as **** entering *** into your R380e will not work! Contact your internet service provider if you have forgotten the password IP Assignment Click Cancel to close the Connect To dialog. Right-click on the icon and then click on Properties.
Trusted Certificates When you use certain WAP services, for example banking, you need a secure connection between your phone and the WAP gateway. When you are browsing a secure site a Secure connection symbol displays in the upper right portion of the browsers title bar. To establish secure connections, you need to have a trusted certificates saved in your phone.
To add a trusted certificate: 1. When you go to a site that requires a trusted certificate, it is downloaded and the New Certificate view displays. The details of the trusted certificate appear. 2. To accept the trusted certificate and store it in your phone, tap OK . If a trusted certificate with the same name is already held, a message will ask if you wish to keep the original trusted certificate or replace it. 3. To cancel the download, or reject the trusted certificate when it has been downloaded tap .
Extras Your R380e provides you with access to a number of additional functions, which you will find on the Extras desktop. Five taskspecific icons are designated to enable you to access these functions: • Notepad. • Clock. • Calculator. • Games. • System. To enter the Extras desktop, select the Extras tab at the top of the programs screen.
• To enter the notepad program: Tap Notepad on the Extras desktop. The Notepad view appears in the display listing all existing entries. Notepad 18-05-2000 17-05-2000 17-05-2000 15-05-2000 14-05-2000 12-05-2000 Minutes for meeting (attendees: John Agenda for meeting (18 May) Dear John, Shopping list Training courses for June Hi Jose, just a quick note to let you know New entry To create a new text note in the notepad: and select New note or tap . 2.
3. Edit the note and tap OK . Deleting notepad entries To delete an entry from the notepad: 1. Select the required entry from the list that appears in the Notepad view. 2. Tap and select Delete. The Confirm delete view appears in the display. Note: If the General settings delete preference is set to Do not confirm deletions then this confirmation view will not be displayed and the record will be deleted. 3. Tap the Yes button to confirm that the entry is to be deleted.
Clock To enter the clock program: 1. Tap Clock on the Extras desktop. When you first enter the program you see the World clock view. Home 18-05-2000 07:00 Timezone: UTC+2 Analogue clock, home displayed and alarm on The World clock view displays a clock on the left of the screen, which can be either analogue or digital. Tap the currently displayed clock to change to the alternative clock.
Setting the current and destination time zone To select the current and destination time zone: and select Timezones. The Timezones view appears in the display. 1. Tap Timezones Auto timezone: Timezone display: Home zone: Daylight saving: Destination zone: UTC+0 UTC+0 2. Select the Auto timezone to specify whether or not the destination clock is to use network time. A pop-up menu allows you to select On or Off.
UTC -10:00 -11:00 -12:00 +1:00 +2:00 +3:00 +3:30 +4:00 +4:30 +5:00 +5:30 +5:45 +6:00 +6:30 +7:00 +8:00 +9:00 +9:30 +10:00 +10:30 +11:00 +12:00 Time Zones AHST - Alaska-Hawaii Standard CAT - Central Alaska HST - Hawaii Standard (default) NT - Nome. IDLW - International Date Line West CET - Central European (default) FWT - French Winter MET - Middle European MEWT - Middle European Winter SWT - Swedish Winter.
Setting the time To set the time: and select Set time. The Set time view appears in the display. 2. Use the up and down scroll arrows to set the time or tap the clock face and move the Hour and Minute hands to set the time. to change the currently 3. If the date format is set to AM/PM, tap displayed time by 12 hours. 4. Tap OK to accept the new time. The display returns to the World clock view. 1. Tap Note: If at any time during the above operation you decide to cancel, select the .
2. Use the up and down scroll arrows to select the time of the alarm. 3. If the date format is set to AM/PM, tap to change the currently displayed time by 12 hours. 4. Tap OK to confirm the new alarm time. The display returns to the updated World clock view. Note: If at any time during the above operation you decide to cancel, select . The display returns to World clock view. Note: Selecting returns you to the top level menu screen.
The calculator program is available in both right-hand and lefthand modes. See “General settings” on page 170 to select your preferred mode. You can also set the number of decimal places. For more information, see “Calculator settings” on page 187. 0 M+ MR X + _ MC C % = 7 4 1 0 8 5 2 9 6 3 +/ Calculator right-handed display 7 4 1 0 8 5 2 9 6 3 +/ 0 M+ MR X + _ MC C % = Calculator left-handed display Enter your calculations by using the stylus on the touchscreen.
Games Selecting Games opens the Games View on the display, from here you can tap either of the two games supplied on the R380e to start playing. Reversi Reversi is a strategy game played by two players: you and your R380e. It is played on an 8x8 (64 squares) board and begins with two white disks and two black discs on the centre of the board as shown.
How to play To enter Reversi program: Tap Games on the Extras desktop. • Tap Reversi. • • To start a new game: Tap and select New game. To change the game settings: and select Game settings. The Game settings view is displayed. 2. To change the level of difficulty, tap Set play level: and select Easy, Medium or Hard. 3. To the colour of your disc’s, tap Player colour: and select White or Black. 4. Tap OK to implement and save the new settings. The display returns to the Game view. 1.
2. Tap on to display the pop up menu of the game play modes. Tap the mode you want to play Tetris in. 3. Use the arrows on the Initial difficulty field to increase or decrease the starting level. 1 is the easiest and 10 is the hardest. Note: You can not change the settings whilst playing Tetris. You must wait until the active game is completed or tap and select Restart Game. To reset the high scores and select Reset My High-Scores. The scores displayed in the Tetris box are deleted. 1.
System This program allows access to Preferences settings, Storage and Touchscreen settings. To enter the System program: 1. Tap System on the Extras desktop. The System view appears in the display. Extras Notepad Clock Calculator Games System Preferences and settings When you select Settings the Preferences and settings view appears in the display.
General settings To change the system settings: 1. Select General settings from the list displayed in the Preferences and settings view. The General settings view appears in the display. General settings Backlight Display Input Language, time and date formats Data connection Confirmations To change the backlight settings: 1. Select Backlight from the list displayed in the General settings view. The Backlight view appears in the display. 2.
5. To change the mode of the screen blanker when Vehicle Hands Free (VHF) is used, select Screen saver hands free: and then select Off or Automatic. 6. Tap OK to implement and save the new settings. The display returns to the General settings view. To change the input settings: 1. Select Input from the list displayed in the General settings view. 2. 3. 4. 5. 6. The Input settings view appears in the display.
To change the data connection settings: 1. Select Data connection from the list displayed in the General settings view. The Data connection settings view appears in the display. 2. To change the idle time period specified before disconnection, select If idle, online for: and use the left and right scroll arrows to select .5, 1, 2, 3, 4, 5, 6, 7, 8, 9, 10, 20 or 30 (minutes). 3. Tap OK to implement and save the new settings. The display returns to the General settings view.
Calendar settings To change the calendar settings: 1. Select Calendar from the list displayed in the Preferences and settings view. The Calendar view appears in the display. 2. To change whether the Calendar to do initial display provides a summary or detailed information, select Default to do view: and then select Summary or Detail. 3. To change whether the Calendar Week initial display provides a summary or detailed information, select Default day view: and then select Summary or Detail. 4.
6. To change the default Remote e-mail view, select Default remote e-mail view: and then select Summary or Detail. 7. Tap OK to implement and save the new settings. The display returns to the Messaging view. E-mail settings To change the e-mail settings: 1. Select E-mail from the list displayed in the Messaging view. The E-mail view appears in the display. 2.
5. To change the default validity period of each SMS message, select Validity period: and Maximum. then select 1 hour, 12 hours, 1 day, 1 week or 6. To turn the concatenation (linking) of SMS messages on or off, select Concatenate SMS: and then select Yes or No. If Yes is selected, and your network supports concatenation, Concatenate SMS enables you to send longer SMS messages (sent as multiple messages). 7. To change the SMS alert signal, select Message alert: and then select None, Click or Tone. 8.
Each type of Area Information message is identified by a three-digit code. The list below shows examples of the Area information codes that exist today.
3. To create a new area info channel, tap and select New channel. The New channel view appears in the display. Select Channel code: and enter the three digit channel code. Select Subscription: and then select Inactive, Active or Auto-store. Tap OK to implement and save the new settings. The display returns to the Area info channels view. 4. To delete an area info channel, scroll and select the channel. The Edit channel view appears in the display. Tap and select Delete. 5.
• To initialize or re-initialize the RSA SecurID: Select Initialise RSA SecurID from the list displayed in the One-time passcodes view. If no previous initialisation has been performed, the Initialise RSA SecurID view appears in the display. Select the User ID: and Activation licence: sections and enter your user identification and the seed data in their respective sections, then tap OK . If any of the entered values cannot be validated a warning message appears stating which value was incorrect.
To change the Safeword PIN: 1. Select Change Safeword PIN: from the list displayed in the One-time passcodes view. The Change Safeword PIN view appears in the display. 2. Select Old PIN: and then enter your PIN. 3. Select New PIN: and then enter a new PIN. 4. Select Confirm PIN:, then enter the PIN number that was chosen in the previous step and then tap OK . If any of the PINs are incorrect a warning message appears in the display.
5. To enter your internet e-mail network protocol, select Protocol: and then select IMAP4 or POP3. These settings are provided by your internet service provider. Note: You cannot change the protocol setting for an account that already exists. 6. To enter or change the user name required for accessing the incoming mail server, select Username: and enter a new user name. 7. To enter or change the password required for accessing the incoming mail server, select Password: and enter a new password. 8.
• When attempting to delete a normal, non-PC mail account, the messaging application will ensure that there are no associated messages on your R380e. If no associated messages are found then the account will be deleted. If there are associated messages, then you are informed that the account has associated messages and can not be deleted. WAP services settings To change the WAP services settings: 1. Select WAP services from the list displayed in the Preferences and settings view.
To create a new WAP profile: 1. Select WAP profiles from the list displayed in the WAP services settings view. The WAP profiles view appears in the display. and select New WAP Profile. The New WAP profile view appears in the display. 3. Enter the required information. • Name: Enter a name for this profile. • Service provider: Tap the service provider field and select which service provider to use for this profile. If you would like to select a service provider whenever you use this profile, choose 2.
The WAP profiles view is displayed. WAP profiles Banking Ericsson (Default) Profile 1 3. Tap the required profile in the list. The edit view is displayed. Edit Banking Name: Service provider: Gateway: Gateway username: Gateway password: Confirm password: Connection mode: Security: <195.100.108.76> 4. To delete the profile or set it as the default, tap and select or Set as default as appropriate.
To view trusted certificates: and choose 1. From within the tab, tap . Then select from the list. 2. Select from the list. The WAP- trusted certificates view displays listing the available trusted certificates. WAP - trusted certificates Deutsche Telekom Root CA1 DSTCA E1 FESTE, Verified Certs 3. Tap the trusted certificate to be viewed. In practice you will need to scroll to see all the fields illustrated below.
To change the homepage settings: and choose 1. From within the tab, tap . Then select from the list. 2. Select from the list. The WAP- homepage view displays listing the homepage settings. WAP - homepage Location: Profile: <[Use default]> 3. To change the homepage location tap Location: and enter the address of the site you want to set as your homepage. 4.
3. To enter or change the name of the service provider, select Name: and enter a name for the service provider. 4. To enter or change the telephone number of the network service provider, select Tel. number: and enter the new number using the phone entry touch sensitive keypad that appears in the display. 5. To enter or change the network protocol, select Bearer capability: and then select ISDN or Analogue. 6.
Port settings To change the port settings: 1. Select Port from the list displayed in the Preferences and settings view. The Port settings view appears in the display. 2. To change the baud rate of the serial port, select Baud rate and then select 2400, 4800, 9600, 19200, 38400, 57600 or 115200. 3. To change the parity checking for the serial port communication, select Parity: and then select None, Odd, Even, Mark or Space. 4.
2. Select Yes to reset the language, keyboard layout, time and date format, decimal symbol and sorting order of the locale settings. An information view appears stating “Reset language” and “Please restart the phone to update the language”. Select OK and restart your R380e to implement the Reset language settings. Master reset You can reset the R380e’s settings to the way they were when you bought your R380e: all data you have entered is erased.
This view is read only and displays the amount of free memory (MB) in the title bar of the view. For each of the programs listed the amount of memory being used is converted and displayed in Kilobytes (KB)/Megabytes (MB), to one decimal place. You can also see in percentage how much memory has been used. Touch screen Touch screen allows you to calibrate the screen. 1 Calibrate touch screen Tap the centre of point 1 3 2 To perform a touchscreen calibration: 1.
• To get information relating to the software versions: Select Software version from the list displayed in the System view. The Software version view appears in the display providing you with information relating to the software versions on your R380e. Software version Phone: 000119 1059 cxc112146 R1A Organiser: 000302 1610 CXC112159 R1A Generate passcode Generate passcode allows you to initiate the generating of an access passcode (one-time passcode). To generate an access passcode: 1.
R380 Communications Suite The R380 Communications Suite allows you to synchronize the data of your R380e and your computer. You can also make backups and restore to your R380e. This chapter tells you how to: • Connect your R380e to your computer. • Synchronize the data between your R380e and your computer. • Store backups from your R380e on your computer. • Restore backups from your computer to your R380e. • Find help on a particular subject.
System requirements Before you can connect your R380e, your computer should have: • Windows 95/98/2000 SP 1 /NT 4.0 (at least service pack 5.0) installed. • A Pentium processor, 166 Mhz or above, including 50 MB of free hard drive space and a CD-ROM drive. • Serial port capability set up for communication. Note: Communication speeds should be set up as follows: serial at 115200 baud. • A Personal Information Manager (PIM) is required to synchronise your R380e data with your PC.
To run the Setup manually, if needed: 1. Select Run from the Start menu. 2. Enter ‘D:\Start.exe’ where D: is the letter of your CD-ROM drive or select Browse and navigate to the ‘Start.exe’ file on the R380 Communications Suite CD-ROM. Select OK to start the installation. or • Open Windows Explorer and select your CD-ROM drive. Scroll to, and double-click, the ‘Start.exe’ file. To install Lotus Organizer 5.0 from the CD-ROM: 1. Run the R380 Communications Suite CD-ROM automatically or manually as above.
Note: Usually, it does not matter which serial port you use to connect to your R380e. R380 Communications Suite quickly checks each port in turn to find a connected R380e. If connection problems arise, see “Troubleshooting” on page 201. 2. Plug the 9-pin connector on the cable into your computer serial port, and the Ericsson connector, with the logo facing upwards, into the interface at the bottom of your R380e.
Finding the R380 Communications Suite on the desktop With R380 Communications Suite a number of menu items and shortcuts are installed in your Windows environment. • You can access all of the programs as well as the online help from the Start menu, by selecting Start|Programs|Ericsson|R380 Communications Suite. Tip! There are further settings that you can change in the Backup, Restore and Synchronization Settings.
If you add a new appointment in your R380e Calendar, the date, time and notes for the entry will be copied to your computer scheduler. • If you change a phone number in your computer scheduler, it will be amended in the contacts database of your R380e. • You and other colleagues can synchronize your work Calendars with the same master scheduler on a networked computer using different account names. • You may have an e-mail and personal account on your computer at home or at work.
To make a backup: 1. Connect the serial cable to your R380e and computer. 2. Click Start|Programs|Ericsson|R380 Communications Suite and choose Backup. 3. In the R380e Backup dialog box you can add additional information (name/comment) to your backup in the Label as text box. 4. Click Start Backup. A progress window appears showing how long the backup will take. 5.
4. Click Yes to confirm that you want to continue. Warning! Everything in your R380e will be overwritten by the chosen backup. Once you have clicked Yes to start the restore, you cannot cancel the procedure. 5. When the restore has successfully been completed, click OK to exit the dialog box. Note: See the online help for more information on how to restore backups. Changing the language in your R380e English is always available from your R380e. To change the language: 1.
Pressing the F1 key or clicking the Help button in a specific dialog box. • Right-clicking the phone icon on the taskbar and choosing Help from the quick menu that appears. • Tip! Further information and help support can be found at http://mobileinternet.ericsson.com (Ericsson’s Mobile Internet). Tips on using the R380 Communications Suite help From the Help Topics window, you can find the information you require as follows: • From the Contents tab, you can select a topic from a structured list, e.g.
R380 Communications Suite
Troubleshooting This chapter consists of an alphabetical selection of suggestions for solving possible problems with your R380e. Blocked contact card provider The SIM card is permanently blocked after the unblocking code has been entered incorrectly ten times in a row. Contact your network operator. Card blocked unblock? This message appears if the PIN code has been entered incorrectly three times in a row. To unblock the SIM card: 1. Press YE S . 2. Enter your personal unblocking key (PUK) and press # .
Fax calls Your R380e does not support fax transmission. Even if your operator subscription supports fax transmission, fax calls are rejected. However they can be forwarded to another number such as the office fax number, see “Divert calls” on page 76 for more information. Note: Make sure potential fax callers do not try to send a fax to your R380e as they can experience a number of retries before the fax transmission is stopped.
• Notepad notes. No network This indicates that no network is within range. The reason for this is either: 1. You are in an area that is not covered by a network. 2. The received signal is too weak, possibly because you are being shielded from the signal. Move to obtain a sufficiently strong signal. Check your display Signal strength indicator. Phone locked Phone locked is displayed followed by the prompt Enter code:. Your R380e is locked to prevent unauthorized use.
Troubleshooting
Important Information Safe and Efficient Use Please read this information before using your smartphone. Your smartphone is a highly sophisticated electronic device. To get the most out of your smartphone, please read this text about product care, and safe and efficient use. PRODUCT CARE • Do not expose your product to liquid or moisture or to humidity. • Do not expose your product to extreme high or low temperatures. • Do not expose your product to lit candles, cigarettes, or cigars, or to open flames, etc.
When you need to clean the screen, switch off the product and use a commercial glass screen cleaner sprayed on a soft cloth. Avoid spraying the screen directly. • Over time, you may notice rainbow-like rings forming on the screen. These rings are only cosmetic and will not impede the functioning of your product. • Keep the product away from strong magnetic fields (e.g. loudspeakers) and sources of static electricity.
Electrostatic discharge can interfere with the normal functioning of electronic devices. Your smartphone can behave abnormally owing to such an event, resulting in the possible loss of unsaved data. To recover, reset your smartphone in accordance with the instructions in this User's Guide. To avoid losing data due to electrostatic discharges or other types of events, it is recommended that you regularly save and backup your data as described in this User's Guide.
International Commission on Non-Ionizing Radiation Protection (ICNIRP), "Guidelines for limiting exposure to time-varying electric, magnetic, and electromagnetic fields (up to 300 GHz)", Health Physics, vol. 74, pp 494-522, April 1998. 99/519/EC, "Council Recommendation of 12 July 1999 on the limitation of exposure of the general public to electromagnetic fields (0 Hz to 300 GHz)", Official Journal of the European Communities, 1999. IEEE C95.
An air bag inflates with great force. Do not place objects, including either installed or portable wireless equipment, in the area over the air bag or in the air bag deployment area. If in-vehicle wireless equipment is improperly installed and the air bag inflates, serious injury could result. ELECTRONIC DEVICES Most modern electronic equipment, for example equipment in hospitals and cars, is shielded from RF energy.
EXPLOSIVE ATMOSPHERES Turn off your smartphone when in any area with a potentially explosive atmosphere. It is rare, but your smartphone or its accessories could generate sparks. Sparks in such areas could cause an explosion or fire resulting in bodily injury or even death. Areas with a potentially explosive atmosphere are often, but not always, clearly marked.
EMERGENCY CALLS IMPORTANT! This smartphone, like any mobile phone, operates using radio signals, cellular and landline networks as well as user-programmed functions, which cannot guarantee connection under all conditions. Therefore you should never rely solely upon any mobile phone for essential communications (e.g. medical emergencies). Remember, in order to make or receive calls, the smartphone must be switched on and in a service area with adequate cellular signal strength.
• • • • • • • • • Turn off your smartphone before removing the battery. Use the battery for the intended purpose only. Do not attempt to take the battery apart. Do not let the metal contacts on the battery touch another metal object. This could short-circuit and damage the battery. Do not expose the battery to open flames. This could cause the battery to explode. Do not expose the battery to liquid. Do not mutilate, puncture or dispose of batteries in fire.
Display/Screen size Flip closed LCD 120 x 116 pixels / 28 x 27 mm. Flip open LCD 120 x 360 pixels / 28 x 83 mm. Memory User data storage 1.1 MB (1 language). Ambient temperatures Max +55°C / 131°F Min -10°C / 14°F Acoustics Microphone Unidirectional Electret. Loudspeaker 250 mW, 32 ohm. Buzzer Electro-magnetic. Power Optional mains adapter 5.2 V DC ± 10%, 1A. Keyboard Touchscreen 4 row 49 key. Layout QWERTY. Communications Infrared IrDA SIR optical link to 115200 baud.
OUR WARRANTY Ericsson Mobile Communications AB, Torshamnsgatan 27, 164 80 Stockholm, Sweden, warrants this Product to be free from defects in material and workmanship at the time of its original purchase by a consumer, and for a subsequent period of one (1) year. Any Ericsson accessory is covered by a warranty period of one (1) year from the date of its original purchase by a consumer in accordance with the applicable terms and conditions stipulated herein.
5. This warranty does not cover Product failures due to improper repair installations, modifications or service performed by a nonEricsson Service Partner or opening of the Product by nonEricsson certified persons. 6. The warranty does not cover Product failures which have been caused by use of non-Ericsson original accessories. 7. Tampering with any of the seals on the Product will void the warranty. 8. THERE ARE NO EXPRESS WARRANTIES, WHETHER WRITTEN OR ORAL, OTHER THAN THIS PRINTED LIMITED WARRANTY.
Copyright Ericsson Mobile Communications AB, 2001 All rights reserved. This manual is copyrighted work of Ericsson Mobile Communications AB, Kista, Sweden. The programs referred to herein are copyrighted and trademarked works of Ericsson Mobile Communications AB, Kista, Sweden, unless otherwise set out below. Reproduction in whole or in part, including utilization in machines capable of reproduction or retrieval, without the express written permission of the copyright holders is prohibited.
1. Redistributions of source code must retain the copyright notice, this list of conditions and the following disclaimer. 2. Redistributions in binary form must reproduce the above copyright notice, this list of conditions and the following disclaimer in the documentation and/or other materials provided with the distribution. 3.
You may: (a) use the enclosed Software on a single Ericsson product; (b) make copies of the Software solely for purposes of backup. The copyright notice must be reproduced and included on a label on any backup copy.
Some jurisdictions do not allow limitations on duration of an implied warranty, so the above limitation may not apply to you. Intended use The Software shall be used in accordance with the instructions and for its intended use and purpose only.
Declaration of Conformity We, Ericsson Mobile Communications AB of Torshamnsgatan 27 SE-164 80 Kista, Sweden declare under our sole responsibility that our product, Ericsson type 7100101-BV, and in combination with our accessories, to which this declaration relates is in conformity with the appropriate standards TBR 19, 20, 31 and 32, ETS 300 342-1 and EN 60950, following the provisions of, Radio Equipment and Telecommunication Equipment directive 99/5/ EC with requirements covering EMC directive 89/336/EE
Index Call charge 79 Call handling options 40 Access security settings 177 Call holding 34 Accounts Call information 68 e-mail 115 Call swapping 41, 64 PC mail 115 Call waiting 34, 64, 74 Alarms 163 Calls Answering calls 32 answering 32 Area info settings 175 automatic re-dialling 30 Asterisk key 27 conference 41 Attachments 104 data 32 Automatic re-dialling 30 divert 76 Automatic service provider and e-mail domestic 30 set up 140 emergency 31 Automatic WAP set up 148 fax 32 holding 34 B information 35 Bac
Communications Suite connecting 191 finding on the PC 195 help 198 PC backup 196 preparing 193 restore 197 serial connectivity 193 synchronization 195 Conference calls 41, 65 Contacts business cards 92 export to SIM card phone book 95 find 97 import from SIM card phone book 94 infrared receive 93 infrared send 89, 92 new 96 personal details 88 settings 172 Copyright information 216 D Data calls 32 Date 163 Declaration of conformity 220 Deleting messages 106 Desktop 16, 47 program icons 48 program tabs 47 t
F I Fax calls 32 Find contacts 97 messages 118 Flip closed making and receiving calls 29 navigation 29 Flip open contents list 89 desktop 16 entering information 17 navigation 49 program icons 16 program tabs 16 selection guidelines 16 stylus location and usage 15 title bar 16 Forwarding messages 106, 110 Icons phone 27 Import from SIM card phone book 94 Inbox 43 Incoming calls 63 Increasing ring 37 Indicators alarm active 28 battery meter 28 call timer 29 conference call 29 connection name 29 connection
L Last call information 35 Last dialled numbers list 84 Last number calls 30 Left and right keys 26 Licence agreement 217 Locale settings 171, 172 Lock keypad 36 Locks 81 M Manual service provider and e-mail set up 141 Manual WAP set up 149 Manuals Quick Guide 5 User’s Guide 5 User’s Manual (on CD) 5 Master reset settings 188 Melodies 71 Memory information 188 Messaging add a sender to contacts 105 attachments 104 auto configuration 120 deleting 106 drafts 111 editing 107, 110 find 118 forwarding 106, 110
Phone calendar 43 Call 59 call information 68 call meter 79 call swapping 64 call waiting 64, 74 conference calls 65 emergency calls 62 handsfree equipment 83 inbox 43 incoming calls 63 international calls 62 keypad position 80 last dialled numbers list 84 locks 81 melodies 71 microphone mute 63 minute minder 70 my numbers 80 networks 77 office handsfree mode 67 on hold 63 outgoing calls 60 phone book 44 phone menu 36 re-dialling 62 restrict calls 75 ring controls 70 rings signals 70 security 22 service num
R Receiving via infrared 93 Re-dialling 62 Regulatory information 219 Reject call 32 Replying to messages 105 Reset locale settings 187 Restoring 197 Restrict calls 75 Reversi 166 Ring controls 70 Ring signals 70 Ring volume 37 S Screen calibration 189 Screen settings 170 Security access password 179 access settings 177 dynamics 178 Phone lock code 23 PIN Codes 22 problems 202 PUK codes 22 secure computing 178 secure computing PIN 179 Selection guidelines 16 Sending messages 107 Sending an e-mail for the f
T Technical data 212 Tetris Tetris 167 Time 163 Time and date settings 14 Timezones 161 Title bar 48 To do 125, 126 Toolbar 48 Touchscreen calibration 20, 189 Trusted Certificates 155 Turning on first time language 13 WAP Services bookmarks 135 browser 132 Ericsson portal 134 history 137 open location 137 settings 181 WAP sites 134 Warranty information 213 XYZ Yes key 26 U Up and down keys 26 User greetings 80 User’s Guide 5 User’s Manual 5, 6 Using WAP for the first time 152 V View messages 100 Viewing
Index